Table of Contents
Advertisement
Quick Links
Advertisement
Table of Contents

Related Manuals for Brooks IntelliXcap


Summary of Contents for Brooks IntelliXcap
- Page 1 IntelliXcap User Manual Part Number 319430 Rev. A...
- Page 2 © 2019 Brooks Automation, Inc. All rights reserved. The information included in this manual is proprietary information of Brooks Automation, Inc. and is provided for the use of Brooks customers only and cannot be used for distribution, reproduction, or sale without the express written permission of Brooks Automation, Inc.
- Page 3 GUTS® Contact Number Website +1-800-FOR-GUTS (1-800-367-4887) North America http://www.brooks.com/ +1-978-262-2900 Europe +49-1804-CALL-GUTS (+49-1804-2255-4887) http://www.brooks.com/ Japan +81-45-477-5980 http://jp.brooks.com/ China +86-21-5131-7066 http://cn.brooks.com/ Taiwan +886-3-5525225 http://tw.brooks.com/ Korea +82-31-288-2500 http://kr.brooks.com/ Singapore +65-6464-1481 http://www.brooks.com/ Contact Technical Publications directly: Technical.Publications@brooks.com Accelerating Innovation Copyright © 2019, Brooks Automation, Inc.
- Page 4 Yokohama, Kanagawa 222-0033 China 201203 Tainan Science Park Tel: +49 351 885 930 Tel: +81-45-477-5570 Tel: +86-21-5131-7070 Tainan City 74147, Taiwan Fax: +49 351 885 9322 Fax: +81-45-477-5571 Fax: +86-21-5131-7068 (R.O.C.) TEL: +886-6-505-0268 FAX: +886-6-505-5228 Copyright © 2019, Brooks Automation, Inc.
- Page 5 Brooks Automation Part Number: 319430 Rev. A Revision History Part Number: 319430 IntelliXcap User Manual Explanation of Revision ECO Number Date Author Changes Initial completion of the Revision A EC108867 12/19/2018 A. Kleen manual template. Copyright © 2019, Brooks Automation, Inc.
-
Page 6: Table Of Contents
Safety Requirements Preparation Procedure 5. Operation Overview Theory of Operation Basic Process LED Indicators Starting the IntelliXcap 6. Preventative Maintenance Overview Preventative Maintenance Parts Schedules and Procedures Maintenance Schedule Cleaning Inspect Cartridge Change Cartridge Copyright © 2019, Brooks Automation, Inc. - Page 7 Brooks Automation Part Number: 319430 Rev. A Waste Disposal 7. Troubleshooting Error Messages Technical Support Error Recovery Manual Recovery Appendix A. Integrating the IntelliXcap Appendix B. Available Cartridges Copyright © 2019, Brooks Automation, Inc.
-
Page 8: Safety
This product is intended for use by industrial customers and should be serviced only by Brooks or Brooks trained representatives. The service manuals and related materials are provided in English at no charge and are intended for use by experienced technicians. -
Page 9: Explanation Of Hazards And Alerts
Indicates a situation or unsafe practice which, if not avoided, may result in equipment damage. Notice signal word is white on blue background with no icon. Copyright © 2019, Brooks Automation, Inc. -
Page 10: Alert Example
The following is an example of a Warning hazard alert. Figure 1-1: Components of a Safety Alert Number Description How to Avoid the Hazard Source of Hazard and Severity General Alert Icon Signal Word Type of Hazard Hazard Symbol(s) Copyright © 2019, Brooks Automation, Inc. -
Page 11: Regulatory Compliance And Declaration Of Conformity (Doc)
The IntelliXcap meets the requirements of the European Union’s Machinery Directive 2006/42/EC and 2014/30/EU as a completed machine. In accordance with the Directive, Brooks Automation has issued a Declaration of Conformity and the IntelliXcap has a CE mark affixed. Copyright © 2019, Brooks Automation, Inc. -
Page 12: General Safety Considerations
The IntelliXcap can only be used with tubes and cartridges that have been configured and tested. Do not use alternative tubes and cartridges that have not been configured and tested. Untrained or Improperly Equipped Personnel Untrained or improperly equipped personnel performing this procedure may cause damage to the equipment. - Page 13 Chemical Hazard The IntelliXcap may be used to de-/recap samples that expose users to chemical hazards which, if not properly handled, may result in death or serious injury. Read and understand the safety information for the equipment where the IntelliXcap is used.
-
Page 14: Safety Functions
There is a safety switch installed on the access door that, if the door is not completely closed, the IntelliXcap will not function. Opening of the access door while tool is in use initiates an immediate stop function of all moving parts. - Page 15 41 for further information on using the IntelliXcap within an Integrated system. When the IntelliXcap is commissioned and starts functioning, the automated door will close, the status message will appear on the operator monitor: Initializing please wait The safety door must be activated and tested before commissioning the machine for use.
-
Page 16: Overview
The IntelliXcap can be controlled manually or can be integrated into an automated robotic system using a serial command set. The IntelliXcap can work with a range of tube types – a specific cartridge is required for each different cap design format. The current list of available... -
Page 17: Concepts And Terminology
This manual contains information on safety, specifications, and operation as well as troubleshooting and maintenance of the IntelliXcap. If there are any questions regarding this manual or use of this system or to order additional copies of this publication, contact Brooks Automation Service. See "For Technical Support:"... -
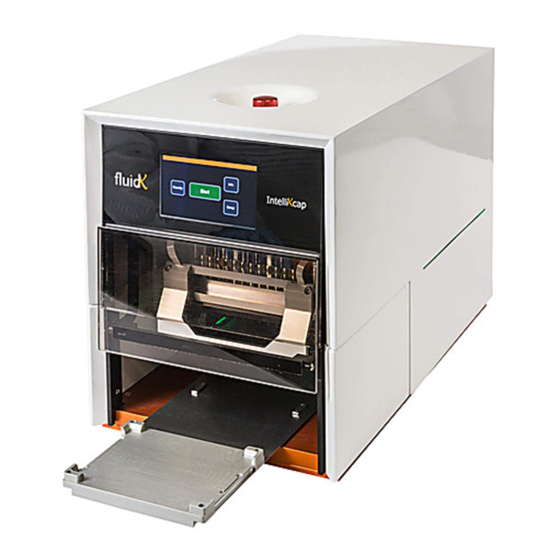
Page 18: 46-8011 - Intellixcap 48
2. Overview IntelliXcap Product Illustration Part Number: 319430 Rev. A 46-8011 – IntelliXcap 48 46-8010 – IntelliXcap 24 Copyright © 2019, Brooks Automation, Inc. -
Page 19: Specifications And Site Requirements
Ensure enough space is available to accommodate the ejected stage platform. The machine has a square footprint and is regarded as highly stable. Place the IntelliXcap in a well-ventilated area on top of an even surface, solid enough to carry its weight. The surface must comply with 1.3.1 of Annex I of 2006/42/EC. - Page 20 464.4 mm 468 mm Stage Height 31.7 mm 31.7 mm 31.7 mm Stage Width 138 mm 138 mm 138 mm Stage Distance 136.5 mm 136.5 mm 136.5 mm (when ejected) System Weight 27(kg) 28(kg) 22(kg) Copyright © 2019, Brooks Automation, Inc.
-
Page 21: Environmental Requirements
Part Number: 319430 Rev. A Site Requirements Environmental Requirements The IntelliXcap shall be used within the rule set of the Good Laboratory Practices, GLP. The machine must be operated indoors and under the following environmental specifications only: Table 3-3: Environmental Requirements... -
Page 22: Electrical Requirements
The machine operates below the noise emissions level: < 70 dB(A) Two fuses: Fuses 100-120V AV 5A fuse 220- 240 V AC 5A fuse Not less than 1MΩ at 1,000V Insulation Resistance Phase 1 = 50GΩ Neutral = 50GΩ UI Connection RS 232 cable Copyright © 2019, Brooks Automation, Inc. -
Page 23: Installation
IntelliXcap on the inner carton box. Safety Requirements When lifting the IntelliXcap, please use the cavity in its back and tilt the IntelliXcap to secure the bottom front of the instrument with your other hand. Copyright © 2019, Brooks Automation, Inc. -
Page 24: Preparation
Move the kit to the appropriate unpack area. Unpack the kit and inspect and confirm the contents. Report any missing or damaged items to Brooks Automation. Review this procedure and confirm that you have the proper items required to do the job. - Page 25 Open the cardboard box, the Manual and Factory Acceptance Test (FAT) are placed on the top of the inner box. Remove the foam supports. The Power, USB and serial cables are located in the Outer cardboard box. Remove the IntelliXcap the inner cardboard box using two people. Copyright © 2019, Brooks Automation, Inc.
- Page 26 Step Action Open the inner box. With two people carefully lift the IntelliXcap system out of the inner Cardboard box, and place on a flat surface able to hold 28KG. Remove the anti-static bag. Copyright © 2019, Brooks Automation, Inc.
- Page 27 Remove the shipping tape securing both the door (seen above) and the stage seen to the left. Keep the original packing material in a dry/low humidity location in case the IntelliXcap needs to be transported for service or repair. Follow all local regulations while disposing the original packing solution.
-
Page 28: Operation
IntelliXcap is covered for both normal operating conditions and emergency conditions. The IntelliXcap shall be screened off appropriately before operation and it must only be used to remove and replace screw caps on micro tubes in specific, SBS-footprint rack types. -
Page 29: Theory Of Operation
The operator places a rack fully or partially filled with capped tubes onto the instrument’s stage. The IntelliXcap confirms that the consumables match the expected height and then de- caps or caps all the tubes. If the instrument detects that the tube rack is of a height different to that expected, it returns an error-message. - Page 30 Ensure that the door is free from obstructions, and that there is nothing in front of the instrument. Turn the IntelliXcap on, using the switch at the rear of the system. The IntelliXcap will start up and begin the Initialization-process.
- Page 31 Choose the Start button. The instrument confirms the height of the tubes and then starts de- capping. When in use, the IntelliXcap displays the current process with a large STOP button display indicating the unit is in use. In case of need, you have the option to stop the current process by clicking the button on screen or by pressing the E-Stop button located at the top of the unit.
- Page 32 Part Number: 319430 Rev. A Step Action Once the de-capping process has finished, the IntelliXcap is ready to start the re-capping process. When ready, place the rack of uncapped tubes and press start. The instrument scans and detects the correct height of the tubes and begins the recapping process.
-
Page 33: Preventative Maintenance
However, it is recommended that the preventative maintenance procedures and schedule provided in this section be followed to extend the operating life of the IntelliXcap. If additional procedures are required, they will be supplied along with their maintenance schedules by Brooks Automation. -
Page 34: Parts
"Technical Support" on page 1. Schedules and Procedures The service life of the IntelliXcap is 20 years of a daily 8-hour operation. This is based on the presumption that all service and maintenance instructions described in this instruction manual are observed. -
Page 35: Cleaning
Shield and/or keep the work area in a moist condition to prevent dust from flying around or smoldering. The operator, or specially trained cleaning staff, should tidy up and clean the IntelliXcap and its surroundings daily. During this work, the same requirements for the use of tools and personal protective equipment apply as for the operational work. -
Page 36: Inspect Cartridge
If necessary, use isopropyl alcohol to disinfect and further clean surfaces Inspect Cartridge The cartridges used on the IntelliXcap have a limited life, generally expected to be in the region of 5000 cycles. After every 2500 cycles with a cartridge, the IntelliXcap will give a service counter warning. -
Page 37: Change Cartridge
Go to the Set-Up Menu and select Cartridge Change. Press Continue. The stage moves inside the unit and the cap-driver cartridge is lowered and placed onto the stage. Press Next. The stage returns to the home position. Copyright © 2019, Brooks Automation, Inc. - Page 38 The head will carry out a re-initialization process which needs to be completed before the first de-capping process can be carried out. There is an automated counter feature, which can be accessed from the main menu. Copyright © 2019, Brooks Automation, Inc.
-
Page 39: Waste Disposal
The system will also count the cycles for each cartridge type. If the user operates the IntelliXcap with two different kinds of cartridges, it counts and records the cycles separately for each type. The Cartridge warning can be removed by pressing the Reset button. -
Page 40: Troubleshooting
Opening safety door operation timeout in damaged. E104 homing command. Call service. Cartridge operation timeout in homing E105 Call service. command. Cartridge operation timeout in homing E106 Call service. command. Cartridge operation timeout in homing E107 Call service. command. Copyright © 2019, Brooks Automation, Inc. - Page 41 Ensure tubes are seated properly in rack. Tube/rack combination does not match Ensure rack is properly seated in stage. E118 any profile comparison in re-cap command. Verify selected tube/rack combination with cartridge setup profile document. Call service. Copyright © 2019, Brooks Automation, Inc.
- Page 42 Call service. "Error Recovery" on page 40. Replace any loose or partial unscrewed caps. Recap command did not succeed within E136 Retry with a new decap. allowed automatic retries. Retry with a new rack. Call service. Copyright © 2019, Brooks Automation, Inc.
- Page 43 E146 sequence. Call service. Remove any direct light sources. Lightcurtain calibration fault in cartridge E147 eject sequence. Call service. Remove any direct light sources. Lightcurtain calibration fault in cartridge E148 load sequence. Call service. Copyright © 2019, Brooks Automation, Inc.
- Page 44 Power cycle the unit. E160 Standby operation. Run a Standby operation. Call service. Main Z operation timeout in init with caps E161 Call service. operation. Timeout stage/nest sequence in recovery E162 Call service. mode. Copyright © 2019, Brooks Automation, Inc.
- Page 45 Timeout homing stage sequence in E166 Call service. manual retry decap operation. Timeout positioning stage sequence in E167 Call service. manual retry decap operation. Twist release emergency stop. E238 Emergency stop is active. Power cycle unit. Call service. Copyright © 2019, Brooks Automation, Inc.
-
Page 46: Technical Support
7. Troubleshooting IntelliXcap Technical Support Part Number: 319430 Rev. A Technical Support For technical support in connection with your IntelliXcap, please contact a technical representative at: BLSS.Service@brooks.com Location GUTS® Contact Number Website +1-800-FOR-GUTS (1-800-367-4887) North America http://www.brooks.com/ +1-978-262-2900 Europe +49-1804-CALL-GUTS (+49-1804-2255-4887) http://www.brooks.com/... -
Page 47: Error Recovery
Manually add a new cap to the ERROR tubes and perform a new de- If the IntelliXcap fails on the second attempt, an error capping cycle. message is shown on the screen, and the IntelliXcap stops. -
Page 48: Appendix A. Integrating The Intellixcap
"Technical Support" on page 39. Additionally, it is possible to run the IntelliXcap units in a legacy mode, emulating the commands used on the older XSD96,48 and 24 units – for support with configuration and commands please contact Brooks support as described above. -
Page 49: Appendix B. Available Cartridges
"Technical Support" on page 39. Table 7-2: IntelliXcap 96 Part IntelliCartridges for IntelliXcap 96 Description – (single cartridge) Number 48-8013- 96 format cap driver cartridge with 96 individual cap drivers for FluidX Internal Next-Gen Thread 48-8013-... - Page 50 Error Recovery Part Number: 319430 Rev. A Table 7-3: IntelliXcap 48 Part IntelliCartridges for IntelliXcap 48 Description – (single cartridge) Number 48-8015- 48 format cap driver cartridge with 48 individual cap drivers for FluidX 1.5ml, 1.9ml, 4.0ml Next-Gen Jacket & 2.0ml Jacket Auto-friendly External Thread 48-8015- 48 format cap driver cartridge with 48 individual cap drivers for FluidX Non-Jacket 2.0ml /...
Need help?
Do you have a question about the IntelliXcap and is the answer not in the manual?
Questions and answers