Table of Contents
Advertisement
Advertisement
Table of Contents

Related Manuals for Brooks CryoPod Carrier


Summary of Contents for Brooks CryoPod Carrier
- Page 1 CryoPod™ Carrier Operator Manual Part Number: 257437 Rev. A...
-
Page 2: Cryopod™ Carrier Operator Manual
Science Systems logo are registered U.S. trademarks of Brooks Automation, Inc. All other trademarks are properties of their respective owners. © 2016 Brooks Automation, Inc. All rights reserved. The information included in this manual is Proprietary Information of Brooks Automation, Inc. and is provided for the use of Brooks customers only and cannot be used for distribution, reproduction, or sale without the express written permission of Brooks Automation, Inc. - Page 3 This technology is subject to United States export Administration Regulations and authorized to the destination only; diversion contrary to U.S. law is prohibited. Original manual printed in English. Printed in the U.S.A. Accelerating Innovation Copyright © 2016, Brooks Automation, Inc.
- Page 4 Brooks Automation Korea, Inc. 400-2 Gomae-Dong, Brooks Automation (Israel) Ltd. Giheung-Gu, Yongin-City Mevo Yerach 5 Gyeonggi-Do, 446-901 Kiryat-Gat 82000 Korea Israel Tel : +82-31-288-2500 Tel: +972 8672 2988 Fax: +82-31-287-2111 Fax: +972 8672 2966 Copyright © 2016, Brooks Automation, Inc.
-
Page 5: Revision History
CryoPod™ Carrier Operator Manual Part Number: 257437 Rev. A Revision History Revision History Part Number: 257437 CryoPod™ Carrier Operators Manual Revision ECO Number Date Explanation of Changes Revision A 90760 1/19/15 Initial completion of the manual. Copyright © 2016, Brooks Automation, Inc. -
Page 6: Table Of Contents
LCD System Display LCD Lighting LCD Control Buttons LCD Indicators and Symbols Concepts and Terminology 3. Installation Unpacking Package Components CryoPod Carrier Registration and Software Download CryoPod Carrier Assembly SET Mode Default SET Mode settings Copyright © 2016, Brooks Automation, Inc. -
Page 7: Table Of Contents
Brooks Automation CryoPod™ Carrier Operator Manual Part Number: 257437 Rev. A Table of Contents Manually Setting the CryoPod Carrier Displays 4. Operation Materials needed (not provided by Brooks Automation) Manual Filling of LN₂ Inserting and Transporting Biospecimens CryoPod Carrier Data Log Software... -
Page 8: Safety
The CryoPod™ Carrier is intended for use by trained and experienced laboratory personnel. It's operators are advised to comply with applicable organizational standard operating procedures, industry standard guidelines, and local, regional, national, and international laws and regulations. Copyright © 2016, Brooks Automation, Inc. -
Page 9: Explanation Of Hazards And Alerts
Indicates a situation or unsafe practice which, if not avoided, may result in equipment damage. Notice signal word is white on blue background with no icon. Copyright © 2016, Brooks Automation, Inc. -
Page 10: Alert Example
Only qualified personnel are allowed to transport, assemble, operate, or maintain the Product. Properly qualified personnel are those who have received training and have the proper qualifications for their jobs. Copyright © 2016, Brooks Automation, Inc. - Page 11 The use of this product when components appear to be damaged may cause equipment malfunction or personal injury. Do not use this product if components appear to be damaged. Place the product in a location where it will not get damaged. Copyright © 2016, Brooks Automation, Inc.
-
Page 12: Safety And Identification Labels
Do not remove the electronic module from the system. Safety and Identification Labels Safety labels are placed on the CryoPod Carrier to identify hazards. Identification labels provide information about the product. Safety Labels provide instructions on how to avoid the hazard. -
Page 13: Illustration Of Label Location
Safety and Identification Labels Do not change or remove the safety or equipment identification labels. To replace a lost or damaged label call Brooks Life Science Systems Technical Support. Table 1-1: Safety Labels placed on Product Hazard Label Type or Name: Extreme Cold... -
Page 14: Fire Hazards
The CryoPod Carrier provides no direct fire hazard. Explosion Hazards Improper Use of liquid nitrogen Do not place objects on top of the CryoPod Carrier. Do not overfill with liquid nitrogen. Do not tightly seal the CryoPod Carrier. Thermal Hazards... -
Page 15: Chemical Hazards
Lift Hazard Lift Hazard This product weighs greater than 9.0 kg (20 lb) but less than 11.3 kg (25 lb). Improper lifting may result in personal injury. Use appropriate lift techniques when lifting this product. Copyright © 2016, Brooks Automation, Inc. -
Page 16: Environmental Information
Noise Emission The CryoPod Carrier provides no direct noise hazard during operation. Vibration The CryoPod Carrier provides no direct vibration hazard during operation. Any vibrations produced during normal operation are minimal and cause no hazardous conditions. Decommissioning and Disposal Brooks Life Science Systems complies with the EU Directive 2002/96/EU Waste Electrical and Electronic Equipment (WEEE). -
Page 17: Regulatory Compliance And Declaration Of Conformity (Doc)
The Product meets the requirements of the European Union’s Machinery Directive 2006/42/EC as a completed machine. In accordance with the Directive, BioCision has issued a Declaration of Conformity and the Product has a CE mark affixed. Copyright © 2016, Brooks Automation, Inc. -
Page 18: Overview
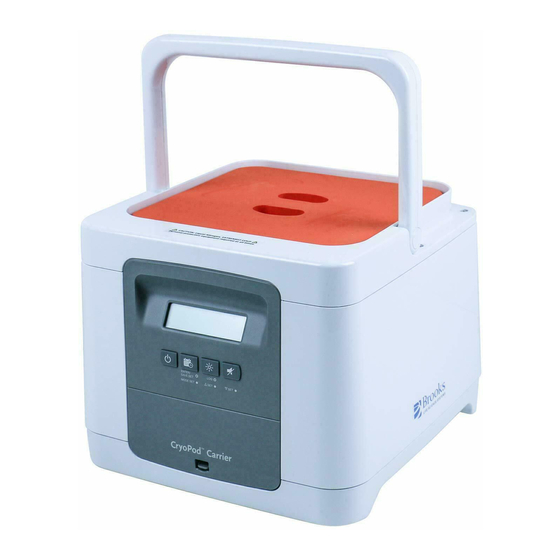
Part Number: 257437 Rev. A 2. Overview The CryoPod™ Carrier is a portable liquid nitrogen (LN₂) based system that, with the CryoPod Carrier lid secure, provides over four hours of < -150°C temperature stability for the handling and transportation of cryogenic biospecimens. The system’s battery powered electronic module displays the cryogenic chamber temperature as well as operator defined parameters such as date, time, instrument identification, alarms and log function activation. -
Page 19: Using This Manual
This manual contains information on safety, specifications, and operation as well as troubleshooting and maintenance of the CryoPod Carrier. If there are any questions regarding this manual or use of this system or to order additional copies of this publication, contact Brooks Automation. -
Page 20: Specifications
Temperature acquisition and data 60 sec logging rate Display temperature range -199 to 49 °C Display temperature accuracy ±5°C Alarms Two programmable temperature alarms Compliance CE Mark, RoHS, WEEE, FCC, EN 61010, EN 61326 Copyright © 2016, Brooks Automation, Inc. -
Page 21: System Button Selections
System Button Selections The system select buttons, located below the LCD screen, are used to interact and program the CryoPod Carrier. Each button can be pressed for a "short press" or held for a "long press" to perform different functions. -
Page 22: Lcd Control Buttons
Back light Short Press Toggle Date/Time On/Off Long Press Enter SET Mode Log Event Alarm Engaged – Alarm being sounded Short Press Toggle Date/Time Back light On Silent Alarm Long Press System Off Log Event Copyright © 2016, Brooks Automation, Inc. -
Page 23: Lcd Indicators And Symbols
No Alarm NO ALARM indicates that none of the alarms have been enabled. OP text on the LCD screen indicates an open sensor issue which must be addressed by Brooks Automation technical support. Copyright © 2016, Brooks Automation, Inc. - Page 24 SERVICE indicator is automatically turned OFF if the issue is resolved. Service NOTE: Contact Brooks Automation Technical Support to resolve service issues that can not be solved by troubleshooting the system. See "Troubleshooting" on page 35 SET appearing on the LCD screen indicates that the unit is now in SET Mode.
-
Page 25: Concepts And Terminology
CryoPod Carrier Data Log Software. Three digit alpha-numeric code to indicate Used to facilitate differentiating units for ID Code individual CryoPod Carrier identity. This can data log file downloads, service visits be set by the operator. and other laboratory use. - Page 26 Standby Mode. TSTANDBY temperature, the system will switch into Standby Mode. When the temperature reaches or exceeds TWARNING to alert the operator TWARNING Temperature setting for Alarm 1. that LN₂ charge is nearly spent. Copyright © 2016, Brooks Automation, Inc.
-
Page 27: Installation
Part Number: 257437 Rev. A Unpacking 3. Installation Unpacking Carefully lift the CryoPod Carrier from its box compartment using the unit's built in handle. All other package components can be found in the accessory box. Package Components CryoPod Carrier CryoPod Carrier lid 3 "AA"... -
Page 28: Cryopod Carrier Assembly
Replace the battery panel. Put the instrument lid on. Turn the CryoPod Carrier on by pressing the power button . The LCD screen will display the start-up sequence. Enter SET Mode by long pressing the time button . -
Page 29: Set Mode
SET Mode The SET mode allows the operator to change settings and properties of the CryoPod Carrier. NOTE: If no button is actively pressed for 10 seconds when in SET Mode, the system will exit the SET Mode without saving any changes. -
Page 30: Operation
Know the facility safety procedures, safety equipment, and contact information. Read and understand each procedure before performing Materials needed (not provided by Brooks Automation) 4-5 Liter Dewar Flask with handle designed to store and transport LN₂ Personal Protective Equipment (PPE) -
Page 31: Manual Filling Of Ln₂
Action Check that the unit is powered off and remove the lid. Remove any contents that are inside the CryoPod Carrier basket. Position the funnel assembly into the interior front left corner of the unit. The notched side of the assembly should be touching the corner cut edge of the internal basket. - Page 32 Wait approximately 15 minutes until the temperature reaches -15°C. The LCD screen will reflect the cooling chamber temperature. NOTE: If the CryoPod Carrier warms up over -20°C, the electronics will turn off automatically after 1 minute. Slowly pour the remaining LN₂ from the Dewar Flask into the funnel. Stop filling when the sensor rod stops bouncing and the bottom of the colored fill bar is visible.
-
Page 33: Inserting And Transporting Biospecimens
(Sample OUT). The LOG text will disappear from the LCD screen and a single beep will occur. If the CryoPod Carrier is not to be used further, place in a location where the unit can safely warm up and go into Standby Mode. Standby Mode will be indicated on the LCD screen by displaying TDISPLAY, OFF and battery indicator. -
Page 34: Cryopod Carrier Data Log Software
NOTE: Long press to place the system in standby mode. NOTE: The CryoPod Carrier is NOT intended for use as an extended time period (e.g. overnight) cryogenic storage device. Do NOT use as a cryogenic shipper. CryoPod Carrier Data Log Software... - Page 35 CryoPod Carrier Data Log Software Step Action Using the USB cable included in the CryoPod Carrier kit, connect the PC to the CryoPod Carrier. The software will automatically detect the unit. NOTE: If the unit is not automatically detected, or re-establishing connection is needed, select Re-Read Data.
-
Page 36: Downloading Temperature Log Data
Step Action Create a destination folder on the PC for the CryoPod Carrier log data. Indicate the preferred Field Separator (Comma/Tab), and whether all of the temperature data will be downloaded each time or if just the new data will be captured. -
Page 37: System Alarms
System Alarms System Alarms The CryoPod Carrier has system alarms, Alarm 1 and Alarm 2, to inform the operator when the internal basket warms. Alarm 1 is set to the colder temperature while Alarm 2 is set to a warmer temperature. -
Page 38: Alarm 2: Tcritical
Biospecimens should be transferred immediately to appropriate cryogenic storage. NOTE: If the TDISPLAY warms above the TCRITICAL and then lowers to below TCRITICAL, the Alarm 2 sound and back light will continue until the system reaches the TSTANDBY temperature. Copyright © 2016, Brooks Automation, Inc. -
Page 39: Preventative Maintenance
5. Preventative Maintenance Cleaning the CryoPod Carrier The CryoPod Carrier should be cleaned after each use unless specified otherwise in the table below. NOTE: Ensure that the CryoPod Carrier is off and at room temperature before cleaning. Part of CryoPod... - Page 40 Open the new package of absorbent pads and retrieve two pads. Put together absorbent pads and metal conductor in the same configuration as the used pads and plate. The metal conductor flanges should slide into the cuts in the absorbent pads. Copyright © 2016, Brooks Automation, Inc.
- Page 41 Re-install internal basket, taking care to orient the basket according to the “Front” marks on the internal basket and tighten the screws with the washers firmly using the L-wrench. NOTE: Do NOT over-tighten screws. Copyright © 2016, Brooks Automation, Inc.
-
Page 42: Troubleshooting
Service indicator If the SERVICE indicator turns on, the operator must contact Brooks Automation technical support. The SERVICE indicator will appear on the LCD screen if the unit detects an error or issue. These include thermocouple detachment (OP), corrupted temperature correlation (TMP), stuck key (KEY), EPROM reading error (EP), and thermocouple chip error (TIC ). - Page 43 Displayed in the three digit ID code area, this indicates that the pre-loaded data needed for the temperature indication is Contact Technical Support. corrupted. Copyright © 2016, Brooks Automation, Inc.
-
Page 44: Contact Information For Brooks Life Science Systems
6. Troubleshooting CryoPod Carrier Service and Error Codes Part Number: 257437 Rev. A Contact Information for Brooks Life Science Systems For the CryoPod Carrier use the following contact information when troubleshooting: Corporate Headquarters 15 Elizabeth Drive Chelmsford, MA 01824 U.S.A. Location GUTS®...
Need help?
Do you have a question about the CryoPod Carrier and is the answer not in the manual?
Questions and answers