Table of Contents
Advertisement
Quick Links
Advertisement
Table of Contents

Subscribe to Our Youtube Channel
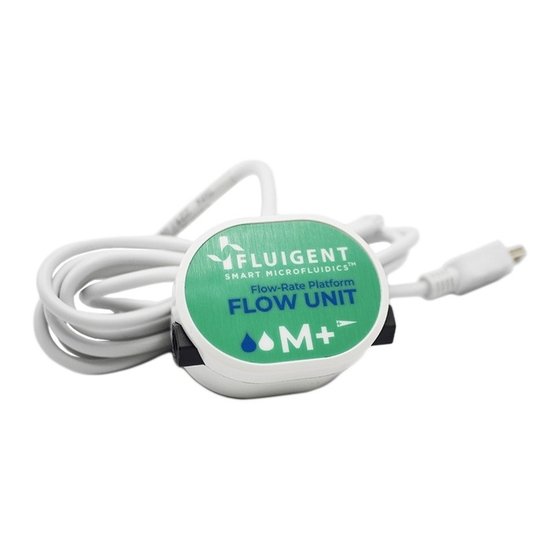
Summary of Contents for Fluigent FLOW UNIT
- Page 1 USER’S MANUAL FLOW RATE PLATFORM FLOW UNIT / FLOW UNIT+...
-
Page 2: Table Of Contents
Explanation General handling Procedure The diameter of the FLOW UNIT XS capillary is small: 25 µm. Filter your Recommendation for fluids solution, if possible add a filter in the fluidic path and clean the FLOW Identified cleaning solutions UNIT XS after each use. -
Page 3: Introduction
This user manual will show you how to install and use flow units in your daily work. It will describe all the Flow unit functionalities and will help you to connect all the different FLOW UNIT models and to use it with all the equipment: with Fluigent Flow EZ... -
Page 4: Specifications
(FLOW EZ™ and MFCS™-EZ). More details on applied to a FLOW UNIT does not go beyond this value at all times. The FLOW UNIT suits your own fluid controller. If you use a pressure regulator you may have to enter a www.fluigent.com. -
Page 5: Flow Unit Description
(2) fluidic ports for water and Isopropyl alcohol of the FLOW UNIT. If not, please note that there is a large panel of The back of the FLOW UNIT also displays information about the range adapters and unions to connect your tubings to ours. - Page 6 (2) fluidic ports of the FLOW UNIT. If not, please note that there is a large panel of tight.
-
Page 7: Setting Up With Flow Ez
To check the tightness of your connection, you may pull gently on Combined with FLOW UNIT it allows access in real time flow rate the tubing: it must stay fitted in the ferrule and nut. -
Page 8: Connection To Flow Ez
For connection of FLOW UNIT to Flow EZ simply connect the USB cable from the FLOW UNIT to the Flow EZ Once a FLOW UNIT is connected, the device automatically detects it and the "Operation window" will display an additional zone including the flow rate measurement. - Page 9 µL/min Set P Ctrl Menu The Link module must be connected to the Flow EZ first. When the Link is connected to the Flow EZ, coneect the Flow unit to Measured flow rate units the Flow EZ. displayed can be chosen...
-
Page 10: Oxygen Software
SETTING UP SETTING UP After the flow unit has been successfully connected in the Flow EZ in After the flow unit has been successfully connected in the Flow EZ in order to measure and control flow rate you just need to launch the order to measure and control flow rate you just need to launch the Oxygen software. -
Page 11: Setting Up With Flowboard
Bubble detection When air is detected, red aeras will be displayed on the flowgraph For the use of our FLOW UNIT sensor range without Flow EZ over the period of detection. Flowboard is a product that must be used. This device hosts up to eight (8) FLOW UNIT models and provides them power supply. -
Page 12: Connection To Flowboard
FLOW UNIT connection To connect a FLOW UNIT to the FLOWBOARD, plug the end of the mini-USB plug fixed with the FLOW UNIT to one of the eight (8) mini- USB ports on the FLOWBOARD. Quick start guide First, you may want to integrate the different FLOW UNIT to your microfluidic system, with the right fittings. -
Page 13: Measure And Control The Flow-Rate
The oxygen software will automatically detect the instrument connected to the flowboard and show immediately the flow rate measure of each connected flow unit on the Flow rate graphs. The new order can be either given via the vertical cursor if a DFC has been set up Flow rate graphs or as a number in the dedicated text field. -
Page 14: Dual Calibration
The different FLOW UNIT models are calibrated to provide an accurate reading when used with the corresponding fluid, water or isopropyl alcohol. For the FLOW UNIT model XS, only one single calibration for water is available. For the FLOW UNIT models S/M+/L+, two calibrations are available: Water and Isopropyl alcohol. - Page 15 Make a table that contains the time for each measurement, the One (1)FLOW EZ flow-rate of the pump and the data measured by the FLOW UNIT. One (1) FLOW UNIT model A minimum of 3 measurements is recommended for each flow-rate.
-
Page 16: Cleaning Procedure
For Flow Unit XS, S and M, fluids have to be compatible with PEEK & Quartz glass. For Flow Unit M+ and L+, fluids have to be compatible... -
Page 17: Recommendation For Fluids
If uncertain about your application and how to clean the flow sensor, When working with water containing organic materials (sugars, etc.) please contact FLUIGENT for additional support at support@fluigent. microorganisms often grow on the walls of the glass capillary and com. -
Page 18: Identified Cleaning Solutions
This warranty is granted by Fluigent and applies in all countries. sensor’s flow path with sharp objects that could scratch the glass surface. Your Fluigent product is guaranteed for one year from the date of delivery at your laboratory against defects in materials and workmanship. - Page 19 - Filter your solution, if possible add a filter in the fluidic path (§ 10) and clean your FLOW UNIT after each use, especially the FLOW UNIT XS (cf § 4.3). The diameter of the FLOW UNIT XS capillary is small: 25 µm. Fluigent rejects any liability in the event of clogging or surface modifications.


Need help?
Do you have a question about the FLOW UNIT and is the answer not in the manual?
Questions and answers