
Related Manuals for Ender 3 V2 Neo


Summary of Contents for Ender 3 V2 Neo
- Page 1 Create reality,achieve dreams Ender-3 V2 Neo Ender-3 V2 Neo 3D Printer User Manual V1.0...
- Page 2 To Our Dear Users Thank you for choosing Creality. For your convenience, please read through this User Manual before you start and follow the instructions provided carefully. Creality is always ready to provide you with high-quality services. If you encounter any issues or have any questions when using our products, please use the contact information at the end of this manual to contact us.
- Page 3 Instructions for Use Do not use this printer by methods or operations that are not described in this manual, otherwise it may result in accidental injury or property damage. Do not place this printer near flammable materials, explosive materials or high heat sources. Please place this printer in a ventilated, cool and low-dust environment. Do not place this printer in a vibrating or any other unstable environment, as the printing quality will be compromised when the printer shakes.
-
Page 4: Table Of Contents
Table of Contents ········································································· About the Printer 01-01 ······································································· Device Specifications 02-02 ········································································· List of Accessories 03-03 ····································································· Installing the 3D Printer 04-07 ········································································ Using the 3D Printer 08-12 ············································································ First Printing 13-13 ············································································ 14-14 Circuit Wiring... -
Page 5: About The Printer
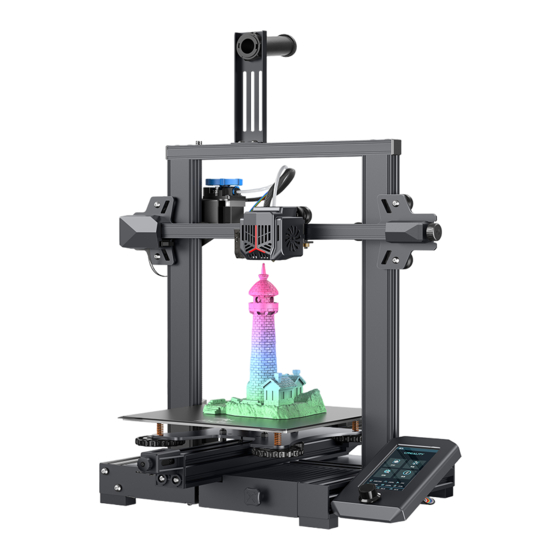
1. About the Printer Indication knob XE-axis component Z-axis passive block E-axis motor X-axis limit switch X-axis tensioner X-axis motor Printing platform Display screen Coupler Rotary switch Y-axis tensioner Z-axis motor Voltage regulation gear Tool box Power switch and socket Nozzle kit Y-axis limit switch Material rack and material barrel... -
Page 6: Device Specifications
2. Device Specifications General Specifications Ender-3 V2 Neo Product model Modeling dimensions 220*220*250mm Molding tech Number of nozzles 0.1mm-0.4mm Slice height Nozzle diameter Standard 0.4mm Precision ±0.1mm Filament PLA/PETG/ABS Supported file format STL/OBJ/AMF Print Method USB/storage card Supported slice software... -
Page 7: List Of Accessories
3. List of Parts Base Frame Package Gantry Frame Material Rack and Display Screen Component Barrel Assembly List of Accessory Kit Item Cutting Plier Wire Clip (Blue) Wrench and Screwdriver Power Cable Nozzle Cleaner Storage Card & Card Reader M5x45 Hexagon Socket Nozzle Filament (20mm)... -
Page 8: Installing The 3D Printer
4. Installing the 3D Printer 4.1 Gantry Frame Installation Place the gantry frame in the slot of the base frame, and pre-lock it with two M5x45 hexagon socket head spring washer combination screws from the bottom to the top. Place the gantry frame in the slot of the base frame, and pre-lock it with two M5x45 hexagon socket head spring washer combination screws from the bottom to the top. Rotate the bottom component by 180°... - Page 9 4. Installing the 3D Printer 4.2 Installing display screen 4.3 Installing material rack Place the display screen assembly on the side of the right profile, snap it Fix the material rack and barrel assembly to the profile, as shown in the diagram below. into the profile in parallel and tighten the screws;...
- Page 10 4. Installing the 3D Printer 4.4 Cable Connection X-axis limit switch X, E, Z-axis motor port 6pin (4 wires) 3pin (2 wires) Put the indication knob directly onto the motor shaft; Follow the yellow label on the 6pin (4 wires) port to connect the X-axis stepper motor; Follow the yellow label on the 6pin (4 wires) port to connect the E-axis stepper motor;...
- Page 11 4. Installing the 3D Printer 4.5 Adjusting pulley tightness Check the pulley looseness before switching on the machine. X/Y/Z axis pulley adjustment: Gently turn the pulley to check whether it is idling or jammed. If this phenomenon occurs, use an open-end wrench to adjust the tightness of the hexagonal eccentric isolation column to make it rotate smoothly.
-
Page 12: Using The 3D Printer
5. Auto Leveling Power up the appliance and select “Leveling" Default: After the printer has first automatically returned to the home position for auto-calibration, and after 16 points of data calibration, the printer will return to the home position again and the levelling process is complete. Leveling Go to “Prepare →... - Page 13 6. Auxiliary levelling Go to “Control → Reset configuration" to reset the printer parameters. Leveling Go to “Prepare → Auto home" to return to the starting position. Leveling 0.00...
- Page 14 6. Auxiliary levelling Go to “Prepare → Move → Move Z" and reset. 0.00 Leveling Go to “Prepare → Z-offset", adjust the Z-axis compensation value so that the height of the nozzle to the platform is almost the thickness of A4 paper (0.08-0.1mm);...
- Page 15 6. Auxiliary levelling Go to “Prepare → Disable stepper" to switch off all motor enables. Leveling 0.00 Adjust the knob at the bottom of the hotbed and move the nozzle to the four corners of the printing platform, respectively, so that the height of the nozzle to the printing platform is approximately the thickness of A4 paper (0.08-0.1mm).
- Page 16 7. Load resin When you wait for the temperature to rise, hang the filament over the filament rack. Press the extrusion clamp and insert the filaments along the extruder hole up to the nozzle. When the temperaturehits the target value, a flow of filaments can be seen at the nozzle, meaning that the filaments have been loaded.
-
Page 17: First Printing
find the Creality software on your memory card and install it. Go to Preferences → Basic → Select Select the model of the printer Language → Finish to complete the settings. (Ender-3 V2 Neo). Load Creality Slicer Load the file. Launch the Creality Slicing Software. -
Page 18: Circuit Wiring
9. Circuit Wiring X-axis motor port Y-axis motor port Extrusion motor port Z-axis motor port TF card slot Micro USB interface Controllable fan port Display port Fuse Power input CR-touch port jack Nozzle thermistor interface X-axis Y-axis Z-axis Nozzle Filament Hotbed NO fan port limit... - Page 19 Since each model is different, the actual product may be different from the picture. Please refer to the actual product. The final interpretation right belongs to Shenzhen Creality 3D Technology Co., Ltd. 18F, JinXiuHongDu Building, Meilong Blvd., Longhua Dist., Shenzhen, China 518131 Official Website: www.creality.com Tel: +86 755-8523 4565 E-mail: info@creality.com cs@creality.com...
Need help?
Do you have a question about the 3 V2 Neo and is the answer not in the manual?
Questions and answers