Table of Contents
Advertisement
Advertisement
Table of Contents

Related Manuals for Ender Ender-3 E


Summary of Contents for Ender Ender-3 E
- Page 1 3D Printer User Manual Ender-3 E To further improve your user experience, you can find more about our devices via the following methods. User manual: Please find instructions and Assembe (Installation) & Tutorial Video in the SD card provided with the printer.
-
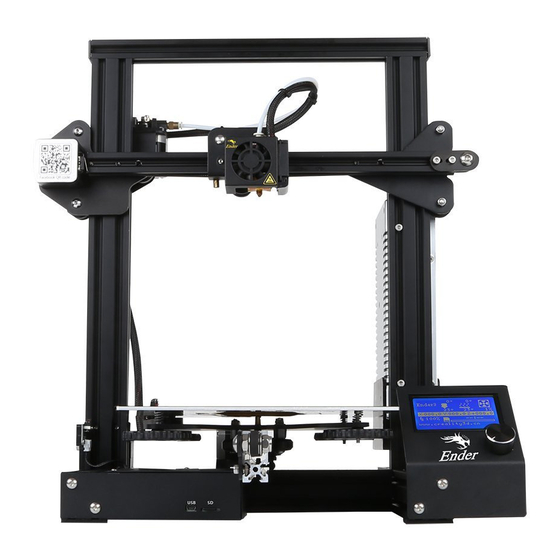
Page 2: List Of Main Parts
1 Instructions for Use Do not use this printer by methods or operations not described in this manual, otherwise it may result in accidental injury or property damage. Do not place this printer near flammable materials, explosive materials or high heat sources. Please place this printer in a ventilated, cool and low-dust environment. - Page 3 M5x8 Hexagon Socket M4x16 Socket Head Cap M4x18 Hexagon socket Flat Head Screw X 4 Screw with Spring Washer X 4 countersunk head screw X 2 M5x25 Socket Head M4x20 Hexagon M5x45 Socket M5 Ship-type Cap Screw with Spring Flat Round Head Head Cap Screw Nut X 2 Washer X 4...
-
Page 4: Install The Printer
5 Install the Printer Install the Z-axis profile A.Expose the right profile of the base component to the table surface by about 35 mm, so that the mounting hole is exposed to the table platform; B.Place the right profile of the Z-axis onto the base slot and pre-lock it with two M5x45 hexagonal cylindrical head spring washer combination screws aligned with the holes from the bottom upwards;... - Page 5 Install the Z-axis limit switch Secure the Z-axis limit switch to the outside of the left profile of the Z-axis with 2 x M5*8 hexagon socket button head screws and 2 ship-type nuts at a distance of 32 mm from the lowest part of the bottom profile.
- Page 6 Install the printhead kit and X-axis passive component A.Install the printhead kit along the X-axis profile slot B.Fix the Z-axis passive component to the other end of the X-axis profile with two M4X16 hexagonal cylindrical head spring washer combination screws; ①...
- Page 7 Install the X-axis components A.Make sure that the V-wheels at both ends of the X-axis component are fully seated in the Z-axis profile slots; B.Align the screw with the T-bar nut, and adjust the X-axis component downwards by rotating the coupling until the screw protrudes 20mm from the surface of the T-bar nut.
-
Page 8: Auto Leveling
Install wires A.Connect the motor wires of the four XYZE axes in sequence according to the wire markings; B.Connect the limit switch wires for the XYZ axes in sequence according to the wire markings; C.Plug the color flat cable into the back of the display; D.Connect the connector between the power supply and the motherboard. -
Page 9: Loading The Filament
The nozzle is too far away from the platform, and the filaments cannot stick to the platform. The filament is evenly extruded and sticks to the platform just right. The nozzle is too close to the platform, and the filament is not extruded enough, which may damage the platform. -
Page 10: First Printing
2.Go to Preferences → Configure Creality → Select language from the website, or find the Creality → Next → Finish to complete the configuration. software on your memory card and install it. 3.Select the model of this printer (Ender-3 E) 4.Enter parameters → Close. Load Creality Slicer 4.8.2... -
Page 11: Start Printing
9 Start Printing Before printing, please check the printer again following these steps: When the printer is powered off: 1.The nozzle is tightly connected and moves smoothly to the left and right. 2.The X axis is horizontal and stable (not wobbling up or down), and it moves run smoothly up and down. 3.The Y axis is tightly connected. -
Page 12: Device Specifications
11 Device Specifications General Specifications Model Ender-3 E Modeling Dimensions 220*220*250mm Modeling Technology Number of Nozzles Layer Height 0.1mm-0.4mm Nozzle Diameter 0.4mm (standard) Accuracy ±0.1mm Printing Material 1.75mm PLA Supported Formats STL/OBJ/AMF Printing Method Memory card offline printing or online printing...
Need help?
Do you have a question about the Ender-3 E and is the answer not in the manual?
Questions and answers