Advertisement
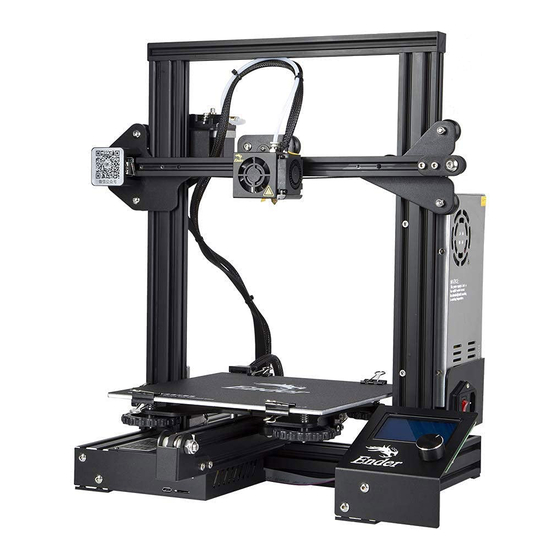
Ender 3 Series 3D Printer
◆ This guide is for the Ender 3 Series of 3D printers.
◆ Select the correct input voltage to match your local mains
(220V or 110V)
◆ Because of software/hardware upgrades and model
differences, new revisions may not be listed in this guide.
◆ Detailed instructions for use are available on the SD card.
Quick Start Guide
V.1.0
Advertisement

Related Manuals for Ender 3 Series


Summary of Contents for Ender 3 Series
- Page 1 Ender 3 Series 3D Printer Quick Start Guide ◆ This guide is for the Ender 3 Series of 3D printers. ◆ Select the correct input voltage to match your local mains (220V or 110V) ◆ Because of software/hardware upgrades and model differences, new revisions may not be listed in this guide. ◆ Detailed instructions for use are available on the SD card. V.1.0...
- Page 2 Notes 1. Do not use the Printer in any way other than described herein to avoid personal injury or property damage. 2. Do not place the Printer near flammables, explosives or heat sources. It is best to place it in a well- ventilated, low-dust environment. 3. Do not expose the Printer to violent vibration or any unstable environment. This will cause poor print quality. 4. The filaments recommended by the manufacturer are preferred as to avoid clogging in the hot end and/or Printer damage. 5. Do not use any other power cable than the one supplied. Use a grounded three-prong power outlet. 6. Do not touch the nozzle or hot bed during printing. Keep hands away from machine while in use to avoid burns or personal injury. 7. Do not wear gloves or loose clothing when operating the Printer. These loose articles can become caught in moving parts and cause personal injury or Printer damage. 8. Clean off filament from the nozzle tip with the provided pliers before the nozzle cools. Do not touch the nozzle directly. This can cause personal injury. 9. Clean the Printer frequently. With the machine powered off, clean the printer body with a dry cloth to remove dust, adhered printing materials and foreign objects on guide rails. Use glass cleaner or isopropyl Alcohol to clean the print surface before every print for consistent results. 10. Children under 10 years of age should not use the Printer without supervision.
-
Page 3: Table Of Contents
Contents 1. Introduction ...……………………………1 5. Soft wa re I ns t alla tio n .. ………… ……9 2. LCD Menu ………………………………2 6. Preparing to Print……………………10 7. Trouble-shooting ……………………11 3. Loading Filament ….……………………3 8. Circuit Wiring Diagram …………………12 4. Bed Leveling ..…….……………………4 Preface Dear consumers, Thank you for choosing our products. For the best experience, please read the instructions before operating the Printer. Our 3D team is always ... -
Page 4: Introduction
1. Introduction Control Box Display Power 13. Z Stepper SD Slot and USB Port Nozzle Assembly 10. Y Limit Switch 14. Z Limit Switch Print Surface Spool Holder 11. Y Stepper 15. X Limit Switch Control Knob Extruder (E) Stepper 12. Coupling 16. X Stepper ... -
Page 5: Lcd Menu
2. LCD Menu Information Displayed Set temperature of the Nozzle Current temperature of Print speed the Nozzle Model Set temperature of the Hot Bed Current temperature of the Hot Bed Part Cooling Fan Speed Current location of the nozzle Print time Print progress Prompt message Push:OK/Enter Sub Menu... -
Page 6: Loading Filament
Loading Filament 1. Preheat 2. Feeding Method 1 Method 2 Press and hold the extruder lever then insert 1.75mm filament through the small hole of the extruder. Continue feeding until you see filament come out the nozzle. Tip:Replacing the Filament Preheat the nozzle then pull out the existing filament. Next, insert the new filament. ... -
Page 7: Bed Leveling
4. Bed Leveling 1. Prepare →Auto Home. Wait for the nozzle to move to the left/front of the platform. 2. Prepare→Disable Steppers 3. Move the nozzle the front/left leveling screw and adjust the platform height by turning the knob underneath. Use a piece of A4 paper (standard printer paper) to assist with the adjustment, making sure that the nozzle lightly scratches the paper. 4. Complete the adjustment on all 4 corners 5. Repeat above steps 1-2 times if necessary. -
Page 8: Software Installation
5. Software Installation 1. Double click the Cura icon to install the Cura Slicing Software. 2. Start Cura from the Start Menu. 3. Select Other→Creality CR-10→Printer Name:Ender 3→Add Printer. 4、Setting→Printer→Manage Printers... 5、Change Printer Settings to (220,220,250). -
Page 9: Preparing To Print
Preparing to Print 1.Slicing 2.Printing Insert SD card into computer with Reader. Insert the SD card 1. Open file 2. Select file Select “Print from SD” 3. Open Select the file to be printed 4. Save to SD Card... -
Page 10: Trouble-Shooting
7. Trouble shooting... -
Page 11: Circuit Wiring Diagram
8. Circuit Wiring Diagram... - Page 12 Shenzhen Creality3D Technology CO.,LTD. O f f i c i a l W e b s i t e : www.creality3d.com Company Address: 12F, Building No.3, Jinchengyuan Industrial Area, Huafan Road, Dalang, Longhua, Shenzhen, Guangdong Province...
Need help?
Do you have a question about the 3 Series and is the answer not in the manual?
Questions and answers