Table of Contents
Advertisement
Quick Links
Advertisement
Table of Contents

Subscribe to Our Youtube Channel
Related Manuals for Electrolux EOG1102AOX


Summary of Contents for Electrolux EOG1102AOX
- Page 1 EOG1102AOX Oven User Manual...
-
Page 2: Table Of Contents
13. TECHNICAL DATA..................23 WE’RE THINKING OF YOU Thank you for purchasing an Electrolux appliance. You’ve chosen a product that brings with it decades of professional experience and innovation. Ingenious and stylish, it has been designed with you in mind. So whenever you use it, you can be safe in the knowledge that you’ll get great results every time. -
Page 3: Safety Information
ENGLISH SAFETY INFORMATION Before the installation and use of the appliance, carefully read the supplied instructions. The manufacturer is not responsible for any injuries or damages that are the result of incorrect installation or usage. Always keep the instructions in a safe and accessible location for future reference. -
Page 4: Safety Instructions
Always use oven gloves to remove or put in • accessories or ovenware. Before maintenance cut the power supply. • Ensure that the appliance is switched off before • replacing the lamp to avoid the possibility of electric shock. - Page 5 ENGLISH 2.4 Use • Do not let mains cables touch or come near the appliance door, especially when the door is hot. WARNING! • The shock protection of live and Risk of injury, burns and insulated parts must be fastened in electrical shock or explosion.
- Page 6 • Use a deep pan for moist cakes. Fruit not use any abrasive products, juices cause stains that can be abrasive cleaning pads, solvents or permanent. metal objects. • This appliance is for cooking • If you use an oven spray, obey the purposes only.
-
Page 7: Product Description
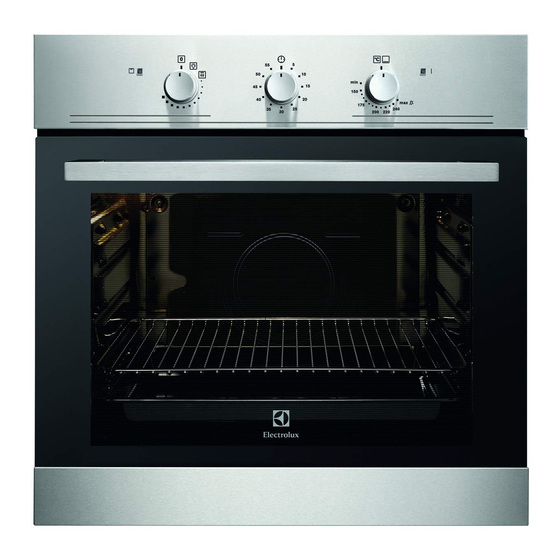
ENGLISH 3. PRODUCT DESCRIPTION 3.1 General overview Control panel Grill indicator Knob for the oven functions Knob for the Minute Minder Knob for the gas control Power indicator Air vents for the cooling fan Heating element Lamp Turnspit hole Oven cavity bottom plate Shelf positions 3.2 Accessories To bake and roast or as pan to collect... -
Page 8: Daily Use
5. DAILY USE WARNING! Refer to Safety chapters. 5.1 Oven functions Oven function Application Off position The appliance is off. Light To activate the lamp without a cooking function. Grill + Turn‐ To grill meat, including kebabs and smaller pieces of spit meat. -
Page 9: Clock Functions
ENGLISH 5.6 Grilling • To minimise splashing, you should thoroughly dry food before grilling. 1. Turn the knob for the oven functions Brush lean meats and fish lightly with a little oil or melted butter to keep clockwise to and set the them moist during cooking. -
Page 10: Additional Functions
9. Select a function with the turnspit position. The turnspit rotates. 10. Set the necessary temperature. Refer to the cooking tables. 7.2 Inserting the accessories Wire shelf: Push the shelf between the guide bars of the shelf support and make sure that the feet point down. - Page 11 ENGLISH 9.1 General information • Leave the meat for approximately 15 minutes before carving so that the • The appliance has five shelf positions. juice does not seep out. Count the shelf positions from the • To prevent too much smoke in the bottom of the appliance floor.
- Page 12 Food Quantity Shelf posi‐ Tempera‐ Time (min) (kg) tion ture (°C) Goose 2.5 - 3.5 220 - 230 160 - 180 Rabbit 180 - 190 60 - 80 Goat 170 - 180 60 - 90 Pizza Food Quantity Shelf posi‐...
- Page 13 ENGLISH Meat & Poultry Food Quantity Tempera‐ Time (min) Shelf posi‐ Comments (kg) ture (°C) tion Beef with min. 40 - 50 On the wire bone shelf. Put a deep pan on the second shelf posi‐ tion. Beef without On the wire bone shelf.
- Page 14 Food Quantity Tempera‐ Time (min) Shelf posi‐ Comments (kg) ture (°C) tion English 44 - 50 On the wire roast beef - shelf. Put a rare deep pan on the second shelf posi‐ tion. English 51 - 55 On the wire roast beef - shelf.
- Page 15 ENGLISH Puddings Food Quantity Tempera‐ Time (min) Shelf posi‐ Comments (kg) ture (°C) tion Egg Custard min. 60 - 75 9 ceramic in a Bain glasses in a Marie deep pan with 2 cm of water Cakes Food Quantity Tempera‐ Time (min) Shelf posi‐...
-
Page 16: Care And Cleaning
9.7 Grilling Preheat the empty oven for 3 minutes before cooking. Food Quantity Tempera‐ Time (min) Shelf po‐ ture (°C) sition Pieces 1st side 2nd side Fillet max. 12 - 15 12 - 14 steaks Beef max. 10 - 12... - Page 17 ENGLISH 10.1 Notes on cleaning The oven door can close if you try to remove the • Clean the front of the appliance with a internal glass panel before soft cloth with warm water and a you remove the oven door. cleaning agent.
-
Page 18: Troubleshooting
The screen-printing zone must face the inner side of the door. Make sure that after the installation the surface of the glass panel frame on the screen-printing zones is not rough when you touch it. - Page 19 ENGLISH 11.1 What to do if... Problem Possible cause Remedy The oven does not heat The oven is deactivated. Activate the oven. The oven does not heat The fuse is blown. Make sure that the fuse is the cause of the malfunc‐ tion.
-
Page 20: Installation
We recommend that you write the data here: Serial number (S.N.) ......... 12. INSTALLATION WARNING! WARNING! Do not use a flame to Refer to Safety chapters. check for leaks! 2. Fully move the oven into the built-in 12.1 Gas connection cabinet. - Page 21 ENGLISH necessary for the type of gas you use. Refer to “Technical information” chapter. 6. Assemble the burner in a reverse sequence. Replace the gas type sticker near the gas supply ramp with the one related to the new gas type. The gas oven burner does not need any primary gas regulation.
- Page 22 From liquid Release the gas to natu‐ adjustment ral gas screw ap‐ proximately 1/3 of a turn. min. 550 4. Attach the knob for the gas control. min. 560 5. Connect the appliance to the electricity. WARNING! Only put the mains plug into...
-
Page 23: Technical Data
ENGLISH • When you install a hob above the This appliance is supplied only with a oven, make different electrical main cable. connections for the hob and for the 12.8 Cable oven. Only make connections with correct Cable types applicable for installation or cables for the power supplied. - Page 24 13.2 Gas oven burner Gas type NOMINAL NOMINAL Reduced BY-PASS INJECTOR GAS POW‐ gas power NEEDLE MARK ER (kW) FLOW (kW) (1/100 (1/100 (g/h) G20 (2H) 20 mbar 2.7 Reg. G30/G31 (3B/P) 30/30 mbar 14. ENVIRONMENTAL CONCERNS Recycle the materials with the symbol...
- Page 25 ENGLISH...
- Page 26 www.electrolux.com...
- Page 27 ENGLISH...
- Page 28 www.electrolux.com/shop...
Need help?
Do you have a question about the EOG1102AOX and is the answer not in the manual?
Questions and answers