Table of Contents
Advertisement
Quick Links
Advertisement
Table of Contents

Related Manuals for Electrolux EOG2102

Summary of Contents for Electrolux EOG2102
- Page 1 EOG2102 Oven User Manual...
-
Page 2: Table Of Contents
14. ENERGY EFFICIENCY.................. 29 WE’RE THINKING OF YOU Thank you for purchasing an Electrolux appliance. You’ve chosen a product that brings with it decades of professional experience and innovation. Ingenious and stylish, it has been designed with you in mind. So whenever you use it, you can be safe in the knowledge that you’ll get great results every time. -
Page 3: Safety Information
ENGLISH SAFETY INFORMATION Before the installation and use of the appliance, carefully read the supplied instructions. The manufacturer is not responsible for any injuries or damages that are the result of incorrect installation or usage. Always keep the instructions in a safe and accessible location for future reference. -
Page 4: Safety Instructions
Always use oven gloves to remove or put in • accessories or ovenware. Before maintenance cut the power supply. • Ensure that the appliance is switched off before • replacing the lamp to avoid the possibility of electric shock. - Page 5 ENGLISH • Always use a correctly installed the appliance according to current shockproof socket. installation regulations. Pay attention • Do not use multi-plug adapters and to requirements regarding adequate extension cables. ventilation. • Make sure not to cause damage to 2.4 Use the mains plug and to the mains cable.
- Page 6 – do not put water directly into the • Clean regularly the appliance to hot appliance. prevent the deterioration of the – do not keep moist dishes and surface material. food in the appliance after you • Clean the appliance with a moist soft finish the cooking.
-
Page 7: Product Description
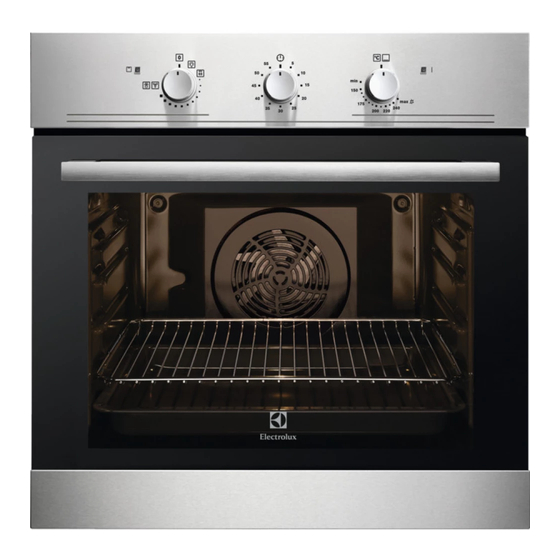
ENGLISH 3. PRODUCT DESCRIPTION 3.1 General overview Control panel Grill indicator Knob for the oven functions Knob for the Minute Minder Knob for the gas control Power indicator Air vents for the cooling fan Heating element Lamp Turnspit hole Oven cavity bottom plate Shelf support, removable Shelf positions 3.2 Accessories... -
Page 8: Daily Use
Let the oven cool down. Dampen a soft washing-up liquid and use this to clean cloth with warm water and a little mild the oven cavity. 5. DAILY USE WARNING! Refer to Safety chapters. 5.1 Oven functions Oven function... -
Page 9: Clock Functions
ENGLISH 2. Adjust the grill and the deep pan Do not keep the knob for the runner position to allow for different oven functions pushed for thickness of food. more than 15 seconds. If the Place the food close to the top oven burner does not light heating element for faster cooking after 15 seconds, release... - Page 10 7.1 Using the turnspit WARNING! Be careful when you use the turnspit. The forks and the spit are sharp. There is a risk of injury. WARNING! Use oven gloves when you remove the turnspit. The turnspit and the grill are hot.
-
Page 11: Additional Functions
ENGLISH All accessories have small indentations at the top of the right and left side to increase safety. The indentations are also anti-tip devices. The high rim around the shelf is a device which prevents cookware from slipping. Wire shelf and baking tray together: Push the baking tray between the guide bars of the shelf support and the wire shelf on the guide bars above. - Page 12 • To prevent too much smoke in the when you cook. This can change the oven during roasting, add some water baking results and cause damage to into the deep pan. To prevent the the enamel.
- Page 13 ENGLISH Food Quantity Shelf posi‐ Tempera‐ Time (min) (kg) tion ture (°C) Thick 1.4 - 1.5 210 - 220 25 - 30 Calzone 1.4 - 1.5 190 - 200 25 - 30 Cakes Food Quantity Shelf posi‐ Tempera‐ Time (min) (kg) tion ture (°C)
- Page 14 Food Fan Cooking Time (min) Comments Temperature Shelf position (°C) Apple cake 80 - 100 In a 20 cm (Apple pie) cake mould on a wire shelf Strudel min. 60 - 80 In a baking tray Jam-tart 30 - 40...
- Page 15 ENGLISH Food Fan Cooking Time (min) Comments Temperature Shelf position (°C) Pizza 10 - 20 In a baking tray or a deep pan Scones 10 - 20 In a baking tray Flans Food Fan Cooking Time (min) Comments Temperature Shelf position (°C) Pasta flan 45 - 50...
- Page 16 Food Quantity Tempera‐ Time (min) Shelf posi‐ Comments (kg) ture (°C) tion Beef without On the wire bone shelf. Put a deep pan on the second shelf posi‐ tion. Lamb min. 40 - 50 On the wire shelf. Put a...
- Page 17 ENGLISH Food Quantity Tempera‐ Time (min) Shelf posi‐ Comments (kg) ture (°C) tion English 51 - 55 On the wire roast beef - shelf. Put a medium deep pan on the second shelf posi‐ tion. English 56 - 60 On the wire roast beef - shelf.
- Page 18 Puddings Food Quantity Tempera‐ Time (min) Shelf posi‐ Comments (kg) ture (°C) tion Egg Custard min. 60 - 75 9 ceramic in a Bain glasses in a Marie deep pan with 2 cm of water Cakes Food Quantity Tempera‐...
- Page 19 ENGLISH 9.8 Grilling Preheat the empty oven for 3 minutes before cooking. Food Quantity Tempera‐ Time (min) Shelf po‐ ture (°C) sition Pieces 1st side 2nd side Fillet max. 12 - 15 12 - 14 steaks Beef max. 10 - 12 6 - 8 steaks Sausages 8...
-
Page 20: Care And Cleaning
9.10 Defrost Food Quantity Defrosting Further defrost‐ Comments time (min) ing time (min) Chicken 1000 100 - 140 20 - 30 Place the chicken on an upturned saucer placed on a large plate. Turn halfway through. Meat 1000 100 - 140 20 - 30 Turn halfway through. - Page 21 ENGLISH 10.4 Removing the shelf 10.5 Catalytic cleaning supports and removing the CAUTION! catalytic panels Do not clean the catalytic surface with oven sprays, To clean the oven, remove the shelf abrasive cleaning agents, supports and remove the catalytic soap or other cleaning panels.
- Page 22 1. Open the door fully and hold the two door hinges. 4. Put the door on a soft cloth on a stable surface. 2. Lift and turn the levers on the two hinges. 5. Release the locking system to remove the internal glass panel.
- Page 23 ENGLISH 10.7 Replacing the lamp Put a cloth on the bottom of the interior of the appliance. It prevents damage to the lamp glass cover and the cavity. 90° WARNING! Danger of electrocution! Disconnect the fuse before you replace the lamp. The lamp and the lamp glass cover can be hot.
-
Page 24: Troubleshooting
11. TROUBLESHOOTING WARNING! Refer to Safety chapters. 11.1 What to do if... Problem Possible cause Remedy The oven does not heat The oven is deactivated. Activate the oven. The oven does not heat The fuse is blown. Make sure that the fuse is the cause of the malfunc‐... -
Page 25: Installation
ENGLISH We recommend that you write the data here: Model (MOD.) ......... Product number (PNC) ......... Serial number (S.N.) ......... 12. INSTALLATION the correct position. Do not apply WARNING! force to the gas supply circuit. Refer to Safety chapters. WARNING! 12.1 Gas connection Do not use a flame to check for leaks! - Page 26 The appliance is set to default gas. To change the setting always use the gasket sealing. 12.3 Oven injector replacement 1. Remove the bottom plate of the oven cavity (A) to get access to the oven burner (B). 4. Slowly move it to the left side. Do not...
- Page 27 ENGLISH 12.5 Building in 3. Adjust the adjustment screw (A) with a thin-bladed screwdriver. • Only set up the appliance in a kitchen or in a kitchen-dining room. Do not set up the appliance in a bathroom or a bedroom. •...
-
Page 28: Technical Data
12.7 Electrical installation • There must be a continuous air supply around the oven in order to not have the oven become too hot. The manufacturer is not • For correct operation, the oven responsible if you do not... -
Page 29: Energy Efficiency
G20 (2H) 20 mbar 2.7 Reg. G30/G31 (3B/P) 30/30 mbar 14. ENERGY EFFICIENCY 14.1 Product Fiche and information according to EU 65-66/2014 Supplier's name Electrolux Model identification EOG2102AOX Energy Efficiency Index 71.6 Energy efficiency class Energy consumption with a standard load, con‐... - Page 30 – When possible, put the food – Use the residual heat to warm up inside the oven without heating it other foods. • Cooking with fan - when possible, – When the cooking duration is use the cooking functions with fan to longer than 30 minutes, reduce save energy.
- Page 31 ENGLISH...
- Page 32 www.electrolux.com/shop...
Need help?
Do you have a question about the EOG2102 and is the answer not in the manual?
Questions and answers