
Related Manuals for real living BG-10257B


Summary of Contents for real living BG-10257B
-
Page 2: Maintenance
GENERAL BEST PRACTICES FOR ASSEMBLY: Read all instruc�ons before star�ng Clear a flat covered space to assemble We recommend two people for assembly Note that hardware required is provided for every step Pay a�en�on to orienta�on Le�er of the part corresponds to a s�cker on the product Number of the hardware corresponds to its number in the package Helpful hints provided along the way MAINTENANCE:... -
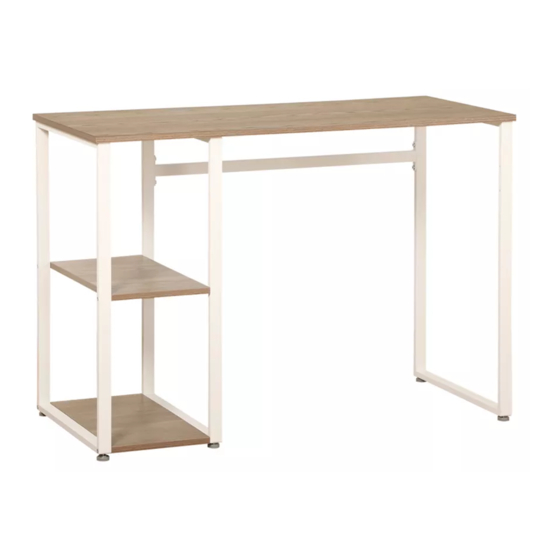
Page 3: Parts List
PARTS LIST Shelf Left Frame Shelf Right Frame Side Frame Cross Bar Top Panel Shelf HARDWARE LIST Adjuster Screw Screw Screw Allen Wrench HELPFUL HINTS • Separate parts before starting... - Page 4 STEP 1 Insert Adjuster (1) into Shelf Left Frame (A), Shelf Right Frame (B) and Side Frame (C). Assembled View: STEP 2 Attach Shelf (F) to Shelf Left Frame (A) and Shelf Right Frame (B) with Screw (4). Assembled View:...
- Page 5 STEP 3 You can place the shelves either on the left or right. Option 1: Shelf on the left Facing the desk and put the shelves on the left. Attach Cross Bar (D) to Shelf Right Frame (B) and Side Frame (C) with Screw (2) and fully tighten.
- Page 6 STEP 3 Option 2: Shelf on the right Facing the desk and put the shelves on the right. Attach Cross Bar (D) to Shelf Right Frame (B) and Side Frame (C) with Screw (2) and fully tighten. Assembled View: STEP 4 Align Top Panel (E) with the holes in the assembled frame and secure in place with Screw (3).