
Related Manuals for LUCCI Air AIRFUSION HAVANA


Summary of Contents for LUCCI Air AIRFUSION HAVANA
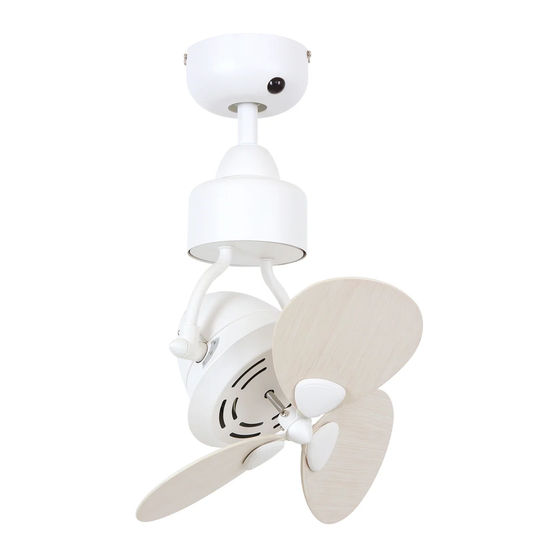
- Page 1 LUCCI AIRFUSION HAVANA CEILING MOUNTED OSCILLATING FAN INSTALLATION OPERATION MAINTENANCE WARRANTY INFORMATION CAUTION READ INSTRUCTIONS CAREFULLY FOR SAFE INSTALLATION AND FAN OPERATION. V1.0AU (2019/12)
-
Page 2: Safety Precautions
Airfusion HAVANA Installation Instructions THANK YOU FOR PURCHASING Thank you for purchasing this quality Lucci product. To ensure correct function and safety, please read and follow all instructions carefully before assembly, installation and use of this ceiling fan. Please keep instructions for future reference. - Page 3 Airfusion HAVANA Installation Instructions Example: If a fan is connected to a circuit that can be isolated via an all-pole safety switch at the switchboard, then this is considered to be an all-pole disconnection to the ceiling fan electrical circuit, meeting the requirements of clause 7.12.2 of AS/NZS 60335.1.
-
Page 4: Parts List
Airfusion HAVANA Installation Instructions PARTS LIST • Unpack your ceiling fan carefully. Remove all parts and hardware. • Lay out all the components on a smooth surface and make sure there are no components missing before assembling. If parts are missing, return the complete product to the place of purchase for inspection or replacement. -
Page 5: Clearance Requirement
Airfusion HAVANA Installation Instructions CLEARANCE REQUIREMENT • The fan must be installed so that the lowest point of the fan blade must be 2.1m from the floor (In Australia); 2.3m from the floor (In Europe). NOTE: The lowest point of the fan blade is when the fan head is adjusted to 45°. - Page 6 Airfusion HAVANA Installation Instructions INSTALLATION OF THE MOUNTING BRACKET • Install the hanging bracket to the ceiling joist or structure that is capable of carrying a load of at least 16kg, with the two long screws provided. Ensure at least 30mm of the screw is threaded into the support. (Fig. 3) 16 KG Fig.
-
Page 7: Installation Of The Fan Blades
Airfusion HAVANA Installation Instructions INSTALLATION OF THE FAN BLADES • Align the 3 mounting holes on the blade (3) to the 3 mounting holes of the blade bracket (2); • Insert the fixing cap (4) into the mouting holes from the bottom of the blade (3) and secure by tightening the 3 screws (1) from the top of the blade bracket (2);... -
Page 8: Hanging The Fan
Airfusion HAVANA Installation Instructions HANGING THE FAN Lift the fan assembly onto the mounting bracket. Ensure thekey slot (A) of the hanger ball is positioned on the key pin (B) of the mounting bracket (C) to prevent the fan from rotating when in operation.(Fig.7A) NOTE: Please be aware of that the fan head can be oscillating 60°. - Page 9 Airfusion HAVANA Installation Instructions ADJUSTMENT OF THE FAN HEAD • Loosen the two set screws on both sides of the motor; (Fig.8) • Rotate the fan head and aim the arm screw at the desired angle (There are only three angles available: 0°, 45°, 90°.They are labelled on the motor part) (Fig.9)
-
Page 10: Electrical Wiring Diagram
Airfusion HAVANA Installation Instructions ELECTRICAL WIRING DIAGRAM WARNING:FOR YOUR SAFETY ALL ELECTRICAL CONNECTIONS MUST BE UNDERTAKEN BY A LICENSED ELECTRICIAN. NOTE:AN ADDITIONAL ALL POLE DISCONNECTION SWITCH MUST BE INCLUDED IN THE FIXED WIRING. Ensure the motor earth wire is connected to the single earthing terminal block “1” in the diagram below. -
Page 11: Finishing The Installation
Airfusion HAVANA Installation Instructions FINISHING THE INSTALLATION • After completing the electrical connection at the mounting bracket terminal block, connect the ceiling fan wiring via the quick connector plug. • Ensure the earth wiring is secure and correct, by performing an earthing continuity test from the fan’s accessible metal body back to the earth terminal at the terminal block on the mounting bracket. - Page 12 Airfusion HAVANA Installation Instructions OPEARATION OF THE REMOTE CONTROLLER (Fig.14) (1) Control of the speed (HIGH, MEDIUM, LOW); (2) Fan On/Off; (3) Timing control of the fan (1Hr, 3Hr, 6Hr). The fan will be stopped automaticly after the time you selected.
-
Page 13: After Installation
Airfusion HAVANA Installation Instructions INSTALLATION OF THE REMOTE HOLDER(Fig.16) Install the remote holder onto the wall by the two screws provided, then place the remote controller onto the holder. Fig. 16 AFTER INSTALLATION WOBBLE: NOTE: Ceiling fans tend to move during operation due to the fact that they are mounted on a rubber grommet. -
Page 14: Care And Cleaning
Airfusion HAVANA Installation Instructions CARE & CLEANING NOTE: Always turn OFF the power at the mains switch before performing any maintenance or attempting to clean your fan. • Every 6 months periodic cleaning of your fan is the only maintenance required. Use a soft brush or lint free cloth to avoidscratching the paint finish. - Page 15 Airfusion HAVANA Installation Instructions TECHNICAL INFORMATION Fan Type Ceiling mounted, 60° oscillating fan LD-15’’ HAVA-ORB/ LD-15’’ HAVA-BLK/ LD-15’’ HAVA-CHW/ Model No./SKU# SKU# 213160 SKU# 213161 SKU# 213162 Colour Black White Rated Voltage 220-240V~ 50Hz Rated Wattage 55W ( 51W fan motor + 4W oscillation motor)
- Page 16 Airfusion HAVANA Installation Instructions LUCCI CEILING FAN WARRANTY DETAIL LUCCI WARRANTY HOTLINE- 1800 602 243 THIS WARRANTY IS VALID IN AUSTRALIA ONLY In the event of service being required, please call the Lucci Fan Warranty Hotline on 1800 602 243between 9am & 5pm (EST) Monday to Friday.
- Page 17 Airfusion HAVANA Installation Instructions CEILING FAN WARRANTY INFORMATION LUCCI WARRANTY HOTLINE- 1800 602 243 Complete and retain this form for your personal records and warranty purposes. NAME………………………………………………………………………………… ADDRESS…………………………………………………………………………… ……………………………………………………POSTCODE…………………… MODEL NUMBER…………………………………………………………………… (PO# + DATECODE Sticker here) PO NUMBER or DATECODE ………………………………………………………...
Need help?
Do you have a question about the AIRFUSION HAVANA and is the answer not in the manual?
Questions and answers