
Related Manuals for LUCCI Air Airfusion Newport


Summary of Contents for LUCCI Air Airfusion Newport
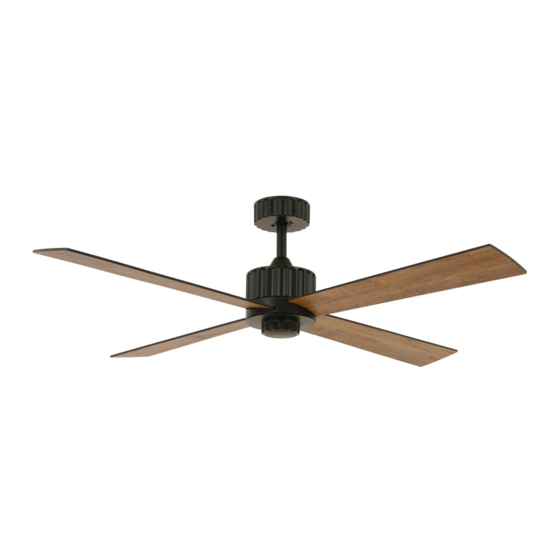
- Page 1 LUCCI NEWPORT DC CEILING FAN INSTALLATION OPERATION MAINTENANCE WARRANTY INFORMATION CAUTION READ INSTRUCTIONS CAREFULLY FOR SAFE INSTALLATION AND FAN OPERATION. V1.0-EU (11/2019)
-
Page 2: Safety Precautions
Airfusion Newport Installation Instructions THANK YOU FOR PURCHASING Thank you for purchasing the latest in energy saving ceiling fans. This fan runs on DC (direct current) power which gives it the benefit of being super energy efficient whilst still maintaining high volume air-movement and silent operation. - Page 3 Airfusion Newport Installation Instructions the minimum electrical safety of this standard. Please note warranty will be void if installation is without a means for an all-pole disconnection incorporated in the fixed wiring in accordance with the wiring rules. Example: If a fan is connected to a circuit that can be...
-
Page 4: Parts List
Airfusion Newport Installation Instructions 12. The fixing means for attachment to the ceiling such as hooks or other devices shall be fixed with a sufficient strength to withstand 4 times the weight of the ceiling fan; that the mounting of the suspension system shall be performed by the manufacturer, its service agent or suitably qualified persons. -
Page 5: Installing The Fan
Airfusion Newport Installation Instructions INSTALLING THE FAN TOOLS REQUIRED: Phillips / flat head screwdriver Pair of pliers Adjustable spanner Step ladder Wire cutter Wiring, supply cable as required by local provincial and national wiring codes and regulations INSTALLING THE MOUNTING BRACKET ... - Page 6 Airfusion Newport Installation Instructions ANGLED CEILING INSTALLATION This fan hanging system supports a maximum 15 degree angled ceiling installation. (Fig. 3) Fig. 3 15° Fig. 3 INSTALLATION OF BLADE (Fig.4) 1. Insert the blade into the slot of rotating member of fan motor assembly.
-
Page 7: Hanging The Fan
Airfusion Newport Installation Instructions HANGING THE FAN Lift the fan assembly onto the mounting bracket. Ensure the key slot (A) of the hanger ball is positioned on the key pin (B) of the mounting bracket (C) to prevent the fan from rotating when in operation. (Fig.6) Fig. - Page 8 Airfusion Newport Installation Instructions Connect “EARTH” wire to the “ ” of terminal block on the mouthing bracket. Hang the fan (Refer to “hanging the fan” Fig. 6, page 6). Plug connector from the supply wiring from the mounting bracket to the input of the DC motor driver/receiver.
-
Page 9: Finishing The Installation
Airfusion Newport Installation Instructions FINISHING THE INSTALLATION INSTALLATION OF THE CANOPY (Fig.9) Ensure the earth wiring is secure and correct, by performing an earthing continuity test from the fan’s accessible metal body back to the earth terminal at the terminal block on the mounting bracket. -
Page 10: Using Your Ceiling Fan
Airfusion Newport Installation Instructions USING YOUR CEILING FAN REMOTE CONTROL (Fig.11) (1) Reverse control (2) Natural wind (The fan speed automatic cycle between 1 to 6 speed) (3) Speed control (4) Light On/Off (5) Fan On/Off Fig. 9 (6) 1.5V AAA battery x 2 pcs (Included) Fig. - Page 11 Airfusion Newport Installation Instructions Install the batteries into the remote. Please make sure the polarity of the battery is correct. Turn ON the power to the receiver. Press and hold the “ ” button on the remote for 10 seconds within 30 seconds of switching the power ON to the receiver of the ceiling fan.
-
Page 12: After Installation
Airfusion Newport Installation Instructions Install the batteries into the remote. Please make sure the polarity of the battery is correct. Turn ON the power to receiver 2. Keep the power OFF to receiver 1. (Each ceiling fan must have its own isolation switch, so that only the ceiling fan that needs to be paired with the transmitter will be ON). -
Page 13: Care And Cleaning
Airfusion Newport Installation Instructions BALANCING KIT: A balancing kit is provided to balance the ceiling fan on initial installation. Please refer to the instruction on how to use the balancing kit. The balancing kit can be used to assist re-balancing should the ceiling fan become un-balanced again. -
Page 14: Technical Information
Airfusion Newport Installation Instructions medical attention. TECHNICAL INFORMATION 54’’ fan - Newport Fan Models / SKU# LD-54" NEWP / SKU# 213170, 213171 Rated Voltage 220-240V~ 50Hz Rated Wattage (Motor) Rated wattage (Lamp) GX53, Max.9W (Not included) Battery for remote 2 x AAA (Included) Weight 4.8kg...
Need help?
Do you have a question about the Airfusion Newport and is the answer not in the manual?
Questions and answers