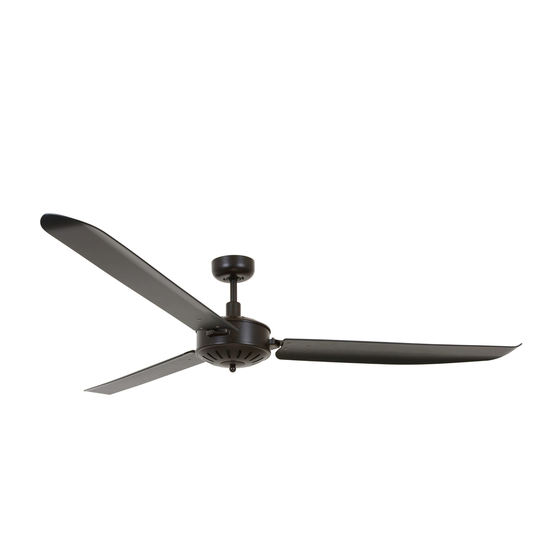
LUCCI Air AIRFUSION CAROLINA Installation, Operation, Maintenance & Warranty Information
70 inch ceiling fan
Hide thumbs
Also See for AIRFUSION CAROLINA:
Summary of Contents for LUCCI Air AIRFUSION CAROLINA
- Page 1 LUCCI AIRFUSION CAROLINA 70 INCH CEILING FAN ⚫ INSTALLATION ⚫ OPERATION ⚫ MAINTENANCE ⚫ WARRANTY INFORMATION CAUTION READ INSTRUCTIONS CAREFULLY FOR SAFE INSTALLATION AND FAN OPERATION. V1.0 - MUTIL–2019-10-25...
-
Page 2: Safety Precautions
Airfusion Carolina 70’ Installation Instructions THANK YOU FOR PURCHASING Thank you for purchasing this quality Lucci product. To ensure correct function and safety, please read and follow all instructions carefully before assembly, installation and use of this ceiling fan. Please keep instructions for future reference. - Page 3 Airfusion Carolina 70’ Installation Instructions A single-pole switch on the active of the receiver input of remote control must also be included in the wiring, and located the same room as the ceiling fan. Do not dispose of electrical appliances as unsorted municipal waste, use separate collection facilities.
-
Page 4: Before Installation
Airfusion Carolina 70’ Installation Instructions BEFORE INSTALLATION • Unpack your ceiling fan carefully. Remove all parts and hardware. • Lay out all the components on a smooth surface and make sure there are no components missing before assembling. If parts are missing, return the complete product to the place of purchase for inspection or replacement. -
Page 5: Installing The Mounting Bracket
Airfusion Carolina 70’ Installation Instructions INSTALLING THE MOUNTING BRACKET • The ceiling fan must be installed in a location so that the blades are a minimum 300mm spacing from the tip of the blade to the nearest objects or walls. -
Page 6: Blade Installation
Airfusion Carolina 70’ Installation Instructions BLADE INSTALLATION • Align the 3 mounting holes on the blade assembly (3) to the 3 mounting holes on the rotating member of fan motor assembly (1) and using the 3 blade screws with washers (2) to secure the blade assembly (3) to the fan motor assembly, •... - Page 7 Airfusion Carolina 70’ Installation Instructions ELECTRICAL WIRING THE FAN WARNING: FOR YOUR SAFETY ALL ELECTRICAL CONNECTIONS MUST BE UNDERTAKEN BY A LICENSED ELECTRICIAN. NOTE: AN ADDITIONAL ALL POLE DISCONNECTION SWITCH MUST BE INCLUDED IN THE FIXED WIRING. NOTE: Wiring diagram includes the light kit wiring. The light wiring diagram and switch is omitted when no light kit is used with the ceiling fan.
- Page 8 Airfusion Carolina 70’ Installation Instructions USE WITH REMOTE WIRING DIAGRAM: (REMOTE sold separately) 1/ Remote without plugs Fig. 7 2/ Remote with plugs Fig. 8 8 | P a g e V1.0 - MUTIL–2019-10-25...
-
Page 9: Finishing The Installation
Airfusion Carolina 70’ Installation Instructions FINISHING THE INSTALLATION • After completing the electrical connection at the mounting bracket terminal block, connect the ceiling fan wiring via the quick connector plug. • Ensure the earth wiring is secure and correct, by performing an earthing continuity test from the fan’s accessible metal body back to the earth terminal at the terminal block on the mounting bracket. -
Page 10: After Installation
Airfusion Carolina 70’ Installation Instructions REVERSE FUNCTION Your ceiling fan can operate either in fan mode or reverse fan mode. SUMMER Mode: The reverse switch shall be in the SUMMER position to make the fan rotate in the anticlockwise direction. The airflow will be directed downwards, for cooling in summer. -
Page 11: Care And Cleaning
Airfusion Carolina 70’ Installation Instructions CARE & CLEANING NOTE: Always turn OFF the power at the mains switch before performing any maintenance or attempting to clean your fan. • Every 6 months periodic cleaning of your ceiling fan is the only maintenance required. Use a soft brush or lint free cloth to avoid scratching the paint finish.


Need help?
Do you have a question about the AIRFUSION CAROLINA and is the answer not in the manual?
Questions and answers