
Related Manuals for VORON VORON2 2.4R2


Summary of Contents for VORON VORON2 2.4R2
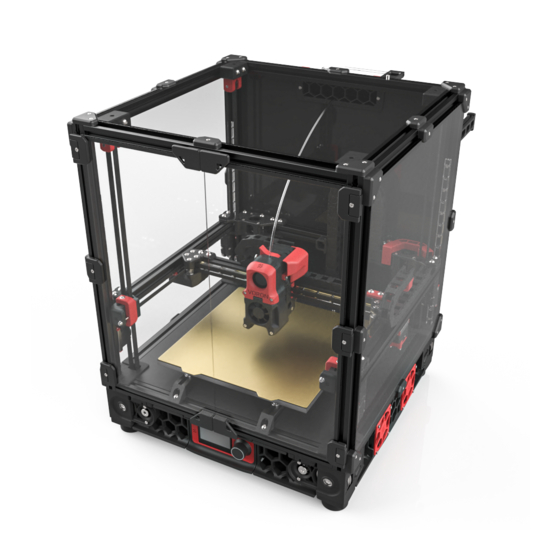
- Page 1 WWW.VORONDESIGN.COM VORON VORON2 2.4R2 BUILD GUIDE We build space shuttles with gardening tools so anyone can have a space shuttle of their own. VERSION 2022-05-08...
- Page 2 Please do not become the first VORON fatality. There is no special Reddit flair for that. Please, read the entire manual before you start assembly. As you begin wrenching, please check our Discord channels for any tips and questions that may halt your progress.
-
Page 3: Table Of Contents
TABLE OF CONTENTS WWW.VORONDESIGN.COM Introduction A/B Belts Hardware Afterburner Frame Electronics Z Drives and Idlers Controller Build Plate Wiring A/B Drives and Idlers Skirts Gantry Panels Z Axis Next Steps... -
Page 4: Introduction
PART PRINTING GUIDELINES The Voron Team has provided the following print guidelines for you to follow in order to have the best chance at success with your parts. There are often questions about substituting materials or changing printing standards, but... - Page 5 WWW.VORONDESIGN.COM FILE NAMING By this time you should have already downloaded our STL files from the Voron GitHub. You might have noticed that we have used a unique naming convention for the files. This is how to use them. PRIMARY COLOR...
- Page 6 THIS IS JUST A REFERENCE This manual is designed to be a simple reference manual. Building a Voron can be a complex endeavour and for that reason we recommend downloading the CAD files off our Github repository if there are sections you need clarification on.
-
Page 7: Hardware
Metric fastener with a cylindrical head head and hex drive. Most commonly and hex drive. The most common found in locations where M5 fasteners fastener used on the Voron. are used. ISO 4762 ISO 7380-1 FLAT HEAD COUNTERSUNK SCREW (FHCS) - Page 8 HARDWARE REFERENCE WWW.VORONDESIGN.COM F695 BEARING 625 BEARING A ball bearing with a flange used in A ball bearing used on the Voron Z drives. various gantry locations. WASHER SHIM Usually stamped from sheet metal this Not to be confused with stamped type of spacer is not as consistent in washers.
- Page 9 A quality driver is strongly recommended. Refer to the sourcing guide for suggestions. ADDITIONAL TOOLS We provide additional tool recommendations in our sourcing guide. Visit https://vorondesign.com/ sourcing_guide and switch to the “Voron Tools” tab at the bottom of the page.
- Page 10 Blind Joints provide a cost effective and rigid assembly method. The head of the BHCS is slid into the channel of another extrusion and securely fastened through a small access hole in the extrusion. If you’ve never assembled one before we recommend you watch the linked guide. https://voron.link/onjwmcd...
- Page 11 WWW.VORONDESIGN.COM The first Voron printer was released to the public on March 10 2016.
- Page 12 FRAME WWW.VORONDESIGN.COM...
- Page 13 EXTRUSION REFERENCE WWW.VORONDESIGN.COM B Extrusion A Extrusion C Extrusion D Extrusion E Extrusion SORT EXTRUSIONS Collect your extrusions and sort them by length. We will highlight the extrusions used in each step and label them as shown on this page.
- Page 14 FRAME WWW.VORONDESIGN.COM M5x16 BHCS A Extrusion PREPARE 8 EXTRUSIONS The extrusions are going to be used in this section. Prepare them as shown above. M5x16 BHCS...
-
Page 15: Frame
More tips on how to assemble a frame are linked below. B Extrusion A Extrusion https://voron.link/kdtpzam BUILD ON A FLAT SURFACE Build the frame on a glass or granite surface to ensure you can get it as square as possible. - Page 16 FRAME WWW.VORONDESIGN.COM B Extrusion A Extrusion...
- Page 17 FRAME WWW.VORONDESIGN.COM A Extrusion...
- Page 18 FRAME WWW.VORONDESIGN.COM A Extrusion M5x16 BHCS Corner Brackets...
- Page 19 FRAME WWW.VORONDESIGN.COM M5x10 BHCS M5 T-Nut M5 Shim...
- Page 20 FRAME WWW.VORONDESIGN.COM POSITION BED EXTRUSIONS Find the centreline of the printer and position the bed extrusions as shown in the diagram to the left. The distance between the extrusions is 130mm centred on the centreline of the printer. 1/2 printer width for standard sizes: 250 spec 205mm 300 spec 230mm 350 spec 255mm...
- Page 21 FRAME WWW.VORONDESIGN.COM CHECK FOR SQUARENESS Verify the angle of all corners and the overall squareness by measuring the diagonals. Refer to the second half of the linked video for additional information. https://voron.link/kdtpzam...
- Page 22 Z DRIVES WWW.VORONDESIGN.COM...
- Page 23 OVERVIEW WWW.VORONDESIGN.COM Z Eyedlers Z Linear Rails Deck Panel Z2 Drive Z1 Drive Z3 Drive Z0 Drive OVERVIEW Individual chapters start with an overview of the components that will be built/added to the printer in the chapter.
- Page 24 Most linear rails arrive with shipping oil. To ensure a smooth gliding motion and long service life, this oil needs to be removed and its rail carriage greased. See the Voron sourcing guide for a recommended list of lubricants. We attached a link to a video guide to get you started.
- Page 25 Z RAILS WWW.VORONDESIGN.COM MGN9 Rail CENTRED RAIL INSTALLATION GUIDE Use the MGN9 guides to M3x8 SHCS position the rail in the center of the extrusion prior to fastening the screws. MIND THE CARRIAGE WHY IS THIS HERE? The carriages are designed to slide As you likely skipped over the along the rail easily.
- Page 26 Z RAILS WWW.VORONDESIGN.COM RAIL SAFETY As we will turn the printer upside down during further assembly make sure to fix each carriage in position with a piece of sticky tape. If your rails were delivered with plastic stoppers you can also temporarily reinstall them to prevent carriages from falling off their rails and spilling their bearing balls..
- Page 27 Z RAILS WWW.VORONDESIGN.COM INSTALL REMAINING Z RAILS Add the remaining Z rails following the same instructions. Make sure the rails face each other as shown in the graphic.
- Page 28 DECK PANEL WWW.VORONDESIGN.COM M5 T-Nut NOTCH TO THE BACK FLIP PRINTER UPSIDE DOWN Deck Panel It’s easier working with gravity than against it. But make sure the rail carriages are secure before doing so.
- Page 29 DECK PANEL WWW.VORONDESIGN.COM DIN RAIL SLOTS If the slots in the rails do not line up with the t-nut you can shorten the DIN rails ALIGN T-NUTS WITH HOLES by a few mm. Position the 4 T-nuts so they are directly below the 4 holes in the deck panel.
- Page 30 ORIENTATION WWW.VORONDESIGN.COM Back Front PRINTER ORIENTATION We regularly insert graphics like the ones above to help you along the build process. The sides are labeled to make it easier to keep track.
- Page 31 Make sure you have the proper inserts (check the hardware reference for a close up picture and the BOM for dimensions). If you’ve never worked with heat set inserts before we recommend you watch the linked guide. Heat Set Insert https://voron.link/m5ybt4d...
- Page 32 BELT DRIVE ASSEMBLY WWW.VORONDESIGN.COM SET SCREWS aka the root of all issues Insert both set screws and use thread locker on all set screws. Use a high quality hex driver to prevent the hex profile from stripping. Ball-end drivers are not recommended. GT2 20T 9mm wide Pulley Loose set screws account for the majority of issues that our users report.
- Page 33 BELT DRIVE ASSEMBLY WWW.VORONDESIGN.COM GT2 80 Tooth Pulley M5 Shim 625 Bearing 625 Bearing 625 Bearing CHECK YOUR WORK Compare your assembled parts to the graphics shown here. APPLY THREAD LOCKER Make sure to use thread locker on the set screws.
- Page 34 Z DRIVE WWW.VORONDESIGN.COM GT2 188mm Belt Loop...
- Page 35 Z DRIVE WWW.VORONDESIGN.COM CHECK SHAFT POSITION Compare your assembled parts to the graphics shown here.
- Page 36 Z DRIVE WWW.VORONDESIGN.COM M3x40 SHCS...
- Page 37 Z DRIVE WWW.VORONDESIGN.COM M3x8 SHCS M5 Nut ACCENT PART? Look for Voron heart next to the part. It indicates that this is an accent part. CHECK FOR BELT Make sure the closed belt loop is in the part.
- Page 38 Z DRIVE WWW.VORONDESIGN.COM NEMA17 Stepper Motor https://voron.link/fx10m8e APPLY THREAD LOCKER Make sure to use thread locker on the set screws. GT2 16 Tooth Pulley 16 TOOTH PULLEYS PULLEY POSITION The Z drive motors are the only Depending on your motors,...
- Page 39 Z DRIVE WWW.VORONDESIGN.COM M3x8 SHCS MOTOR ORIENTATION Pay attention to the orientation of the cable exit.
- Page 40 ORIENTATION WWW.VORONDESIGN.COM PICTURE FOR ORIENTATION The Z0 drive is the first Z drive that will be added to the printer. The fully assembled Z Drive is highlighted in blue.
- Page 41 Z DRIVE WWW.VORONDESIGN.COM M5 T-Nut M5 T-Nut M5x40 SHCS WHICH CORNER IS THIS? We highlighted the corner with a circle. UPSIDE DOWN ASSEMBLY For ease of assembly we recommend flipping the printer on its head for the next steps.
- Page 42 Z DRIVE WWW.VORONDESIGN.COM M5x10 BHCS SLIDE INTO PLACE DON’T TIGHTEN Insert at an angle and slide into place. Leave the bolt loose for the next step.
- Page 43 Z DRIVE WWW.VORONDESIGN.COM M5x10 BHCS DON’T TIGHTEN Leave the bolt loose for the next step.
- Page 44 Z DRIVE WWW.VORONDESIGN.COM CLOSE THE BELT TENSIONER Flip the belt tensioner latch closed.
- Page 45 Z DRIVE WWW.VORONDESIGN.COM M5x16 BHCS Rubber Foot TIGHTEN BOLTS After closing the tensioner the M5 bolts can be properly fastened.
- Page 46 Z DRIVE WWW.VORONDESIGN.COM CHECK POSITION Ensure that closing the belt tensioner did not cause the Z Drive to move/shift. If it did undo the bolts and realign.
- Page 47 OTHER Z DRIVES WWW.VORONDESIGN.COM REPEAT INSTRUCTIONS FOR OPPOSING CORNER REPEAT INSTRUCTIONS FOR THE MIRRORED DRIVES Build another Z drive, following the same instructions. Build two more Z drives following the instructions that came before. The printed parts are mirrored.
- Page 48 Z IDLER WWW.VORONDESIGN.COM M3 Nut M5x30 BHCS M3x16 SHCS GT2 20 Tooth Idler 9mm wide...
- Page 49 Z IDLER WWW.VORONDESIGN.COM IDLER ORIENTATION Mind the idler orientation. The idler must face in the same orientation as the pulley in the drive below it. SEAT IN CORNER Ensure idler is pressed firmly into corner before M5 T-Nut tightening. M5x30 BHCS...
- Page 50 OTHER Z IDLERS WWW.VORONDESIGN.COM REPEAT INSTRUCTIONS FOR OPPOSING CORNER REPEAT INSTRUCTIONS FOR THE MIRRORED DRIVES Build another Z idler following the same instructions. Build two more Z idlers following the instructions that came before. The printed parts are mirrored.
- Page 51 WWW.VORONDESIGN.COM The first design released under the name Voron was the “Voron Geared Extruder”. This was on January 28 2015.
- Page 52 PRINT BED WWW.VORONDESIGN.COM...
- Page 53 OVERVIEW WWW.VORONDESIGN.COM Back Front WHICH SIDE IS WHICH? The top of the plate has mounting holes with bores that allow boltheads to sit flush/below the surface. The plate has additional tapped holes to secure the Protective Bottom Earth (PE) connection and a thermal fuse, those are on the back side of the plate.
- Page 54 Use the edge of a plastic object or a small roller to firmly press the magnet on the plate to get a good bond from the adhesive backing. If you have never done this before we recommend you watch the linked guide. https://voron.link/rm6tpld...
- Page 55 HEATED BED WWW.VORONDESIGN.COM HEATER APPLICATION The heater is installed in the same fashion as the magnet. Centre it on the bottom side of the build plate and make sure to firmly press it onto the build plate.
- Page 56 HEATED BED WWW.VORONDESIGN.COM THERMAL FUSE While not required to operate the printer, a thermal fuse M3x12 SHCS attached to the build plate adds an additional layer of protection against potentially dangerous malfunctions. M3 Washer The thermal fuse is wired in-line with the heater wires. Depending on the tapped holes in the plate you may Thermal Fuse need to use a shorter bolt.
- Page 57 HEATED BED WWW.VORONDESIGN.COM M3x6 BHCS Ring Terminal PROTECTIVE EARTH (PE) 1mm²(AWG18) or larger...
- Page 58 HEATED BED WWW.VORONDESIGN.COM M4 Thumb Nuts M4 NUT FOR A M3 BOLT? We use the thumb nuts as spacers. You can replace them with different heat resistant spacers of the same length. M3 T-Nut Front...
- Page 59 HEATED BED WWW.VORONDESIGN.COM M3x16 SHCS BED AND SPACER THICKNESS Depending on the combination of bed and spacer thickness you may need to use longer bolts to secure the bed. DON’T TIGHTEN Only tighten one bolt fully. Leave the remaining bolts slightly loose. This will allow for thermal expansion without putting additional stress on the plate.
- Page 60 HEATED BED WWW.VORONDESIGN.COM WIRE PASSTHROUGH Feed the bed related wires through the opening in the deck plate. Front VERIFY PLATE PLACEMENT The front edge of the print plate should sit 38mm behind the front edge of the frame.
- Page 61 WWW.VORONDESIGN.COM The Voron Legacy is a modernized design true to the spirit of the original Voron 1.0.
- Page 62 A/B DRIVES AND IDLERS WWW.VORONDESIGN.COM...
- Page 63 OVERVIEW WWW.VORONDESIGN.COM B Drive A Drive B Idler A Idler...
- Page 64 PREPARATION WWW.VORONDESIGN.COM Heat Set Insert M5 Nut...
- Page 65 A IDLER WWW.VORONDESIGN.COM M5 Shim F695 Bearing ASSEMBLY AID This bolt is used to align components and will be removed in a later step. M5x40 SHCS...
- Page 66 A IDLER WWW.VORONDESIGN.COM M5x40 SHCS REMOVE ASSEMBLY AID Remove the bolt and slide the tension arm into place.
- Page 67 A IDLER WWW.VORONDESIGN.COM M3 Washer M3x40 SHCS...
- Page 68 A IDLER WWW.VORONDESIGN.COM CHECK YOUR WORK Compare your assembled parts to the graphics shown here. Pay attention to the features highlighted by the circles.
- Page 69 B IDLER WWW.VORONDESIGN.COM F695 Bearing M5 Shim ASSEMBLY AID This bolt is used to align components and will be removed in a later step. M5x40 SHCS...
- Page 70 B IDLER WWW.VORONDESIGN.COM M5x40 SHCS REMOVE ASSEMBLY AID Remove the bolt and slide the tension arm into place.
- Page 71 B IDLER WWW.VORONDESIGN.COM M3 Washer M3x40 SHCS...
- Page 72 B IDLER WWW.VORONDESIGN.COM CHECK YOUR WORK Compare your assembled parts to the graphics shown here. Pay attention to the features highlighted by the circles.
- Page 73 A DRIVE WWW.VORONDESIGN.COM M5x30 BHCS CUTOUT The printed parts for the A drive have a cutout.
- Page 74 A DRIVE WWW.VORONDESIGN.COM M5 Shim F695 Bearing UPSIDE DOWN ASSEMBLY For ease of assembly we recommend to assemble the A and B drives upside down. DON’T OVER TIGHTEN The M5 bolts are threaded directly into plastic.
- Page 75 A DRIVE WWW.VORONDESIGN.COM GT2 20 Tooth Pulley APPLY THREAD LOCKER Make sure to use thread locker on the set screws. MOTOR ORIENTATION Pay attention to the orientation of the cable exit. The wires from the motors will be pointing towards each other once fully assembled.
- Page 76 A DRIVE WWW.VORONDESIGN.COM M3x30 SHCS CHECK YOUR WORK Compare your assembled part to the graphic shown here. Pay attention to the pulley orientation and alignment with the bearing stack ups.
- Page 77 B DRIVE WWW.VORONDESIGN.COM M5x30 BHCS...
- Page 78 B DRIVE WWW.VORONDESIGN.COM M5 Shim F695 Bearing UPSIDE DOWN ASSEMBLY For ease of assembly we recommend to assemble the A and B drives upside down. DON’T OVER TIGHTEN The M5 bolts are threaded directly into plastic.
- Page 79 B DRIVE WWW.VORONDESIGN.COM GT2 20 Tooth Pulley APPLY THREAD LOCKER Make sure to use thread locker on the set screws. MOTOR ORIENTATION Pay attention to the orientation of the cable exit.
- Page 80 B DRIVE WWW.VORONDESIGN.COM M3x30 SHCS CHECK YOUR WORK Compare your assembled part to the graphic shown here. Pay attention to the pulley orientation and alignment with the bearing stacks.
- Page 81 WWW.VORONDESIGN.COM V24 (not V2.4) was an experimental design, only 2 have ever been built. It’s design became the basis for the Voron2.
- Page 82 GANTRY WWW.VORONDESIGN.COM...
- Page 83 OVERVIEW WWW.VORONDESIGN.COM B Drive A Drive XY Bridge Left XY Joint Right XY Joint B Idler X Linear Rail A Idler...
- Page 84 PREPARATION WWW.VORONDESIGN.COM GENERIC CABLE CHAINS IGUS CABLE CHAINS The 3 hole pattern is usually IGUS chains have 2 mounting found on generic cable chains. holes. WHICH TO CHOOSE? Pick the style that matches the mounting pattern of your cable chains.
- Page 85 GANTRY WWW.VORONDESIGN.COM M5 T-Nut T-NUT ORIENTATION Insert the t-nuts as shown in the highlight. E Extrusion...
- Page 86 GANTRY WWW.VORONDESIGN.COM M5x10 BHCS...
- Page 87 GANTRY WWW.VORONDESIGN.COM M5x10 BHCS...
- Page 88 Y AXIS WWW.VORONDESIGN.COM CENTRED RAIL INSTALLATION GUIDE Use the MGN9 guides to position the rail in the centre of the extrusion prior to fastening the screws. MGN9 Rail T-NUT ORIENTATION Insert the t-nuts as shown in the highlight. M3x8 SHCS M3 T-Nut MIND THE CARRIAGE C Extrusion...
- Page 89 Y AXIS WWW.VORONDESIGN.COM M5 T-Nut T-NUT ORIENTATION Insert the t-nuts as shown in the highlight.
- Page 90 Y AXIS WWW.VORONDESIGN.COM M5 T-Nut T-NUT ORIENTATION Insert the t-nuts as shown in the highlight. M3 T-Nut M3 T-Nut M5 T-Nut...
- Page 91 Y AXIS WWW.VORONDESIGN.COM 5MM HOLES ON TOP Make sure to use the idler that has 2 holes for M5 bolts in the top when oriented as shown. M5x16 BHCS...
- Page 92 Y AXIS WWW.VORONDESIGN.COM NOTCH ORIENTATION The indentation along the part is designed to clamp on the belt. The notch points away from the idler assembly. FLUSH INSTALL Make sure the plastic part sits flush with the end of the extrusion. If not flush check if you installed the correct idler.
- Page 93 Y AXIS WWW.VORONDESIGN.COM FLUSH INSTALL Make sure the plastic part sits flush with the end of the extrusion. M5x16 BHCS...
- Page 94 GANTRY WWW.VORONDESIGN.COM...
-
Page 95: Gantry
GANTRY WWW.VORONDESIGN.COM M5x16 BHCS NOTCH ORIENTATION The indentation along the part is designed to clamp on the belt. The notch points away from the drive assembly. FLUSH INSTALL Make sure the plastic part sits flush with the end of the extrusion. - Page 96 XY JOINTS WWW.VORONDESIGN.COM M5 Nut...
- Page 97 RIGHT XY JOINT WWW.VORONDESIGN.COM CABLE PATH The printed parts for the right XY joint have a small channel to guide the end stop wires.. M5 Shim F695 Bearing M5x40 SHCS...
- Page 98 RIGHT XY JOINT WWW.VORONDESIGN.COM M5x40 SHCS M5x40 SHCS DON’T OVER TIGHTEN GT2 20 Tooth Idler The bolt is used to position the idler and is screwed directly into plastic. The idler must spin freely.
- Page 99 LEFT XY JOINT WWW.VORONDESIGN.COM M5 Shim F695 Bearing M5x40 SHCS...
- Page 100 LEFT XY JOINT WWW.VORONDESIGN.COM M5x40 SHCS M5x40 SHCS GT2 20 Tooth Idler DON’T OVER TIGHTEN The bolt is used to position the idler and is screwed directly into plastic. The idler must spin freely.
-
Page 101: Z Axis
X AXIS WWW.VORONDESIGN.COM M3 T-Nut T-NUT ORIENTATION CENTRED RAIL INSTALLATION GUIDE Insert the t-nuts as shown in the highlight. Use the MGN12 guides to position the rail in the centre of the extrusion prior to fastening the screws. M3x8 SHCS D Extrusion MIND THE CARRIAGE Temporarily secure the carriage with a piece of sticky... - Page 102 X AXIS WWW.VORONDESIGN.COM M5 T-Nut T-NUT ORIENTATION Insert the t-nuts as shown in the highlight. M5 T-Nut...
- Page 103 X AXIS WWW.VORONDESIGN.COM...
- Page 104 X AXIS WWW.VORONDESIGN.COM M5x16 BHCS M5x10 BHCS LEAVE SLIGHTLY LOOSE Lightly tighten the bolts. M5 Shim M5x30 BHCS...
- Page 105 X AXIS WWW.VORONDESIGN.COM CHECK YOUR WORK Compare your assembled part to the graphic shown here. Pay attention to the pulley orientation and alignment with the bearing stack ups.
- Page 106 GANTRY WWW.VORONDESIGN.COM FLIP GANTRY Turn the gantry around for the next step. INSERT AT AN ANGLE Tilt the X axis to install it onto the gantry. 2X BOLT ONLY The remaining bolts will be installed in a later step. M3x16 SHCS...
- Page 107 WWW.VORONDESIGN.COM V1 and V2 are not version numbers but the printer models/lines. We renamed the V1 to Voron Trident to address the confusion this caused.
- Page 108 Z AXIS WWW.VORONDESIGN.COM...
- Page 109 OVERVIEW WWW.VORONDESIGN.COM Z Idler Z Belt Z Joint Z Drive...
- Page 110 Z BEARING BLOCKS WWW.VORONDESIGN.COM M5 Nut 6x3 Magnet OPTION: HALL EFFECT ENDSTOP If you are building your printer with a Hall Effect Endstop add a magnet to the cutout.
- Page 111 Z BEARING BLOCKS WWW.VORONDESIGN.COM NOTCH ORIENTATION GANTRY IS STILL UPSIDE DOWN The indentation along the It’s a lot easier than fighting with gravity. part is designed to clamp on the belt. M5x30 BHCS M3x30 SHCS GT2 Belt 9mm wide TEETH DOWN MINIMUM RECOMMENDED BELT CUT LENGTH The teeth of the belts are facing 250 spec 1000mm...
- Page 112 Z BEARING BLOCKS WWW.VORONDESIGN.COM MIND THE PART ORIENTATION The cutout goes towards the outside.
- Page 113 Z BEARING BLOCKS WWW.VORONDESIGN.COM REPEAT BELT INSTALL FOR ALL 4 BLOCKS We are not showing the belts in the pictures on this page. OPTION: HALL ENDSTOP Install the block with the magnet in this position. The magnet faces the XY joint.
- Page 114 GANTRY INSTALL WWW.VORONDESIGN.COM A HELPING HAND Secure the gantry with long zipties or similar while the gantry is being installed. An extra pair of hands helps with this step. Long Zipties Back Front INSERT AT AN ANGLE Tilt the gantry to move it past the uprights.
- Page 115 Z JOINTS WWW.VORONDESIGN.COM M3x20 SHCS M5x40 SHCS...
- Page 116 Z JOINTS WWW.VORONDESIGN.COM INSTALL REMAINING JOINTS Add the other 3 joints repeating the same steps.
- Page 117 PREPARATION WWW.VORONDESIGN.COM EXTEND IDLER Loosen the idler bolt to extend the idler. Once extended to the maximum before becoming undone tighten 4 turns. Repeat for all 4 idlers. LOOSEN TOP BELT CLAMPS Undo the top belt clamps, we’ll be installing the belts in the next steps.
- Page 118 Z BELT WWW.VORONDESIGN.COM Z BELT ROUTING Follow the path pointed out by the arrows. Needle nose pliers, tweezers or similar tools can help in this step. The belt teeth are on the inside of the loop.
- Page 119 Z BELT WWW.VORONDESIGN.COM...
- Page 120 Z BELT WWW.VORONDESIGN.COM PULL TIGHT AND SECURE BELT CLAMP Pull on the end of the belt and securely fasten the top belt clamp. EXCESS BELT Fold the excess belt over and use a small ziptie to secure the end.
- Page 121 Z BELT WWW.VORONDESIGN.COM INSTALL REMAINING Z BELTS Repeat the install instructions for the other 3 Z belts.
- Page 122 SQUARING THE GANTRY Move the gantry all the way back until it hits the A and B drive on both sides. Fully tighten all screws on the X axis. REMOVE ZIPTIES With the belts installed the gantry will stay in position. https://voron.link/cekh81l...
- Page 123 WWW.VORONDESIGN.COM Voron2.0 was never officially released.
- Page 124 A/B BELTS WWW.VORONDESIGN.COM...
- Page 125 OVERVIEW WWW.VORONDESIGN.COM THE VORON BELT PATH Voron printers use a belt path based on the popular CoreXY pattern. The individual belt paths are stacked on top of each other and the crossing often found in CoreXY designs is omitted. Compared to many other implementations, the motors are moved to a less intrusive position.
- Page 126 OVERVIEW - A BELT WWW.VORONDESIGN.COM Back Front...
- Page 127 OVERVIEW - B BELT WWW.VORONDESIGN.COM Back Front...
- Page 128 PREPARATION WWW.VORONDESIGN.COM EXTEND IDLER Loosen the idler bolt to extend the idler. Once extended to the maximum tighten 4 turns. Repeat for the second idler.
- Page 129 PREPARATION WWW.VORONDESIGN.COM M3 Nut Heat Set Insert Heat Set Insert...
- Page 130 X CARRIAGE WWW.VORONDESIGN.COM M3x12 SHCS...
- Page 131 A/B BELTS WWW.VORONDESIGN.COM GT2 Belt 6mm wide M3x8 SHCS CLAMP BELTS Clamp both A and B belts in place by installing the left X carriage part. The belt teeth face away from the extrusion.
- Page 132 A BELT WWW.VORONDESIGN.COM A BELT ROUTING Follow the path pointed out by the arrows. Needle nose pliers, tweezers or similar tools can help in this step.
- Page 133 A BELT WWW.VORONDESIGN.COM...
- Page 134 A BELT WWW.VORONDESIGN.COM BELTING IDLERS If you’re having trouble guiding the belts around the bearing stack temporarily remove the M3x40 SHCS to get better access.
- Page 135 A BELT WWW.VORONDESIGN.COM...
- Page 136 B BELT WWW.VORONDESIGN.COM B BELT ROUTING BELTING IDLERS Follow the path pointed out by the arrows. If you’re having trouble guiding the belts around Needle nose pliers, tweezers or similar tools the bearing stack temporarily remove the M3x40 can help in this step. SHCS to get better access.
- Page 137 B BELT WWW.VORONDESIGN.COM...
- Page 138 B BELT WWW.VORONDESIGN.COM...
- Page 139 A/B BELTS WWW.VORONDESIGN.COM X CARRIAGE Use the second part of the X carriage to capture the belt ends.
-
Page 140: A/B Belts
A/B BELTS WWW.VORONDESIGN.COM M3x40 SHCS M3x8 SHCS M3x30 SHCS LEAVE LOOSE FIX BELTS Lightly tighten the bolts. Lightly tighten the screws. The belt must still be able to move. - Page 141 A/B BELTS WWW.VORONDESIGN.COM TIGHTEN BOLTS PULL TIGHT Fully tighten the carriage bolts. Grab both belt ends with a pair of pliers and pull the belt tight. As both belts are cut to the exact same total length and the belt paths are equal length in this design make sure the same length of belt protrudes from the carriage.
- Page 142 A/B BELTS WWW.VORONDESIGN.COM CHECK YOUR WORK Make sure that the belt is not riding on the plastic parts.
- Page 143 X CARRIAGE WWW.VORONDESIGN.COM PROBE WIRES Cut the probe wires to about 150mm. OTHER PROBE TYPES The picture shows the recommended Omron TL- Q5MC probe. Other probes with a similar form factor and characteristics might work as well. A design for a M3x30 SHCS PINDA probe adapter is included in the released files.
- Page 144 X CARRIAGE WWW.VORONDESIGN.COM CHANNEL FOR PROBE CABLE ADJUST PROBE POSITION Guide the probe cable into the The position can be fine-tuned highlighted slot. later. Set an initial position of about 6mm below the plastic part.
- Page 145 X CARRIAGE WWW.VORONDESIGN.COM Magnet OPTION: HALL EFFECT ENDSTOP If you are using a Hall Effect Endstop insert a 3x6 magnet into the highlighted position.
- Page 146 AFTERBURNER WWW.VORONDESIGN.COM...
- Page 147 OVERVIEW WWW.VORONDESIGN.COM Clockwork Fan Assembly X Carriage Tool Cartridge...
- Page 148 HEAT SET INSERTS WWW.VORONDESIGN.COM OPTION: TOOLHEAD PCB If you opt to use a toolhead PCB, add an additional heat set insert into the alternate part. Heat Set Insert HEAT SET INSERTS You will need to install heat set inserts into various plastic parts.
- Page 149 HEAT SET INSERTS WWW.VORONDESIGN.COM Heat Set Insert...
- Page 150 HEAT SET INSERTS WWW.VORONDESIGN.COM GENERIC CABLE CHAINS IGUS CABLE CHAINS The 3 hole pattern is usually IGUS chains have 2 mounting found on generic cable chains. holes. Heat Set Insert...
- Page 151 TOOL CARTRIDGE WWW.VORONDESIGN.COM AVAILABLE MOUNTS We also provide mounts for Heat Set Insert other hotends. They are assembled in a similar manner.
- Page 152 TOOL CARTRIDGE WWW.VORONDESIGN.COM HEATER AND SENSOR E3D V6 Hot End We do not show the heater and temperature sensor cartridge in the drawing. Install them prior to assembling the toolhead.
- Page 153 TOOL CARTRIDGE WWW.VORONDESIGN.COM DIFFERENT TOOL CARTRIDGES The mounts for all hotends are designed to have a piece of PTFE here. It might be PTFE Tube held in place by the printed parts instead. M3x16 SHCS...
- Page 154 TOOL CARTRIDGE WWW.VORONDESIGN.COM PTFE STICKOUT The PTFE tube should end 10mm above the surface of the printed part. The stick out length might vary if you use an extruder other than the Clockwork. M3x40 SHCS...
- Page 155 TOOL CARTRIDGE WWW.VORONDESIGN.COM WIRING PATH Guide the wires in the highlighted path. CHECK ORIENTATION The heater block must point forwards.
- Page 156 TOOL CARTRIDGE WWW.VORONDESIGN.COM...
- Page 157 TOOL CARTRIDGE WWW.VORONDESIGN.COM INDEXING BOLTS The bolts are used to index the tool cartridge. Leave them slightly loose so that the cartridge can be slid out.
- Page 158 MOTOR PLATE WWW.VORONDESIGN.COM NEMA 17 Stepper DRIVE PINION Make sure the set screw in the drive pinion is seated on the flat of the motor shaft. Use thread locker. MOTOR ORIENTATION Rotate the motor in such a way that BMG Drive Pinion the connector/wires are on the left side when looking at it from the back.
- Page 159 MOTOR PLATE WWW.VORONDESIGN.COM M3x8 SHCS ADJUSTABLE MOTOR POSITION The motor position is adjustable to allow for a proper meshing of the drive gears. Start in the topmost position of the slot.
- Page 160 Lightly sand the shaft if required. Carefully tighten the set screw, the head is easy to strip. CHECK PLACEMENT https://voron.link/p0xac5e Make sure the filament drive gear is fully seated against the drive shaft gear.
- Page 161 MAIN BODY WWW.VORONDESIGN.COM M3x30 SHCS CHECK FOR CLEARANCE The drive shaft must not touch the motor housing. Check if the shaft has sufficient clearance when fully seated. Sand the face of shaft if required.
- Page 162 GEAR LASH CHECK WWW.VORONDESIGN.COM CHECK GEAR PLAY The gear should have a slight play and should not be fully tight against the pinion. Adjust the position of the motor until you have a faint play.
- Page 163 GUIDLER WWW.VORONDESIGN.COM LUBRICATE BEARINGS A lubrication film is required to ensure smooth operation and longevity. BMG Idler Assembly Refer to the BOM for lubricant options - look for a “light grease”. https://voron.link/dncvwdm...
- Page 164 GUIDLER & LATCH WWW.VORONDESIGN.COM M3x20 SHCS M3x30 SHCS...
- Page 165 CABLE COVER WWW.VORONDESIGN.COM REMOVE SCREWS BMG Thumb Screw Carefully remove the screws from the left side of the motor. They will be replaced with new bolts in the next step.
- Page 166 CLOCKWORK WWW.VORONDESIGN.COM M3x20 SHCS OPTION: TOOLHEAD PCB If you opted to use a toolhead PCB, skip the wire cover and follow the instructions on page 174. M3x8 SHCS...
- Page 167 CLOCKWORK WWW.VORONDESIGN.COM...
- Page 168 CLOCKWORK WWW.VORONDESIGN.COM M3x20 SHCS M3x30 SHCS...
- Page 169 FAN ASSEMBLY WWW.VORONDESIGN.COM 4020 Blower 4010 Fan REMOVE TOP COVER Split the fan open by bending the tabs on the side. https://voron.link/vyvtcpa...
- Page 170 FAN ASSEMBLY WWW.VORONDESIGN.COM WIRING PATH Route the wires through the large opening in the back.
- Page 171 FAN ASSEMBLY WWW.VORONDESIGN.COM M3x16 SHCS DON’T OVER TIGHTEN The bolts are threaded directly into plastic.
- Page 172 FAN ASSEMBLY WWW.VORONDESIGN.COM WIRING PATH Guide the wires in the highlighted path. Filament...
- Page 173 FAN ASSEMBLY WWW.VORONDESIGN.COM M3x30 SHCS M3x12 SHCS...
- Page 174 ALTERNATE CONFIGURATION - TOOLHEAD PCB WWW.VORONDESIGN.COM Toolhead PCB OPTION: TOOLHEAD PCB M3 Nylon Washer If you opted to use a toolhead PCB, install it instead of the cable cover. While not strictly required the use of plastic (e.g. nylon) washers is recommended. M3x8 SHCS...
- Page 175 WWW.VORONDESIGN.COM Voron2.1 was released on November 5 2018.
- Page 176 ELECTRONICS WWW.VORONDESIGN.COM...
- Page 177 OVERVIEW WWW.VORONDESIGN.COM Raspberry Pi Controller Board 5V PSU 24V PSU Power Inlet...
- Page 178 RASPBERRY PI WWW.VORONDESIGN.COM M2x10 Self Tapping...
- Page 179 RASPBERRY PI WWW.VORONDESIGN.COM Raspberry Pi M2x10 Self Tapping...
- Page 180 5V PSU WWW.VORONDESIGN.COM M3x6 BHCS RS25-5 PSU...
- Page 181 24V PSU WWW.VORONDESIGN.COM M4x6 BHCS...
- Page 182 CONTROLLER BOARD WWW.VORONDESIGN.COM AVAILABLE MOUNTS We also provide mounts for other controller boards. They are assembled in a similar manner. M2x10 Self Tapping...
- Page 183 CONTROLLER BOARD WWW.VORONDESIGN.COM Controller Board WHY DOES IT LOOK THAT WAY? We used a dummy to keep the file size of the printers CAD manageable. The wiring section will have a fully featured image. M3x6 BHCS...
- Page 184 POWER INLET WWW.VORONDESIGN.COM Filtered Inlet M3x10 FHCS Switch Heat Set Insert...
- Page 185 SOLID STATE RELAY WWW.VORONDESIGN.COM M4x6 BHCS Solid State Relay Relay Mount WHERE CAN I FIND THE RELAY MOUNT? The SSR mount is an off the shelf part. Look for a metal bracket in your pile of parts. There is no printed mount.
- Page 186 Use a bottle opener or some pliers to remove the top flange. Microswitch SWITCH W/OUT LEVER This part requires a switch without lever to be installed in the shown orientation. You can remove the lever from microswitches by https://voron.link/ict0j6x gently pressing on the lever’s hinge point.
- Page 187 Z ENDSTOP WWW.VORONDESIGN.COM 5mm Shaft PREVENTING MISHAPS You can add a notch to the Z endstop point and capture it with a set screw to prevent it from falling out. SOLDER CONNECTOR Solder a connection from the outer two terminals of the microswitch to the connector.
- Page 188 OPTION: Z ENDSTOP BOARD 5mm Shaft GT2 20 Tooth Pulley PRESS FIT Apply the required force to fully seat the pulley in the printed part. M2x10 Self Tapping Microswitch Z Endstop Board ADDITIONAL INFORMATION Visit voron.link/3bwwnqy for design files and BOM.
- Page 189 Z ENDSTOP WWW.VORONDESIGN.COM M3 T-Nut M3x20 SHCS ADJUST Z ENDSTOP POSITION The shaft of the Z Endstop must not touch the print bed. Adjust the position if required.
- Page 190 X/Y ENDSTOP WWW.VORONDESIGN.COM M2x10 Self Tapping Microswitch END-STOP SWITCHES FOR X AND Y End-stops are wired in a “Normally Closed” configuration. On microswitches those are the 2 outer terminals indicated by C and NC. Prepare the switches for X and Y by soldering 150mm of wire to each of the outer terminals.
- Page 191 ALTERNATE X/Y ENDSTOPS WWW.VORONDESIGN.COM OPTION: XY ENDSTOP BOARD OPTION: HALL EFFECT ENDSTOP BOARD M3x8 SHCS M3x8 SHCS XY Endstop Board Hall Effect Endstop Board...
- Page 192 X/Y ENDSTOP WWW.VORONDESIGN.COM M3x30 SHCS...
- Page 193 ALTERNATE MAINS DISTRIBUTION - WAGO WWW.VORONDESIGN.COM WAGO 221 415 Clamps M5 T-Nut M5x10 BHCS...
- Page 194 POWER INLET WWW.VORONDESIGN.COM UPSIDE DOWN ASSEMBLY For ease of assembly we recommend to flip the printer on its head for the next steps. Hope you don’t regret building a 350. M3 T-Nut...
- Page 195 POWER INLET WWW.VORONDESIGN.COM M3x8 SHCS...
- Page 196 DIN RAIL MOUNTS - HOW TO WWW.VORONDESIGN.COM HOOK FIXED SIDE Hook the fixed side of the printed mount on side of DIN rail. MOVE INTO POSITION Rotate the part into place, make SNAP INTO PLACE sure it does not unhook from the Press to snap the free side fixed side.
- Page 197 24V PSU WWW.VORONDESIGN.COM Front Back M4x6 BHCS M5 T-Nut M5x10 BHCS...
- Page 198 PI & CONTROLLER WWW.VORONDESIGN.COM Front Back...
- Page 199 SOLID STATE RELAY WWW.VORONDESIGN.COM SPRING-LOADED Use a flat head screw driver to Front pull the latch open. It will lock open. Be careful when releasing the latch, it will snap back into place. Mind your fingers. Back...
- Page 200 5V PSU WWW.VORONDESIGN.COM Front Back...
- Page 201 WWW.VORONDESIGN.COM By Feburary 2019 over 100 Voron2 printers had been built and serialized.
- Page 202 CONTROLLER BOARD WWW.VORONDESIGN.COM...
- Page 203 CONTROLLER BOARD WWW.VORONDESIGN.COM CONTROLLER BOARD The assembly manual will outline the wiring for a Bigtreetech Octopus V1.1 board. You can find additional documentation and alternative configurations on docs.vorondesign.com JUMPERS Several jumpers need to be configured on the controller board. We will begin by removing all the JUMPERS from the controller board (MCU).
- Page 204 CONTROLLER BOARD WWW.VORONDESIGN.COM JUMPERS Several jumpers need to be set on the MCU. Add the following JUMPERS to the controller board (MCU). 1) Set the jumpers in the 5) Set the jumper “driver sockets” as shown in “Probe Voltage to set TMC2209 UART Selection”...
- Page 205 STEPPER DRIVERS WWW.VORONDESIGN.COM Diagram courtesy of @GadgetAngel...
- Page 206 CONTROLLER BOARD WWW.VORONDESIGN.COM OCTOPUS PINOUT REFERENCE This Coloured PIN diagram can be found on GadgetAngel's GitHub repository for the Octopus V1.1 original PIN diagram can be found on Bigtreetech’s GitHub repository for Octopus V1.1 (preview friendly version)
- Page 207 WWW.VORONDESIGN.COM A year later this figure grew to 350 Voron2 printers.
- Page 208 WIRING WWW.VORONDESIGN.COM...
- Page 209 WWW.VORONDESIGN.COM INPUT VOLTAGE SWITCH Check the input voltage switch of the power supply. It is located in the highlighted area. Make sure the selection matches your local mains voltage. Refer to the Mean Well LRS-200 datasheet for possible settings (voron.link/e0szdyh).
- Page 210 POWER INLET WWW.VORONDESIGN.COM ATTACH 250MM OF WIRE Cables should be at least 1mm² (AWG18) or thicker depending on local regulations. MAINS INLET WIRING We show the wiring in the IEC colour scheme. Depending on your region the colour scheme and wiring standards will differ. Mains wiring should only be done by qualified personnel trained in local regulations and safety standards.
- Page 211 MAINS WIRING WWW.VORONDESIGN.COM MAINS WIRING CONTINUED Secure the wires with cable clips / cable tie anchors. The bed heater is powered by AC voltage and receives its PE in a later step. Observe your local regulations in regards to the Protective Earth connections for the frame/other components. Switch LRS-200-24 PSU +V -V PE N...
- Page 212 BED CABLE HOOKUP WWW.VORONDESIGN.COM Z END-STOP 2x 0.25mm²(AWG24) or larger PROTECTIVE EARTH (PE) 1mm²(AWG18) or larger BED HEATER 2x 1mm²(AWG18) or larger BED THERMISTOR 2x 0.25mm²(AWG24) or larger...
-
Page 213: Controller
MAINS WIRING WWW.VORONDESIGN.COM Switch Filtered Mains Inlet LRS-200-24 PSU +V -V PE N L AC LOAD INPUT RS-25-5 PSU AC BED CONTROL To Controller 2x 0.25mm²(AWG24) or larger... - Page 214 ALTERNATE MAINS WIRING - WAGO CLAMPS WWW.VORONDESIGN.COM OPTION: WAGO CLAMPS FOR MAINS WAGO wire clamps allow for a clean and easy wiring of the mains side. You may want to label your clamps as shown below.
- Page 215 ALTERNATE MAINS WIRING - WAGO CLAMPS WWW.VORONDESIGN.COM...
- Page 216 ALTERNATE MAINS WIRING - WAGO CLAMPS WWW.VORONDESIGN.COM AC LOAD...
- Page 217 ALTERNATE MAINS WIRING - WAGO CLAMPS WWW.VORONDESIGN.COM AC LOAD...
- Page 218 DC POWER WWW.VORONDESIGN.COM LRS-200-24 PSU +V -V PE N L RS-25-5 PSU CABLE CROSS SECTION Cables to the controller board should be 1mm² (AWG18) or larger. 24V Controller Board 5V Raspberry Pi 0.5mm² (AWG20) is sufficient for the connection to the Raspberry Pi.
- Page 219 RASPBERRY PI WWW.VORONDESIGN.COM 5V PSU RASPBERRY PI POWER While we suggest that you power the Raspberry Pi via the GPIO pins you may also power it using the “Power-In” USB port. Cut a suitable USB cable and wire the + and ground lines to the 5V DC/DC converter instead.
- Page 220 CONTROLLER BOARD WWW.VORONDESIGN.COM CONTROLLER BOARD The assembly manual will outline the wiring for a JUMPERS Bigtreetech Octopus V1.1. You can find additional Several jumpers may need to be documentation and alternative configurations on configured on the controller board. docs.vorondesign.com Please consult our documentation docs.vorondesign.com EXP1 EXP2...
- Page 221 CONTROLLER BOARD WWW.VORONDESIGN.COM Z1 Motor Z0 Motor Front MOTOR CONNECTIONS Z2 Motor 4x 0.25mm²(AWG24) or larger Z3 Motor Back BLACK MOTOR WIRES? There is no standardized stepper wire colouring scheme. Each manufacturer implements their EXP1 EXP2 wires colours slightly different. Please consult the datasheet of your stepper motors for the correct order.
- Page 222 CABLE CHAINS - OVERVIEW WWW.VORONDESIGN.COM CABLE CHAINS INSTALL You can opt to install the chains now and fish the wires through the chains or build the complete harness outside of the printer and install it in one go. Either approach does work. If you sourced a pre-built wire harness completing the harness outside of the printer is recommended.
- Page 223 CABLE CHAINS - OVERVIEW WWW.VORONDESIGN.COM Toolhead Endstop Pod Toolhead A Motor Endstop Pod B Motor To Electronics Compartment A/B Motors...
- Page 224 HOTEND WWW.VORONDESIGN.COM HOTEND COOLING FAN 2x 0.25mm²(AWG24) or larger PART COOLING FAN 2x 0.25mm²(AWG24) or larger EXTRUDER MOTOR 4x 0.25mm²(AWG24) or larger HOTEND HEATER 2x 0.5mm²(AWG20) or larger HOTEND THERMISTOR 2x 0.25mm²(AWG24) or larger INDUCTIVE PROBE 3x 0.25mm²(AWG24) or larger WIRES, DRAG CHAINS AND CRIMPS The wires attached to the probe, fans, heater, etc.
- Page 225 ALTERNATE HOTEND WIRING - TOOLHEAD PCB WWW.VORONDESIGN.COM HOTEND THERMISTOR PART COOLING FAN OPTION: TOOLHEAD PCB The layout of the toolhead pcb changed over HOTEND COOLING FAN the versions. For a full breakdown visit the link below. HOTEND HEATER PROBE https://voron.link/zopduze EXTRUDER MOTOR...
- Page 226 ALTERNATE HOTEND WIRING - TOOLHEAD PCB WWW.VORONDESIGN.COM...
- Page 227 X CABLE CHAIN WWW.VORONDESIGN.COM M3 T-Nut Cable Chain M3x6 FHCS...
- Page 228 ZIP TIE LOOPS Secure the wire bundle to the strain relief using small zip ties. X END-STOP 2x 0.25mm²(AWG24) or larger OPTION: ENDSTOP BOARD/HALL EFFECT BOARD Those boards utilize a 4 pin connector instead. Please refer to https:// voron.link/djhyygu https://voron.link/d6qb7o6 for details.
- Page 229 Y CABLE CHAIN WWW.VORONDESIGN.COM M3 T-Nut M3x6 FHCS Cable Chain...
- Page 230 Z CABLE CHAIN WWW.VORONDESIGN.COM SECURING MOTOR CABLES Secure the wire bundles along the small extrusion that sits between the drives with small zip ties. A Motor B Motor...
- Page 231 Z CABLE CHAIN WWW.VORONDESIGN.COM M5x10 BHCS Heat Set Insert M5 T-Nut...
- Page 232 Z CABLE CHAIN WWW.VORONDESIGN.COM Cable Chain M3x10 FHCS M3x10 FHCS...
- Page 233 Z CABLE CHAIN WWW.VORONDESIGN.COM M5 T-Nut M5x10 BHCS...
- Page 234 Z CABLE CHAIN WWW.VORONDESIGN.COM M3x12 SHCS WIRE PATH Guide the wire bundle behind the Z belt and over the A drive as shown above. Secure it with zip ties on the strain relief of the cable chains.
- Page 235 CONTROLLER WIRING WWW.VORONDESIGN.COM B Motor A MOTOR B MOTOR A Motor 4x 0.25mm²(AWG24) or larger 4x 0.25mm²(AWG24) or larger EXP1 EXP2 FAN0 FAN1 FAN2 FAN3 FAN4 FAN5 FAN7 FAN6 X END-STOP Y END-STOP 2x 0.25mm²(AWG24) or larger 2x 0.25mm²(AWG24) or larger To End-Stop Pod...
- Page 236 CONTROLLER WIRING WWW.VORONDESIGN.COM EXTRUDER MOTOR 4x 0.25mm²(AWG24) or larger EXP1 EXP2 FAN0 FAN1 FAN2 FAN3 FAN4 FAN5 FAN6 FAN7 HOTEND HEATER HOTEND THERMISTOR 2x 0.5mm²(AWG20) or larger 2x 0.25mm²(AWG24) or larger To Hotend...
- Page 237 BAT85 diode as protection. The black ring on the diode “points” toward the toolhead. For technical details please refer to https://voron.link/n9i7lss. INDUCTIVE PROBE 3x 0.25mm²(AWG24) or larger To Hotend...
- Page 238 FAN VOLTAGE WWW.VORONDESIGN.COM EXP1 EXP2 FAN0 FAN1 FAN2 FAN3 FAN4 FAN5 FAN6 FAN7 FAN VOLTAGE The fans recommended in the sourcing guide are 24V fans. Please check your hotend cooling (40x40x10 axial), part cooling (40x40x20 blower) and exhaust/electronics (60x60x20 axial) fans for their voltage rating and jumper the voltage selection accordingly.
- Page 239 CONTROLLER WIRING WWW.VORONDESIGN.COM EXP1 EXP2 FAN0 FAN1 FAN2 FAN3 FAN4 FAN5 FAN6 FAN7 WHAT ABOUT THE OTHER FANS? We’ll add them once we get them installed. Enclosure and skirts are PART COOLING FAN HOTEND COOLING FAN “optional” parts. 2x 0.25mm²(AWG24) or larger 2x 0.25mm²(AWG24) or larger To Hotend...
- Page 240 SKIRTS WWW.VORONDESIGN.COM...
- Page 241 PREPARATION WWW.VORONDESIGN.COM Heat Set Insert FRONT COVER The front cover is held in place by the heat set inserts. Hold the front face firmly in place while inserting the heat set inserts. BUILT-IN SUPPORT Remove the highlighted section. It’s a built-in support for printability.
- Page 242 PREPARATION WWW.VORONDESIGN.COM Heat Set Insert...
- Page 243 PREPARATION WWW.VORONDESIGN.COM Heat Set Insert 60x20 Fan...
- Page 244 WWW.VORONDESIGN.COM M3x12 SHCS Mini 12864 Screen...
- Page 245 WWW.VORONDESIGN.COM OPTION: LIGHT BLOCKER Some LCDs come with a smaller encoder knob. This extra piece prevents excess light bleed. Threads onto the encoder before the knob is pressed on.
- Page 246 WWW.VORONDESIGN.COM M3x40 SHCS Filament...
-
Page 247: Skirts
SKIRTS WWW.VORONDESIGN.COM M3x8 SHCS M3x8 SHCS OPTION: KEYSTONE INSERTS The picture is showing blanks for the keystone slots. Alternatively you can add modules for USB or ethernet and expose ports of the Raspberry PI on the back of the printer. M3x8 SHCS... - Page 248 SKIRTS WWW.VORONDESIGN.COM M3 T-Nut M3 T-Nut...
- Page 249 SKIRTS WWW.VORONDESIGN.COM M3x8 SHCS...
- Page 250 SKIRTS WWW.VORONDESIGN.COM M3x12 SHCS...
- Page 251 LCD HOOKUP WWW.VORONDESIGN.COM WHICH IS WHICH? The socket with 1 dot below it is EXP1 and the socket with with 2 is EXP2. 2x Flat Ribbon Cable EXP1 EXP2...
- Page 252 SKIRTS WWW.VORONDESIGN.COM M3x8 SHCS M3 T-Nut...
- Page 253 SKIRTS WWW.VORONDESIGN.COM M3x8 SHCS...
- Page 254 SKIRTS WWW.VORONDESIGN.COM M3x8 SHCS...
- Page 255 SKIRTS WWW.VORONDESIGN.COM M3x8 SHCS...
- Page 256 SKIRTS WWW.VORONDESIGN.COM M3 T-Nut M5 T-Nut M3 T-Nut...
- Page 257 SKIRTS WWW.VORONDESIGN.COM M3x8 SHCS M5x10 BHCS...
- Page 258 SKIRTS WWW.VORONDESIGN.COM Controller Board ELECTRONICS COOLING FAN M3x8 SHCS 2x 0.25mm²(AWG24) or larger...
- Page 259 SKIRTS WWW.VORONDESIGN.COM M3 T-Nut M5 T-Nut M3 T-Nut...
- Page 260 SKIRTS WWW.VORONDESIGN.COM M3x8 SHCS M5x10 BHCS...
- Page 261 SKIRTS WWW.VORONDESIGN.COM EXP1 EXP2 FAN0 FAN1 FAN2 FAN3 FAN4 FAN5 FAN6 FAN7 CONTROLLER FANS (60X60X20 AXIAL) [FAN2] 2x 0.25mm²(AWG24) or larger Bottom Electronics Case...
- Page 262 BOTTOM PANEL WWW.VORONDESIGN.COM APPLY VHB TAPE VHB Tape is a double sided adhesive tape.
- Page 263 BOTTOM PANEL WWW.VORONDESIGN.COM M3x8 SHCS...
- Page 264 Z BELT COVERS WWW.VORONDESIGN.COM M3 Hammerhead Nut M3x6 BHCS...
- Page 265 Z BELT COVERS WWW.VORONDESIGN.COM PINCH BELT TURN TO FASTEN Pinch the Z belt loop flat The hammerhead nut will rotate and and slide the cover in place. lock into place when you fasten the screw. At least that’s the theory.
- Page 266 Z BELT COVERS WWW.VORONDESIGN.COM REPEAT FOR REMAINING COVERS Repeat the assembly steps and install the remaining 3 covers.
- Page 267 WWW.VORONDESIGN.COM Voron2.4 was released on May 13 2020. Between the releases of 2.4 and 2.4R2 over 2500 Voron2 printers have been build and serialized.
- Page 268 PANELS WWW.VORONDESIGN.COM...
- Page 269 BACK PANEL WWW.VORONDESIGN.COM HAMMERHEAD NUTS? A drop of thread locker will turn the hammerhead nuts into a 1/4 turn quick release for the panels. Best done once the assembly is finished. M3x8 SHCS Foam Tape 1mm M3 Hammerhead Nut APPLY FOAM TAPE Use foam tape on the contact areas between the panels and the frame to mitigate noise from vibrations.
- Page 270 BACK PANEL WWW.VORONDESIGN.COM...
-
Page 271: Panels
SIDE PANELS WWW.VORONDESIGN.COM M3x12 SHCS Foam Tape 3mm APPLY 3MM FOAM TAPE Use foam tape on the contact areas between the panels and the frame to mitigate noise from vibrations. The 3mm foam tape is used on the M3 Hammerhead Nut side panels to prevent the gantry from rubbing on the panels. - Page 272 SIDE PANELS WWW.VORONDESIGN.COM...
- Page 273 TOP PANEL WWW.VORONDESIGN.COM Foam Tape 1mm APPLY FOAM TAPE Use foam tape on the contact areas between the panels and the frame to mitigate noise from vibrations. M3x8 SHCS M3 Hammerhead Nut...
- Page 274 TOP PANEL WWW.VORONDESIGN.COM...
- Page 275 DOORS WWW.VORONDESIGN.COM M3 Hammerhead Nut Magnets GLUE INTO PLACE Use a fast acting glue like super-glue. M3x8 SHCS Magnets MIND THE MAGNET POLARITY Ensure that the magnets are facing in the right direction prior to gluing them into place.
- Page 276 DOORS WWW.VORONDESIGN.COM...
- Page 277 DOORS WWW.VORONDESIGN.COM M3 Hammerhead Nut M3x8 SHCS APPLY VHB TAPE VHB Tape is a double sided adhesive tape.
- Page 278 DOORS WWW.VORONDESIGN.COM APPLY VHB TAPE VHB Tape is a double sided adhesive tape.
- Page 279 DOORS WWW.VORONDESIGN.COM...
- Page 280 EXHAUST WWW.VORONDESIGN.COM Heat Set Insert...
- Page 281 EXHAUST WWW.VORONDESIGN.COM BSPP ADAPTER Some adapters have a small lip that prevents the PTFE tube from passing through. Inspect the adapter and if necessary use a drill to carefully remove the lip.
- Page 282 EXHAUST WWW.VORONDESIGN.COM M3x8 SHCS M3x30 SHCS...
- Page 283 EXHAUST WWW.VORONDESIGN.COM APPLY VHB TAPE Filter Material VHB Tape is a double sided adhesive tape.
- Page 284 EXHAUST WWW.VORONDESIGN.COM M3x12 SHCS M5 T-Nut...
- Page 285 EXHAUST WWW.VORONDESIGN.COM M5x10 BHCS...
- Page 286 EXHAUST WWW.VORONDESIGN.COM TIGHTEN BOLTS REMOVE TAPE BACKING Attach the exhaust assembly to the back panel and secure it with the bolts on the other side of the exhaust gril.
- Page 287 SPOOL HOLDER WWW.VORONDESIGN.COM M3x8 SHCS M3 Hammerhead Nut...
- Page 288 SPOOL HOLDER WWW.VORONDESIGN.COM PTFE Tube M5 T-Nut M5x16 BHCS...
- Page 289 The software setup and other initial setup steps with your new printer can also be found on our documentation page. We recommend starting here. DOCS https://docs.vorondesign.com/ https://github.com/VoronDesign/Voron-2...
- Page 290 If you need assistance with your build, we’re here to help. Head on over to our Discord group and post your questions. This is our primary medium to help VORON Users and we have a great community that can help you out if you get stuck. Alternativly, you can use our subreddit.
- Page 291 WWW.VORONDESIGN.COM Enjoy your printer.
- Page 292 WWW.VORONDESIGN.COM VORON Website Github Docs Discord vorondesign www.vorondesign.com github.com/ docs.vorondesign.com discord.gg/voron...
Need help?
Do you have a question about the VORON2 2.4R2 and is the answer not in the manual?
Questions and answers