Advertisement
What's In The Box
Please inspect the contents of your shipped package to ensure you have received everything that is listed
below.
No part of this document may be reproduced, stored in a retrieval system, or transmitted by any form or by any means,
electronic, mechanical, photo-copying, recording, or otherwise, except as may be expressly permitted by the applicable
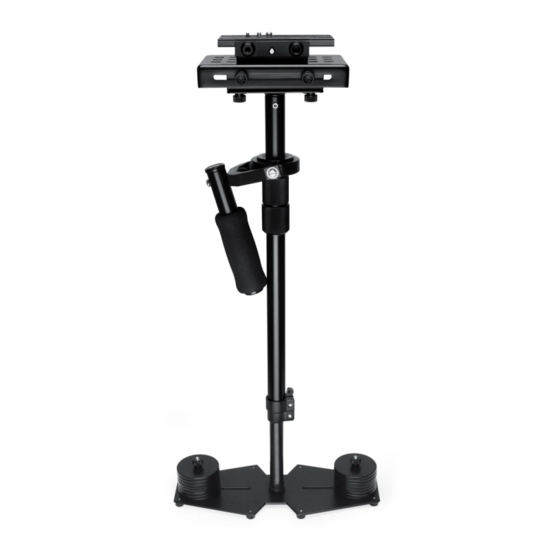
10 Handheld Stabilizer
A s s e m b l y M a n u a l
Metal Quick Release
Handle
16 weight discs
All rights reserved.
copyright statutes or in writing by the Publisher.
(FLCM-10-Q)
Foam Padded Bag
1
Advertisement
Table of Contents

Subscribe to Our Youtube Channel
Related Manuals for PROAIM Flycam 10


Summary of Contents for PROAIM Flycam 10
- Page 1 10 Handheld Stabilizer (FLCM-10-Q) A s s e m b l y M a n u a l What’s In The Box Please inspect the contents of your shipped package to ensure you have received everything that is listed below. Metal Quick Release Handle 16 weight discs...
- Page 2 Handheld Video Stabilizer Setup • Loosen the 2x Allen bolts at the bottom of the camera plate, align the holes with the top of the central post & retighten the Allen bolts se- curing the head to the stalk. • Remove the head plate by unscrewing the four side knobs to mount the quick-release adaptor.
- Page 3 In case you want to avoid or skip using the quick release plate, you can attach the camera directly to the Head Plate using the following assembly sequence: • Remove the Head plate from the 3-piece head assembly before attaching it to your camera.
- Page 4 If you wish to use table clamp then please use following sequence of pictures and text. • Attach clamp onto the table, and tighten the provided knob to secure. Then attach the handle onto the clamp; it helps achieve Bal- ance in just seconds and saves your profes- sional time.
- Page 5 • Practice walking/movements ensuring your body motion is not transmitted to your hands and then the Flycam and camera. YOUR FLYCAM 10 HANDHELD STABILIZER ALL DRESSED UP AND READY TO GO! (SHOWN WITH OPTIONAL ACCESSORIES) Warranty: We offer one year warranty for our products from date of purchase. Within this period of time, we will repair it without charge for labor or parts.
Need help?
Do you have a question about the Flycam 10 and is the answer not in the manual?
Questions and answers