Advertisement
Quick Links
Advertisement

Subscribe to Our Youtube Channel
Related Manuals for Nauticam 16120


Summary of Contents for Nauticam 16120
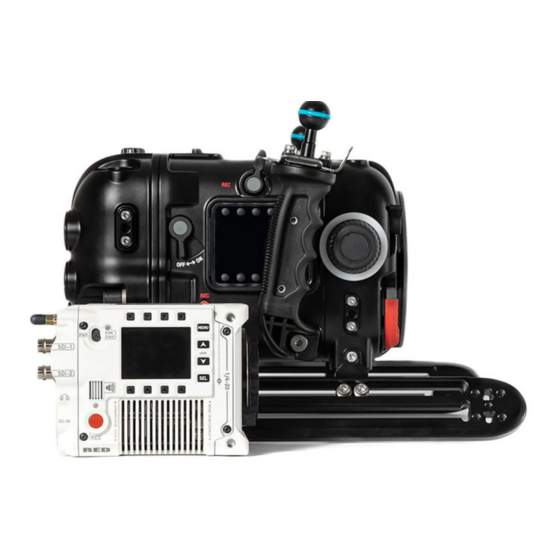
- Page 1 Instruction Manual for Nauticam Raptor Housing...
- Page 2 What’s in the package? Page 1...
- Page 3 What’s in the package? Page 2...
-
Page 4: Chapter I, Install The Camera
Chapter I, Install the camera • Turn the Lock Lever shown in yellow CCW to release, then take out the camera tray. • Mounting the camera tray to Raptor top with the Allen key delivered. - Page 5 • Micro V‐mount battery can be installed or later. • Mounting the bottom tray to Raptor, then fasten it by two screws.
- Page 6 ‐ Mounting the right control block to camera , fasten it with the 3 thumb screws...
- Page 7 • • Install RF mount lens to camera, and For use with EF lens, Canon EF – Lock the RF mount Locking ring. EOS R Mount adapter is required.
- Page 8 EF lens use only. • Install the EF REL Block for use with EF lens and EF–RF Mount adapter, Fasten it with two thumb screws.
- Page 9 EF lens use only. • As for use with Control Ring/V‐ND mount adapter, please adjust the control dial position as shown above.
- Page 10 • Turn down the two Lock levers to release lens control unit. • Install the whole camera system to housing • Turn up the Lock levers to engage the zoom and focus gear.
- Page 11 • Pull out the LEMO connector inside housing(lower left). • Plug it into camera EXT port.
-
Page 12: Chapter Ii, Preparation For Electrical Controls
Chapter II, Preparation for Electrical controls Update Raptor camera to the latest firmware(BETA). Enables the 5 V / 500 mA power out to the Extension Port by setting Menu/System Setting Menu/Power/Power out/Enable Enable AF by setting Menu/Autofocus‐BETA Menu/Enable Remarks Backlight ‐ Long press PRE button to turn it on, turn off by holding the WB. FPS +/ ‐ ‐ NOT supported yet, waiting for the firmware update by RED. Gently push these buttons to protect the internal electronic components. ...
Need help?
Do you have a question about the 16120 and is the answer not in the manual?
Questions and answers