
Related Manuals for Nauticam NA-C70


Summary of Contents for Nauticam NA-C70
-
Page 1: Table Of Contents
May, 2021 NA - C70 For Canon EOS C70 Cinema Camera PN 16507 User Manual Housing Digital Cinema Introduction Package Contents Important Instructions Part Names and Functions Opening the housing Closing the housing Preparation for Use Reset Leak Detector Circuit HDMI Output Vacuum Valve System Care/Storage... -
Page 2: Introduction
PACKAGE CONTENTS Make sure that you have all the included items listed below before using this product. If some items are missing or damaged, contact your local Nauticam dealer. NA-C70 Padded Travel Case... -
Page 3: Important Instructions
Only the accesories specifi ed by Use only Nauticam lubricant on silicone Nauticam must be used. Third-party rubber O-ring. accessories may result in malfunctions or damage to the product. -
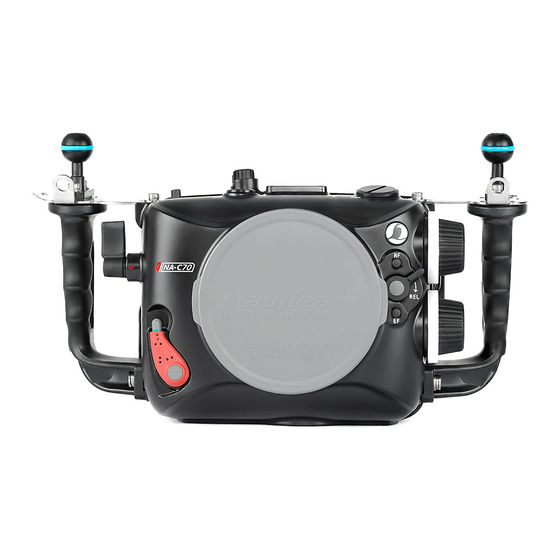
Page 4: Part Names And Functions
PART NAMES AND FUNCTIONS Rear View Playback button IRIS + button IRIS - button Assignable button 1 Cancel button Joystick - up Menu button ND Filter button Shutter mode Shutter adjustment + Shutter adjustment - Assignable button 2 Moisture alarm window Joystick - left Joystick - right Joystick - down... - Page 5 PART NAMES AND FUNCTIONS Top + Front Views M24 Accessory port 1/4” -20 mounting threads M16 Accessory port Power switch Slot select button M16 Accessory port Accessory mounting ball Port lock safety button Port locking lever Port index mark RF lens release button Lens release lever EF lens release button...
- Page 6 PART NAMES AND FUNCTIONS Back + Side Views Sacrifi cial zinc anodes 1/4” Threaded tripod holes Focus knob Zoom knob Shutter release lever...
-
Page 7: Opening The Housing
OPENING THE HOUSING * drawings as illustrations only depress housing unlock button turn housing lock outward lift up the back housing... -
Page 8: Closing The Housing
CLOSING THE HOUSING * drawings as illustrations only before closing the housing, clean and lubricate the main O-ring make sure nothing is caught between front and back housing and that they are fully aligned before locking turn housing lock inward until you hear and feel it click into place housing locked in place securely... -
Page 9: Preparation For Use
PREPARATION FOR USE * drawings as illustrations only Setting up the housing - RF Lens / EF or EF-S Lens This housing allows you to switch between RF & EF lens by alternating 5 pieces of mechanisms inside the housing : For RF Lens - Stay on Position 1 - For EF or EF-S Lens with Canon Mount Adaptor EF-EOS R - Change to Position 1 - For EF Lens with Canon Mount Adaptor EF-EOS R 0.71x - Change to Position 2 -... - Page 10 PREPARATION FOR USE Setting up the housing - RF Lens / EF or EF-S Lens To alternate between Position 1 & 2 : press the unlock button turn the lever to position 2 From Position 1 to Position 2 unscrew the attached screw turn the part so that it is aligned at position 2 From Position 1...
- Page 11 PREPARATION FOR USE * drawings as illustrations only Setting up the housing - Zoom/Focus Knob The housing is designed to maintain an easy access to the focus knob which is positioned as the top from left hand controls and zoom knob at the bottom on the housing, this works using gear mechanisms that drive the gear set attached to the camera lenses.
- Page 12 PREPARATION FOR USE * drawings as illustrations only Installing the Camera unlock camera tray lever and remove the tray from the housing detached the remote cable connection from the camera tray before installing the camera turn the small lever at 900 if you are using a lens adaptor remote cable...
- Page 13 PREPARATION FOR USE * drawings as illustrations only Port Mounting depress safety button and rotate anti-clockwise lubricant the port O-ring before mounting align index mark push port assembly straight in rotate locking lever clockwise to lock...
- Page 14 PREPARATION FOR USE * drawings as illustrations only Coating housing O-ring Main O-ring remove the main O-ring using an O-ring remover clean the O-ring groove with a cloth and ensure that it is free from salt or other foreign materials lightly coat it with provided lubricant return the main O-ring by slowly pressing from one corner to the whole perimeter...
- Page 15 PREPARATION FOR USE * drawings as illustrations only Setting up moisture alarm Alarm ON/OFF CR2032 Battery remove battery press the battery down until it insulation fi lm click into place switch on the alarm test the alarm - the moisture alarm - connect the wires with a window will fl...
-
Page 16: Reset Leak Detector Circuit
RESET LEAK DETECTOR CIRCUIT * drawings as illustrations only If using with vacuum valve : remove the cap from the vacuum valve and press the red button to release pressure before unlocking port lock If using without vacuum valve, please follow from step 2 unlock port lock and remove port assembly turn the lens release lever... -
Page 17: Hdmi Output
HDMI OUTPUT * drawings as illustrations only HDMI 1.4 / 2.0 HDMI 1.4 HDMI Cable Pre-installed in Monitor packaging 25033 Standard HDMI Bulkhead 25081 M24-M16 Step Down Adaptor 25701 HDMI (D-A) cable in 260mm length HDMI 2.0 25702 M24A3R210-M28A1R170 HDMI 2.0 cable 25086 M24 adaptor for HDMI 2.0 cable... -
Page 19: Care/Storage
CARE/STORAGE Nauticam to Canon SDK Control Board System * Electronic Control Contacts If the contacts get soiled, scratched, or Soak the housing system in fresh water have fi ngerprints on them, corrosion or after salt water usage faulty connections can result. Clean them with a soft cloth. -
Page 20: Warranty
NAUTICAM accepts no liability for any damage to and defects in the housing caused by improper use and/or poor maintenance; it is the responsibility of the own- er to carefully follow the instructions in our manuals. -
Page 21: Specifi Cations
25625 M16 Vacuum Valve II (pushbutton release) 25613 M16 Dual Activation Vacuum Valve 16701 Top Handle for Cinema System 17959 Housing Mounting ball with 1/4’’ screws 25218 Mounting Ball Set for Tripod 16702 NA-C70 Camera Tray to use with EF-EOSR 0.71X Mount Adapter... - Page 22 Nauticam Internationl Ltd. Rm 2203, CCT Telecom Bldg, 11 Wo Shing St, Fo Tan, Hong Kong Tel. +852 - 26902711 Fax. +852 - 26909778 URL. www.nauticam.com Gallery. www.nauticam.smugmug.com...
Need help?
Do you have a question about the NA-C70 and is the answer not in the manual?
Questions and answers