Table of Contents
Advertisement
Advertisement
Table of Contents

Related Manuals for Horizon Fitness TR3.0


Summary of Contents for Horizon Fitness TR3.0
- Page 1 TR3.0 TREADMILL OWNER’S MANUAL...
-
Page 2: Important Precautions
IMPORTANT PRECAUTIONS ENGLISH SAVE THESE INSTRUCTIONS When using an electrical product, basic precautions should always be followed, including the following: Read all instructions before using this treadmill. It is the responsibility of the owner to ensure that all users of this treadmill are adequately informed of all warnings and precautions. - Page 3 WARNING DANGER TO REDUCE THE RISK OF BURNS, FIRE, ELECTRICAL SHOCK OR INJURY TO PERSONS: TO REDUCE THE RISK OF ELECTRICAL SHOCK: • At NO time should pets or children under the age of 13 be closer to the treadmill than 10 feet. •...
-
Page 4: Grounding Instructions
GROUNDING INSTRUCTIONS Place the treadmill on a level and stable surface. There should be one foot of clearance in front of the treadmill for the power cord. Please leave a clear zone behind the treadmill that is at This product must be grounded. If a treadmill should malfunction or breakdown, grounding provides a path of least resistance least the width of the treadmill and at least 79”... - Page 5 ASSEMBLY WARNING There are several areas during the assembly process that special attention must be paid. It is very important to follow the assembly instructions correctly and to make sure all parts are firmly tightened. If the assembly instructions are not followed correctly, the treadmill could have parts that are not tightened and will seem loose and may cause irritating noises.
-
Page 6: Parts Included
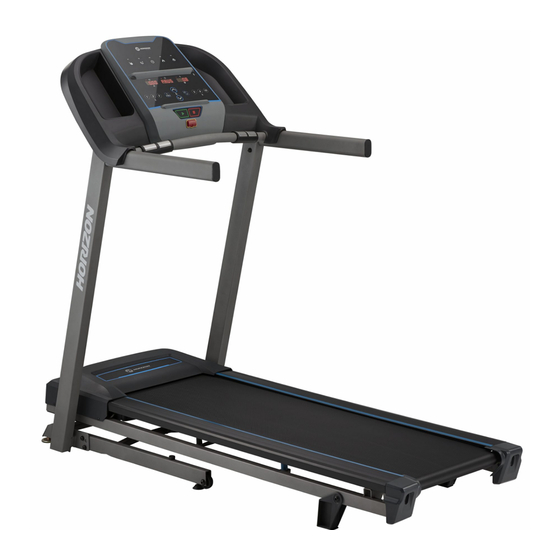
CONSOLE PRE ASSEMBLY TOOLS INCLUDED: WATER BOTTLE HOLDER 6 mm L-Wrench TABLET/READING RACK 6 mm T-Wrench WARNING CONTROL PANEL & DISPLAY PARTS INCLUDED: WINDOWS DO NOT ATTEMPT TO LIFT THE TREADMILL! Do not move or lift TABLET/READING RACK 1 Console Assembly treadmill from packaging until specified to do so in the assembly WATER BOTTLE HOLDER HANDLEBAR... -
Page 7: Assembly Step
ASSEMBLY STEP 1 ASSEMBLY STEP 2 Open HARDWARE FOR STEP 1. Open HARDWARE FOR STEP 2. HARDWARE FOR STEP 1 HARDWARE FOR STEP 2 PART TYPE DESCRIPTION PART TYPE DESCRIPTION Attach the LEFT CONSOLE MAST (1) to the Attach LEAD WIRE to bottom end of CONSOLE BOLT M8X1.25PX15L BOLT... - Page 8 ASSEMBLY STEP 3 ASSEMBLY STEP 4 Open HARDWARE FOR STEP 4. NOTE: Be careful not to pinch any wires HARDWARE FOR STEP 3 HARDWARE FOR STEP 4 while assembling the console. PART TYPE DESCRIPTION PART TYPE DESCRIPTION Gently place the CONSOLE (5) on top of the CONSOLE MASTS (1&2).
-
Page 9: Treadmill Operation
• USING THE SAFETY KEY • FOLDING THE TREADMILL • MOVING THE TREADMILL • LEVELING THE TREADMILL • TENSIONING THE RUNNING BELT • CENTERING THE RUNNING BELT • USING THE HEART RATE FUNCTION TR3.0 User Weight Capacity: 113 kg / 250 lbs. -
Page 10: Console Operation
CONSOLE OPERATION Note: There is a thin protective sheet of clear plastic on the overlay of the console that should be removed before use. A) LED DISPLAY: Calories, Time, Distance, Speed, Heart Rate. B) WORKOUT PROGRAMS: used to reference program code shown on LED display. C) START: press to begin exercising, start your workout, or resume exercising after pause. -
Page 11: Getting Started
GETTING STARTED 1) Check to make sure no objects are placed on the belt that will hinder the movement of the treadmill. 2) Plug in the power cord and turn the treadmill ON. (The ON/OFF switch is next to the power cord.) 3) Stand on the side rails of the treadmill. - Page 12 WORKOUT PROFILES P5) FAT BURN: A workout designed specifically to target fat. Promotes weight loss by increasing and decreasing the speed, while keeping you in your fat burning zone. Includes 10 levels. Segment Warm Up P1) MANUAL: Adjust your speed manually during your workout. Time 4:00 Mins 30 Sec...
-
Page 13: Finishing Your Workout
30 seconds and then reset. Dut: Verwijderingsaanwijzing VISION Fitness / HORIZON Fitness / TEMPO Fitness / TREO Fitness producten zijn recyclebaar. Breng het apparaat aan het einde van de gebruiksduur naar een in recycling gespecialiseerd bedrijf (plaatselijk verzamelpunt). - Page 15 Horizon TR3.0 | Rev. 1.1 D ©2021 Johnson Health Tech...
Need help?
Do you have a question about the TR3.0 and is the answer not in the manual?
Questions and answers