Advertisement
Quick Links
Advertisement

Related Manuals for Orei CO-EX330-K


Summary of Contents for Orei CO-EX330-K
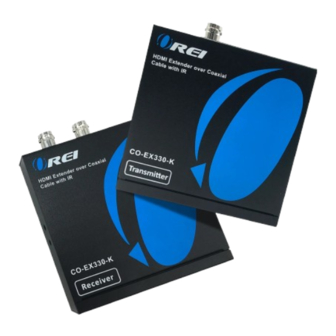
- Page 1 HDMI Extender over single 100m/328ft Coaxial Cables with IR Control Operation Manual...
- Page 2 Thank you for purchasing this product. For optimum performance and safety, please read these instructions carefully before connecting, operating or adjusting this product. Please keep this manual for future reference. ● Introduction The HDMI Over Single Coax Extender sends HDMI signals Over just one 75Ohm Coaxial cable -- up to100m away.
- Page 3 and serial control signals. The Extender offers the most convenient solution for HDMI extension over a single coaxial cable with long distance capability, and is the perfect solution for any application. ● Features 1.Flexible extension of high-bandwidth HDMI 1.3 thanks to the performance and reliability of 75Ohm RG-6U Coax cable.
-
Page 4: Package Contents
8.Lip-Sync Pass Through. 9.Bi-directional IR system allowing for control of source or display (IR accessories included) ● Package Contents: (1) [TX & RX] (2) IR Blaster (TX) (2) IR Receiver (RX) (2) DC 5V in line power supply (1) User Manual... - Page 5 ● Specification Frequency Bandwidth 225MHz/link (HDMI 1.3) 480i, 576i, 720p@50/59.94,60 In/Output Support Resolution 1080i@50/59.94/60 1080p@23.98/24/25/29.97/30/50/59.94/60 Input TMDS Signal: 3.3 volts Input DDC Signal: 5.0 volts/P-P ESD Protection Human body ±8kV (air-gap discharge) model ±4kV (contact discharge) Full HD up to 100M (RG-6U cables) Coaxial Cable Distance HD up to 200M (RG-6U cables) SD up to 300M (RG-6U cables )
- Page 6 Dimension (mm) 100(D)x105(W)x25(H) Weight (g) Power Supply: (2) 5V1A DC Power consumption: 2.3 watts (TX); 2.2 watts (RX) Operation temperature: 32~104 °F Storage temperature: -4 ~140 °F Relative humidity: 20~90 % RH (no condensation)
-
Page 7: Operation Controls And Functions
● Operation Controls and Functions 1. Transmitter Front Panel Rear Panel... - Page 8 ◆ LINK LED:This LED will illuminate when the device is connected with HDMI source. ◆ HDMI IN: This slot is to connect with the input source equipment such as DVD or Blue-ray player with connection cable for input video and audio signal transmission.
- Page 9 ◆ Power LED: This red LED will switch on when the device is connected with the power supply. ◆ DC 5V: Plug the 5V DC power supply into the unit and connect the adaptor to an AC outlet. The red LED will turn on when the power is on. ◆...
- Page 10 Rear Panel ◆ LOCK LED: This LED will illuminate when the HDMI signal from the transmitter is stable. ◆ HDMI Out: This slot is where you connect a HDMI display with a HDMI cable. ◆ IR RX: Connect to the IR Receiver for IR signal reception. Ensure that remote being used is within the direct line-of-sight of the IR receiver.
- Page 11 ◆ DC 5V: Plug the 5V DC power supply into the unit and connect the adaptor to an AC outlet. The red LED will turn on when the power is on. ◆ Coax IN: Connect one 75ohm RG-6U coax cable between the transmitter and the receiver BNC port.
- Page 12 IR RECEIVER (RX) To control the source: Plug IR Receiver into IR RX port of receiver unit; place receiver at or near display. To control the display: Plug IR Receiver into IR RX port of transmitter unit; place receiver in position where it is able to receive remote signals. IR BLASTER (TX) To control the source: Plug IR Blaster into IR TX port of transmitter unit;...
- Page 14 ● Connection and Installation Connect the HDMI Transmitter output BNC ports using single RG6 coaxial cables to included Receiver. It is strongly recommended that factory terminated cable assemblies be used and their length shall not exceed 328 ft respectively. Connect the HDMI output from the Receiver to high-definition display devices such as HD-LCD, HD-DLP and HD projectors with HDMI input interfaces.
Need help?
Do you have a question about the CO-EX330-K and is the answer not in the manual?
Questions and answers