
Related Manuals for Fisher & Paykel HC60PLX4


Summary of Contents for Fisher & Paykel HC60PLX4
- Page 1 INSTALLATION INSTRUCTIONS USER GUIDE Chimney Pyramid Rangehood HC60PLX4 and HC90PLX4 models NZ AU...
-
Page 3: Table Of Contents
CONTENTS Safety and warnings Installation instructions Operating instructions Cleaning and maintenance Parts and accessories Customer Care IMPORTANT! Registration SAVE THESE INSTRUCTIONS Register your product with us so we can The models shown in this user guide may provide you with the best service possible. not be available in all markets and are subject to change at any time. -
Page 5: Safety And Warnings
The rangehood is heavy. Please ensure adequate care is taken when installing the rangehood to prevent personal injury. The rangehood must be installed onto a solid wall, stud, beam or truss. Weight of the HC60PLX4 is 12.8 kg and weight of HC90PLX4 is 15 kg. 12.8 kg (HC60) - Page 6 SAFETY AND WARNINGS Exhaust air must not be discharged into an existing flue that is used for exhausting fumes from appliances burning gas or other fuels. There shall be adequate ventilation of the room when the rangehood is used at the same time as appliances burning gas or other fuels.
-
Page 7: Installation Instructions
INSTALLATION INSTRUCTIONS Contents of packaging INSTALLATION INSTRUCTIONS USER GUIDE Chimney Pyramid Rangehood HC60PLX4 and HC90PLX4 models NZ AU Rangehood Installation instructions Chimney User guide manual Upper chimney Upper chimney bracket Chimney bracket 150 mm diameter 125 mm diameter Expansion plug... - Page 8 INSTALLATION INSTRUCTIONS Product dimensions Ø Power cord HC60PLX4 HC90PLX4 PRODUCT DIMENSIONS Overall height of product min. 610 – max. 1050 min. 610 – max. 1050 Overall width of product Overall depth of product Height of product Width of chimney Depth of chimney...
-
Page 9: Installation Instructions
INSTALLATION INSTRUCTIONS Height of rangehood INSTALLATION DIMENSIONS Installation height Ducted min. 650 – max. 1050 Recirculation min. 690 – max. 1050 Height top of cooktop to base of product Electric cooktop min. 600 – max. 750 Gas cooktop min. 650 – max. 750 Rangehood installation height above the cooktop is the user’s preference. - Page 10 INSTALLATION INSTRUCTIONS Venting options Attention should be given to ensure that any applicable regulations concerning the discharge of exhaust air are fulfilled. The rangehood can be installed to operate with the exhaust air ducted externally from the kitchen, or installed to operate with the exhaust air recirculating within the kitchen. Ducted For ducted installation it is recommended that 150 mm diameter, rigid or semi-rigid ducting is used.
- Page 11 INSTALLATION INSTRUCTIONS WARNING! This product is heavy and requires two persons for installation. Installation work and electrical wiring must be done by qualified person(s) Failure to install the screws or fixing device in accordance with these instructions IMPORTANT! Wear gloves to protect against sharp edges. Installation 1 Preparing for installation: Before installing your rangehood:...
-
Page 12: Upper Chimney Bracket
Chimney bracket attachment points Upper rangehood attachment point Lower rangehood attachment point Fig.2 HC60PLX4 HC90PLX4 PRODUCT DIMENSIONS Lower rangehood attachment point width Lower rangehood attachment point height Upper rangehood attachment point width Upper rangehood attachment point height Chimney bracket attachment point width... - Page 13 INSTALLATION INSTRUCTIONS INSTALLATION INSTRUCTIONS Fig.3 3 Attach the ducting adapter to the rangehood Place the ducting adapter onto the rangehood and screw it in place using the 10 mm screws.
- Page 14 INSTALLATION INSTRUCTIONS 4 Wall mounting Remove the filters – pull the relative catch and tilt the filter downwards until it disengages from the supports. Hang the rangehood o the upper rangehood mounting screws with 2 mm gap. Hang o the keyhole attachment points on the back of the rangehood then tighten the screws.
- Page 15 INSTALLATION INSTRUCTIONS 5 Attach ducting Attach ducting to the ducting adapter using aluminium duct tape and vent outside. 6 Attach chimney Bend the tabs on the chimney (A). Place chimney around the hood chassis and hang o the bracket (B). Extend the upper chimney and attach to the chimney bracket with 10 mm screws (C).
-
Page 16: Operating Instructions
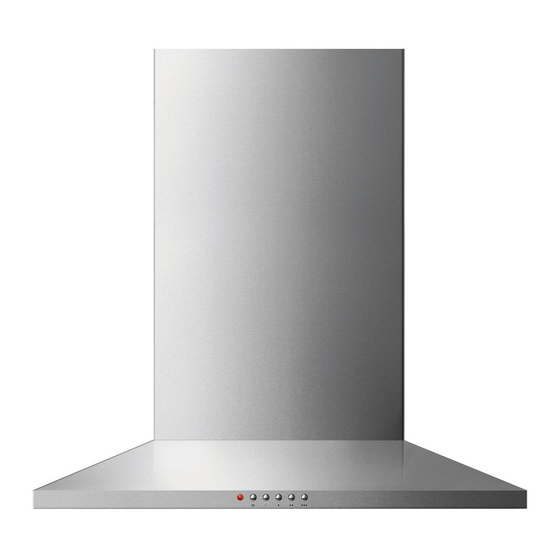
OPERATING INSTRUCTIONS Control panel Extractor fan Lighting Extractor operating control on and o fan o Extractor fan speed 1, 2 and 3 pilot light Note: we recommend turning your rangehood on before you start cooking for optimal performance. -
Page 17: Cleaning And Maintenance
CLEANING AND MAINTENANCE WARNING! Unplug or disconnect the appliance from the power supply before servicing or cleaning. IMPORTANT! Never use abrasive or oil based cleaners. Wear gloves to protect against sharp edges. Maintenance The rangehood should be cleaned regularly using a mild, liquid detergent and a clean soft cloth to avoid a build-up of grease occurring. - Page 18 CLEANING AND MAINTENANCE WARNING! When replacing the bulb, let the bulb cool, and assure that power to the rangehood has been turned o . Use new bulbs according to that indicated on the rangehood nameplate. Carbon filters – for use in recirculation mode Active carbon filters are disposable items designed to remove grease and odours from cooking vapours before the air is channelled back into the kitchen.
-
Page 19: Parts And Accessories
PARTS AND ACCESSORIES ITEM REFERENCE NUMBER bulb Aluminium filter 792527 Recirculation carbon filter x2 792481 Recirculation diverter 791820 PD-RHK150E PD-RHK150W... -
Page 20: Customer Care
CUSTOMER CARE Before you call for service or assistance... Check the things you can do yourself. Refer to the installation instructions and your user guide and check that: 1 Your product is correctly installed. 2 You are familiar with its normal operation. If after checking these points you still need assistance or parts, please refer to your nearest Authorised Service Centre, Customer Care, or contact us through our website www.fisherpaykel.com. - Page 21 CUSTOMER CARE Complete and keep for safe reference: Model Serial No. Purchase Date Purchaser Dealer Suburb Town Country...
- Page 24 FISHERPAYKEL.COM © Fisher & Paykel Appliances 2022. All rights reserved. The models shown in this guide may not be available in all markets and are subject to change at any time. The product specifications in this guide apply to the specific products and models described at the date of issue.
Need help?
Do you have a question about the HC60PLX4 and is the answer not in the manual?
Questions and answers