
Related Manuals for 3D LabPrint WACO YMF-5


Summary of Contents for 3D LabPrint WACO YMF-5
- Page 1 ... print your plane | www.3DLabPrint.com User Guide rev. 2021/08 Fully 3d printable WACO YMF-5 scale 1:6.5 wingspan 1442 mm / 56.8 inch page...
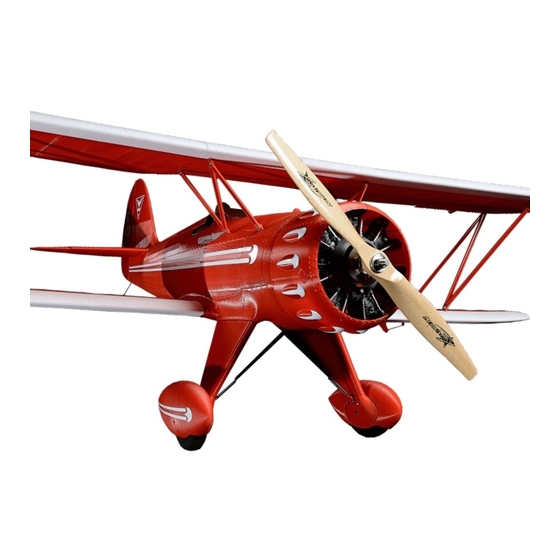
- Page 2 ... print your plane | www.3DLabPrint.com WACO YMF-5 fully printable R/C plane for your desktop 3Dprinter Fully 3D printable, cheap and easy to build RC model for everyday flying. Many scale details such as airframe plating or engine encourages to create realistic paint jobs. This plane has been designed for printing from PolyAir 1.0...
-
Page 3: Recommended Setup
... print your plane | www.3DLabPrint.com General specifications (HP setup): Wingspan: 1442 mm / 56.8 inch Lenght: 1094 mm / 43.1 inch Height: 433 mm / 17.0 inch Wing area: 54,5 dm2 / 7.0 square foot Wing loading: 59 g/dm2 / 19.0 oz/square foot Center of gravity: 120 mm from leading edge of upper wing... - Page 4 ... print your plane | www.3DLabPrint.com WACO YMF-5 , History The Waco Aircraft Company (WACO) was an aircraft manufacturer located in Troy, Ohio, United States. Between 1920 and 1947, the company produced a wide range of civilian biplanes. The ‚F‘ series was popular with private owner pilots for sporting and other uses and continued in production through the late 1930s.
- Page 5 ... print your plane | www.3DLabPrint.com Included: 1. STL 3d files Universal STL files designed to be used with desktop FDM 3d printers and slicer software as Simplify3D (recommended), CURA or MatterControl 2. Factory files for Simplify3D slicer - preffered contains all the necessary settings to slice the models along with suggested bed layout.
- Page 6 ... print your plane | www.3DLabPrint.com 5. Slice on your own with CURA or MatterControl slicers If you for any reason don‘t like Simplify3D, there is always option to use another free slicer Please follow our Cura guide in the Help section of the website where you can find the basic single-wall profile.
- Page 7 ... print your plane | www.3DLabPrint.com WACO YMF-5 Centre of Gravity 120 mm Wing area: 54,5 dm2 / 7.0 square foot 120 mm Centre of Gravity Lenght: 1094 mm / 43.1 inch page...
- Page 8 ... print your plane | www.3DLabPrint.com Wing span: 1442 mm / 56.8 inch page...
- Page 9 Step By Step PDF/VIDEO userguide Choose airplane at www.3Dlabprint.com, visit our Facebook for latest info. Basic requirments for WACO YMF-5 are 195/195/195 mm volume, nozzle 0.4mm recommended (0.35 or 0.5mm alternativelly). Heated bed recommended. Designed to be printed with PolyAir 1.0 (recommended) or regular PLA filament.
- Page 10 ... print your plane | www.3DLabPrint.com option B Factory files Simplify3D (recommended): We prepared all you need in these files (FFF process settings, parts layout on bed, etc...) You can use these settings as a start point. Adjust according to your need (adapt for your printer), print single parts and so on...
- Page 11 ... print your plane | www.3DLabPrint.com option D CURA CURA is a free software and provides similar results. Expect a steeper learning curve, as you need to figure out the settings for your printer. Please check our CURA guide on the website for the latest basic profile. Please visualise our presliced gcodes to see how the result should look like and try to achieve the same in your slicer.
- Page 12 ... print your plane | www.3DLabPrint.com 4. Print it Save the Gcodes to the SD card and insert into your printer. Prepare your printer and start printing, we prefer to use SD card rather than direct USB connection. Scaling the model will lead to unusable result! you will need: Polyair 1.0...
- Page 13 ... print your plane | www.3DLabPrint.com WACO YMF-5 weights of printed parts (PLA) fuselage 124 g 4,37 oz 138 g 4,87 oz 119 g 4,20 oz 78 g 2,75 oz 55 g 1,94 oz 73 g 2,57 oz fuselage cover 1...
- Page 14 ... print your plane | www.3DLabPrint.com 5. Assembly of printed parts 5.1 Wing assembly WACO YMF-5 Glue wing parts L1-L5 perfectly together. The new 3DLabPrint joint system will help you. Repeat for the right side. Repeat it for bottom wing the same. Use the thin CA glue, and use activator to speed up the glue curing.
- Page 15 ... print your plane | www.3DLabPrint.com 5.2.1 Fuselage assembly WACO YMF-5 You can use snap knife for cleaning the surface of printed parts, but mostly it is not necessary. Glue fuselage parts F1-F6 with thin CA glue together. The new 3DLabPrint joint system will help you.
- Page 16 ... print your plane | www.3DLabPrint.com 5.2.2 Fuselage tail - elevator pushrods and servos Glue vertical stabiliser 1 & 2 to the fuselage. Glue all parts of rudder together. Glue L1 and L2 parts of the elevator. The profile is symmetric, so the left and right sides are identical. Glue elevator arm together and smooth the surface with sand paper (you can use drill).
- Page 17 ... print your plane | www.3DLabPrint.com 5.2.3 Fuselage gear The landing gear is designed as dry assembled system consisting of 4mm carbon rods. In case of mishap during landing, the damaged parts can easily be replaced. Insert M3 nut in between the wheel cover parts and glue them together.
- Page 18 ... print your plane | www.3DLabPrint.com 5.2.4 Fuselage tail wheel The tail gear is just a simple tail-drag assembly consisting from 1.5-2 mm piano wire bent to a shape and printed wheel. Use pliers to bend the piano wire to a desired shape. Secure the wheel using a collar.
- Page 19 ... print your plane | www.3DLabPrint.com 6. Servo installation Install the prepared servos to the wing servo bays. Use a 1.2 mm steel wire with Z bends as a linkage between the servos and aileron control horns. Elevator and rudder servo will be fixed directly to the fuselage by included screws.
- Page 20 ... print your plane | www.3DLabPrint.com 7.2 Fuselage - motor mount & ESC & battery holder The scale engine replica must be mounted in a certain position marked with TOP mark. Assemble the printed motor mount (16 x 19 mm) with motor, propeller. Mount the motor using 4x M3 screws and nuts to the printed universal motor holder.
- Page 21 ... print your plane | www.3DLabPrint.com 7.3 Fuselage and Wing struts - Final assembly/setting Mount all pins at fuselage and wing struts. All pins are the same. Use 2 x 8 mm screws. You can find good screws in each HXT900 servo package. Push M3 screw to the prepared slot in the wing pins.
-
Page 22: Aileron Mounting
... print your plane | www.3DLabPrint.com 7.4 Aileron mounting Glue the horns on ailerons and use a piano wire with Z bends as push rods. you will need: 1,2mm steel wire See video guide Wings final assembly page... - Page 23 9. Go flying Pre-flight check center of gravity is very important (move it 5mm forward for the first flights), battery properly charged, ailerons and elevator deflection check, your own flying skills or RC simulator training ... Flight video of WACO YMF-5 page...
- Page 24 ... print your plane | www.3DLabPrint.com 10. Pilots Please Attention! For the first flights we recommend setting the center of gravity to around 5 mm forward of the CG tag - nose heavy, this increases the stability (you can use heavier battery). Increasing expo settings on your transmitter for elevator and ailerons to 80 % calms response from your stick inputs.
-
Page 25: Shopping List
... print your plane | www.3DLabPrint.com Shopping list Printing material: 2,5 kg of Polyair 1.0 a little piece of PETG for motor mount Motor: any motor 5055 size for 6S Li-Pol with weight up to 450g ESC: 80A 6s with UBEC or any 6s 60-100A + conector suitable for battery Propeller: wooden 15 x 6 inch...
Need help?
Do you have a question about the WACO YMF-5 and is the answer not in the manual?
Questions and answers