Renogy REGO User Manual
Mppt solar charge controller
Hide thumbs
Also See for REGO:
- User manual (101 pages) ,
- Quick manual (48 pages) ,
- User manual (59 pages)
Table of Contents
Advertisement
Quick Links
Advertisement
Table of Contents

Related Manuals for Renogy REGO


Summary of Contents for Renogy REGO
- Page 2 Renogy reserves the right to change the information in the User Manual without notice. Copyright REGO 12V 60A MPPT Solar Charge Controller User Manual © 2022 Renogy. All rights reserved. All information in the User Manual is subject to copyright and other intellectual property rights of Renogy and its licensors.
-
Page 3: Important Safety Information
Important Safety Information The User Manual provides important installation, operation, and maintenance instructions for REGO 12V 60A MPPT Solar Charge Controller. Please read the User Manual carefully before installation and operation and save it for future reference. Failure to observe the instructions or precautions in the User Manual can result in electrical shock, serious injury, or death, or can damage Charge Controller, potentially rendering it inoperable. - Page 4 Important Safety Information CAUTION...
-
Page 5: Key Features
The REGO 12V 60A MPPT Solar Charge Controller has achieved several firsts as a key member of the entire REGO Collection. Focusing on rapid plug and play and safety, the REGO 60A MPPT reduces installation time and integrates a high BPU (Battery Protect Unit) technology achieving the highest protection against battery cells damage and battery failure, especially Lithium. - Page 6 Introduction Power In = Power Out Volts In * Amps In = Volts out * Amps out Current vs.Voltage(12V System) Output Power(12V System) Typical Battery Maximum Maximum Voltage Range Power Point Traditional Power Point Controller Operating Range VOLTAGE VOLTAGE 15 17 15 17...
- Page 7 Introduction Four Charging Stages Battery Voltage Fast charging Constant voltage charging Floating charge Equalize charging voltage Boost charging voltage Float charging voltage Charging return voltage CHARGING CURRENT Constant pressure time (Range:10-600 min) Cumulative Time Maximum current Bulk Charge: Constant Charging: Boost Charge: Float Charge:...
- Page 8 Introduction Equalization: CAUTION WARNING...
-
Page 9: Package Contents
Package Contents Package Contents REGO 12V 60A MPPT Quick Guide × 1 Solar Charge Controller × 1 Renogy Temperature Solar Adapter Cable Sensor × 1 ( Anderson PP75 to (Model: RTSCC) MC4 Adapter Cable ) Mounting Screws × 4 ST6.3x1.8x13mm... - Page 10 Battery Fuse: The battery fuse will protect the charge controller, wire and battery from overcurrent. Solar Panel Fuses: Provide complete single circuit protection for solar pan- els. It can prevent the high current from damaging the so- lar panels. It can prevent the high current from damaging the solar panels.
-
Page 11: Product Overview
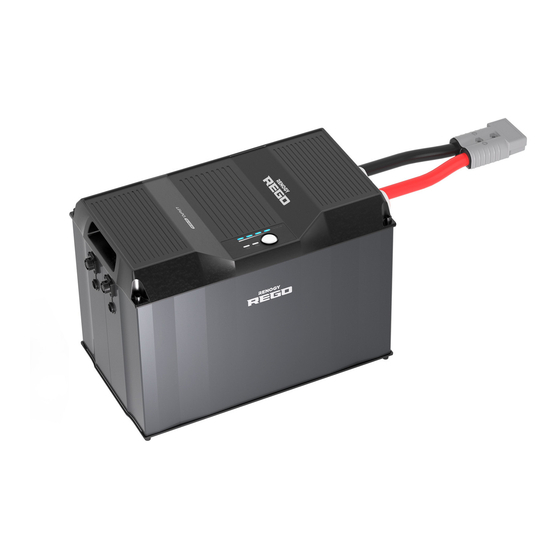
Product Overview Product Overview Part Part CAN Communication Ports Positive Battery Terminal Positive Solar Terminal Negative Battery Terminal Negative Solar Terminal Battery Temperature Sensor Port Battery Status Indicator Battery Voltage Sensor Port Solar Status Indicator Mounting Holes Battery Type Setting Knob... -
Page 12: Wiring Diagram
Wiring Diagram Wiring Diagram Positive Negative Solar Panel Battery... - Page 13 Recommended Components Battery Scenario A: REGO Battery Kit Renogy REGO System Combiner Box or Positive/Negative Busbars Battery Adapter Cable ( Anderson PP75 to Anderson 120 Adapter Cable ) Battery Adapter Cables ( Anderson PP75 to Ring Terminal Adapter Cable )
- Page 14 Installation Battery Scenario B: Normal Battery Kit Battery Adapter Cables ( Anderson PP75 to Normal Battery with +/- Bolts Ring Terminal Adapter Cable ) Solar Panel Kit Solar Panel Solar Panel Extension Cables Required Tools Wrench (10mm) Wrench (14mm) Insulation Tape...
- Page 15 WARNING WARNING Place Rover on a vertical surface protected from direct sunlight, high temperatures, and water. Make sure there is good ventilation. Ventilation is highly recommended if mounted in an enclosure.
- Page 16 CAUTION WARNING Please refer to the "Recommendations of Wire Diameters and Fuses" in this manual, and Cable Check CAUTION WARNING...
- Page 17 System voltage Batterys in Series Batterys in Parallel according to the formula to ensure that it U1+U2+U3 U1=U2=U3 CAUTION WARNING Solar Panel Check (Optional) CAUTION WARNING...
- Page 18 CAUTION WARNING Working voltage solar panel/solar panel array according to module array = Solar Panels in Solar Panels in Series Parallel U1+U2+U3 U1=U2=U3 CAUTION...
- Page 19 WARNING For the Battery terminal, align the Battery Adapter Battery Adapter Cables Cable's Anderson PP75 connectors to the correct orientation and polarity. Remove the protective cover of the Solar Adapter Cable by sliding it downwards.
- Page 20 Push the protective cover upwards. Insert the Anderson connectors into the Solar terminal.
- Page 21 160A NH fuse in the top NH fuse disconnect switch. If the Anderson PP75 to Ring Terminal Adapter Cable is used to connect with the System Combiner Box, please refer to the user manual of REGO MPPT Solar Charge Controller at renogy.com for more detailed instructions.
- Page 22 For your safety, it is recommended to use a battery fuse. Please refer to the user manual of the charge controller at renogy.com for the recommended fuse. Connect the positive Battery Adapter Cable to one end...
-
Page 23: Solar Panel Wiring
Once the solar panel wiring is completed correctly, the charger controller's Solar indicator lights up green. If the Solar indicator does not light up, please refer to the user manual of the charge controller at renogy.com for troubleshooting instructions. STEP-4.3... - Page 24 For your safety, it is recommended to use a solar panel in-line fuse. Please refer to the user manual of the charge controller at renogy.com for the recommended fuse. Insert the Solar Panel In- line Fuse between the Solar Adapter Cable and the solar panel's positive cable.
- Page 25 WARNING...
- Page 26 WARNING...
- Page 27 *Optional Accessories WARNING...
- Page 28 REGO Battery Normal Battery with +/- Bolts...
- Page 29 The communication connection is optional. The communication between REGO products allows safe operation, smart control, and close monitoring. Depending on the installation condition, the communication connection needs to be established with backbone or daisy chain topology. Backbone Topology If an RV-C bus is pre-installed in the RV, please follow the backbone topology for the communication connection.
- Page 30 Locate the drop tap (not included) on the RV-C bus (not included) that is the closest to the charge controller installation location. The drop taps are usually located above the entry door, in the bathroom, or under the bed in the RV. STEP-8.3 Connect either of the CAN Communication Ports of the...
-
Page 31: Daisy Chain Topology
Recommended Accessories LP16 Plug (7-Pin) Communication Cable LP16 Terminator Plug (7-Pin) STEP-8.5 STEP-8.6 Connect REGO devices in Plug the Terminator Plug (sold separately) into the free CAN series through either of the CAN Communication Ports with the Communication Cables (sold separately). - Page 32 According to the actual situation, you can monitor the charge controller or even the whole system through DC Home app or Renogy Super Panel. Please scan the QR Code on the last page of the Quick Guide to download the DC Home app.
- Page 33 This device complies with Part 15 of the FCC Rules. Operation is subject to the following two conditions: (1) This device may not cause harmful interference, and (2) This device must accept any interference received, including interference that may cause undesired operation.
-
Page 34: Operation
Operation The charge controller is simple and easy to use. The plug & play design makes the installation easier, and the knob with 5 gears makes the selection of battery type more convenient. - Page 35 Operation User Mode Equalization Voltage Boost Voltage Float Voltage Undervoltage alarm voltage Equalization Interval Equalization Duration...
- Page 36 Parameters Parameter Value Model RCC60REGO System Voltage 800W Self-consumption 8-16V Battery Voltage Range Battery Type Operating Temperature Range Storage Temperature Range -3mV/ /2V Communication Dimensions...
- Page 37 Parameters WARNING Battery Type User setting AGM/SLD FLOODED LI (LFP) USER Range Parameters OverVolts Shutdown OverVolts Limit Equalization — — — Voltage Boost Voltage — Float Voltage Boost Return Voltage LowVolts Reconnect UnderVolts Recover UnderVolts Warning LowVolts Shutdown — Boost Duration 120 min 600 min Equalization...
- Page 38 Inspection Ensure there is no any corrosion, insulation damage, or discoloration marks of NOTE In some applications, corrosion may exist around the contacts inside the Anderson Corrosion can loosen springs and increase resistance, leading to premature connection WARNING Cleaning Wipe the charger housing and connector contacts with a damp cloth or non-metallic Storage By applying dielectric grease to each connector contact, the dielectric grease repels...
- Page 39 WARNING Fire WARNING Flooding Usual Smell Usual Noise CAUTION...
- Page 40 For additional support, contact the Renogy technical support team through renogy.com/ contact-us. Have the following information available when contacting Renogy. Owner name Contact information Order number Purchase channel Serial number Brief description of the issue...
- Page 41 "Contact Us". Renogy reserves the right to change the contents of this manual without notice. Manufacturer: RENOGY New Energy Co.,Ltd Address: No.66, East Ningbo Road Room 624-625 Taicang German Overseas Students Pioneer Park...
Need help?
Do you have a question about the REGO and is the answer not in the manual?
Questions and answers