
Related Manuals for Midea MCHT60L07


Summary of Contents for Midea MCHT60L07
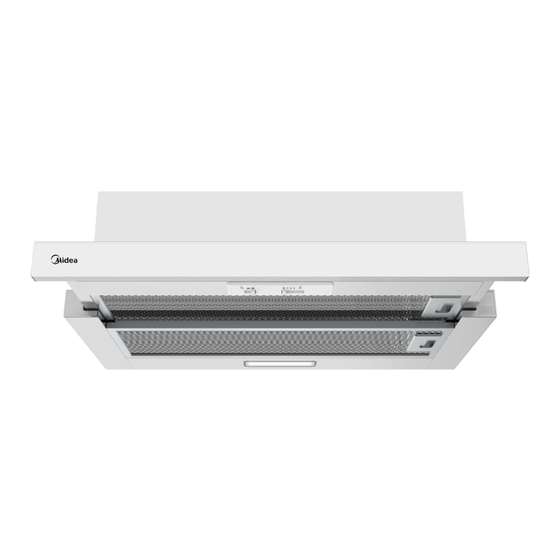
- Page 1 COOKER HOOD INSTRUCTION MANUAL Read this manual carefully before use Pictures in this manual are for reference only, the actual product shall prevail. MCHT60L07...
-
Page 2: Table Of Contents
Contents CONTENTS ..............SAFETY WARNING ............COMPONENTS .............. DIMENSIONS ..............INSTALLATION .............. CHOOSING A VENTILATION MODE ......CONNECTIONS .............. USAGE ................MAINTENANCE .............. LIGHTING ............... DISPOSAL OF OLD ELECTRICAL APPLIANCES ..TROUBLE SHOOTING ........... -
Page 3: Safety Warning
SAFETY WARNING INSTALLATION The manufacturer will not be liable for any damages resulting from incorrect or improper installation. The minimum safety distance between the cooker top and the range hood is 650 mm (some models can be installed at a lower height, please refer to the paragraphs ... -
Page 4: Components
COMPONENTS Ref. Qty. Product Components Hood Body, including: Controls, Light, Blower, Filter. Screws 5 x 50 Wall Plugs Flange... -
Page 5: Dimensions
DIMENSIONS unit:mm Min. Min. OPTIONAL 28/18... -
Page 6: Installation
INSTALLATION METHOD 1 OPTIONAL 28/18 According to the figure, determine the position of the hood at the cabinet. The wood strips should be line up with the 4 keyholes slots on the top of the range hood. At the cabinet, install 4 screws (as provided) according to the relative position of 4 key holes at the top of the hood. - Page 7 If the installation surface at the cabinet cannot adapt to the installation of the cooker hood, please fix the cooker hood on wall as per the diagram. On the wall, install 2 screws (as provided) according to the relative position of 2 key holes on the back of hood....
-
Page 8: Choosing A Ventilation Mode
CHOOSING A VENTILATION MODE Here are two ventitlation modes, extraction-air mode and recirculation mode, you should select one of them before installation. For extraction-air mode, the air is discharged out of the house by a pipe. For recirculation mode, the air is purified and discharged into the house. Recirculation mode Extraction-air mode Tips for Recirculation mode... -
Page 9: Usage
USAGE Operation Check beforehand Check the safety condition of the appliance: Check whether there are visible defects. Check whether all parts of the appliance have been properly and firmly fixed. Switching on/off Slide the front part of the cooker hood. ... -
Page 10: Maintenance
MAINTENANCE GREASE FILTERS CLEANING SELF-SUPPORTING METAL GREASE FILTERS The filters must be cleaned every 2 months or more frequently for heavy usage. It can be washed in a dishwasher. Pull the panels to open them. Remove the filters one by one by pushing them towards the back side of the hood and pulling downwards at the same time.... -
Page 11: Lighting
LIGHTING LIGHT REPLACEMENT Replacing the light Lightning inside the appliance is provided by a 1.5W LED light. Follow the below steps to replace the LED light: 1. Disconnect the appliance from the power or switch off the circuit breaker. 2. Remove the metal filters (see Cleaning and Replacing Filters) . 3. -
Page 12: Trouble Shooting
TROUBLE SHOOTING Malfunction Cause Solution The blades are blocked. Clean the blades The capacitor is damaged. Replace capacitor. Light on, but The motor is damaged. Replace motor. motor does not The internal wiring of motor is cut off/ work Replace motor. disconnected. - Page 14 The manufacturer shall decline all responsibility if the foregoing recommendations and instruction regarding installation, maintenance and usage are not abide and follow when using the cooker hood.
- Page 15 。 。 。 。 。 。 。 。 。 。 。 。 。 。 。 。 。 。 。 。 。 。 。 。 。 。 。 。 。 。 。 。 。 。 。 。 。 。 。 。 。 。 。 。 。 。 。 。 。 。 。 。 。 。 。 。 。 。 。 。 。 。 。 。 。 。 。 。 。 。 。 。 。 。 。 。 。 。 。 。 。 。 。 。 。 。 。 。 。 。 。 。 。 。 。 。 。 。 。 。 。 。 。 。 。 。 。 。 。 。 。 。 。 。 。 。 。 。 。 。 。 。 。 。 。 。 。 。 。 。 。 。 。 。 。 。 。 。 。 。 。 。 。 。 。 。 。 。 。 。 。 。 。 。 。 。 。 。 。 。 抽油煙機 使用說明書 操作前請仔細閱讀本手冊 本手冊圖片僅供參考,產品以實物為准。 MCHT60L07...
- Page 16 目錄 ................目錄 ............... 安全警告 ................組件 ................尺寸 ................安裝 .............. 選擇通風模式 ................連接 ................使用 ............... 維修保養 ............... 照明設備 ............... 廢棄處置 ............... 故障處理...
-
Page 17: 安全警告
安全警告 。 。 。 。 。 。 。 。 。 。 。 。 。 。 。 。 。 。 。 。 。 。 。 。 。 。 。 。 。 。 。 。 。 。 。 。 。 。 。 。 。 。 。 。 。 。 。 。 。 。 。 。 。 。 。 。 。 。 。 。 。 。 。 。 。 。 。 。 。 。 。 。 。 。 。 。 。 。 。 。 。 。 。 。 。 。 。 。 。 。 。 。 。 。 。 。 。 。 。 。 。 。 。 。 。 。 。 。 。 。 。 。 。 。 。 。 。 。 。 。 。 。 。 。 。 。 。 。 。 。 。 。 。 。 。 。 。 。 。 。 。 。 。 。 。 。 。 。 。 。 。 。 。 。 。 。 。 安裝... - Page 18 組 件 編號 數量 產品組件 抽油煙機主體,包括:控制器、燈、鼓風 機、濾芯。 5 x 50 螺 絲 牆上插頭 排氣管 接頭...
- Page 19 尺寸 。 。 。 。 。 。 。 。 。 。 。 。 。 。 。 。 。 。 。 。 。 。 。 。 。 。 。 。 。 。 。 。 。 。 。 。 。 。 。 。 。 。 。 。 。 。 。 。 。 。 。 。 。 。 。 。 。 。 。 。 。 。 。 。 。 。 。 。 。 。 。 。 。 。 。 。 。 。 。 。 。 。 。 。 。 。 。 。 。 。 。 。 。 。 。 。 。 。 。 。 。 。 。 。 。 。 。 。 。 。 。 。 。 。 。 。 。 。 。 。 。 。 。 。 。 。 。 。 。 。 。 。 。 。 。 。 。 。 。 。 。 。 。 。 。 。 。 。 。 。 。 。 。 。 。 。...
- Page 20 安裝 。 。 。 。 。 。 。 。 。 。 。 。 。 。 。 。 。 。 。 。 。 。 。 。 。 。 。 。 。 。 。 。 。 。 。 。 。 。 。 。 。 。 。 。 。 。 。 。 。 。 。 。 。 。 。 。 。 。 。 。 。 。 。 。 。 。 。 。 。 。 。 。 。 。 。 。 。 。 。 。 。 。 。 。 。 。 。 。 。 。 。 。 。 。 。 。 。 。 。 。 。 。 。 。 。 。 。 。 。 。 。 。 。 。 。 。 。 。 。 。 。 。 。 。 。 。 。 。 。 。 。 。 。 。 。 。 。 。 。 。 。 。 。 。 。 。 。 。 。 。 。 。 。 。 。 方法...
- Page 21 當櫥櫃安裝面不適於安裝抽油煙機時,按照圖示,請將抽油煙機的位置固定在牆上。 在牆上,根據抽油煙機背部 2 個鎖孔槽的相對位置安裝 2 個螺絲(隨附) 擰緊程度應便於下次安裝。 請同時在安全孔中安裝螺釘,防止抽油煙機前後移動,使用更安全。 。 。 。 。 。 。 。 。 。 。 。 。 。 。 。 。 。 。 。 。 。 。 。 。 。 。 。 。 。 。 。 。 。 。 。 。 。 。 。 。 。 。 。 。 。 。 。 。 。 。 。 。 。 。 。 。 。 。 。 。 。 。 。 。 。 。 。 。 。 。 。 。 。 。 。 。 。 。 。 。 。 。 。 。 。 。 。 。 。 。 。 。 。 。 。 。 。 。 。 。 。 。 。 。 。 。 。 。 。 。 。 。 。 。 。 。 。 。 。 。 。 。 。 。 。 。 。 。 。 。 。 。 。 。 。 。 。 。 。 。 。 。 。 。 。 。 。 。 。 。 。 。 。 。 。 。...
-
Page 22: 選擇通風模式
選擇通風模式 。 。 。 。 。 。 。 。 。 。 。 。 。 。 。 。 。 。 。 。 。 。 。 。 。 。 。 。 。 。 。 。 。 。 。 。 。 。 。 。 。 。 。 。 。 。 。 。 。 。 。 。 。 。 。 。 。 。 。 。 。 。 。 。 。 。 。 。 。 。 。 。 。 。 。 。 。 。 。 。 。 。 。 。 。 。 。 。 。 。 。 。 。 。 。 。 。 。 。 。 。 。 。 。 。 。 。 。 。 。 。 。 。 。 。 。 。 。 。 。 。 。 。 。 。 。 。 。 。 。 。 。 。 。 。 。 。 。 。 。 。 。 。 。 。 。 。 。 。 。 。 。 。 。 。 。... - Page 23 使用 。 。 。 。 。 。 。 。 。 。 。 。 。 。 。 。 。 。 。 。 。 。 。 。 。 。 。 。 。 。 。 。 。 。 。 。 。 。 。 。 。 。 。 。 。 。 。 。 。 。 。 。 。 。 。 。 。 。 。 。 。 。 。 。 。 。 。 。 。 。 。 。 。 。 。 。 。 。 。 。 。 。 。 。 。 。 。 。 。 。 。 。 。 。 。 。 。 。 。 。 。 。 。 。 。 。 。 。 。 。 。 。 。 。 。 。 。 。 。 。 。 。 。 。 。 。 。 。 。 。 。 。 。 。 。 。 。 。 。 。 。 。 。 。 。 。 。 。 。 。 。 。 。 。 。 。...
-
Page 24: 維修保養
維修保養 。 。 。 。 。 。 。 。 。 。 。 。 。 。 。 。 。 。 。 。 。 。 。 。 。 。 。 。 。 。 。 。 。 。 。 。 。 。 。 。 。 。 。 。 。 。 。 。 。 。 。 。 。 。 。 。 。 。 。 。 。 。 。 。 。 。 。 。 。 。 。 。 。 。 。 。 。 。 。 。 。 。 。 。 。 。 。 。 。 。 。 。 。 。 。 。 。 。 。 。 。 。 。 。 。 。 。 。 。 。 。 。 。 。 。 。 。 。 。 。 。 。 。 。 。 。 。 。 。 。 。 。 。 。 。 。 。 。 。 。 。 。 。 。 。 。 。 。 。 。 。 。 。 。 。 油脂過濾網... -
Page 25: 照明設備
照明設備 燈具更換 。 。 。 。 。 。 。 。 。 。 。 。 。 。 。 。 。 。 。 。 。 。 。 。 。 。 。 。 。 。 。 。 。 。 。 。 。 。 。 。 。 。 。 。 。 。 。 。 。 。 。 。 。 。 。 。 。 。 。 。 。 。 。 。 。 。 。 。 。 。 。 。 。 。 。 。 。 。 。 。 。 。 。 。 。 。 。 。 。 。 。 。 。 。 。 。 。 。 。 。 。 。 。 。 。 。 。 。 。 。 。 。 。 。 。 。 。 。 。 。 。 。 。 。 。 。 。 。 。 。 。 。 。 。 。 。 。 。 。 。 。 。 。 。 。 。 。 。 。 。 。 。 。 。 。 。... -
Page 26: 故障處理
故障處理 故障 原因 解決方案 扇葉 堵塞。 清理葉轮 。 電容器損壞。 更換電容器。 燈亮,但摩打 摩打 損壞。 更換 摩打 。 無法運行 摩打內部線路被切斷/斷開,有 更換 摩打 。 可能產生難聞氣味。 除上述情況外,請檢查以下情況: 摩打 燈和 均無法 燈損壞。 更換燈。 運行 按照電路圖連接電源線。 電源線鬆動。 出口和通風入口未有密封。 截斷電源,使用膠水將其密封。 漏油 取下 U 形截面,使用肥皂或油漆密封。 U 形截面和蓋的連接處有洩漏。 如扇葉損壞就會導致振動。 更換扇葉... - Page 28 如在使用抽油煙機時未遵守上述有關安裝、維修保養和使用的建議及說 明,製造商將不承擔任何責任。 P/N:16173000A18346...
Need help?
Do you have a question about the MCHT60L07 and is the answer not in the manual?
Questions and answers