Advertisement
Available languages
Available languages
Quick Links
H-9745, H-9746
H-9747
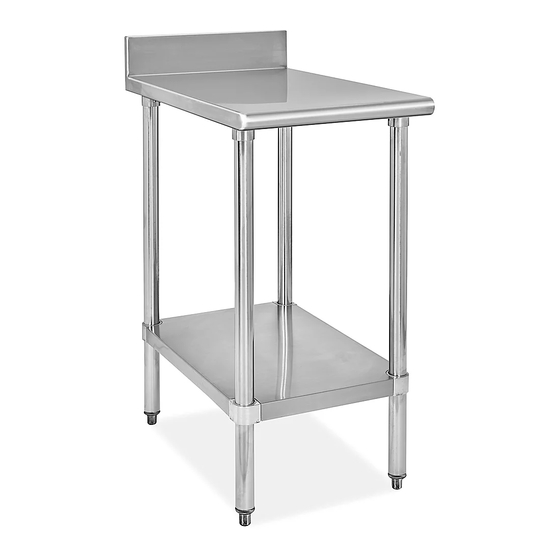
STAINLESS STEEL
FILLER TABLES
TOOL NEEDED
5/32" Allen Wrench
(included)
Tabletop x 1
Undershelf x 1
Figure 1
PAGE 1 OF 9
1-800-295-5510
uline.com
PARTS
Legs with Adjustable Feet x 4
ASSEMBLY
1.
Pour le français, consulter les pages 7-9.
NOTE: If purchased with optional casters,
adjustable feet will be replaced after complete
table assembly.
With the undershelf on its side, push the legs through
the collars to the desired height. To ensure exact
height, mark desired height on each leg with magic
marker or grease pencil. (See Figure 1)
NOTE: Each leg must be at the same height or
shelf collars could fail. Recommended height
from the floor to the top of the undershelf is 10"
and must be 6" or higher to meet NSF standards.
NOTE: Optional casters add 3⁄" to height.
Para Español, vea páginas 4-6.
Set Screw x 16
Caster x 4
(Optional)
1121 IH-9745
Advertisement

Subscribe to Our Youtube Channel
Related Manuals for U-Line H-9745


Summary of Contents for U-Line H-9745
- Page 1 Para Español, vea páginas 4-6. Pour le français, consulter les pages 7-9. H-9745, H-9746 1-800-295-5510 H-9747 uline.com STAINLESS STEEL FILLER TABLES TOOL NEEDED 5/32" Allen Wrench (included) PARTS Set Screw x 16 Tabletop x 1 Legs with Adjustable Feet x 4...
- Page 2 ASSEMBLY CONTINUED 2. Secure legs to undershelf with set screws using 5/32" Figure 2 Allen wrench. (See Figure 2) NOTE: Undershelf must be level. Use care not to overtighten screws or failure will occur. 3. Stand table upright and place tabletop onto legs, Figure 3 inserting legs into tabletop gussets.
-
Page 3: Optional Casters
OPTIONAL CASTERS Flip the table back over onto a smooth, non-marring Figure 5 surface. Remove adjustable feet from tube legs using a flat head screwdriver. (See Figure 5) NOTE: You may need to use a rubber mallet or hammer to assist. 2. - Page 4 H-9745, H-9746 800-295-5510 H-9747 uline.mx MESAS AUXILIARES DE ACERO INOXIDABLE HERRAMIENTA NECESARIA Llave Allen de 5/32" (incluida) PARTES 16 Tornillos de Ajuste 1 Cubierta 4 Ruedas (Opcionales) 4 Patas con Niveladores Ajustables 1 Repisa Inferior ENSAMBLE NOTA: Si se adquiere con las ruedas...
- Page 5 CONTINUACIÓN DEL ENSAMBLE 2. Asegure las patas a la repisa inferior con los tornillos Diagrama 2 de sujeción utilizando una llave Allen de 5/32”. (Vea Diagrama 2) NOTA: La repisa inferior debe estar nivelada. Tenga cuidado de no apretar demasiado los tornillos;...
- Page 6 RUEDAS OPCIONALES 1. Voltee la mesa sobre una superficie lisa, que no Diagrama 5 deje marcas. Retire los niveladores ajustables de los las patas usando un desarmador de cabeza plana. (Vea Diagrama 5) NOTA: Podría necesitar un mazo de caucho o martillo para ayudarse.
-
Page 7: Montage
H-9745, H-9746 1-800-295-5510 H-9747 uline.ca TABLE UTILITAIRE EN ACIER INOXYDABLE OUTIL REQUIS Clé Allen de 5/32 po (inclus) PIÈCES Vis de réglage x 16 Surface de table x 1 Montant avec pied réglable x 4 Tablette inférieure x 1 Roulette x 4 (en option) MONTAGE REMARQUE : Si la table est achetée avec les... - Page 8 MONTAGE SUITE 2. Fixez les montants à la tablette inférieure avec les vis Figure 2 de réglage et la clé Allen de 5/32 po. (Voir Figure 2) REMARQUE : La tablette inférieure doit être nivelée. Faites attention de ne pas trop serrer les vis, sinon une défaillance pourrait se produire.
- Page 9 ROULETTES OPTIONNELLES Retournez la table sur une surface lisse qui ne Figure 5 marque pas. Retirez les pieds réglables des montants tubulaires avec un tournevis à tête plate. (Voir Figure 5) REMARQUE : Aidez-vous d'un maillet en caoutchouc ou d'un marteau si nécessaire. 2.
Need help?
Do you have a question about the H-9745 and is the answer not in the manual?
Questions and answers