Jamara CCX Pro Instructions Manual
Hide thumbs
Also See for CCX Pro:
- Instructions manual (20 pages) ,
- Instruction (12 pages) ,
- Instructions (2 pages)

Related Manuals for Jamara CCX Pro


Summary of Contents for Jamara CCX Pro
- Page 1 Free for use in:: D, A, E, GB, F, B, DK, PL, FIN, GR, P, I, CH CCX Pro 2,4 GHz 06 1200 Instructions Ord. No. Please read these instructions carefully before use and keep them for future reference!
-
Page 2: Table Of Contents
The system may not be altered in any way, doing so will void the Always operate the CCX Pro 2,4 GHz with extreme caution and guarantee. follow the instructions listed here. Always switch the transmitter on before the receiver and switch off in the opposite order. -
Page 3: Certificate Of Conformity
Certificate of Conformity JAMARA hereby declare that the „CCX Pro 2,4 GHz“ follows the Relevant EEC Directives: appropriate and relevant EEC Directives, in particular those listed here and that the model has been constructed accordingly. • Radio & Telecom Terminal Equipment (R&TTE) 1999/5/EU The set contains a transmitter and a receiver. - Page 4 General Description Our CCX Pro 2,4 GHz system works on the ISM Band. This ‚new‘ The transmitter is equipped with a series of useful programming Band offers several advantages of which probably the most useful features. These features can be used to easily set the model up to...
- Page 5 Charging The Batteries If you use NiCad or NiHm rechargeable cells for your transmitter ensure that the cells are fully charged before using the system. Please be aware that due to the self-discharge characteristics of this type of cells that they should always be fully charged prior to use. Please refer to the battery manufacturers recommendations regarding charging current etc.
- Page 6 Connecting To The Receiver Warning! To avoid any short-circuit in your receiver, please make sure to connect the cables with correct polarity in mind. Switch Steering Servo Wiring Diagram For Electric Models Motor Battery Pack Channel 2 Channel 1 Receiver Switch Wiring Diagram for I/C Engine Models Receiver Battery...
-
Page 7: Ein- Und Ausschaltreihenfolge / Fail Safe
Binding The Receiver To The Transmitter As with all modern 2.4GHz R/C systems the receiver must be bound to Binding Button the transmitter to ensure that the receiver will only react to signals from that transmitter. If you wish to re-bind the receiver with the transmitter please proceed as follows: A. - Page 8 Switching On 1. Plug in all of the components. 2. Switch the transmitter on. 3. Connect the receiver battery to the receiver. 4. Check that the LEDs on both the transmitter and the receiver illuminate solidly. 5. The system is now correctly switch on and operating and can now safely be used.
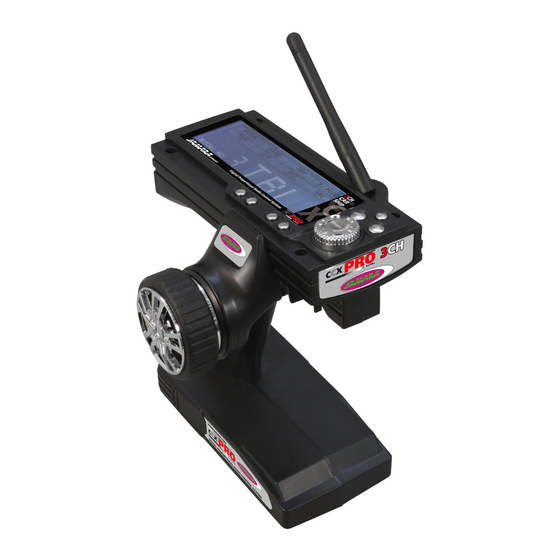
- Page 9 LCD Display Button functions Enter: Turn the knob to navigate through the menu Enter: Press the button for menu select End: Press to select a submenu Back: Press to exit the menu LCD Display: The transmitter is turned on, the display shows the voltage in volts and the number (here 8) and the name (in this case ACB) of the model.
- Page 10 Functions MODEL You can store up to 10 models in the transmitter. Each memory can be set individually for each model. The default setting of the transmitter shows „no. 0 „FS0“. In the picture you see the space „no. 8“ and the model name „ACB“.
- Page 11 Functions E POINT With this setting you can set the steering angle of your servos. If your steering servo differs at full scale (left or right) differ, you can adjust it with this setting. Output value is 100%. Displacements from 0 to 120% Press „Enter“...
- Page 12 Functions With this setting you can change the servo sensitivity, without af- fecting the total servo way. Output value is 0% Adjustment of -100 - 100% Press „Enter“ and select „EXP“ on the menu. The channel will flash. Press „END“ to enter the setting of the channel. Select with the ro- tary knob to set the value and press Enter to confirm the value.
- Page 13 Operating The Model This function is used to steer the model and turning the steering Steering wheel will make the models wheels to turn in the relevant direc- tion. Turning the wheel to the right will make the models wheels turn to right when viewed from above as illustrated.
- Page 14 Using A Simulator The CCX Pro 2,4 Ftransmitter can also be used to operate a computer simulator program loaded onto your PC or Notebook. If you wish to use the transmitter in this way you will have to purchase a Simulator Cable which will be available from your local dealer. The Jack-Plug of th eSimulator Cable plugs into the transmitter as shown and the USB plug will connect to your PC.
- Page 15 Notice...
- Page 16 Mistakes and technical changes reserved Copyright JAMARA e.K. 2010 Copies and reprints, also partly, only with allowance of JAMARA. Coupon Ask for the up-to-date catalogue with our com- plete assortment of goods (this very day). Name _______________________________ First name _______________________________...
Need help?
Do you have a question about the CCX Pro and is the answer not in the manual?
Questions and answers