Jamara CCX Pro 2,4 GHz Instructions Manual
Hide thumbs
Also See for CCX Pro 2,4 GHz:
- Instructions manual (20 pages) ,
- Instruction (12 pages) ,
- Instructions manual (20 pages)

Related Manuals for Jamara CCX Pro 2,4 GHz


Summary of Contents for Jamara CCX Pro 2,4 GHz
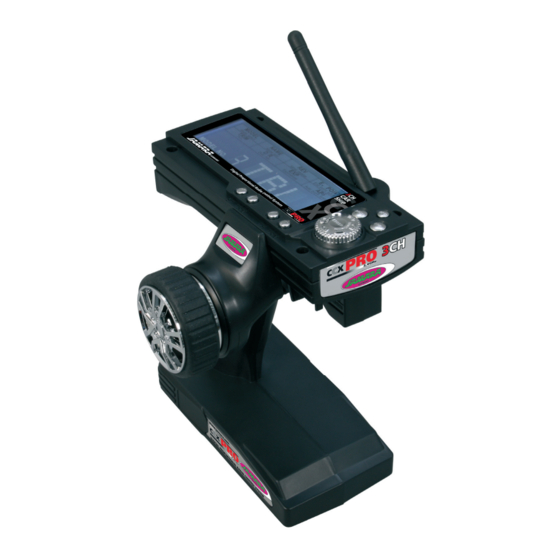
- Page 1 Autorizado en: Free for use in: EU | CH Emisora | Transmitter CCX Pro 2,4 GHz Manual de Instrucciones Ref. | Ord. No. 06 1200 Instructions...
-
Page 2: Table Of Contents
Always operate the CCX Pro 2,4 GHz with extreme caution and receptor y causar daños. follow the instructions listed here. Always switch the transmitter on before the receiver and switch off in the opposite order. -
Page 3: Información General
Información general Indemnity Statement Jamara K. no se hace responsable de los daños causados al pro- Jamara e.K. is not liable for any damage caused to the product ducto en sí o por medio de esto, a menos que esto se debe al mal itself or through this, provided this is due to improper operation funcionamiento o errores de manejo. -
Page 4: Declaración De Conformidad
GB - Certifi cate of Conformity Por medio de la presente, la empresa JAMARA e.K. declara que el JAMARA e. K. hereby declare that the model „CCX Pro 2,4 GHz, modelo ‘’CCX Pro 2,4GHz, No. 061200“cumple con las normativas No. 061200“ follows the appropriate and relevant EEC Directives, CE correspondientes (en particular con las indicadas más abajo) -
Page 5: Accesorios
Obtenga información sobre los productos actuales en el catálo- go o por Internet (www.jamara.de) You should only use high-quality accessories with this system such as those found in our product catalogue or under www.jamara. Descripción General General Description La emisora CCX Pro 2,4GHz trabaja con la banda ISM. La ventaja de Our CCX 2.4 GHz system works on the ISM Band. -
Page 6: Datos Técnicos | Características
154 x 127 x 270 mm Dimensiones 154 x 127 x 270 mm Weight 395 g 395 g (sin bateria) Peso Receiver CCX Pro 2,4 GHz Receptor CCX Pro 2,4 GHz Part No. 06 1185 Ref. 06 1185 Frequency Band 2,4 GHz Banda... -
Page 7: Dispositivos Para La Carga | Controle
ES - Dispositivos para la carga GB - Charging the batteries Cuando se usa un cargador NiCd o NiMH en la emisora, asegúrese If you use NiCad or NiHm rechargeable cells for your transmitter en- que las células estén completamente cargadas, la tiene que volver a sure that the cells are fully charged before using the system. -
Page 8: Instalación Del Receptor
ES - Controle GB - Controls Programación Programming Panel B. Pantalla LCD B. LCD display C. Volver C. Back D. Clave de enlace D. Binding Button E. Fin/ Selección de menú E. Selection for sub-menu F. Confi rmación ( derecha/izquierda) F. - Page 9 Modelo con un motor de combustión Interruptor Wiring Diagram for I/C Engine Models Switch Batería Receiver Battery Servo gas Throttle Servo Receptor Receiver Servo de dirección Steering Servo 2,4 GHz Antena 2,4 GHz Antenna Ajuste la antena vertical de 2,4GHz, como se muestra en la imagen. Usted no puede, conectar la antena a los objetos metálicos, porque Receptor Receptor...
-
Page 10: Enlace De La Emisora Con El Receptor
Clave de enlace Binding Button Batería Battery Conexión de enchufe Binding Plug Receptor Receiver ES - Enlace de la emisora con el receptor GB - Binding the receiber to the transmitter En un moderno sistema de 2,4GHz, es imprescindible que la emi- As with all modern 2.4GHz R/C systems the receiver must be bound sora y el receptor están unidos en el modelo. -
Page 11: Fail Safe
Fail Safe Batteria Batteria Battery Battery Conexión de enchufe Conexión de enchufe Binding Plug Binding Plug Receptor Receptor Receiver ES - Fail Safe GB - Fail Safe La programación de FailSafe. Programming of the integrated FailSafe unit. 1. Desprición de la función 1. -
Page 12: Interruptor
ES - Secuencia de la conexión 1. Recoger los elementos 2. Gire el canal 3. Conecte el cargador al receptor del canal 4. Compruebe que el LED de la estación y el receptor están conectados con la luz. 5. Si el sistema se enciende, ya se puede utilizar Enchufar Enchufar Switching on... -
Page 13: Pantalla Lcd
Pantalla LCD LCD Display Funciones de las teclas | Button functions Enter: Gire la perilla para seleccionar el menú Enter: Pulse el botón para seleccionar el elemento de menú. End: Pulse para seleccionar un submenú Back: Pulse para salir del menú Enter: Turn the knob to navigate through the menu Enter:... - Page 14 Funciónes | Functions Encienda la emisora y pulse „Enter“. Al gira el botón Enter entrará MODEL en el Menú „Modell“ para izquierda o derecha para seleccionar el modelo. Pulse para confi rmar el modelo de la tecla „Enter“. Para salir del menú, pulse el botón „Back“ You can store up to 10 models in the transmitter.
- Page 15 Funciónes | Functions E POINT Esta palma puede defi nir permite a la dirección de sus servos. Si el With this setting you can set the steering angle of your servos. If your servo de dirección a escala completa (a la izquierda oa la derecha) son steering servo differs at full scale (left or right) differ, you can adjust diferentes, puede ajustar esta confi guración.
- Page 16 Funciónes | Functions Pulse „Enter“ y Seleccione „D/R“en el menú. Parpadella el canal. Pulse „Enter“ para ajustar el canal. Gira el botón para fi jar el valor y pulse „ENTER“ para confi rmar el valor. This setting allows you to limit the adjustment of the servo travel. Output value is 100% Displacements from 0 - 100% Press „Enter“...
-
Page 17: Control De Vehículos
ES - Control de vehículos Volante Esta función es para manejar el volante del vehículo. Girando a la Steering dirección deseada. Como puede ser verifícado por un automóvil en las fotografi as secundarias. Con la opción adecuada (6) en la zona de programación puede, si necesario, hacer la inversión de la polaridad. -
Page 18: Uso Del Simulador
ES - Uso del simulador GB - Using A Simulator La emisora de coches CCX Pro 2,4 se puede utilizar con un simulador The CCX Pro 2,4 Transmitter can also be used to operate a computer de un vehículo en el ordenador de sobremesa o portátil. simulator program loaded onto your PC or Notebook. - Page 19 Tel.: 0043 (0)5523 52220 Tel.: 07151 5002192 Fax: 0043 (0)5523 522204 Fax: 07151 5002193 E-Mail: modellbau.boeckle@aon.at Web: www.modellbau-boeckle.com E-Mail: info@bay-tec.de Web: www.bay-tec.de Tuttomodellismo Team Jamara-HN Jesolo Via Ugo Foscolo 1 IT-30016 Jesolo-VE Tel/Fax 0039 (0)421 372735 E-Mail: bisoncorse@libero.it Web: www.tuttomodellismo.com Fbk:www.facebook.com/Tuttomodellismo...
- Page 20 Copyright JAMARA e.K. 2013 Prohibida su reproducción o distribución, por cualquier medio, Copying or reproduction in whole or part, salvo consentimiento expreso de JAMARA e.K. only with the expressed permission of JAMARA e.K. Vale Coupon Solicite hoy mismo nuestro catálogo principal con Order the current catalogue with our complete todos los productos de nuesta gama.
Need help?
Do you have a question about the CCX Pro 2,4 GHz and is the answer not in the manual?
Questions and answers