Table of Contents
Advertisement
Available languages
Available languages
Quick Links
H-1210, H-3571
RUBBERMAID
®
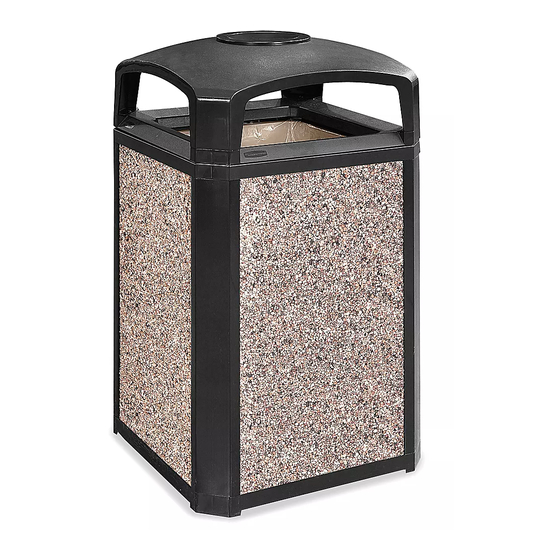
TRAY TOP RECEPTACLE
TOOLS NEEDED
Flathead Screwdriver
Lock and Key
Bolt x 8
Assembly
(Not Included)
Base x 1
BASE ASSEMBLY
1.
Place base on its side on a smooth, non-marring
surface.
2. Insert metal legs into square sockets in base.
(See Figure 1)
3. Attach metal leg to base with bolt, lock washer and
flat washer. (See Figure 1)
4. Repeat for remaining metal legs. Tighten all bolts
securely using screwdriver.
PAGE 1 OF 9
1-800-295-5510
uline.com
ASH
Electric Drill
(For optional lock and
key assembly)
Lock
Washer x 8
Washer x 8
Ash Tray x 1
Dome Top and Collar x 1
PARTS
Metal
Plastic
Leg x 4
Leg x 4
ASSEMBLY
Figure 1
Washer
Lock
Bolt
Washer
Para Español, vea páginas 4-6.
Pour le français, consulter les pages 7-9.
Liner x 1
Panel x 4
0321 IH-1210
Advertisement
Table of Contents

Related Manuals for U-Line RUBBERMAID H-1210


Summary of Contents for U-Line RUBBERMAID H-1210
- Page 1 Para Español, vea páginas 4-6. Pour le français, consulter les pages 7-9. H-1210, H-3571 1-800-295-5510 uline.com RUBBERMAID ® TRAY TOP RECEPTACLE TOOLS NEEDED Flathead Screwdriver Electric Drill (For optional lock and key assembly) PARTS Lock and Key Bolt x 8 Lock Washer x 8 Assembly...
-
Page 2: Panel Assembly
ASSEMBLY CONTINUED PLASTIC LEG ASSEMBLY DOME LID ASSEMBLY 1. Turn assembly upright. 1. Open dome top to expose square sockets in collar. 2. Slip four plastic legs over four metal legs and NOTE: Do not let dome top open all the way or position firmly over tabs. - Page 3 ASSEMBLY CONTINUED LOCK AND KEY ASSEMBLY 3. Insert front of lock through the back of the hole drilled in stationary collar. (See Figure 7) Remove key and nut from lock assembly and reserve. Figure 7 2. Drill hole through stationary collar using circle molded in plastic as a guide.
-
Page 4: Herramientas Necesarias
H-1210, H-3571 800-295-5510 uline.mx RUBBERMAID BOTE DE ® BASURA CON TAPA CON CENICERO HERRAMIENTAS NECESARIAS Desarmador Plano Taladro Eléctrico (Para ensamble opcional de la cerradura y llave) PARTES Ensamble de 8 Pernos 8 Rondanas 8 Rondanas Cerradura de Bloqueo y Llave 1 Cenicero (No incluido) 1 Base... - Page 5 CONTINUACIÓN DEL ENSAMBLE ENSAMBLE DE LAS PATAS DE PLÁSTICO ENSAMBLE DE LA TAPA TIPO DOMO Ponga el ensamble de pie. Abra la tapa tipo domo para dejar expuestas las cavidades cuadradas en el collar. 2. Deslice cuatro patas de plástico sobre cuatro patas de metal y posiciónelas firmemente sobre las pestañas.
- Page 6 CONTINUACIÓN DEL ENSAMBLE ENSAMBLE DE LA CERRADURA Y LLAVE 3. Inserte la parte delantera de la cerradura a través de la parte trasera del orificio taladrado en el collar Remueva la llave y tuerca del ensamble de la fijo. (Vea Diagrama 7) cerradura y resérvelas.
-
Page 7: Outils Requis
H-1210, H-3571 1-800-295-5510 uline.ca RUBBERMAID – POUBELLE – COUVERCLE CENDRIER OUTILS REQUIS Tournevis à tête plate Perceuse électrique (pour ensemble optionnel de serrure et clé) PIÈCES Ensemble de Boulon x 8 Rondelle de Rondelle x 8 serrure et clé blocage x 8 Cendrier x 1 Base x 1 Couvercle dôme... -
Page 8: Montage Des Panneaux
MONTAGE SUITE MONTAGE DES PIEDS EN PLASTIQUE MONTAGE DU COUVERCLE EN DÔME Ouvrez le couvercle dôme pour mettre à nu les Redressez l'ensemble. embouts carrés situés dans la collerette. 2. Faites glisser les quatre pieds en plastique sur les pieds REMARQUE : N'ouvrez pas complètement le en métal et placez-les fermement au-dessus des couvercle dôme sous peine de déboîter la... - Page 9 MONTAGE SUITE MONTAGE DE LA SERRURE 3. Insérez l'avant de la serrure à travers l'arrière du trou percé dans la collerette fixe. (Voir Figure 7) Retirez la clé et l'écrou de l'ensemble de serrure et mettez-les de côté. Figure 7 2.
Need help?
Do you have a question about the RUBBERMAID H-1210 and is the answer not in the manual?
Questions and answers