Advertisement
Available languages
Available languages
Table of Contents
H-1223, H-2217
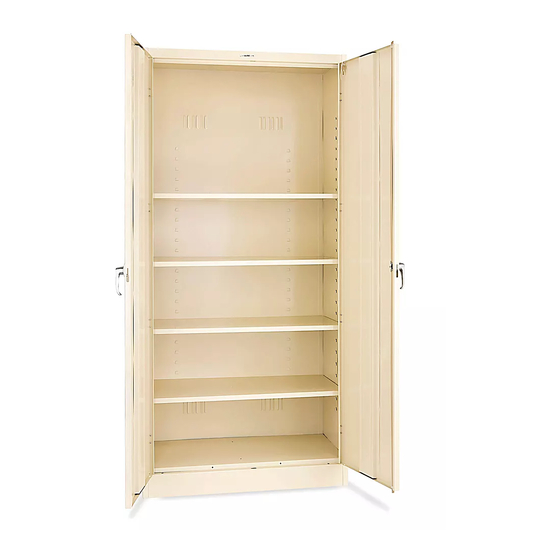
HEAVY DUTY CABINET
TOOLS NEEDED
11/32" Nut Driver (included)
CAUTION! Some parts may have sharp edges. Take care when handling various pieces to avoid
injury. For safety, wear a pair of work gloves when assembling.
5
3
7
#
DESCRIPTION
1
Back Panel
2
Right Side Panel
3
Left Side Panel
4
Shelf
5
Top
6
Bottom
7
Door & Frame Assembly
PAGE 1 OF 9
1-800-295-5510
uline.com
Flat Head Screwdriver
1
4
6
2
QTY.
1
1
1
4
1
1
1
Rubber Mallet
PARTS
8
11
8
#
DESCRIPTION
8
Lock Bar
9
Locking Handles with Keys
10
Locking Cam
11
Cotter Pin
12
Lock Bar Guide
Para Español, vea páginas 4-6.
Pour le français, consulter les pages 7-9.
12
10
9
12
QTY.
0321 IH-1223
2
1
1
1
2
Advertisement
Table of Contents

Related Manuals for U-Line H-1223


Summary of Contents for U-Line H-1223
- Page 1 Para Español, vea páginas 4-6. Pour le français, consulter les pages 7-9. H-1223, H-2217 1-800-295-5510 uline.com HEAVY DUTY CABINET TOOLS NEEDED 11/32" Nut Driver (included) Flat Head Screwdriver Rubber Mallet PARTS CAUTION! Some parts may have sharp edges. Take care when handling various pieces to avoid injury.
- Page 2 ASSEMBLY ASSEMBLING CABINET 4. Locate top which has the holes along the perimeter (5). Place top, with two holes toward front, under 1. Place the back (1) on a protected surface. The flanges at top of sides. Secure with three bolts along bottom flange should be facing upward.
-
Page 3: Attaching Handle
ASSEMBLY CONTINUED ATTACHING HANDLE Figure 5 1. Place the door handle Figure 7 (9) on the right hand door and fasten with two slotted bolts and lockwashers. (See Figure 7) 2. Turn the handle to the open position (parallel to the ground) and hook the locking bars (8) to the locking cam (10). -
Page 4: Herramientas Necesarias
H-1223, H-2217 800-295-5510 uline.mx GABINETE DE USO PESADO HERRAMIENTAS NECESARIAS Llave de Tuercas de Desarmador Plano Mazo de Hule 11/32" (incluida) PARTES ¡PRECAUCIÓN! Algunas partes pueden tener bordes filosos. Tenga cuidado al manipular las distintas piezas para evitar lesiones. Para seguridad, use guantes de trabajo para ensamblar las partes. - Page 5 ENSAMBLE ENSAMBLE DEL GABINETE 4. Localice la parte superior (5), la que tiene los orificios alrededor del perímetro. Coloque la parte 1. Coloque el panel posterior (1) sobre una superficie superior, con dos orificios hacia el frente, debajo de protegida. La pestaña inferior deberá mirar hacia las pestañas arriba de los laterales.
- Page 6 CONTINUACIÓN DE ENSAMBLE COLOCACIÓN DEL ASA Diagrama 5 1. Coloque el asa de Diagrama 7 bloqueo de la puerta (9) sobre la puerta derecha y fíjela con dos pernos ranurados y rondanas de seguridad. (Vea Diagrama 7) 2. Gire el asa a la posición abierta (paralela al piso) y fije las barras de seguridad (8) a la leva...
-
Page 7: Outils Requis
H-1223, H-2217 1-800-295-5510 uline.ca ARMOIRE ROBUSTE OUTILS REQUIS Tournevis à douille de Tournevis à tête plate Maillet en caoutchouc 11/32 po (compris) PIÈCES MISE EN GARDE! Certaines pièces peuvent avoir des bords tranchants. Faites attention lorsque vous manipulez les diverses pièces afin d’éviter les blessures. Pour sécurité, portez des gants de travail lors du montage. -
Page 8: Montage
MONTAGE MONTAGE DE L'ARMOIRE 4. Identifiez le dessus de l'armoire (5) avec des trous le long du périmètre. Placez-le, avec deux trous 1. Placez le panneau arrière (1) sur une surface orientés vers l'avant, sous les brides supérieures des protégée. Les brides inférieures doivent être panneaux lateraux. - Page 9 MONTAGE SUITE FIXATION DE LA POIGNÉE Figure 5 1. Placez la poignée de Figure 7 porte (9) sur la porte droite et fixez à l’aide de deux boulons fendus et deux rondelles de blocage. (Voir Figure 7) 2. Tournez la poignée en position ouverte (parallèle au sol) et accrochez les barres de verrouillage (8) à...
Need help?
Do you have a question about the H-1223 and is the answer not in the manual?
Questions and answers