
Subscribe to Our Youtube Channel
Related Manuals for ARTHUR HOLM AH12D 2A


Summary of Contents for ARTHUR HOLM AH12D 2A
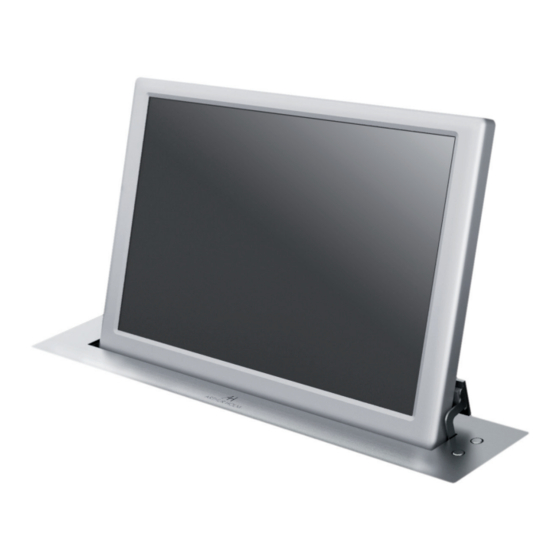
- Page 1 User manual AH12D 2A – AH12D 216A AH15D 2HDA AH17D 2HDA AH19D 2HDA AH22D X216GA Retractable monitors for furniture integration...
-
Page 2: Table Of Contents
Table of contents EC REGULATIONS & SECURITY SAFETY INSTRUCTIONS APPLICATIONS FEATURES BOX CONTENTS CONNECTIONS CONTROLS OSD MENU INPUT CONNECTORS WARNING AHnet PROTOCOL INPUT SIGNALS PRODUCT WARRANTY... - Page 3 Welcome Thank you for purchasing an ARTHUR HOLM product. Our product range has been designed to create the perfect meeting room, where the screens are a part of the interior design as well as essential communication tools. Please, read this installation and operating instructions carefully and keep them in a safe place for future reference.
-
Page 4: Ec Regulations & Security
EC Regulations and Security ATTENTION: Do not disassemble or modify the device in any way. This symbol warns of the presence of dangerous un-insulated voltages inside some of the components, of sufficient magnitude to expose people to risk of electronic shock. This symbol draws attention to important use and maintenance instructions in the manual that accompanies the unit. -
Page 5: Safety Instructions
Safety instructions PLUGS – Do not dismantle any part of the monitor power connector – Disconnect the power plug from the AC outlet when the monitor is not going to be used for an indefinite period of time POWER AND EXTENSIONS CORDS –... -
Page 6: Applications
This TFT-LCD product range is specially designed for desk integration at: Conference rooms Meeting rooms Board rooms Auditoriums Information desks Training rooms FEATURES - TFT Active Matrix display AH12D 2A 12" AH12D 216A 12" widescreen format AH15D 2HDA FULL HD 15" AH17D 2HDA FULL HD 17" AH19D 2HDA FULL HD 19"... -
Page 7: Box Contents
System Description BOX CONTENTS Before the installation of your motorised monitor, please check the contents of the shipping box, it must contain the following items: - Monitor - Power cord - Power supply 100-240Vac, 50-60Hz. Output 12V - Remote control (1 per 5 monitors) - User Manual CONNECTIONS Before connecting the power... -
Page 8: Controls
Controls REMOTE CONTROL POWER Switch ON/OFF the monitor MENU Activates the OSD menu on screen Cursor control up on the OSD menu DOWN Cursor control down on the OSD menu LEFT Cursor control left on the OSD menu RIGHT Cursor control right on the OSD menu Selects the function on the OSD menu. - Page 9 Controls IR SENSOR The IR sensor is located on the lower right side of the screen MONITOR MOVEMENT CONTROLS On the upper cover plate, there are two buttons to control the UP and DOWN monitor movements. 1. DOWN button control 2.
-
Page 10: Osd Menu
OSD menu ACCESSING THE MENU SYSTEM – With the OSD off, push the MENU button to activate the main OSD menu – Press the UP and DOWN button to move from one function to another. Please refer to the following sections below to view a complete list of all the functions available for the monitor –... - Page 11 OSD menu SCREEN Adjusts the image aspect on screen 16:9 Shows the image on screen with 16:9 aspect Shows the image on screen with 4:3 aspect Just scan Noise Adjusts the image noise filter Reduction Medium High Default Screen (Only for analogue signals) Auto Adjust Horizontal Position Vertical Position...
- Page 12 OSD menu SETUP Language OSD language selection Restore Adjusts the parameters to the initial factory parameters Factory Default Blending OSD window transparency Medium High OSD Duration Adjusts the time that the OSD menu window remains on screen Software Used for firmware upgrade mirror Update 0: Image with no flip 1: Vertical flip...
-
Page 13: Input Connectors
Input connectors DVI 1/ DVI A DVI-I input signal. Connect a DVI (digital) input signal and select DVI 1 on the OSD monitor menu. Use a DVI to VGA adapter to connect an ARGB (analogue) input signal and select DVI-A on the OSD monitor menu DVI 2 DVI-D input signal. -
Page 14: Warning
Warning Do not use the unit in horizontal position. It could damage the mechanical parts of the monitor. Do not use force to open or close the monitor. It could damage the mechanical parts of the monitor. Use this device only with the supplied accessories. The use of unapproved accessories, as a power supply unit, will invalid the warranty. -
Page 15: Ahnet Protocol
AHnet protocol COMMUNICATIONS PROTOCOL Communication RS422 Connection RJ45 Wiring CAT-5 SPEED & CONFIGURATION Baud Rate 38400 Data Bits Parity None Stop Bits WIRING DIAGRAM Data TX + Data TX – Data RX + Data RX – RJ-45 CONNECTION Pins 1 & 2 The units respond Pins 3 &... - Page 16 AHnet protocol AHnet PROTOCOL Using 5 bytes communication: BYTE 0 START BYTE BYTE 1 ADDRESS BYTE BYTE 2 COMMAND BYTE BYTE 3 VALUE 1 BYTE 4 VALUE2 COMMANDS COMMAND DESCRIPTION RESPONSE FA XX 01 01 00 GO UP FB XX 01 01 00 FA XX 01 00 00 GO DOWN FB XX 01 00 00...
- Page 17 AHnet protocol BITE CLOSED OPENED SCREEN ON SCREEN OFF DVI-A DVI1-D DVI2-D PROTECTION STOP MONITOR OK BITE BUTTON LOCK BUTTON UNLOCK To send an order to all the monitors, you must use the address 249 Dec. (Byte1) F9 Hex. (Byte1) In this case, the units do not send a reply...
- Page 18 AHnet protocol PICTURE COMMANDS COMMAND DESCRIPTION RESPONSE FA XX 15 00 00 ASK FOR BACKLIGHT LEVEL FB XX 15 00 ZZ FA XX 16 00 00 ASK FOR CONTRAST LEVEL FB XX 16 00 ZZ FA XX 17 00 00 ASK FOR BRIGHTNESS LEVEL FB XX 17 00 ZZ Number of the monitor address.
-
Page 19: Input Signals
Input Signals AH12D 2A RESOLUTION Horizontal freq (KHz) Vertical freq (Hz) Scanning type 800x600@60Hz 37.879 60.317 Progressive 800x600@72Hz 48.077 72.188 Progressive 800x600@75Hz 46.875 75.000 Progressive 1024x768@60Hz 48.363 60.005 Progressive 1024x768@70Hz 56.476 70.070 Progressive 1024x768@75Hz 60.023 75.030 Progressive AH12D 216A RESOLUTION... - Page 20 Input Signals AH15D 2HDA / AH17D 2HDA / AH19D 2HDA / AH22D 216A RESOLUTION Horizontal freq (KHz) Vertical freq (Hz) Scanning type 800x600@60Hz 37.879 60.317 Progressive 800x600@72Hz 48.077 72.188 Progressive 800x600@75Hz 46.875 75.000 Progressive 1024x768@60Hz 48.363 60.005 Progressive 1024x768@70Hz 56.476 70.070 Progressive 1024x768@75Hz...
- Page 22 Information on Disposal for users of waste Electrical & Electronic equipment This symbol on the products and/or accompanying documents means that used electrical and electronic products should not be mixed with general household waste. For proper treatment, recovery and recycling, please take these products to designated collection points, where they will be accepted on a free of charge basis.
-
Page 23: Product Warranty
LIMITED 2-YEAR WARRANTY LCD PANEL, LCD PANEL INVERTER, LCD CONTROLLER & POWER SUPPLY The electric parts of the Arthur Holm are warranted to be free from manufacturing defects for a period of two 2 years from the date of purchase. - Page 24 Patents ES 1051718UU ES 1061088UU EP 1574150A1 ES 1068395 U WO 2009141744 Fàtima 25, Sant Hipòlit de Voltregà MU 170180 ES00 08512 Barcelona – Spain EP 2289367 A1 tel: +34 93 850 23 76 / 23 83 MU 17301 ES00 fax: +34 93 850 25 50 / 23 72 MU 17322 ES00 web: www.arthurholm.com...
Need help?
Do you have a question about the AH12D 2A and is the answer not in the manual?
Questions and answers