Table of Contents
Advertisement
Quick Links
Advertisement
Table of Contents

Subscribe to Our Youtube Channel
Related Manuals for Electrolux EOB3400DOX


Summary of Contents for Electrolux EOB3400DOX
- Page 1 EOB3400DOX Oven User Manual...
-
Page 2: Table Of Contents
13. ENERGY EFFICIENCY.................. 24 WE’RE THINKING OF YOU Thank you for purchasing an Electrolux appliance. You’ve chosen a product that brings with it decades of professional experience and innovation. Ingenious and stylish, it has been designed with you in mind. So whenever you use it, you can be safe in the knowledge that you’ll get great results every time. -
Page 3: Safety Information
ENGLISH SAFETY INFORMATION Before the installation and use of the appliance, carefully read the supplied instructions. The manufacturer is not responsible for any injuries or damages that are the result of incorrect installation or usage. Always keep the instructions in a safe and accessible location for future reference. -
Page 4: Safety Instructions
Always use oven gloves to remove or put in • accessories or ovenware. Before maintenance cut the power supply. • Ensure that the appliance is switched off before • replacing the lamp to avoid the possibility of electric shock. - Page 5 ENGLISH cable. Should the mains cable need to • Do not apply pressure on the open be replaced, this must be carried out door. by our Authorised Service Centre. • Do not use the appliance as a work • Do not let mains cables touch or surface or as a storage surface.
- Page 6 2.4 Care and cleaning household appliances. Do not use it for house lighting. WARNING! WARNING! Risk of injury, fire, or Risk of electrical shock. damage to the appliance. • Before replacing the lamp, disconnect • Before maintenance, deactivate the the appliance from the power supply.
-
Page 7: Product Description
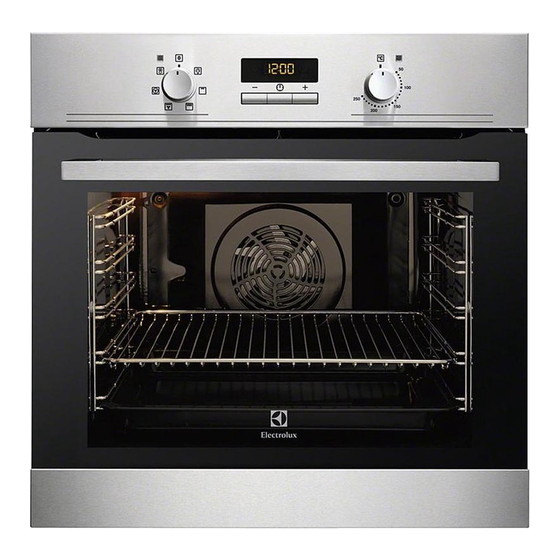
ENGLISH 3. PRODUCT DESCRIPTION 3.1 General overview Control panel Knob for the oven functions Power lamp / symbol Electronic programmer Knob for the temperature Temperature indicator / symbol Heating element Lamp Shelf support, removable Shelf positions 3.2 Accessories • Combi pan For cakes and biscuits. -
Page 8: Daily Use
5. DAILY USE 1. Turn the knob for the oven functions WARNING! to select an oven function. Refer to Safety chapters. 2. Turn the knob for the temperature to select a temperature. 5.1 Activating and deactivating 3. To deactivate the appliance turn the... -
Page 9: Clock Functions
ENGLISH Oven function Application True Fan Cook‐ To bake on up to three shelf positions at the same time and to dry food. Set the temperature 20 - 40 °C lower than for Top / Bottom Heat. Pizza Setting To bake food on one shelf position for a more inten‐ sive browning and a crispy bottom. - Page 10 6.2 Setting and changing the 6. The appliance deactivates automatically. time 6.5 Setting the TIME DELAY You must set the time before you operate the oven. 1. Set an oven function and temperature. flashes when you connect the appliance to the electrical supply, when 2.
-
Page 11: Using The Accessories
ENGLISH 7. USING THE ACCESSORIES Wire shelf and the deep pan together: WARNING! Push the deep pan between the guide Refer to Safety chapters. bars of the shelf support and the wire shelf on the guide bars above and make 7.1 Inserting the accessories sure that the feet point down. -
Page 12: Hints And Tips
9. HINTS AND TIPS aluminium foil on the components WARNING! when you cook. This can change the Refer to Safety chapters. baking results and cause damage to the enamel. The temperature and baking times in the tables are 9.2 Baking cakes guidelines only. - Page 13 ENGLISH Food Top / Bottom Heat True Fan Cooking Time Com‐ (min) ments Tempera‐ Shelf po‐ Tempera‐ Shelf po‐ ture (°C) sition ture (°C) sition Buttermilk 60 - 80 In a 26 cm cheese‐ cake cake mould Apple 2 (left and 80 - 100 In two 20 cake (Ap‐...
- Page 14 Food Top / Bottom Heat True Fan Cooking Time Com‐ (min) ments Tempera‐ Shelf po‐ Tempera‐ Shelf po‐ ture (°C) sition ture (°C) sition Biscuits / 140 - 150 1, 3 and 5 35 - 45 In a baking...
- Page 15 ENGLISH Food Top / Bottom Heat True Fan Cooking Time Com‐ (min) ments Tempera‐ Shelf po‐ Tempera‐ Shelf po‐ ture (°C) sition ture (°C) sition Bread 2 (2 and 25 - 40 6 - 8 rolls in a bak‐ rolls ing tray 230 - 250 230 - 250...
- Page 16 Food Top / Bottom Heat True Fan Cooking Time Com‐ (min) ments Tempera‐ Shelf po‐ Tempera‐ Shelf po‐ ture (°C) sition ture (°C) sition English 60 - 70 On a wire roast beef, shelf medium English 70 - 75...
- Page 17 ENGLISH Food Quantity Tempera‐ Time (min) Shelf po‐ ture (°C) sition Pieces 1st side 2nd side Fillet max. 12 - 15 12 - 14 steaks Beef max. 10 - 12 6 - 8 steaks Sausages 8 max. 12 - 15 10 - 12 Pork max.
- Page 18 Pork Food Quantity (kg) Temperature Time (min) Shelf posi‐ (°C) tion Shoulder, neck, 1 - 1.5 160 - 180 90 - 120 1 or 2 ham joint Chop, spare rib 1 - 1.5 170 - 180 60 - 90...
-
Page 19: Care And Cleaning
ENGLISH 9.8 Drying - True Fan Cooking the door and let it cool down for one night to complete the drying. • Cover trays with grease proof paper or baking parchment. • For a better result, stop the oven halfway through the drying time, open Vegetables Food Temperature... - Page 20 10.3 Cleaning the door gasket CAUTION! Do not use the oven without • Regularly do a check of the door the internal glass panel. gasket. The door gasket is around the frame of the oven cavity. Do not use 1.
-
Page 21: Troubleshooting
ENGLISH the above steps in the opposite sequence. The screen-printing zone must face the inner side of the door. Make sure that after the installation the surface of the glass panel frame on the screen-printing zones is not rough when you touch it. Make sure that you install the internal glass panel in the seats correctly. -
Page 22: Installation
11.1 What to do if... Problem Possible cause Remedy The oven does not heat The oven is deactivated. Activate the oven. The oven does not heat The clock is not set. Set the clock. The oven does not heat... - Page 23 ENGLISH 12.1 Building In 12.3 Electrical installation The manufacturer is not responsible if you do not follow the safety precautions from the Safety chapters. min. 550 This appliance is supplied with a main plug and a main cable. min. 560 12.4 Cable Cable types applicable for installation or replacement:...
-
Page 24: Energy Efficiency
13. ENERGY EFFICIENCY 13.1 Product Fiche and information according to EU 65-66/2014 Supplier's name Electrolux Model identification EOB3400DOX Energy Efficiency Index 100.0 Energy efficiency class Energy consumption with a standard load, con‐ 0.93 kWh/cycle ventional mode Energy consumption with a standard load, fan- 0.85 kWh/cycle... - Page 25 ENGLISH...
- Page 26 www.electrolux.com...
- Page 27 ENGLISH...
- Page 28 www.electrolux.com/shop...
Need help?
Do you have a question about the EOB3400DOX and is the answer not in the manual?
Questions and answers