Table of Contents
Advertisement
Quick Links
Advertisement
Table of Contents

Related Manuals for Electrolux EOB3400BOW


Summary of Contents for Electrolux EOB3400BOW
- Page 1 EOB3400BOW EOB3400EAX Oven User Manual...
-
Page 2: Table Of Contents
13. ENERGY EFFICIENCY.................. 27 WE’RE THINKING OF YOU Thank you for purchasing an Electrolux appliance. You’ve chosen a product that brings with it decades of professional experience and innovation. Ingenious and stylish, it has been designed with you in mind. So whenever you use it, you can be safe in the knowledge that you’ll get great results every time. -
Page 3: Safety Information
ENGLISH SAFETY INFORMATION Before the installation and use of the appliance, carefully read the supplied instructions. The manufacturer is not responsible for any injuries or damages that are the result of incorrect installation or usage. Always keep the instructions in a safe and accessible location for future reference. -
Page 4: Safety Instructions
Always use oven gloves to remove or put in • accessories or ovenware. Before carrying out any maintenance, disconnect the • appliance from the power supply. Ensure that the appliance is switched off before • replacing the lamp to avoid the possibility of electric shock. - Page 5 ENGLISH electrical ratings of the mains power • Deactivate the appliance after each supply. use. • Always use a correctly installed • Be careful when you open the shockproof socket. appliance door while the appliance is • Do not use multi-plug adapters and in operation.
- Page 6 • Do not clean the catalytic enamel (if the appliance is in operation. Heat applicable) with any kind of detergent. and moisture can build up behind a 2.5 Internal lighting closed furniture panel and cause...
-
Page 7: Product Description
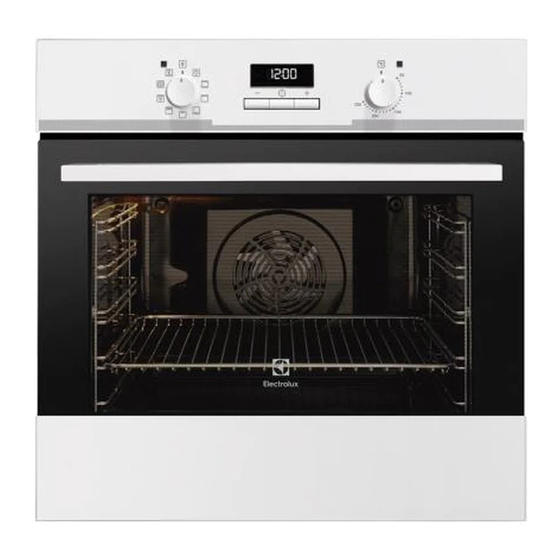
ENGLISH 3. PRODUCT DESCRIPTION 3.1 General overview Control panel Knob for the heating functions Power lamp / symbol Display Control knob (for the temperature) Temperature indicator / symbol Heating element Lamp Shelf support, removable Shelf positions 3.2 Accessories • Trivet For roasting and grilling. -
Page 8: Daily Use
5. DAILY USE WARNING! Oven func‐ Application Refer to Safety chapters. tion 5.1 Setting a heating function This function is de‐ signed to save energy 1. Turn the knob for the heating during cooking. For the Moist Fan functions to select a heating function. -
Page 9: Clock Functions
ENGLISH Oven func‐ Application Oven func‐ Application tion tion To bake pizza. To make To bake and roast food intensive browning and on one shelf position. a crispy bottom. Pizza Setting Conventional Cooking (Top / Bottom Heat) 5.3 Display A. Clock functions B. - Page 10 6.2 Setting the time. Changing 6.5 Setting the TIME DELAY the time 1. Set an oven function and You must set the time before you temperature. operate the oven. 2. Press again and again until flashes when you connect the starts to flash.
-
Page 11: Using The Accessories
ENGLISH 7. USING THE ACCESSORIES WARNING! Small indentation at the top Refer to Safety chapters. increase safety. The indentations are also anti-tip devices. The high rim 7.1 Inserting the accessories around the shelf prevents Wire shelf: cookware from slipping of the shelf. -
Page 12: Additional Functions
2. Put the deep pan into the oven on the necessary shelf position. 8. ADDITIONAL FUNCTIONS 8.1 Cooling fan dangerous overheating. To prevent this, the oven has a safety thermostat which When the oven operates, the cooling fan interrupts the power supply. The oven... - Page 13 ENGLISH condensation, add water each time after Initially, monitor the performance when it dries up. you cook. Find the best settings (heat setting, cooking time, etc.) for your Cooking times cookware, recipes and quantities when Cooking times depend on the type of you use this appliance.
- Page 14 Food Top / Bottom Heat True Fan Cooking Time Com‐ (min) ments Tempera‐ Shelf po‐ Tempera‐ Shelf po‐ ture (°C) sition ture (°C) sition Small 140 - 150 1, 3 and 5 30 - 45 In a baking cakes - tray three lev‐...
- Page 15 ENGLISH Bread and pizza Food Top / Bottom Heat True Fan Cooking Time Com‐ (min) ments Tempera‐ Shelf po‐ Tempera‐ Shelf po‐ ture (°C) sition ture (°C) sition White 60 - 70 1 - 2 pieces, bread 500 gr per piece Rye bread 190 30 - 45...
- Page 16 Food Top / Bottom Heat True Fan Cooking Time Com‐ (min) ments Tempera‐ Shelf po‐ Tempera‐ Shelf po‐ ture (°C) sition ture (°C) sition Pork 90 - 120 On a wire shelf Veal 90 - 120 On a wire...
- Page 17 ENGLISH 9.3 Grilling Set the maximum temperature. Preheat the oven for 3 minutes. Use the fourth shelf position. Food Quantity Time (min) Pieces Quantity 1st side 2nd side (kg) Fillet steaks 12 - 15 12 - 14 Beef steaks 10 - 12 6 - 8 Sausages 12 - 15...
- Page 18 Veal Food Tempera‐ Time (min) Food Tempera‐ Time (min) ture (°C) ture (°C) Chicken, 190 - 210 50 - 70 Roast veal, 160 - 180 90 - 120 poulard, 1 - 1 kg 1.5 kg Knuckle of 160 - 180 120 - 150 Duck, 1.5 -...
- Page 19 ENGLISH Food Accessories Temperature Shelf po‐ Time (min) (°C) sition Soufflè, 6 ceramic ramekins on 45 - 55 pieces wire shelf Sponge flan flan base tin on wire 35 - 45 base shelf Victoria Sand‐ baking dish on wire 35 - 50 wich shelf Poached fish,...
- Page 20 Vegetables For one tray use the third shelf position. For 2 trays use the first and fourth shelf position. Food Temperature (°C) Time (h) Beans 60 - 70 6 - 8 Peppers 60 - 70 5 - 6 Vegetables for sour...
- Page 21 ENGLISH Food Function Acces‐ Shelf Tem‐ Time (min) Comments sories posi‐ pera‐ tion ture (°C) Apple pie True Fan Wire 70 - 90 Use 2 tins (20 Cooking / shelf cm diameter), di‐ Fan Cook‐ agonally shifted. Fatless‐ Conven‐ Wire 40 - 50 Use a cake ponge...
-
Page 22: Care And Cleaning
Food Function Acces‐ Shelf Tem‐ Time (min) Comments sories posi‐ pera‐ tion ture (°C) Beef bur‐ Grilling Wire max. 20 - 30 Put the wire shelf shelf and on the fourth lev‐ 6 pieces, dripping el and the drip‐... - Page 23 ENGLISH 2. Pull the rear end of the shelf support away from the side wall and remove 2. Lift and turn the levers fully on both hinges. Install the removed accessories in the opposite sequence. 10.5 Removing and installing door The oven door has two glass panels.
-
Page 24: Troubleshooting
5. Hold the door trim (B) on the top When installed correctly the door trim edge of the door at the two sides and clicks. push inwards to release the clip seal. Make sure that you install the internal glass panel in the seats correctly. -
Page 25: Installation
ENGLISH Problem Possible cause Remedy The oven does not heat The necessary settings are Make sure that the settings not set. are correct. The oven does not heat The fuse is blown. Make sure that the fuse is the cause of the malfunc‐ tion. - Page 26 12.1 Building In min. 550 min. 560 min. 550 min. 560 12.2 Securing the appliance to 12.3 Electrical installation the cabinet The manufacturer is not responsible if you do not follow the safety precautions from the Safety chapters. This appliance is supplied without a main plug and a main cable.
-
Page 27: Energy Efficiency
Number of cavities Heat source Electricity Volume 72 l Type of oven Built-In Oven EOB3400BOW 28.1 kg Mass EOB3400EAX 27.8 kg EN 60350-1 - Household electric cooking When possible, do not preheat the oven appliances - Part 1: Ranges, ovens, before you put the food inside. - Page 28 Keep food warm Moist Fan Baking Choose the lowest possible temperature Function designed to save energy during setting to use residual heat and keep a cooking. meal warm. 14. ENVIRONMENTAL CONCERNS appliances marked with the symbol Recycle materials with the symbol with the household waste.
- Page 29 ENGLISH...
- Page 30 www.electrolux.com...
- Page 31 ENGLISH...
- Page 32 www.electrolux.com/shop...
Need help?
Do you have a question about the EOB3400BOW and is the answer not in the manual?
Questions and answers