Dundalk LeisureCraft Luna Assembly Instructions
Hide thumbs
Also See for Luna:
- Assembly instructions manual (41 pages) ,
- Assembly instructions manual (44 pages)
Advertisement
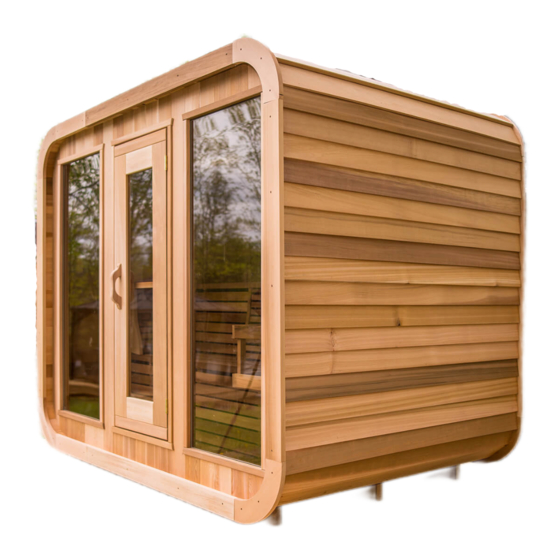
Dundalk LeisureCraft
Luna Sauna
Assembly Instructions
Start by removing all protective film from the stainless
steel pieces before installation.
Install the floor plate centered between the benches at
the back wall.
Using 2 people, place the Harvia M3 Heater centered on
the floor plate.
Insert the adapter pipe on the back of the stove as a
guide.
Slide it up against the back wall.
This is to find the placement for the hole you will soon
cut out.
32
ph: 519-923-9813 | info@dundalkleisurecraft.com| web: www.dundalkleisurecraft.com
Advertisement
Table of Contents

Subscribe to Our Youtube Channel
Related Manuals for Dundalk LeisureCraft Luna


Summary of Contents for Dundalk LeisureCraft Luna
- Page 1 Dundalk LeisureCraft Luna Sauna Assembly Instructions Start by removing all protective film from the stainless steel pieces before installation. Install the floor plate centered between the benches at the back wall. Using 2 people, place the Harvia M3 Heater centered on the floor plate.
- Page 2 Dundalk LeisureCraft Luna Sauna Assembly Instructions Using a pencil or pen, trace around the outside of the adapter pipe. Measure out 1” (25mm) past your circle and draw another line. This will be the line you cut out so the chimney pipe will fit through.
- Page 3 Dundalk LeisureCraft Luna Sauna Assembly Instructions Connect the short chimney connector to the adapter pipe using the stainless steel screws provided with the chimney kit. Slide the short Chimney connector through the hole and insert the chimney adapter into the back of the stove.
- Page 4 Dundalk LeisureCraft Luna Sauna Assembly Instructions Attach middle chimney connector to the “T” with provided screws. Attach rain guard to top chimney piece and secure with provided screws. Wrap the chimney support strap around chimney and use the provided nut and bolt to secure.
- Page 5 Dundalk LeisureCraft Luna Sauna Assembly Instructions Tighten up the chimney support brackets with a 7/16” (11mm) socket or wrench until snug. Attach chimney top onto chimney and secure with provided screws. Connect the stove handle to the door with the 2 provided screws.
Need help?
Do you have a question about the Luna and is the answer not in the manual?
Questions and answers