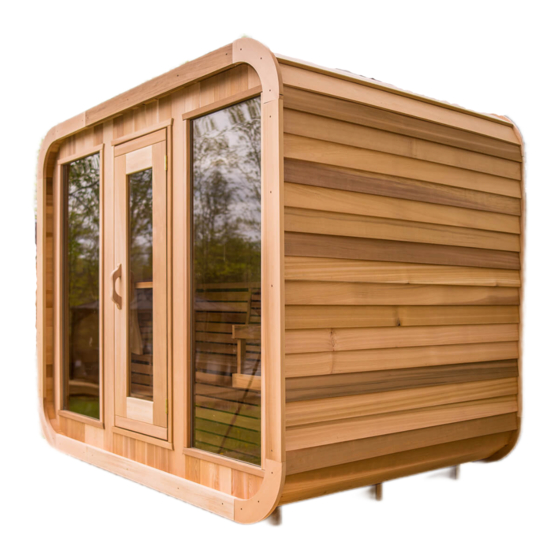
Dundalk LeisureCraft Luna Assembly Instructions Manual
Hide thumbs
Also See for Luna:
- Assembly instructions (5 pages) ,
- Assembly instructions manual (44 pages)
Advertisement
Quick Links
Dundalk LeisureCraft Luna Sauna Assembly
Instructions
Please read and understand the complete instructions prior to assembly and use of your sauna. Customer agrees not to hold
Dundalk LeisureCraft Inc. and any of its authorized dealers liable for improper installation, maintenance and repair of this product
Requirements:
* 2 People (recommended)
* Step or Extension Ladder
* Cordless Drill (we supply the bit)
* Tape Measure
* Staple Gun
* Utility Knife
* Hacksaw
* 3/16" Drill bit
* 1 ½" or less staples or nails to fasten bevel siding
View the assembly process on
ph: 519-923-9813 | info@dundalkleisurecraft.com| web: www.dundalkleisurecraft.com
Advertisement

Subscribe to Our Youtube Channel
Related Manuals for Dundalk LeisureCraft Luna


Summary of Contents for Dundalk LeisureCraft Luna
- Page 1 Please read and understand the complete instructions prior to assembly and use of your sauna. Customer agrees not to hold Dundalk LeisureCraft Inc. and any of its authorized dealers liable for improper installation, maintenance and repair of this product Requirements:...
- Page 2 Index Sauna Base Preparation (Standard) – Page 3 Luna Sauna Assembly (Standard) – Page 4 to 18 Standard Bench Installation (Standard) – Page 19 to 23 Lounge Bench Installation (Option) – Page 24 & 25 Electric Heater Installation (Option) – Page 26 to 28 Wood Heater Installation (Option) –...
- Page 3 Dundalk LeisureCraft Luna Sauna Assembly Instructions Sauna Base Preparation A solid base for your sauna is recommended and can be made from any of the following. Concrete Pad Wooden Deck Crushed Gravel Patio Stones/Paver Blocks (Refer to the below chart for minimum base requirements) It is recommended to build a base larger than required to provide a sitting area for cooling off during your sauna session.
- Page 4 Dundalk LeisureCraft Luna Sauna Assembly Instructions Make sure you have a solid base for your Luna sauna and lay out the cradle pieces. Gather up your pieces for the back wall. This should consist of 17 pcs of 2x6x80”(5cm x 15cm x 203cm) and 4 pcs pieces with rounded corners.
- Page 5 Dundalk LeisureCraft Luna Sauna Assembly Instructions Thread the longer threaded rods through the holes. * This will take some finessing Make sure staves are tight together. Place a washer and nut on each end of the threaded rod for each hole.
- Page 6 Dundalk LeisureCraft Luna Sauna Assembly Instructions Cut off any excess threaded rod with a hacksaw. Using the assembled back wall as a guide, start the assembly of the front wall with the side rounded stave. Slide the shorter threaded rods through the holes and add 5 small blocks on to the threaded rods on the top and bottom.
- Page 7 Dundalk LeisureCraft Luna Sauna Assembly Instructions Next, Thread on a full size stave. Again this stave should sit inside the groove of the window. Thread one small stave on each threaded rod. Carefully insert the door between the 2 small staves.
- Page 8 Dundalk LeisureCraft Luna Sauna Assembly Instructions Thread on a full size stave, then 5 short staves then the other window in the same manner as the opposite side. Finish the front wall by adding the corner stave. Tighten the nuts again in the same manner as the back wall.
- Page 9 Start laying out the bottom staves, there will be 6 staves on either side of the center stave. * The staves for the Luna without the porch option are symmetrical and can be used on the left or right side of the center stave.
- Page 10 Dundalk LeisureCraft Luna Sauna Assembly Instructions After laying out the bottom staves, line them up so the ends are flush. * All the grooves should be in line with each other as well. Use a rubber mallet to tap all the staves tight together.
- Page 11 Dundalk LeisureCraft Luna Sauna Assembly Instructions Repeat process for the front wall. Once both walls are centered in the grooves, use any stave to temporarily brace the walls to prevent them from falling. Start adding staves to both sides. Use the Rubber mallet to tap them tight to each other.
- Page 12 Dundalk LeisureCraft Luna Sauna Assembly Instructions Continue to add staves on both sides in the same process, tapping tight to each other then securing with screws. * When attaching the corner staves, the inside of the staves will be tight and flush to each other which will leave the outside open a bit.
- Page 13 Adding a Spacer to the Top Sauna Stave In your sauna package you will find a spacer stave that is square on both sides that is only required If there happens to be a “gap” after installing all of the staves, (as in picture) You will need to follow the following instructions to add this spacer to the top special stave.
- Page 14 Making the Top Sauna Stave narrower In rare instances, your sauna staves will be too tight not allowing the staves to settle into position correctly. (as in picture) This doesn’t happen often and the sauna staves and bands are always better being as tight as possible. You will need to follow the following instructions to make the top special stave narrower.
- Page 15 Dundalk LeisureCraft Luna Sauna Assembly Instructions The following 2 steps are only required if the porch option was chosen, and only on the front of the sauna. Using 2 ½” (64mm) screws to secure the front staves together. * Pre drill these holes with the 3/16” drill bit to prevent the staves from splitting.
- Page 16 Dundalk LeisureCraft Luna Sauna Assembly Instructions After securing the front of the membrane to the sauna, pull the rubber tight to the back and secure with staples. Cut the excess rubber off the back of the sauna and then secure both the front and back of the membrane with more staples.
- Page 17 Dundalk LeisureCraft Luna Sauna Assembly Instructions After both corner pieces are secured, make sure the long front piece is level and then secure in the same manner. Continue to line up the trim pieces all the way around the front of the sauna and secure with 2” (51mm) screws.
- Page 18 Dundalk LeisureCraft Luna Sauna Assembly Instructions When you get to the rubber membrane, secure the bevel siding under the membrane. Secure the next piece over top the membrane like shown. Continue to add the bevel siding till you reach the top.
- Page 19 Dundalk LeisureCraft Luna Sauna Assembly Instructions The Dundalk Leisurecraft Luna Sauna is available with the choice of 3 different bench layouts. Back Wall two-tiered Bench Two-tiered L shaped Bench (L bench available on right or left side) Side Wall Benches * Lounge bench upgrade only available on Side wall layout.
- Page 20 Dundalk LeisureCraft Luna Sauna Assembly Instructions Space the bench brackets out along the back wall. * Do not fasten yet. Place the top bench on to the bench supports. Line the bench supports up with the seat support bracket on the bottom of bench.
- Page 21 Dundalk LeisureCraft Luna Sauna Assembly Instructions Repeat process for the lower bench, making sure that the bench supports line up with the seat support bracket on the bottom of bench. Secure the bench bracket up into the lower bench seat supports with 2 ½”...
- Page 22 Dundalk LeisureCraft Luna Sauna Assembly Instructions Place the top bench on to the bench supports. Line the bench supports up with the seat support bracket on the bottom of bench. Once bench brackets are lined up with the seat supports, secure the bench brackets to the back wall using 2 ½”...
- Page 23 Dundalk LeisureCraft Luna Sauna Assembly Instructions On a clean flat surface, assemble the porch bench and front wall enclosure using 2 ½” (64mm) screws into the pre drilled pocket holes. Position the assembled bench on the porch floor and up against the front wall of the barrel Sauna.
- Page 24 Dundalk LeisureCraft Luna Sauna Assembly Instructions Bring in the front bench enclosure. Lay the front enclosure down and using the pre drilled holes, assemble the lounge bench support to the front enclosure using 2” (51mm) screws. Ensure bench assembly is level and secure to end walls using 2 ½”...
- Page 25 Dundalk LeisureCraft Luna Sauna Assembly Instructions Place lounge bench on top of bench supports and secure with 2 ½” (64mm) screws. * The backrest is not available with the lounge bench option as it impedes in the correct operation of bench.
- Page 26 Dundalk LeisureCraft Luna Sauna Assembly Instructions The following installation instructions are for the Helo Cup (Saaku) electric heater. Always refer to the original sauna heater manual for confirmation. Always Read all instructions carefully. Measure the proper distances for the heater template according to the heater manufacturers instructions.
- Page 27 Dundalk LeisureCraft Luna Sauna Assembly Instructions The following installation instructions are for the Helo Cup (Saaku) electric heater. Always refer to the original sauna heater manual for confirmation. Always Read all instructions carefully. Hang the heater on the two upper screws.
- Page 28 Dundalk LeisureCraft Luna Sauna Assembly Instructions Locate the pieces for your heater guard. They consist of the following: (A) 2 - Assembled side pieces (B) 2 - heater guard support 4 – 2 ½” (64mm) screws 8 – 1 ½” (38mm) screws Stand the 2 Assembled side pieces (A) of the heater guard on edge with pre-drilled holes on the bottom.
- Page 29 Dundalk LeisureCraft Luna Sauna Assembly Instructions To install the wood burning heater, lift the heater into the hole in the back of the sauna. * Woodstove is very heavy and 2 people are recommended for lifting. Secure the wood stove with the provided 1 ½” (38mm) lag screws.
- Page 30 Dundalk LeisureCraft Luna Sauna Assembly Instructions Insert the flanged end of the chimney head onto the elbow firmly. * Some finessing may be required. Ensure that the flanged end of the chimney is securely in place Rinse the rocks with water before placing in the heater.
- Page 31 Dundalk LeisureCraft Luna Sauna Assembly Instructions Start by removing all protective film from the stainless steel pieces before installation. Install the floor plate centered between the benches at the back wall. Using 2 people, place the Harvia M3 Heater centered on the floor plate.
- Page 32 Dundalk LeisureCraft Luna Sauna Assembly Instructions Using a pencil or pen, trace around the outside of the adapter pipe. Measure out 1” (25mm) past your circle and draw another line. This will be the line you cut out so the chimney pipe will fit through.
- Page 33 Dundalk LeisureCraft Luna Sauna Assembly Instructions Connect the short chimney connector to the adapter pipe using the stainless steel screws provided with the chimney kit. Slide the short Chimney connector through the hole and insert the chimney adapter into the back of the stove.
- Page 34 Dundalk LeisureCraft Luna Sauna Assembly Instructions Attach middle chimney connector to the “T” with provided screws. Attach rain guard to top chimney piece and secure with provided screws. Wrap the chimney support strap around chimney and use the provided nut and bolt to secure.
- Page 35 Dundalk LeisureCraft Luna Sauna Assembly Instructions Tighten up the chimney support brackets with a 7/16” (11mm) socket or wrench until snug. Attach chimney top onto chimney and secure with provided screws. Connect the stove handle to the door with the 2 provided screws.
- Page 36 Dundalk LeisureCraft Vent Kit Assembly Instructions (Optional) In most cases, venting is not required for proper sauna function, however it increases air flow circulation as well as ventilation when the sauna is not in use. Many people prefer not to install vents in pre fabricated saunas.
- Page 37 Dundalk LeisureCraft Vent Kit Assembly Instructions (Optional) On the wall away from the heater, close to the top, drill holes in the same manner as the previous step Install the Stainless Vent cover on the outside using Install the cedar vent cover on the inside of the sauna 1-1/2”...
- Page 38 Sauna Light Assembly Instructions (Optional) If a light is ordered, Dundalk Leisurecraft supplies the light fixture only. The light switch and any other electric components need to be purchased separately and should be installed according to the light manufacturers instructions and by a licensed electrician.
-
Page 39: Product Maintenance
Dundalk LeisureCraft Sauna Light Assembly Instructions (Optional) You can also install on the ceiling. ( Do not install light where you may hit your head on it) Installing the light under one of the benches can create a relaxing ambiance within the sauna that many customers enjoy. - Page 40 Congratulations on the assembly of your new Western Red Cedar Luna Sauna! For assistance in the assembly of your Cedar Luna sauna please visit our support page at: https://www.dundalkleisurecraft.com/support/ Or to view the assembly process got to: https://www.youtube.com/watch?v=fEK-idUJ1SE ph: 519-923-9813 | info@dundalkleisurecraft.com| web: www.dundalkleisurecraft.com...
-
Page 41: How To Take A Sauna
CHILDREN MUST BE SUPERVISED BY ADULTS. WARRANTY Dundalk LeisureCraft Inc. warrants our saunas against defects in materials and workmanship under normal/residential use for a period of five (5) years, as applicable, from the date of receipt of the product by the original end-user consumer.
Need help?
Do you have a question about the Luna and is the answer not in the manual?
Questions and answers