
Subscribe to Our Youtube Channel
Related Manuals for Dundalk LeisureCraft Pure Cube PU550


Summary of Contents for Dundalk LeisureCraft Pure Cube PU550
- Page 1 Rev.3 Pure Cube Indoor Sauna Assembly Instructions Tools Required Carpenters Hammer Cordless Drill 7/16” Drill Bit 11/16” Drill Bit Hex Keys (Included) Tape Measure Step Ladder Rubber Mallet Level...
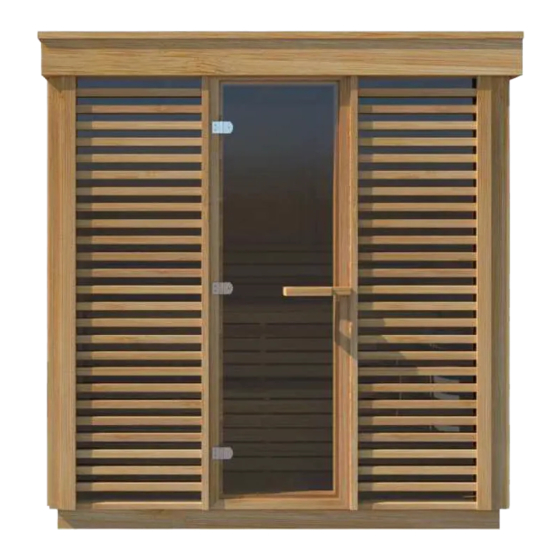
- Page 2 Indoor Pure Cube Sauna Assembly Instructions Before you begin the installation of your Pure Cube Sauna, Please read these instructions completely. Make sure the placement for your sauna is level and on a solid base. Parts Identification The pure cube indoor sauna is available in 2 sizes, PU550 - 5’...
- Page 3 Indoor Pure Cube Sauna Assembly Instructions Parts Identification (Cont..) Top Bench Bottom Bench Backrest Bench Seats Bench Front Enclosures Bench Brackets Saaku Electric Heater Flat Floor Fig 2a Hardware Fig 2b 2 ½” (63mm) 2 ½” (63mm) 2 ¾” (70mm) Threaded Cap Nuts 2 ¾”...
- Page 4 Indoor Pure Cube Sauna Assembly Instructions To start the assembly of your indoor Pure Cube sauna, place a wide wall panel and a corner post together ensuring they are flush. * Depending on your sauna layout, this may be a large or a small panel.
- Page 5 Indoor Pure Cube Sauna Assembly Instructions Secure a narrow wall panel to the wide panel using the provided lag bolts and nuts. Tighten with an allen key or drill. Secure a narrow wall panel to the other narrow panel in the same manner as above. Fig 2a Secure the third narrow wall panel to the other 2 narrow panels again in the same manner as the...
- Page 6 Indoor Pure Cube Sauna Assembly Instructions Place a corner post on to the narrow panel. Ensure the panel and post are flush and secure the panel to the post using the 2 ¾” (70mm) lag screws in the pre drilled holes to complete the back wall. Fasten a wide wall panel to the post in the same manner as the previous steps ensuring the panel and the post are flush.
- Page 7 Indoor Pure Cube Sauna Assembly Instructions Ensure the panel and corner post are flush and secure the panel to the post using the 2 ¾” (70mm) lag screws in the pre drilled holes to complete the side wall. Start the front wall by securing the glass panel to the post using the 2 ¾”...
- Page 8 Indoor Pure Cube Sauna Assembly Instructions Attach the last corner post to the glass panel and to the wall panel ensuring they are flush using the 2 ¾” (70mm) lag screws in the pre drilled holes to complete in the same manner as previous steps. With a helper, place one of the roof panels on top of the sauna as shown.
- Page 9 Indoor Pure Cube Sauna Assembly Instructions Tighten with a drill and allen key. Double check to ensure the roof and walls are flush. Tap with a rubber mallet if needed. Secure the roof by screwing 2 ½” (64mm) screws up through the wall panels into the roof.
- Page 10 Indoor Pure Cube Sauna Assembly Instructions Line up the side trim piece with the edge of the wall panel ensuring it is flush to the front post. From the inside of the sauna, secure the trim piece through the pre drilled holes using the 2 ¾” (70mm) Connector Lag Bolts .
- Page 11 Indoor Pure Cube Sauna Assembly Instructions To install the door handles, locate the 2 handles and 2 of the 2 ¾” (70mm) Connector Bolts . Line up the handles with the longer handle on the outside and thread the lag connector bolts from the inside to the outer handle.
- Page 12 Indoor Pure Cube Sauna Assembly Instructions Continue adding the trim pieces all the way around the sauna in the same process as the previous step. To start the installation of the benches, bring in the bench supports and roughly place them spaced out evenly against the back wall.
- Page 13 Indoor Pure Cube Sauna Assembly Instructions Follow the same process to secure the bench supports to the side walls. Secure the outer bench supports to the top bench from underneath using 2 ½” (64mm) screws . To install the backrest, slide the backrest supports behind the top bench.
- Page 14 Indoor Pure Cube Sauna Assembly Instructions Ensure they align flush behind the bench supports and secure with 2 ½” (64mm) screws. Secure the bench from underneath using 2 ½” (64mm) screws. Fig 2a Line the brackets up to the supports on the bottom of the bench. Fig 2b ph: 519-923-9813 | info@dundalkleisurecraft.com| web: www.dundalkleisurecraft.com...
- Page 15 Indoor Pure Cube Sauna Assembly Instructions Follow the same process to secure the bench supports to the side walls. Secure the outer bench supports to the top bench from underneath using 2 ½” (64mm) screws . Line the center brackets up to the supports on the bottom of the bench.
- Page 16 Indoor Pure Cube Sauna Assembly Instructions Ensure the backrests are located flush behind the center supports and secure with 2 ½” (64mm) screws. Ensure the bench supports are square and screw to the floor as well. Secure the outer bench supports to the top bench from underneath using 2 ½”...
- Page 17 Indoor Pure Cube Sauna Assembly Instructions Screw the enclosure to the bench supports using 2 ½” (64mm) screws ensuring that you screw in between the slats of the enclosure. Repeat the process for the bottom enclosure. Place your backrest to the top of the backrest supports and secure using 2 ½”...
- Page 18 Indoor Pure Cube Sauna Assembly Instructions Bring in your flat floor and gently lay it in place in front of the bench. To install the electric heater, measure out where the supports will go. These are usually 14 ¾” (37cm) high and 14 ¾”...
- Page 19 Indoor Pure Cube Sauna Assembly Instructions Bring in your flat floor and gently lay it in place in front of the bench. To install the electric heater, measure out where the supports will go. These are usually 14 ¾” (37cm) high and 14 ¾”...
- Page 20 Indoor Pure Cube Sauna Assembly Instructions Locate the pieces for your heater guard. They consist of the following: (A) 2 - Assembled side pieces (B) 2 - heater guard support 4 – 2 ½” (64mm) screws 8 – 1 ½” (38mm) screws Stand the 2 Assembled side pieces (A) of the heater guard on edge with pre-drilled holes on the bottom.
- Page 21 Indoor Pure Cube Sauna Assembly Instructions To install the vent kit, drill inlet holes centered underneath the heater. * A 2” diameter hole saw was used in pictures but more holes with a smaller drill size will also work) On the outside of the sauna, secure the vent plate with the provided screws.
- Page 22 Indoor Pure Cube Sauna Assembly Instructions To install the vent cover, place it over the holes and secure into place with a 1 ½” (38mm) scre. * Tighten screw enough that the vent cover still rotates smoothly. Place your shelf where you prefer and ensure it is level then secure with 1 ½”...
- Page 23 If you wish to retain the natural color of your Dundalk Leisurecraft Sauna, there are many cedar stains on the market and almost as many opinions as to which is best.
-
Page 24: How To Take A Sauna
Children must be supervised by an adult. WARRANTY Dundalk LeisureCraft Inc. warrants our saunas against defects in materials and workmanship under normal/residential use for a period of five (5) years, as applicable, from the date of receipt of the product by the original end-user consumer. This warranty does not apply to normal wear and tear and/or natural weather conditions.
Need help?
Do you have a question about the Pure Cube PU550 and is the answer not in the manual?
Questions and answers