
Subscribe to Our Youtube Channel
Related Manuals for Toshiba B-EV4D-GS24-CUS-R


Summary of Contents for Toshiba B-EV4D-GS24-CUS-R
- Page 1 TOSHIBA Barcode Printer B-EV4D-GS24-CUS-R Owner’s Manual Mode d’emploi Bedienungsanleitung Manual de instrucciones Gebruikershandleiding Manuale Utente Manual do Utilizador Instrukcja użytkownika...
- Page 2 This product is designed for commercial usage and is not consumer product. Copyright © 2013 < For EU Only > by TOSHIBA TEC CORPORATION TOSHIBA TEC Europe Retail Information Systems S.A. All Rights Reserved 6-78 Minami-cho, Mishima-shi, Shizuoka-ken, JAPAN Rue de la Célidée 33 BE-1080 Brussels...
- Page 3 Waste Recycling information for users: Following information is only for EU-member states: The use of the crossed-out wheeled bin symbol indicates that this product may not be treated as general household waste. By ensuring this product is disposed of correctly you will help prevent potential negative consequences for the environment and human health, which could otherwise be caused by inappropriate waste handling of this product.
- Page 4 Do not attempt to effect repairs or modifications to this equipment. If a fault occurs that cannot be rectified using the procedures described in this manual, turn off the power, unplug the machine, and then contact your authorised TOSHIBA TEC representative for assistance. Meanings of Each Symbol This symbol indicates warning items (including cautions).
- Page 5 • Utilise our maintenance services. After purchasing the machine, contact your authorised TOSHIBA TEC representative for assistance once a year to have the inside of the machine cleaned. Dust will build up inside the machines and may cause a fire or a malfunction. Cleaning is particularly effective before humid rainy seasons.
- Page 6 Ne tentez pas d’effectuer des réparations ou des modifications sur ce matériel. Si une erreur se produit qui ne peut être résolue en suivant les instructions de ce manuel, coupez le courant, déconnectez le câble secteur et contactez votre revendeur agréé TOSHIBA TEC pour une assistance technique. Explication des symboles Ce symbole signale une mise en garde (ou des précautions).
- Page 7 • Faites appel à nos services de maintenance. Après avoir reçu le matériel, prenez contact avec votre revendeur agréé TOSHIBA TEC pour une visite de maintenance annuelle, de manière à effectuer un nettoyage complet de l'intérieur de la machine. Autrement, la poussière qui s’accumule à l’intérieur de la machine peut être source d'incendie ou de mauvais fonctionnement.
-
Page 8: Table Of Contents
ENGLISH VERSION EO1-33095 TABLE OF CONTENTS Page PRODUCT OVERVIEW ......................E1-1 Introduction ........................E1-1 Features ........................E1-1 Unpacking ........................E1-1 Accessories ........................E1-1 Appearance ........................E1-3 1.5.1 Dimensions ........E1-3 1.5.2 Front View ........................E1-3 1.5.3 Rear View ........................E1-3 1.5.4 Interior ........................ - Page 9 CAUTION! 1. This manual may not be copied in whole or in part without prior written permission of TOSHIBA TEC. 2. The contents of this manual may be changed without notification.
-
Page 10: Product Overview
1. Unpack the printer. 2. Check for damage or scratches on the printer. However, please note that TOSHIBA TEC shall have no liability for any damage of any kind sustained during transportation of the product. 3. Keep the cartons and pads for future transportation of the printer. - Page 11 1.4 Accessories When purchasing the power cord Since only US power cord set is enclosed in this unit, please purchase an approved one that meets the following standard from your authorized TOSHIBA TEC representative. (As of August 2008) Certification Certification...
-
Page 12: Appearance
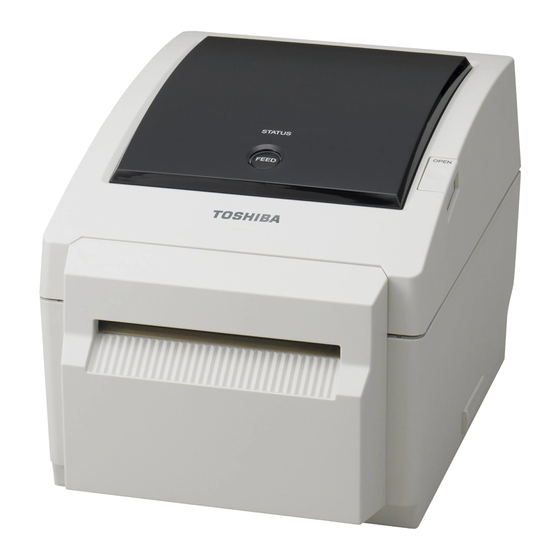
ENGLISH VERSION EO1-33095 1. PRODUCT OVERVIEW 1.5 Appearance The names of the parts or units introduced in this section are used in the 1.5 Appearance following chapters. 198 (7.80) 1.5.1 Dimensions 169(6.67) Dimensions in mm (inches) 1.5.2 Front View STATUS Lamp Media View Window Top Cover FEED Button... -
Page 13: Interior
ENGLISH VERSION EO1-33095 1. PRODUCT OVERVIEW 1.5 Appearance 1.5.4 Interior WARNING! Do not touch the print head or around it just after printing. You may get burned as the print head becomes very hot during printing. AVERTISSEMENT! Ne touchez pas la tête ou autour de celle-ci juste après l’impression. -
Page 14: Button And Indicator Lamp
ENGLISH VERSION EO1-33095 1. PRODUCT OVERVIEW 1.5 Appearance 1.5.5 Button and Indicator The [FEED] button operates as FEED button or PAUSE button depending on the printer statuses. Lamp Pressing this button when the printer is in online As the FEED state causes a media feed. -
Page 15: Printer Setup
être affectés et For best results, and longer printer life, use only TOSHIBA TEC entrainer un mauvais recommended media. (Refer to the Supply Manual.) fonctionnement. -
Page 16: Procedure Before Operation
For details, please contact your TOSHIBA TEC representative. 2.3 Turning the Printer When the printer is connected to a host computer it is good practice to turn the printer ON before turning on the host computer and to turn OFF ON/OFF the host computer before turning off the printer. -
Page 17: Turning Off The Printer
ENGLISH VERSION EO1-33095 2. PRINTER SETUP 2.4 Connecting the Cables to the Printer 1. Before turning off the printer power switch verify that the Indicator 2.3.2 Turning OFF the Lamp is illuminated in green, not flashing. Printer 2. To turn OFF the printer power, press the power switch as shown in the diagram below. -
Page 18: Connecting The Cables To The Printer
ENGLISH VERSION EO1-33095 2. PRINTER SETUP 2.4 Connecting the Cables to the Printer The following paragraphs outline how to connect the cables from the 2.4 Connecting the printer to your host computer, and will also show how to make cable Cables to the Printer connections to other devices. -
Page 19: Connecting The Power Adapter And The Power Cord
ENGLISH VERSION EO1-33095 2. PRINTER SETUP 2.5 Connecting the Power Adapter and the Power Cord 1. Make sure that the printer power switch is in the OFF (O) position. 2.5 Connecting the 2. Insert the Power Cord into the inlet of the Power Adapter. Power Adapter and the Power Cord NOTES:... -
Page 20: Opening/Closing The Top Cover
ENGLISH VERSION EO1-33095 2. PRINTER SETUP 2.6 Opening/Closing the Top Cover When opening or closing the Top Cover, please be sure to follow the 2.6 Opening/Closing the instructions below. Top Cover To open the Top Cover: WARNING! 1. Press down the Top Cover Release Button to unlock the Top Cover, To avoid injury, be careful not to trap your fingers while and then fully open the Top Cover. -
Page 21: Loading The Media
2. PRINTER SETUP 2.7 Loading the Media This section describes how to load a media in the printer. This printer 2.7 Loading the Media accepts Linerless label rolls. Please use TOSHIBA TEC approved media. WARNING! NOTES: 1. Do not touch any moving 1. - Page 22 ENGLISH VERSION EO1-33095 2. PRINTER SETUP 2.7 Loading the Media 2. Slide the Media Holder Lock Switch to the Unlock (▲) side to 2.7 Loading the Media release the Media Holders. (Cont.) Media Holder Lock Switch 3. Open the Media Holders. NOTE: Media path Feed Gap Sensor Media Holder...
- Page 23 ENGLISH VERSION EO1-33095 2. PRINTER SETUP 2.7 Loading the Media 6. Adjust the media sensor position and select a sensor type to be used. . 2.7 Loading the Media (Refer to Section 2.8.1) (Cont.) This printer is provided with a Feed Gap Sensor which detects inter-label gaps.
- Page 24 ENGLISH VERSION EO1-33095 2. PRINTER SETUP 2.7 Loading the Media Close the Top Cover gently and push down the arrow-indicating 2.7 Loading the Media portions until they click. (Cont.) 10. Press the [FEED] button to check for a proper media feed. CAUTION! FEED Button To separate the printed...
-
Page 25: Media Sensor Calibration, Self Print Test, And Dump Mode Utilities
ENGLISH VERSION EO1-33095 2. PRINTER SETUP 2.8 Media Sensor Calibration, Self Print Test, and Dump Mode Utilities This utility is used to calibrate the sensitivity of the Feed Gap Sensor. 2.8 Media Sensor It is necessary to set the media sensors after the media is changed to Calibration, Self Print different type when use media which have gaps. -
Page 26: Self Print Test And Dump Mode
ENGLISH VERSION EO1-33095 2. PRINTER SETUP 2.8 Media Sensor Calibration, Self Print Test, and Dump Mode Utilities 1. Turn off the printer power and install a media roll on the printer. 2.8.2 Self Print Test and Dump Mode 2. Press the [FEED] Button while turning on the printer. The Indicator Lamp will light up in the following order: Green (Flashing) ... - Page 27 ENGLISH VERSION EO1-33095 2. PRINTER SETUP 2.8 Media Sensor Calibration, Self Print Test, and Dump Mode Utilities The test print contents are following: 2.8.2 Self Print Test and Dump Mode (Cont.) PROGRAM VERSION: VX.XX XXXX --- Firmware version and checksum TONE ADJUST: +XX ------------------------- Print tone fine adjustment value FEED ADJUST: +XX.Xmm ------------------ Print position fine adjustment value CUT POSITION ADJUST: +XX.Xmm ----- Cut position fine adjustment value...
-
Page 28: How To Use An Sd Card
This printer enables you to save print formats, writable characters, True Type fonts, etc. in commercially available SD cards. Card For available SD card types, please ask the nearest TOSHIBA TEC representative. For how to save data in an SD card, please refer to the External CAUTION! Equipment Interface Specification. -
Page 29: Maintenance
3. MAINTENANCE ENGLISH VERSION EO1-33095 3.1 Cleaning 3. MAINTENANCE This chapter describes how to perform routine maintenance. WARNING! To ensure the continuous high quality operation of your printer, you 1. Be sure to turn OFF the should perform a regular maintenance routine. For high throughput it power before performing should be done on a daily basis. -
Page 30: Cleaning
3. Ne touchez pas la tête à mains nues, l’électricité statique peut endommager la tête. Éléments chauffants de la tête (sur l’arête de la tête) NOTE: Please purchase the Print Head Cleaner from the authorised TOSHIBA TEC service representative. E3- 2... -
Page 31: Platen / Paper Path / Sensors
3. MAINTENANCE ENGLISH VERSION EO1-33095 3.1 Cleaning 1. Wipe the Platen, Paper path and Paper guide 1 time per day with a 3.1.2 Platen / Paper path / soft cloth moistened with absolute ethyl alcohol. Sensors 2. Remove dust or paper particles 1 time per day by wiping the Feed Gap Sensor and Cover Open Sensor with a dry soft cloth. -
Page 32: Media Housing
3. MAINTENANCE ENGLISH VERSION EO1-33095 3.2 Care/Handling of the Media Wipe the media housing with a dry soft cloth. Wipe off dirt with a soft 3.1.4 Media Housing cloth slightly moistened with mild detergent solution. 3.1.5 Linerless Cutter Cleanup Cutter guide by Cleaner Pen. (Option) Cleaner Pen Wipe Cutter outlet and Cutter tray with a dry soft cloth. - Page 33 3. MAINTENANCE ENGLISH VERSION EO1-33095 3.2 Care/Handling of the Media 1. Turn the power off. 3.1.5 Linerless Cutter 2. Open the Top Cover. (Cont.) 3. Remove Linerless cutter from printer. Cutter Block 4. Pull and open bottom side paper guide for cleanup. 5.
-
Page 34: Care/Handling Of The Media
3. MAINTENANCE ENGLISH VERSION EO1-33095 3.2 Care/Handling of the Media 7. Release bottom side paper guide gently, paper guide returns to 3.1.5 Linerless Cutter original position by spring. (Cont.) Side Paper Guide • Do not store media for longer than the manufacturer’s recommended 3.2 Care/Handling of the shelf life Media... -
Page 35: Troubleshooting
4. TROUBLESHOOTING WARNING! If a problem cannot be solved by taking actions described in this chapter, do not attempt to repair the printer. Turn off and unplug the printer. Then contact an authorised TOSHIBA TEC service representative for assistance. AVERTISSEMENT! Si un problème n’est pas résolu en suivant les recommandations indiquées dans ce chapitre,... -
Page 36: Status Lamp
4.3 Removing Jammed Media Symptom Cause Solutions Labels are not separated TOSHIBA TEC approved media Replace the media with TOSHIBA TEC from the backing paper is not used. approved one. smoothly. (When the Label loading method is Load the label properly. ( Section 2.7) optional strip unit is incorrect. -
Page 37: Removing Jammed Media
ENGLISH VERSION EO1-33095 4. TROUBLESHOOTING 4.3 Removing Jammed Media 4.3 Removing Jammed Media This section describes in detail how to remove jammed media from the printer. CAUTION! Do not use any tool that may damage the print head. ATTENTION! N’utilisez aucun outil qui pourrait endommager la tête. 1. -
Page 38: Appendix 1 Specifications
QR Code is a trademark of DENSO CORPORATION. Maxi Code is a trademark of United Parcel Service of America, Inc., U.S. Please use TOSHIBA TEC recommended SD cards. The SD Cards are available from your nearest TOSHIBA TEC representative or TOSHIBA TEC Head Quarters. -
Page 39: A1.2 Options
The above options are available from your nearest TOSHIBA TEC representative or TOSHIBA TEC Head Quarters. A1.3 Media Please make sure that the media to be used is approved by TOSHIBA TEC. The warranties do not apply to problems caused by using media that is not approved by TOSHIBA TEC. -
Page 40: A1.3.2 Effective Print Area
ENGLISH VERSION EO1-33095 APPENDIX 1 SPECIFICATIONS A1.3 Media A1.3.2 Effective Print Area The figure below illustrates the relation between the head effective print width and media width. Out of print range Out of print range Print head element 108.0 mm0.2mm 2 mm 2 mm (Head Effective Print Range) - Page 41 ENGLISH VERSION EO1-33095 APPENDIX 2 INTERFACE APPENDIX 2 INTERFACE APPENDIX 2 INTERFACE Interface Cables To prevent radiation and reception of electrical noise, the interface cables must meet the following requirements: Fully shielded and fitted with metal or metallized connector housings. ...
- Page 42 ENGLISH VERSION EO1-33095 GLOSSARIES GLOSSARIES Printer driver GLOSSARIES A software program that will convert the application program’s printing request into the Bar code language that the printer understands. A code which represents alphanumeric characters by using a series of black and white stripes in Print head element different widths.
- Page 43 EO1-33095C...
Need help?
Do you have a question about the B-EV4D-GS24-CUS-R and is the answer not in the manual?
Questions and answers