
Related Manuals for gefran ADV200 SP Series


Summary of Contents for gefran ADV200 SP Series
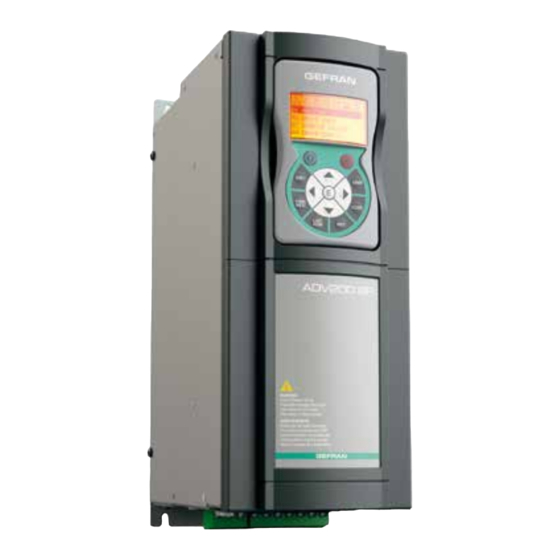
- Page 1 AC Drive for Solar Water Pumps ADV200 SP ..Quick start up guide Specification and installation...
-
Page 2: Information About This Manual
Gefran Drives and Motion S.r.l. has the right to modify products, data and dimensions without notice. The data can only be used for the product description and they can not be understood as legally stated properties. -
Page 3: Table Of Contents
Table of contents Information about this manual ........................2 1 - Safety Precautions..........................5 1.1 Symbols used in the manual..........................5 1.2 Safety precaution ..............................6 1.3 General warnings..............................6 1.4 Instruction for compliance with UL Mark (UL requirements), U.S. and Canadian electrical codes ....7 2 - Introduction to the product ........................9 2.1 Drive type designation ............................10 3 - Transport and storage ........................ - Page 4 8.2 Messages ...............................66 9 - Specification............................70 9.1 Environmental Conditions ..........................70 9.2 Standards ...............................70 9.3 Accuracy (Asyncronous) ..........................70 9.3.1 Current control ......................................70 9.3.2 Speed control......................................70 9.3.3 Speed control limits ....................................71 9.3.4 Torque control ......................................71 9.3.5 Overload ......................................... 71 9.4 DC circuit ................................71 9.5 Input electrical data............................72 9.5.1 AC power supply .....................................
-
Page 5: Safety Precautions
1 - Safety Precautions 1.1 Symbols used in the manual Indicates a procedure, condition, or statement that, if not strictly observed, could result in personal injury or death. Indique le mode d’utilisation, la procédure et la condition d’exploitation. Si ces consignes ne sont passtricte- Warning! ment respectées, il y a des risques de blessures corporelles ou de mort. -
Page 6: Safety Precaution
Use for intended purpose only The power drive system (electrical drive + application plant) may be used only for the application stated in the manual and only together with devices and components recommended and authorized by Gefran. Utiliser uniquement dans les conditions prévues Le système d’actionnement électrique (drive électrique + installation) ne peut être utilisé... -
Page 7: Instruction For Compliance With Ul Mark (Ul Requirements), U.s. And Canadian Electrical Codes
Electrical Shock The DC link capacitors remain charged at a hazardous voltage even after cutting off the power supply. Never open the device or covers while the AC Input power supplyis switched on. Minimum time to wait before working on the terminals or inside the device is listed in section 9.7 . Risque de décharge électrique Les condensateurs de la liaison à... - Page 8 lution degree 2. Wiring of the input and output power terminals Use UL listed cables rated at 75°C and round crimping terminals. Crimp terminals with tool recommended by terminal manufacturer. Field wiring terminals shall be used with the tightening torque specified in par. “5.1.1 Cable Cross Section”, page 20.
-
Page 9: Introduction To The Product
Synergies between the ADV200 SP Industrial Drives technology and the company’s Solar and Pump appli- cation know-how have allowed Gefran to develop a special SW app to optimize the operation of solar pump systems. -
Page 10: Drive Type Designation
2 = size 2 5 = size 5 3 = size 3 6 = size 6 External heatsink drive models with IP54 protection degree Drive ADV200 SP series Identification Nameplate GEFRAN DRIVES AND MOTION S.R.L. via G.Carducci, 24 I-21040-Gerenzano (VA) Modello inverter... -
Page 11: Transport And Storage
3 - Transport and storage Correct transport, storage, erection and mounting, as well as careful operation and maintenance are essential for proper and safe operation of the equipment. Protect the inverter against physical shocks and vibration during transport and storage. Also be sure to protect it against water (rainfall) and excessive temperatures. -
Page 12: Permissible Environmental Conditions
3.2 Permissible Environmental Conditions Temperature storage ��������������� -25…+55°C (-13…+131°F), class 1K4 per EN 60721-3-1 -20…+55°C (-4…+131°F), for devices with keypad transport �������������� -25…+70°C (-13…+158°F), class 2K3 per EN 60721-3-2 -20…+60°C (-4…+140°F), for devices with keypad Air humidity storage ��������������� from 5% to 95 % and from 1 g/m to 29 g/m (class 1K3 as per EN 60721-3-1) transport ��������������... -
Page 13: Mechanical Installation
4 - Mechanical installation The Drive must be mounted on a wall that is constructed of heat resistant material. While the Drive is operat- ing, the temperature of the Drive’s cooling fins can rise to a temperature of 158° F (70°C). Le drive doit être monté... -
Page 14: Fastening Positions
4.2 Fastening positions 268 [10.55”] Fissaggio a muro Wall mounting 220 [8.66”] 187.6 [7.4”] 150 [5.91”] 156.2 [6.15”] 120 [4.72”] 126.2 [4.97”] 100 [3.94”] Taglia 4 Taglia 3 Taglia 2 Taglia 1 Size 4 Size 3 Size 2 Size 1 267 [10.51”] 135 [5.31”] 110 [4.33”]... - Page 15 311 [12.24”] Fissaggio a muro Wall mounting 190 [7.48”] 268 [10.55”] 220 [8.66”] 187.6 [7.4”] 150 [5.91”] ADV200-...-DC ADV200-...-DC ADV200-...-DC Taglia 5 Taglia 4 Taglia 3 Size 5 Size 4 Size 3 265 [10.43”] 267 [10.51”] 421 [16.57”] 421 [16.57”] Fissaggio a muro Wall mounting 275 [10.83”]...
- Page 16 Taglie 1-2-3 Taglia 4 Sizes 1-2-3 Size 4 [0.21”] [0.26”] [0.26”] 12.5 [0.49”] [0.21”] Taglia 5 Taglia 6 Size 5 Size 6 [0.26”] [0.26”] [0.26”] 24.95 [0.98”] [0.26”] 12.75 [0.50”] Recommended screws for fastening Size 1 (ADV 1...) Size 2 (ADV 2...) Size 3 (ADV 3...) 4 x M5 x 12 mm screws + Grover (spring-lock) washer + Flat washer...
-
Page 17: Wiring Procedure
5 - Wiring Procedure Adjustable frequency drives are electrical apparatus for use in industrial installations. Parts of the Drives are energized during operation. The electrical installation and the opening of the equipment should therefore only be carried out by qualified personnel. Improper installation of motors or Drives may therefore cause the failure Warning! of the device as well as serious injury to persons or material damage. - Page 18 Note: The residual current operated circuit-breakers used must provide protection against direct-current components in the fault current and must be suitable for briefly suppressing power pulse current peaks. It is recommended to protect the frequency inverter by fuse separately. The regulations of the individual country (e.g. VDE regulations in Germany) and the regional power suppliers must be observed! Fonctionnement avec un dispositif de courant résiduel En cas d’installation d’un RCD –...
- Page 19 : appliquer une tension d’alimentation sans actionner le variateur. Type of networks ADV200 SP drives are designed to be powered with IT network, it does not include the use of an EMI filter with internal capacitors connected to the ground. The RFI emissions level are more relevant but in accordance with Caution EN 61800-3.
-
Page 20: Power Section
5.1 Power section 5.1.1 Cable Cross Section Terminals: L1 - L2 - L3 - BR1 - BR2 - C - D - U - V - W Maximum Cable Cross Section Recommended Tightening torque Sizes (flexible conductor) stripping (min) (mm) (Nm) 0.5 ... -
Page 21: Connection Of Shielding
5.1.2 Connection of shielding • Sizes 1...5 Fasten the metallic support (A), for shielding of the power section, in the two housings (B) and secure with the two screws + washer provided (C). Fasten the shield of the cables to the omega sections (D). •... -
Page 22: Emc Guide Line
For further information regarding electro-magnetic compatibility standards, according to Directive 2014/30/EU, conform- ity checks carried out on Gefran appliances, connection of filters and mains inductors, shielding of cables, ground con- nections, etc., consult the “Electro-magnetic compatibility guide” (1S5E84) you can download from www.gefran.com. -
Page 23: Power Line Connection
5.1.5 Power line connection Isolated systems, PV alone: ADV200 SP-1015 ... 61600 ADV200 SP-3220-DC... 61600-DC PV generator 350 ... 750Vcc Insulation control Insulation control PV generator 350 ... 750Vcc Dual supply systems, PV or Secondary power source: ADV200 SP-1015 ... 61600 Insulation control PV generator... -
Page 24: Input Mains Choke (L1)
5.1.6 Input mains choke (L1) Sizes ADV200 SP-1015 ... 61600: Integrated on DC-link. Sizes ADV-...-DC: not available. 5.1.7 Motor connection ADV200 SP-1015 ... 61600 L1 L2 L3 BR1 BR2 C 3 ph Note: terminals L1-L2 and L3 are not present in -DC versions. 5.1.8 Braking unit connection (optional) L1 L2 L3 BR1 BR2 C Braking resistor... -
Page 25: Parallel Connection Of Several Inverters
5.1.9 Parallel connection of several inverters From PV field only • Inverters come in different sizes. • Such connection is suitable for a maximum of 6 inverters. • If necessary dissipate braking energy; a single internal braking unit (with external resistor) has to be used or one (or several) external braking unit. -
Page 26: Regulation Section
5.2 Regulation section 5.2.1 Removing the terminal cover When removing the covers be carefull to lateral metal sheet enclosure. Presence of sharp edge are possible. Warning! 5.2.2 Cable Cross Section Maximum Cable Cross Section Recommended Tightening torque (min) Terminal strips stripping (min) (Regulation card) - Page 27 Table 5.2.3.1: Regulation terminals Strip T2 (top) Termi- Designation Function COM Digital Common reference for digital output 2 (Relay 2) output 2 Digital output 2 Programmable digital relay output 2 (NO). Default = Drive ready 250V - 30V / 2A Analog output 1 Analog output 1.
-
Page 28: Switches, Jumpers And Led
5.2.4 Switches, jumpers and LED Jumpers : LEDs : Switches : Switch V/I settings on inputs and analog output LEDs Function Analog input 1 LED lit during IGBT modulation Default = voltage (±10 V) (green) Flashes (freq. 1 sec) if no errors or faults have Analog input 2 occurred. - Page 29 +24 V To Expansion Cards +24 V Analog input 1 Analog output 1 Analog input 2 Radiation Analog output 2 Sensor +10V +24V Digital input E mon - 10V FR forward src FR reverse src Digital output 1 (Relay 1) Drive OK Null (not assigned) Digital output 2...
-
Page 30: Braking
5.3 Braking There are various possible types of braking: via internal braking unit and external braking resistor (up to size ADV5750), via external braking unit (BUy, usable for all sizes), Injection of direct current from the Inverter into the motor (D.C. braking) through a special overflux function (AC braking) available if V/F control is selected. - Page 31 Sizes Technical data of the Internal Braking Units (Duty 50%) Nominal current of the Peak current Minimum braking internal braking unit resistance value (Ω) External Braking Unit See BUy manual for all technical details. ≥ 5900 (optional) BUy-1020 ADV200 BUy-1050 SP-...-DC BUy-1085 ADV200 SP •...
-
Page 32: Serial Interface (Xs Connector)
5.4 Serial interface (XS connector) Function Electr. interface PIN 1 Internal use – – PIN 2 Internal use – – PIN 3 RxA/TxA RS485 PIN 4 Equipotentiality (optional) – – PIN 5 0V (Ground for 5 V) – Power supply PIN 6 +5 V –... -
Page 33: Drive / Rs485 Port Point-To-Point Connection (With Insulation)
RS485 (XS) Industrial PC Shielded cable with connectors, (with RS485) 4.5 mt (8S864C), 10 mt (8S874C) RS485 (XS) RS232 RS485 Shielded cable with connectors, PCI-COM (S560T) 4.5 mt (8S864C), 10 mt (8S874C) RS485 (XS) RS485 Serial converter USB / RS485 5 mt (8S8F64) Figure 5.4.1.2: RS485 connection to the PC Connection of an industrial PC with RS485... -
Page 34: Rs 485 Multi-Drop Connection
5.4.3 RS 485 multi-drop connection For the multi-drop connection, the OPT-RS485-ADV optional card must be installed on each drive; the ends of the connection must have S1 termination switch set to ON (for point 3: ON only on the first). The multi-drop connection is always galvanically insulated. - Page 35 OPT-RS485-ADV OPT-RS485-ADV OPT-RS485-ADV OPT-RS485-ADV ADV200 ADV200 ADV200 ADV200 v = verde a = arancione g = giallo m = marrone n = nero USB - RS485 Serial Converter Cable Figure 5.4.3.3: Example of Multidrop connection between ADV200 and a PC with USB port ADV200 SP •...
-
Page 36: Typical Connection Diagrams
5.5 Typical connection diagrams The diagrams shown are for example only, in any case the installer must comply with the rules relating to the state of competence, in order to have a state-of-the-art system. Figure 5.5.1: Auxiliary control circuits S1 ON / OFF Mains PV source EMERGENCY-OFF... - Page 37 Figure 5.5.2: PV power supply Dig. Out.4 + 24V PS Dig. Out.3/4 0 V24 Dig. Out.3 COM Dig. Out.3/4 COM ID Analog output 1 Analog output 2 Digital input E mon (Enable) - 10 V FR forward src + 10 V Multi ref sel 0 src 0 V 10 Multi ref sel 1 src...
- Page 38 Figure 5.5.3: PV power supply or AC mains power supply Dig. Out.4 + 24V PS Dig. Out.3/4 0 V24 Dig. Out.3 COM Dig. Out.3/4 COM ID Analog output 1 Analog output 2 Digital input E mon (Enable) - 10 V FR forward src + 10 V 0 V 10...
- Page 39 Figure 5.5.4: PV power supply and AC mains power supply Dig. Out.4 + 24V PS Dig. Out.3/4 0 V24 Dig. Out.3 COM Dig. Out.3/4 COM ID Analog output 1 Analog output 2 Digital input E mon (Enable) - 10 V + 10 V FR forward src 0 V 10...
-
Page 40: Use Of The Keypad
6 - Use of the keypad This chapter describes the keypad and methods of use for display and programming of inverter parameters. 6.1 Description LCD display led is lit 7 virtual leds line: ILim led is off 01 MONITOR 02 DRIVE INFO Four alphanumeric lines 03 STARTUP WIZARD with 21-digit each... -
Page 41: Navigation
6.2 Navigation 6.2.1 Scanning of the first and second level menus 1st level 2nd level ILim 27 MACRO ILim 01 MONITOR 02 DRIVE INFO 23 COMMUNICATION 03 STARTUP WIZARD 24 ALARM CONFIG ILim 25 ALARM LOG 26 PROCESS 01 MONITOR 02 DRIVE INFO 03 STARTUP WIZARD 04 DRIVE CONFIG... -
Page 42: Scanning Of The Parameters
6.2.3 Scanning of the parameters . . . ILim 0 1 . 2 2 PA R : 1 4 0 0 Digital out ut X mon ILim ILim 0 1 . 0 1 PA R : 2 5 0 01 MONITOR Out p ut current 02 DRIVE INFO 0 .3... -
Page 43: How To Save Parameters
● Binary parameters (BIT type) The parameter may assume only two states which are indicated as OFF-ON or 0-1. ILim ILim ILim 1 3 . 0 5 PA R : 1 3 3 0 1 3 . 0 5 PA R : 1 3 3 0 10 SPEED MONITOR FUNC Di g out 1 inversion... -
Page 44: Configuration Of The Display
6.5 Configuration of the display 6.5.1 Language selection Menu 04 DRIVE CONFIG, parameter 04.15 Language select, PAR: 578, default=English. Used to set one of the languages available : English, Italian, Francais, Deutsch, Polish, Romanian, Russian, Turkish and Portuguese. ILim ILim ILim 0 4 . -
Page 45: Alarms
6.6 Alarms The alarms page is displayed automatically when an alarm occurs. ILim Alarm -R T N : 1 / 2 Power down Code: 0000H-0 Time: 28:04 1 Alarm: identifies the alarm page. RTN : indicates that the alarm has been reset; if the alarm is still active, nothing is displayed. x/y : x indicates the position of this alarm in the list of alarms and y the number of alarms (the alarm with lowest x is the most recent) 2 Description of the alarm... -
Page 46: Saving And Recovery Of New Parameter Settings
Note ! For further information, see chapter 8.2. 6.8 Saving and recovery of new parameter settings Drive parameters can be saved on the keypad in 5 different memory areas. This function is useful to obtain various sets of parameters, for safety backup or to transfer the parameters from one drive to another. -
Page 47: Transfer Of Parameters Between Drives
If an error occurs during transfer, the following message is displayed: ILim Message Load par failed Code: Press ESC to exit The code XX indicates the type of error, see paragraph 8.2. To exit from the error message, press the ESC key. 6.8.4 Transfer of parameters between drives Transfer the parameters of the source drive to the keypad memory as indicated in paragraph 6.8.2, then con- nect the keypad to the drive on which the new setting is to be saved and proceed as indicated in paragraph... -
Page 48: Commissioning Via Keypad (Startup Wizard)
7 - Commissioning via keypad (STARTUP WIZARD) Adjustable frequency drives are electrical apparatus for use in industrial installations. Parts of the Drives are energized during operation. The electrical installation and the opening of the equipment should therefore only be carried out by qualified personnel. Improper installation of motors or Drives may therefore cause the failure Warning! of the device as well as serious injury to persons or material damage. - Page 49 High voltage levels are present in the drive. Les tensions, à l’intérieur du drive, sont élevées. Wherever faults occurring in the control equipment can lead to substantial material damage or even grievous bodily injury (i.e. potentially dangerous faults), additional external precautions must be taken or facilities pro- vided to ensure or enforce safe operation, even when a fault occurs (e.g.
- Page 50 La mise en service électrique doit être effectuée par un personnel qualifié. Ce dernier est responsable del’exis- tence d’une connexion de terre adéquate et d’une protection des câbles d’alimentation selon les prescriptions locales et nationales. Le moteur doit être protégé contre la surcharge. Do not connect power supply voltage that exceeds the standard specification voltage fluctuation permissible.
-
Page 51: Startup Wizard And Dedicated Settings
7.1 Startup Wizard and dedicated settings Only for isolated PV systems. Introduction The ADV200 SP can operate with regulation modes : V/f control (Voltage/Frequency) and Flux vector OL (open loop). Menu 04 DRIVE CONFIG, parameter 04.2 Regulation mode, PAR: 552, default=V/f control. Start-up in one mode is valid also for the other regulation modes. - Page 52 Step 1 - Connections Connect the solar panels to the inverter DC-Link (see section “5.5 Typical connection diagrams”, page 36); Connect the centrifugal pump actuator motor to the inverter (see section “5.1.7 Motor connection”, page 24); Insert an enabling contact between terminals 7 and S3 (Enable the drive and +24V inputs) on the R- ADV200 board.
- Page 53 Step 2 - Setting motor parameter (Set motor data) Set the rating data of the motor connected: rated voltage, rated frequency, rated current, rated speed, rated power, power factor (cosφ). Motor & Co. Type: ABCDE IEC 34-1 / VDE 0530 Motor: 3 phase 12345-91 50 Hz...
- Page 54 At the end of the procedure, proceed to Step 3A (motor free to rotate and uncoupled from transmission) or to Step 3B (motor coupled to transmission). Step 3 - Autotune of the motor The drive carries out the motor autotune procedure (real measurement of motor parameters). Autotune may last a few minutes.
- Page 55 Note ! Autotuning can be cancelled at any time by pressing ILim ILim ILim ILim ILim STARTUP WIZARD STARTUP WIZARD S E Q . 0 1 PA R : 2 0 2 4 Autotune STARTUP WIZARD Run autotune still ? Close Enable input Autotune still Open Enable input...
- Page 56 Step 6 - Saving parameters (Save parameters) To save the new parameter settings, so that they are maintained also after power-off, proceed as follows: ILim ILim ILim ILim ILim STARTUP WIZARD S E Q . 0 1 PA R : 5 5 0 S E Q .
- Page 57 • PAR 750 Ramp In 0 = Pad 5 • PAR 752 Ramp Out 0 = Pad 5 This setting will automatically reset the system in case of Undervoltage. 5. Select PAR 11008 Control Mod to set the desired control type; there are four (4) possible modes: SOLAR SOURCE, AUTO DUAL SOURCE, AC SOURCE, AUTOHYBRID Proceed to Step 9.
- Page 58 Step 10 – Enable system / Checks 1. The system will start when the hardware enable contact is activated (the contact is usually used by closing the circuit between terminals 7 and S3) and when the start command setting is high. The keypad display shows the current operating conditions.
-
Page 59: Programming
7.3 Programming 7.3.1 Menu display modes The programming menu can be displayed in two modes, which can be selected using the Access mode pa- rameter (04 - DRIVE CONFIG menu), see chapter 6.5.2: • Easy (default) only the main parameters are displayed. •... - Page 60 • Example: Changing the Speed Reference source The main drive reference (in the default configuration) Ramp ref 1 mon (PAR: 620) is generated by the output of the function block “Ramp setpoint Block”. Its default source is the Analog input 1 mon signal (PAR: 1500), from the output of the function block “Analog input 1 Block”, which in this case refers to analog input 1 of the signal terminal strip.
-
Page 61: Multiple Destination
7.3.4 Multiple destination Several functions can be assigned together to each input: to display which and how many functions have been assigned to each input, check the relative “dest” parameter to see whether there is a number shown in square brackets to the right of the number of the selected parameter (as shown in the figure below). -
Page 62: Troubleshooting
8 - Troubleshooting 8.1 Alarms Note ! To reset alarms, see paragraph 6.6.1. In the following table, the Code is visible only from serial line. Code Error message shown Sub-code Description on the display No alarm Condition: No alarm present Condition: DC link overvoltage alarm due to energy recovered from the motor. - Page 63 Code Error message shown Sub-code Description on the display Solution: - Verify the correct operation of the cooling fan. - Check that the heatsinks are not clogged - Check that the openings for the cabinet cooling air are not blocked. Solution: - Check correct fan operation Intakeair OT...
- Page 64 Code Error message shown Sub-code Description on the display Solution: - Limit the speed reference. - Check that the motor is not driven in overspeed during rotation. Condition: Speed reference loss alarm Occurs if the difference between the speed regulator reference and the actual motor speed is more than 100 rpm. This Speed ref loss condition occurs because the drive is in the current limit condition.
- Page 65 Code Error message shown Sub-code Description on the display Condition: If an analog measurement is out of the allowed range an “Analog X err” alarm is generated. This control is only possible for 4-20 mA, PT100, PT1000, NI1000 probes. For temperature probes both short-circuits and power loss on the cable are detected.
-
Page 66: Messages
8.2 Messages Note ! For more information see chapter 6.7. Index Error message shown Sub-code Description on the display Condition: may occur during loading of the parameter database saved in flash normally appears in the following conditions: at initial power-on when a new firmware version is downloaded, when the regulation is installed on a new size, when the region is changed. - Page 67 Solution: Close the enable contact before sending the Autotune command Internal calculation error concerning IGBT control Solution: Perform autotuning once more, if the problem persists, contact the Gefran technical support centre. The drive has measured a stator resistance value exceeding the set limit.
- Page 68 Index Error message shown Sub-code Description on the display 0017H-23 The configuration required is not available on the power card Solution: Download the correct configuration on the power card Condition: during transfer of the parameters from the drive to the memory of the keypad Save par failed 0H-0 Communication error...
- Page 69 Incorrect PLC key. PLC application not available. Solution: Ask Gefran to supply the correct key to enable the desired firmware function. Condition: this may occur at drive power-on if the incorrect enabling key was inserted for a given firmware function.
-
Page 70: Specification
9 - Specification 9.1 Environmental Conditions Installation location ��������������������������� Pollution degree 2 or lower (free from direct sunligth, vibration, dust, corrosive or inflammable gases, fog, vapour oil and dripped water, avoid saline environ- ment) Installation altitude ��������������������������� Up to 1000m (3280 feet) above sea level without derating. Over 1000m and up to 4000m (13123 feet): see section 9.6.1 Derating factors. -
Page 71: Speed Control Limits
Speed measurement ��������������������������� FP, F mode Speed regulation accuracy ����������������������� Flux vector OL : ± 30 % rated slip V/F : ± 60 % rated slip. 9.3.3 Speed control limits Control range (1) ������������������������������ ± 32000 rpm Speed format (1) ������������������������������ 32 bit Frequency range ������������������������������... -
Page 72: Input Electrical Data
9.5 Input electrical data 9.5.1 AC power supply AC Input voltage, U �������������������������� 3 ph 380V -15% ... 480V +10% Types of networks ____________________________ IT, TN and TT (with the possible adoption of EMI filters external to the drive) AC Input frequency ��������������������������� 50/60 Hz, ± 5% Choke ��������������������������������������... -
Page 73: Output Electrical Data
9.6 Output electrical data U2 Max output voltage �������������������������� 0,94 x U =AC Input voltage) f2 Max output frequency ������������������������ 500 Hz (Sizes 1015 ... 61600) see section 9.3.3 for more details. Braking IGBT Unit ����������������������������� KBX models: standard internal with external resistor, KXX: not included;... -
Page 74: Output Current Derating Factors
Rated output current (For Asynchronous motors) =400V =460V Sizes Heavy duty Light duty Heavy duty Light duty 5900 51100 61320 61600 Rated output current (For Asynchronous motors) Sizes @540V @540V @650V @650V ADV200 Heavy duty Light duty Heavy duty Light duty SP-DC 3220 34.2... - Page 75 Derating factor Switching frequency Sizes f (4) Default Higher 2 kHz 4 kHz 6 kHz 8 kHz 10 kHz 12 Hz 1030 6, 8, 10, 12 0.85 0.55 1040 6, 8, 10, 12 0.85 0.55 1055 6, 8, 10, 12 0.85 2075 6, 8, 10, 12...
-
Page 76: Overload For Output Frequency
9.6.2 Overload for output frequency For Asynchronous motors Sizes Heavy duty Light duty K1 SP [%] K2 SP [Hz] K3 SP [Hz] K1 SL [%] K2 SL [Hz] 1015 1022 1030 1040 1055 2075 2110 2150 3185 3220 3300 4370 4450 4550 5750... -
Page 77: Voltage Level Of The Inverter For Safe Operations
9.7 Voltage level of the inverter for safe operations The minimum time between the moment in which an ADV200 SP drive is disabled from the mains and that in which an operator can operate on internal parts of the drive, without the danger of electric shock, is 5 minutes. The value consider the time to turn-off for a drive supplied at 460Vac +10%, without any options (time indicated for disabled drive condition). - Page 78 118 mm (4.65”) 100 [3.94”] 82 mm (3.23”) Figure 9.9.1: Size 1 Dimensions 150 mm (5.91”) 120 [4.72”] 110 mm (4.33”) Figure 9.9.2: Size 2 dimensions ADV200 SP • Quick start up guide - Specification and installation...
- Page 79 180 mm (7.09”) 150 [5.91”] 135 mm (5.31”) Figure 9.9.3: Size 3 dimensions (ADV200 SP-...-4) 180 mm (7.09”) 150 [5.91”] Figure 9.9.4: Size 3 dimensions (ADV200 SP-...-4-DC) ADV200 SP • Quick start up guide - Specification and installation...
- Page 80 268 [10.55”] Figure 9.9.5: Size 4 dimensions (ADV200 SP-...-4) 268 [10.55”] Figure 9.9.6: Size 4 dimensions (ADV200 SP-...-4-DC) ADV200 SP • Quick start up guide - Specification and installation...
- Page 81 311 [12.24”] 220 [8.66”] DETAIL B DETAIL A (2:3) DETAIL B (2:3) DETAIL A Figure 9.9.7: Size 5 dimensions (ADV200 SP-...-4) 311 [12.24] 325 [12.80] 45.5 190 [7.48] DETAIL DETAIL SCALE 1:1 DETAIL DETAIL 265 [10.43] SCALE 1:1 Figure 9.9.8: Size 5 dimensions (ADV200 SP-...-4-DC) ADV200 SP •...
- Page 82 422 [16.61”] 350 [13.78”] 175 [6.89”] Figure 9.9.9: Size 6 dimensions (ADV200 SP-...-4) 421 [16.57”] 360 [14.17”] 275 [10.83”] 175 [6.89”] 350 [13.78”] Figure 9.9.10: Size ADV200 SP-61320-...-DC dimensions ADV200 SP • Quick start up guide - Specification and installation...
- Page 83 421 [16.57”] 360 [14.17”] 275 [10.83”] 175 [6.89”] 350 [13.78”] Figure 9.9.11: Size ADV200 SP-61600...-DC dimensions 7 (8x) Figure 9.9.12: Size 2 ADV200 SP-EH-... dimensions ADV200 SP • Quick start up guide - Specification and installation...
- Page 84 7 (x12) Figure 9.9.13: Size 3 ADV200 SP-EH-... dimensions 7 (8x) 247.5 Figure 9.9.14: Size 4 ADV200 SP-EH-... dimensions ADV200 SP • Quick start up guide - Specification and installation...
- Page 85 9 (8x) Figure 9.9.15: Size 5 ADV200 SP-EH-... dimensions 222.5 GASKET Figure 9.9.16: Size 6 ADV200 SP-EH-... dimensions ADV200 SP • Quick start up guide - Specification and installation...
-
Page 86: Options
10 - Options 10.1 DC-side diode The blocking diodes provide protection against reverse current to the panels, which arises when the voltage generated by the photovoltaic field is lower than the rectified mains voltage. Note! The diodes must have a minimum blocking voltage of 1600V. The diodes and their cooling system must be sized for the maximum currents on the DC side. - Page 87 Figure 10.1.1: S8DI100 dimensions Ø 4.1 (mm) Figure 10.1.2: S8DI101 dimensions Ø 8.3 (mm) Figure 10.1.3: S8DI102 dimensions Ø 10.6 (mm) ADV200 SP • Quick start up guide - Specification and installation...
- Page 88 Figure 10.1.4: S8DI103 dimensions (mm) Figure 10.1.5: S8DI104 dimensions (mm) ADV200 SP • Quick start up guide - Specification and installation...
- Page 89 Figure 10.1.6: S8DI105 dimensions (mm) Figure 10.1.7: S8DI106, S8DI107 and S8DI108 dimensions (mm) ADV200 SP • Quick start up guide - Specification and installation...
- Page 90 Figure 10.1.8: S8DI109 dimensions (mm) Figure 10.1.9: S8DI110 and S8DI111 dimensions (mm) ADV200 SP • Quick start up guide - Specification and installation...
-
Page 91: Mounting Instructions And Precautions
10.1.3 Mounting instructions and Precautions Assembly example S8DI100 ... S8DI102 S8DI103 ... S8DI111 S8DI101 S8DI102 Rondella piana Flat washer Rondella piana Flat washer S8DI100 Models Hexagonal Insulator Hexagonal Round Round Screw Cod. BD-SP-1600V-... - Page 92 Voltages on heatsink and diode The device has dangerous voltages (see electrical data on the DC supply side and AC supply side) on all its parts (heatsinks and diode). In this regard, the insulation of the fastening components of the device towards the Warning! metal parts of the electrical panel where it is installed must be considered.
-
Page 93: Spds (Surge Protection Devices)
10.2 SPDs (surge protection devices) Note! SPDs must be installed in the immediate vicinity of the drive and with an overall connection cable length of less than 50 cm (out and back < 50 cm). The ADV200-SP has been designed to be connected to a power supply with category III overvoltage (to ground) and 4 kV pulse voltage. -
Page 94: Insulation Monitor
10.3 Insulation monitor Since the ADV200-SP drive is normally used in a ground-insulated system (IT), in accordance with IEC 61557- 8, use of insulation resistance monitoring is required. In an island or dual source configuration, we can have one of the following types of power supply: •... -
Page 95: Fuses
10.5 Fuses 10.5.1 AC input side fuses The inverter must be fused on the AC Input side. Use fast fuses only. The table below shows the recommended fuses up to a maximum ambient temperature of 40°C. F1 - AC input side fuses DC link capacitors life EUROPE AMERICA... - Page 96 The technical data of the fuses, e.g. dimensions, weights, heat dissipation, auxiliary contactors, are reported in the Eaton - Bussmann data sheets. Note! The fuses must have gPV type breaking characteristics, a 1000V rating and a current rating that does not exceed the manufacturer’s recommendations for panel protection.
-
Page 97: Emi Filters
10.6 EMI filters 10.6.1 EMI filters for IT network connections In the case of IT-type AC power `supply systems (generator insulated from PE), generally components con- nected between the supply phases and PE are prohibited. This is required for the operational reliability and safety of the system. -
Page 98: Emi Filters For Tt Or Tn Network Connections
10.6.2 EMI filters for TT or TN network connections Standard EMC filters (with capacitors connected between phases and PE) can be used in TN or TT grounded AC power supply networks, where both the generator and the load (AC motor) are electrically connected to PE. AC Input voltage 400V-480V, System earthing TN ,TT Sizes Heavy Duty... -
Page 99: Emi Filters For Dc Connections
10.6.3 EMI filters for DC connections On the DC side, the standards have not set limits on conducted emissions. If necessary, the EMC filters listed below can be installed to reduce emissions from the photovoltaic field. Filters can be supplied with capacitors connected between the DC-link and PE; in that case, FN 2200 version filters (with no B) should be requested. -
Page 100: Braking Resistor (Optional)
10.8 Braking resistor (optional) Recommended resistors for use with internal braking unit (except ADV200 SP-DC models): List and technical data of standard external resistors Max Overload Max Overload Resistance energy, energy, Braking resistor value Sizes Enclo- Resistor type Code 1”- duty-cycle 30”- duty-cycle nominal power sure... -
Page 101: Installation Of Optional Cards
10.9 Installation of optional cards Up to three optional cards can be inserted in the three slots under the top cover: • Slot 1-2: dedicated to IO cards (EXP-IO-...-ADV) • Slot 3: dedicated to field Bus cards (EXP-PDP-ADV, EXP-CAN-ADV, etc.). Note! EXP- SFTy-ADV card: Integrated on board as the 4th option. -
Page 102: Procedure
10.9.1 Procedure 1. Remove the bottom cover as indicated in paragraph 5.2.1. 2. To remove the top cover, loosen screws B by about 2 turns and slide out cover C as shown in the figure. 3. To prevent damage to the connection of the keypad, the top cover can be positioned as indicated in the figure. -
Page 103: Shielding Of Optional Card Connections
10.9.2 Shielding of optional card connections Fasten the shield of the cables to the omega sections as showed on figure. ADV200 SP • Quick start up guide - Specification and installation... -
Page 104: Appendix 1 - Miscellaneous
Appendix 1 - Miscellaneous A 1.1 DC-link capacity Size DC-link capacity (µF) 1015 1022 1030 1040 1055 2075 2110 2150 3185 1500 3220 1500 3300 1500 4370 2350 4450 2800 4550 3400 5750 4700 5900 5600 51100 6800 61320 11200 61600 13600 You cannot add an external capacitor on 1015 ... - Page 106 Fax +55 (0) 1132974012 commercial@gefran.fr comercial@gefran.com.br GEFRAN S.P.A. Manuale ADV200 SP QS GEFRAN DRIVES AND MOTION S.R.L. Via Sebina 74 (Rev. 0.4 - 19-2-2021) 25050 Provaglio d’Iseo (BS) ITALY Via Carducci 24 Ph. +39 030 98881 21040 Gerenzano [VA] ITALY...
Need help?
Do you have a question about the ADV200 SP Series and is the answer not in the manual?
Questions and answers