
Related Manuals for allen TRTP275


Summary of Contents for allen TRTP275
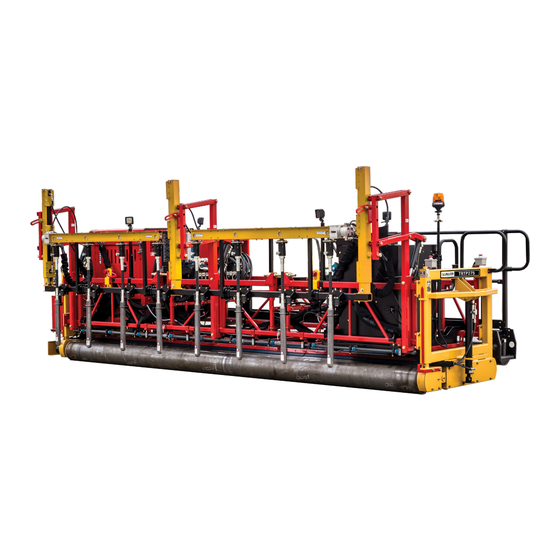
- Page 1 T R I P L E R O L L E R T U B E P A V E R S TRTP275 OPERATIONS & PARTS MANUAL Man ual Par t #: 06 813 6 | R evis io n : 02 .20 22...
- Page 2 INTENTIONALLY BLANK...
- Page 3 No part of this manual may be reproduced or transmitted in any form or by any means, electronic or mechanical, for any purpose, without the express written permission of Allen Engineering Corporation (AEC). AEC assumes no responsibility or liability for any errors or inaccuracies that may appear in this manual.
- Page 4 Allen reserves the choice to repair or replace. 2. If Allen chooses to replace the part, it will be at no cost to the customer and will be made available to the Allen Distributor, Dealer, or Rental Center from whom the End User purchased the product.
-
Page 5: Table Of Contents
Table of Contents Title Page Limited Warranty Table of Contents Information Contained In This Manual Dealer Information Ordering Parts Model Number - Serial Number Codes Unit Identification Technical specifications Machine Dimensional Specifications Engine Specifications Sound and Vibration Testing CE Declaration of Comformity Engine CE Information Section 1 - Safety State Regulations... -
Page 6: Table Of Contents
Table of Contents - Continued Title Page Parts Factory Service Information Replacement Part Procedure Operator End Assembly Idle End Assembly Engine Assembly Engine Cabinet Assembly Operator Platform Assembly Hydraulic Tray Assembly Water Spray Assembly Spray Pump Assembly Spray Nozzle Assembly Right Hand 6’... -
Page 7: Information Contained In This Manual
Complete any warranty requirements as specified by the engine manufacturer in their instructions found inside the manual box located on the operator’s control panel. Your engine is not manufactured by Allen Engineering Corporation, Inc, and therefore is not covered under Allen Engineering Corporation, Inc warranty. -
Page 8: Dealer Information
Dealer Information Your Dealer has Allen Engineering Corporation trained mechanics and original Allen replacement parts. Always contact the Allen Dealer who sold you this machine for Allen Certified repairs and replacement parts. Place Allen Dealer information below for future reference. -
Page 9: Ordering Parts
Ordering Parts Section 4 contains illustrated parts lists for help in ordering replacement parts for your machine. Follow the instructions below when ordering parts to insure prompt and accurate delivery: All orders for service parts - include the serial number for the machine. Shipment will be delayed if this information is not available. -
Page 10: Model Number - Serial Number Codes
Model Number - Serial Number Codes Manufacturer’s Codes: When ordering parts or requesting service information, you will always be asked to specify the model and serial numbers of the machine. The legends below specifically defines each significant character or group of characters of the Model Number and Serial Number codes. -
Page 11: Unit Identification
Unit Identification Unit Identification Plate Location: An identification plate listing the model number and the serial number is attached to each unit and is located on the top left corner of the operator end handle. See image below for serial number plate location. This plate should not be removed at any time. -
Page 12: Technical Specifications
Technical Specifications Engine Power unit: • Hatz Turbo Diesel 4 cylinder (74 HP) • 29 Gal (109.7 Lit) Fuel Tank Capacity • Fuel Consumption =? • Battery Lock Out Switch Machine Dimensions: • Weight 8,700 lbs. estimated at 18’ length •... - Page 13 Machine Dimensions 243 1/2 [20'-3 1/2"] [8'-6"] 18’ SETUP SHOWN 87 1/4 [7'-3 1/4"] [18'-0"] Page 13 09/2018 - 275...
-
Page 14: Engine Specifications
Engine Specifications Page 14 275 - 09/2018... - Page 15 Engine Specifications (cont’d) 09/2018 - 275 Page 15...
- Page 16 Engine Specifications (cont’d) Page 16 275 - 09/2018...
- Page 17 Engine Specifications (cont’d) 09/2018 - 275 Page 17...
- Page 18 Engine Specifications (cont’d) Page 18 275 - 09/2018...
- Page 19 Engine Specifications (cont’d) 09/2018 - 275 Page 19...
-
Page 20: Sound And Vibration Testing
Sound and Vibration Testing IN PROCESS Page 20 275 - 09/2018... - Page 21 Declaration of Conformity IN PROCESS 09/2018 - 275 Page 21...
- Page 22 Declaration of Conformity Hatz Engine Page 22 275 - 09/2018...
- Page 23 INTENTIONALLY BLANK 09/2018 - 275 Page 23...
-
Page 24: Section 1 - Safety
State Regulations SECTION 1 SAFETY Proposition 65 Warning Page 24 275 - 09/2018... -
Page 25: Federal Regulations
Federal Regulations SECTION 1 Respiratory Hazards SAFETY 09/2018 - 275 Page 25... -
Page 26: Safety Information
Safety Information SECTION 1 SAFETY Do not operate or service the equipment before reading the entire manual. Safety precautions should be followed at all times when operating this equipment. Failure to read and understand the safety messages and operating instructions could result in injury to yourself and others. -
Page 27: Safety Symbols
Safety Symbols SECTION 1 SAFETY Potential hazards associated with the operation of this equipment will be referenced with hazard symbols which may appear throughout this manual in conjunction with safety notes. 09/2018 - 275 Page 27... -
Page 28: General Safety
General Safety SECTION 1 SAFETY • NEVER operate this equipment without proper protective clothing, shatterproof glasses, respiratory protection, hearing protection, steel-toed boots and other protective devices required by the job or city and state regulations. • ALWAYS avoid wearing jewelry or loose fitting clothes that may snag on the controls or moving parts as this can cause serious injury. - Page 29 General Safety (cont’d) SECTION 1 SAFETY • ALWAYS know the location of the nearest phone or keep a phone on the job site. Also, know the phone numbers of the nearest ambulance, doctor and fire department. This information will be invaluable in the case of an emergency. •...
- Page 30 General Safety (cont’d) SECTION 1 SAFETY • ALWAYS keep the machine in proper running condition. • Fix damage to machine and replace any broken parts immediately. • ALWAYS store equipment properly when it is not being used. Equipment should be stored in a clean, dry location out of the reach of children and unauthorized personnel.
- Page 31 General Safety (cont’d) SECTION 1 SAFETY • DO NOT start the engine near spilled fuel or combustible fluids. Fuel is extremely flammable and its vapors can cause an explosion if ignited. • ALWAYS refuel in a well-ventilated area, away from sparks and open flames. •...
- Page 32 General Safety (cont’d) SECTION 1 SAFETY • ALWAYS recharge the battery in a well-ventilated environment to avoid the risk of a dangerous concentration of com- bustible gases. • If the battery liquid (dilute sulfuric acid) comes into contact with clothing or skin, rinse skin or clothing immediately with plenty of water. •...
-
Page 33: Safety Labels And Decals
Safety Labels and Decals (cont’d) SECTION 1 SAFETY 09/2018 - 275 Page 33... - Page 34 Safety Labels and Decals (cont’d) SECTION 1 SAFETY Page 34 275 - 09/2018...
- Page 35 Safety Labels and Decals (cont’d) SECTION 1 SAFETY DIRECTIONS • Attach the optical wedge decal to the barrel of the vibrator as close to the nose as possible • Hang vibrator vertically in the air • Run vibrator and observe the optical wedge (The image on the wedge will change with the pointed end of the wedge become pale and appearing to visually move up the scale) •...
-
Page 36: Operational Safety
Operational Safety SECTION 1 SAFETY Before starting up and during operation of the paver, the operator must make sure that there are no persons in the “danger zone”. He must give a warning signal whenever a situation presenting danger to persons might develop. He must imme- diately stop work if any person, although asked, does not leave the danger zone. - Page 37 Operational Safety (cont’d) SECTION 1 SAFETY Pressing the emergency stop button (e.g. when someone enters the danger zone, when the machine is no longer under control, etc.) causes the drive motors, the screed motor and the steering system to be switched off. The paver brakes to a standstill.
-
Page 38: Transportation Safety
Transportation Safety SECTION 1 Machine Lifting SAFETY LIFTING POINT LIFTING POINT Page 38 275 - 09/2018... - Page 39 Transportation Safety (cont’d) SECTION 1 Trailer Safety SAFETY Before driving, make sure your vehicle maintenance and trailer maintenance are current. This is very important because towing puts additional stress on the tow vehicle. • Check and correct tire pressure on the tow vehicle and trailer, including the spare tire. •...
- Page 40 Transportation Safety (cont’d) SECTION 1 SAFETY Lifting Hazards of using lifting equipment The hazards: associated with the use of lifting equipment in construction are: • Hazards related to the loads, e.g. crushing due to impact of moving objects or loads falling from vehicles because they are not slinged properly or the wrong type of slings were used.
- Page 41 Transportation Safety (cont’d) SECTION 1 Lifting SAFETY Before using mobile lifting equipment the following safety precautions should be taken: • The working environment: Routes should be leveled, marked and planned in such a way as to avoid potential hazards such as overhead power lines and steeply sloping ground. Where possible a one-way system should be used. Speed limits should be required and clearly displayed, they should be reduced for adverse site conditions and for areas near work in progress.
- Page 42 Transportation Safety (cont’d) SECTION 1 SAFETY Lifting What needs to be examined depends on the professional judgment of the competent person undertaking the examination. For most common lifting equipment and accessories, there are standard procedures and criteria. Methods include a visual examination and functional checks, measurements of wear, traditional non-destructive testing and load testing.
- Page 43 Transportation Safety (cont’d) SECTION 1 Lifting SAFETY P. Free rigging is prohibited. If the lift equipment has the manufacturer approved lifting attachment installed on the tines/ forks, it is not free rigging. Q. Personnel-elevating work platforms shall not be used as cranes. R.
- Page 44 Transportation Safety (cont’d) SECTION 1 SAFETY Lifting General tips for crane operation Additionally, a few key points always worth keeping in mind during crane operation: • Once a load is in the air, don’t leave the controls – While a load is suspended the operator should not leave the controls. •...
- Page 45 Transportation Safety (cont’d) SECTION 1 Lifting SAFETY 4. Plan for swing. The counterweight and boom travel within a specific arc that’s called the swing radius. It’s important to ensure that the area within that radius is barricaded off, and to establish a control zone for those authorized to work in the immediate area.
- Page 46 Transportation Safety (cont’d) SECTION 1 SAFETY Rigging Page 46 275 - 09/2018...
- Page 47 Transportation Safety (cont’d) SECTION 1 Rigging SAFETY 09/2018 - 275 Page 47...
- Page 48 Transportation Safety (cont’d) SECTION 1 SAFETY Rigging Page 48 275 - 09/2018...
- Page 49 Transportation Safety (cont’d) SECTION 1 Rigging SAFETY 09/2018 - 275 Page 49...
- Page 50 Transportation Safety (cont’d) SECTION 1 SAFETY Rigging Page 50 275 - 09/2018...
- Page 51 Transportation Safety (cont’d) SECTION 1 SAFETY Rigging 09/2018 - 275 Page 51...
-
Page 52: Lifting Locations
Lifting Point Locations SECTION 1 SAFETY 068130 - 16' T275 TRIPLE TUBE LIFTING LOCATION LIFT POINT POWER END OPERATOR END 3'-7" 5'-1" 6'-10" Page 52 275 - 09/2018... - Page 53 Lifting Point Locations (cont’d) SECTION 1 SAFETY 068000 - 18' T275 TRIPLE TUBE LIFTING LOCATION LIFT POINT POWER END OPERATOR END 3'-7" 5'-1" 8'-10" 09/2018 - 275 Page 53...
- Page 54 Lifting Point Locations (cont’d) SECTION 1 SAFETY 068131 - 20' T275 TRIPLE TUBE LIFTING LOCATION LIFT POINT OPERATOR END POWER END 3'-7" 5'-2" 10'-9" Page 54 275 - 09/2018...
- Page 55 Lifting Point Locations (cont’d) SECTION 1 SAFETY 068132 - 22' T275 TRIPLE TUBE LIFTING LOCATION LIFT POINT OPERATOR END POWER END 3'-7" 5'-1" 8'-5" 09/2018 - 275 Page 55...
- Page 56 Lifting Point Locations (cont’d) SECTION 1 SAFETY 068133 - 24' T275 TRIPLE TUBE LIFTING LOCATION LIFT POINT POWER END OPERATOR END 3'-7" 5'-1" 14'-10" Page 56 275 - 09/2018...
- Page 57 Lifting Point Locations (cont’d) SECTION 1 SAFETY 068134 - 26' T275 TRIPLE TUBE LIFTING LOCATION LIFT POINT POWER END OPERATOR END 3'-7" 5'-1" 16'-10" 09/2018 - 275 Page 57...
- Page 58 Lifting Point Locations (cont’d) SECTION 1 SAFETY 068001 - 28' T275 TRIPLE TUBE LIFTING LOCATION LIFT POINT POWER END OPERATOR END 3'-7" 5'-1" 18'-10" Page 58 275 - 09/2018...
- Page 59 Lifting Point Locations (cont’d) SECTION 1 SAFETY 068100 - 30' T275 TRIPLE TUBE LIFTING LOCATION LIFT POINT OPERATOR END POWER END 3'-7" 5'-1" 20'-10" 09/2018 - 275 Page 59...
- Page 60 Lifting Point Locations (cont’d) SECTION 1 SAFETY 068135 - 32' T275 TRIPLE TUBE LIFTING LOCATION LIFT POINT OPERATOR END POWER END 3'-7" 5'-1" 22'-10" Page 60 275 - 09/2018...
-
Page 61: Lifting Hoist Information
Lifting Hoist SECTION 1 SAFETY 068058 - ASSEMBLY, LIFT HOIST 275 TRTP 12-1/2 TON (25,000lbs) LIFTING CAPACITY 09/2018 - 275 Page 61... -
Page 62: Section 2 - Operations
Pre Operating Instructions SECTION 2 OPERATIONS Before operation each day ensure the following: • All guards, side screens and panels are in place. • All safety and information signs are in place and legible. • Engine and hydraulic oil levels are correct. •... - Page 63 Pre Operating Instructions (cont’d) SECTION 2 Control Panel Layouts OPERATIONS 09/2018 - 275 Page 63...
-
Page 64: Operating Instructions
Operating Instructions SECTION 2 OPERATIONS Refer to images on Page 53 for controls. Step 1) Pull up on both the Emergency Stop Switch (H and P) on the engine control panel and the operator control panel. • Power light (A) is on •... - Page 65 Operating Instructions (cont’d) SECTION 2 OPERATIONS 09/2018 - 275 Page 65...
-
Page 66: Section 3 - Service
Engine Maintenance Schedule SECTION 3 SERVICE Symbol Maintenance interval Maintenance activity/check Check the oil level. Check the intake area of the combustion air. 8-15h Every 8–15 operating hours or every day before starting Check the radiator fins for dirt accumulation. Check the cooling system Change the engine oil and oil filter Change the fuel prefilter... - Page 67 Air Cleaner Maintenance SECTION 3 SERVICE Step Activity 1. Check the intake opening (1) for coarse contamination such as leaves, heavy dust deposits, etc., and clean if neces- sary. 2. Check that the dust discharge valve (2) is clear. Remove dust seals by pressing them together. 3.
-
Page 68: Maintenance Schedule
TRTP Maintenance Schedule SECTION 3 SERVICE Page 68 275 - 09/2018... -
Page 69: Filter Replacements
Filter Replacement SECTION 3 Pre-Fuel Filter SERVICE Step Activity 1. Lock the fuel supply line on the fuel prefilter. 2. Place a suitable container under the filter to collect emerging fuel. 3. Disconnect the water level sensor cable (4) from the drain plug (3). 4. - Page 70 Filter Replacement (Cont’d) SECTION 3 SERVICE Fuel Filter Step Activity 1. Block the fuel feed line (1) using the hose clip (2). 2. Place a suitable container under the filter to collect emerging fuel. 3. Unscrew the main fuel filter (3) and dispose of it according to local environmental regulations. 4.
- Page 71 Filter Replacement (Cont’d) SECTION 3 Oil Seperator SERVICE Step Activity 1. Release the four mounting bolts (1) on the breather cap (2). 2. Carefully lift the breather cap. If necessary, release the vent hose (4). 3. Remove the used oil separator cartridge dispose of it according to local environmental regulations. 4.
- Page 72 Filter Replacement (Cont’d) SECTION 3 Oil Filter SERVICE Step Activity 1. Keep a container ready for collecting the used oil. 2. Loosen the oil filter (1) with a strap wrench or similar and unscrew it. 3. Dispose of the old filter in accordance with local environmental regulations. 4.
- Page 73 Filter Replacement (Cont’d) SECTION 3 Air Filter SERVICE 09/2018 - 275 Page 73...
- Page 74 Filter Replacement (Cont’d) SECTION 3 Air Filter (Cont’d) SERVICE Replacing the primary/secondary filters Step Activity 1. Open the retaining clips (2) and remove the air filter cover (3). 2. Pull out the primary filter (6) and either replace (recommended) or clean (see below). Replace or clean the primary filter according to the service interval indicator.
- Page 75 Filter Replacement (Cont’d) SECTION 3 Hydraulic Filters SERVICE TMF-50-5 PART NUMBER: 057661 TMF-25-5 PART NUMBER: 049357 09/2018 - 275 Page 75...
-
Page 76: Troubleshooting
Troubleshooting SECTION 3 SERVICE Possible Corrective Area Malfunction Ref. Cause Measure Battery is discharged - Add battery fluid - Charge the battery - Replace the battery Battery cable is disconnected - Connect battery cable Blown fuse - Replace fuse Bad connection or breakage in the wiring - Contact your AEC dealer Engine does not start, Out of fuel... - Page 77 Troubleshooting (cont’d) SECTION 3 SERVICE Possible Corrective Area Malfunction Ref. Cause Measure Bad fuel - Change fuel Clogged air cleaner - Clean or replace the air cleaner Black smoke comes out of exhaust Choke is not fully open - Open the choke fully Engine Other (other than above) - Contact your AEC dealer...
-
Page 78: Factory Service Information
Factory Service Information SECTION 4 PARTS This section contains the illustrated drawings and parts list for help in identifying and/or ordering re- placement parts for your machine. Follow the instructions in the front section of this manual “Ordering Parts” when ordering replacement parts to insure prompt and accurate delivery. The FRONT and/or REAR orientations are defined from the operator’s view of sitting on machine (SOM). -
Page 79: Replacement Part Procedure
Replacement Part Procedures SECTION 4 PARTS We recommend AEC quality replacement parts, available from the AEC Customer Service Department or your nearest AEC Dealer. Part numbers are subject to change without notice. Part numbers might be different outside of the Unit- ed States of America. - Page 80 Operator End Assembly - Illustration SECTION 4 068101 PARTS Page 80 275 - 09/2018...
- Page 81 Operator End Assembly - Parts List SECTION 4 068101 PARTS ITEM PART NO. DESCRIPTION 010002 FSTN, HHCS 1/4-20 X 3/4 010031 FSTN HHCS 5/16-18 X 3-3/4 GRD8 010036 FSTN, HHCS 3/8-16 X 1 GR 8 010042 FSTN, HHCS 3/8-16 X 2-1/2 GR 8 010045 FSTN, HHCS 3/8-16 X 3-1/4 010046...
-
Page 82: Operator End Assembly
Operator End Assembly - Illustration SECTION 4 PARTS 068101 - (Cont’d) Page 82 275 - 09/2018... - Page 83 Operator End Assembly - Parts List SECTION 4 068101 - (Cont’d) PARTS ITEM PART NO. DESCRIPTION 063085 HOSE,18” LONG FLEXIBLE GREASE W/ 1/8 063085 HOSE,18” LONG FLEXIBLE GREASE WITH 1/8” NPT FTG’S 066497 DECAL, FINISH TUBE VERTICAL ADJUSTER 067470 FRAME WMTN, 6’ END LH FRONT & RH REAR 275 TRTP 067480 FRAME WMTN, 6’...
- Page 84 Idle End Assembly - Illustration SECTION 4 068102 PARTS Page 84 275 - 09/2018...
- Page 85 Idle End Assembly - Parts List SECTION 4 068102 PARTS ITEM PART NO. DESCRIPTION 010001 FSTN, HHCS 1/4-20 X 1/2 GR 5 010002 FSTN, HHCS 1/4-20 X 3/4 010031 FSTN HHCS 5/16-18 X 3-3/4 GRD8 010035 FSTN, HHCS 3/8-16 X 3/4 010036 FSTN, HHCS 3/8-16 X 1 GR 8 010039...
-
Page 86: Idle End Assembly
Idle End Assembly - Illustration SECTION 4 PARTS 068102 (Cont’d) Page 86 275 - 09/2018... - Page 87 FTG, BULK HEAD 1/8” NPT X 5/8-18 OD THREADS BRASS 063085 HOSE,18” LONG FLEXIBLE GREASE W/ 1/8 065653 DECAL “LIFT HOOK” 075277 DECAL “ALLEN MADE IN USA” 067057 PLUG, 9283K34 F/ RAIL TUBES (AUS) 067470 FRAME WMTN, 6’ END LH FRONT & RH REAR 275 TRTP 067477...
-
Page 88: Engine Assembly
Engine Assembly - Illustration SECTION 4 PARTS 067770 Page 88 275 - 09/2018... - Page 89 Engine Assembly - Parts List SECTION 4 067770 PARTS ITEM PART NO. DESCRIPTION 010069 FSTN, HHCS 1/2-13 X 1-1/2 GRADE 8 010085 FSTN, FW 1/2 GR8 010093 FSTN, LW 1/2 GR8 059580 STACK CAP, 2” (P270532) 064286 HATZ ENGINE H50 1800 RPM 064535 MUFFLER CLAMP, 2 3/16”...
- Page 90 Engine Assembly - Illustration SECTION 4 PARTS 067770 - Cont’d Page 90 275 - 09/2018...
- Page 91 Engine Assembly - Parts List SECTION 4 067770 - Cont’d PARTS ITEM PART NO. DESCRIPTION 010069 FSTN, HHCS 1/2-13 X 1-1/2 GRADE 8 010085 FSTN, FW 1/2 GR8 010093 FSTN, LW 1/2 GR8 059580 STACK CAP, 2” (P270532) 064286 HATZ ENGINE H50 1800 RPM 064535 MUFFLER CLAMP, 2 3/16”...
-
Page 92: Engine Cabinet Assembly
Engine Cabinet Assembly - Illustration SECTION 4 PARTS 067730 Page 92 275 - 09/2018... - Page 93 Engine Cabinet Assembly - Parts List SECTION 4 067730 PARTS ITEM PART NO. DESCRIPTION 010075 FSTN, HHCS 1/2-13 X 3 GR 8 010085 FSTN, FW 1/2 GR8 010091 FSTN, LW 3/8 011238 FSTN, NUT HEX NYLOK 1/2-13 017751 FSTN, FW HARD A325 3/8 (p) 032268 UNIT, CHROME LOCKABLE GAS-HYDRA TANK CAP 042260...
- Page 94 Engine Cabinet Assembly - Illustration SECTION 4 PARTS 067730 - Cont’d Page 94 275 - 09/2018...
- Page 95 Engine Cabinet Assembly - Parts List SECTION 4 067730 - Cont’d PARTS ITEM PART NO. DESCRIPTION 010075 FSTN, HHCS 1/2-13 X 3 GR 8 010085 FSTN, FW 1/2 GR8 010091 FSTN, LW 3/8 011238 FSTN, NUT HEX NYLOK 1/2-13 017751 FSTN, FW HARD A325 3/8 (p) 032268 UNIT, CHROME LOCKABLE GAS-HYDRA TANK CAP...
- Page 96 Operator Platform - Illustration SECTION 4 PARTS 067805 Page 96 275 - 09/2018...
- Page 97 Operator Platform - Parts List SECTION 4 067805 PARTS ITEM PART NO. DESCRIPTION 010001 FSTN, HHCS 1/4-20 X 1/2 GR 5 010002 FSTN, HHCS 1/4-20 X 3/4 010019 FSTN, HHCS 5/16-18 X 3/4 GR 5 010035 FSTN, HHCS 3/8-16 X 3/4 010036 FSTN, HHCS 3/8-16 X 1 GR 8 010067...
- Page 98 Operator Platform - Illustration (cont’d) SECTION 4 PARTS 067805 Page 98 275 - 09/2018...
- Page 99 Operator Platform - Parts List (cont’d) SECTION 4 067805 PARTS ITEM PART NO. DESCRIPTION 067835 HAND RAIL, LH OPERATOR CONSOLE 275TRTP 067917 COVER, CONTROL PANEL 275 TRTP 067990 HANDLE, PLASTIC PULL WITH THREADED HOLES 4” CENTERS 067992 CONTROL PANEL ASSEMBLY, FOR 275 TRTP 068167 GAUGE, CHARGE SYSTEM FILTER 068362...
-
Page 100: Hydraulic Tray Assembly
Hydraulic Tray Assembly - Illustration SECTION 4 PARTS 067784 Page 100 275 - 09/2018... - Page 101 Hydydraulic Tray Assembly - Parts List SECTION 4 067784 PARTS ITEM PART NO. DESCRIPTION 010011 FSTN, HHCS 1/4-20 X 3 010019 FSTN, HHCS 5/16-18 X 3/4 GR 5 010035 FSTN, HHCS 3/8-16 X 3/4 010036 FSTN, HHCS 3/8-16 X 1 GR 8 010045 FSTN, HHCS 3/8-16 X 3-1/4 010081...
-
Page 102: Water Spray Assembly
Water Spray Assembly - Illustration SECTION 4 067795 PARTS Page 102 275 - 09/2018... - Page 103 Water Spray Assembly - Parts List SECTION 4 067795 PARTS ITEM PART NO. DESCRIPTION 010020 FSTN, HHCS 5/16-18 X 1 010021 FSTN, HHCS 5/16-18 X 1-1/4 GR5 010036 FSTN, HHCS 3/8-16 X 1 GR 8 010045 FSTN, HHCS 3/8-16 X 3-1/4 010054 FSTN, HHCS 7/16-14 X 1 1/2”...
-
Page 104: Spray Pump Assembly
Spray Pump Assembly - Illustration SECTION 4 PARTS Page 104 275 - 09/2018... - Page 105 Spray Pump Assembly - Parts List SECTION 4 PARTS ITEM PART NO. DESCRIPTION 010020 FSTN, HHCS 5/16-18 X 1 010021 FSTN, HHCS 5/16-18 X 1-1/4 GR5 010082 FSTN, FW 5/16 010090 FSTN, LW 5/16 012612 FSTN, NUT HEX NYLOCK 5/16-18 029418 PUMP, 6500C-R 039788...
-
Page 106: Spray Nozzle Assembly
Spray Nozzle Assembly - Illustration SECTION 4 PARTS 044914 Page 106 275 - 09/2018... - Page 107 Spray Nozzle Assembly - Parts List SECTION 4 044914 PARTS ITEM PART NO. DESCRIPTION 044914 ASSY, TRTP PLASTIC SPRAY NOZZLE 041603 ADAPTOR, 1/4 CLAMP-ON 041604 VALVE, CHECK BODY 041605 SPRAY TIP F/TRTP (PLASTIC) 041606 PLASTIC 1/4 NPT CLOSE NIPPLE 041624 RETAINER, NYLON SPRAY TIP 047579 STRAINER, POLY 100 MESH...
- Page 108 RH 6’ End Scraper Assembly - Illustration SECTION 4 PARTS 067841 Page 108 275 - 09/2018...
- Page 109 RH 6’ End Scraper Assembly - Parts List SECTION 4 PARTS 067841 ITEM PART NO. DESCRIPTION 010020 FSTN, HHCS 5/16-18 X 1 010045 FSTN, HHCS 3/8-16 X 3-1/4 010082 FSTN, FW 5/16 010083 FSTN, FW 3/8 010090 FSTN, LW 5/16 010100 FSTN, NUT HEX 5/16-18 GR8 010464...
- Page 110 LH 6’ End Scraper Assembly - Illustration SECTION 4 067842 PARTS Page 110 275 - 09/2018...
- Page 111 LH 6’ End Scraper Assembly - Parts List SECTION 4 067842 PARTS ITEM PART NO. DESCRIPTION 010020 FSTN, HHCS 5/16-18 X 1 010045 FSTN, HHCS 3/8-16 X 3-1/4 010082 FSTN, FW 5/16 010083 FSTN, FW 3/8 010090 FSTN, LW 5/16 010100 FSTN, NUT HEX 5/16-18 GR8 010464...
- Page 112 RH 6’ Spray Bar Assembly - Illustration SECTION 4 068055 PARTS Page 112 275 - 09/2018...
- Page 113 RH 6’ Spray Bar Assembly - Parts List SECTION 4 068055 PARTS ITEM PART NO. DESCRIPTION 041598 BUSHING 1 x 3/4 SCH 80 PVC THREADED 041599 TEE 1” SCH 80 PVC 041602 CAP, 1” SCH 80 PVC 041603 ADAPTOR, 1/4 CLAMP-ON 041604 VALVE, CHECK BODY 041605...
- Page 114 LH 6’ Spray Bar Assembly - Illustration SECTION 4 PARTS 067947 Page 114 275 - 09/2018...
- Page 115 LH 6’ Spray Bar Assembly - Parts List SECTION 4 067947 PARTS ITEM PART NO. DESCRIPTION 041602 CAP, 1” SCH 80 PVC 041603 ADAPTOR, 1/4 CLAMP-ON 041604 VALVE, CHECK BODY 041605 SPRAY TIP F/TRTP (PLASTIC) 041606 PLASTIC 1/4 NPT CLOSE NIPPLE 041610 1”...
- Page 116 16’ Gang Vibration Assembly - Illustration SECTION 4 PARTS 069269 Page 116 275 - 09/2018...
- Page 117 16’ Gang Vibration Assembly - Parts List SECTION 4 PARTS 069269 ITEM PART NO. DESCRIPTION 010002 FSTN, HHCS 1/4-20 X 3/4 010081 FSTN, FW 1/4 010085 FSTN, FW 1/2 GR8 010089 FSTN, LW 1/4 010095 FSTN, LW 5/8 010098 FSTN, NUT HEX 1/4-20 010110 FSTN, NUT HEX 5/8-11 GR 8 011238...
- Page 118 18’ Gang Vibration Assembly - Illustration SECTION 4 PARTS 068165 Page 118 275 - 09/2018...
- Page 119 18’ Gang Vibration Assembly - Parts List SECTION 4 068165 PARTS ITEM PART NO. DESCRIPTION 010002 FSTN, HHCS 1/4-20 X 3/4 010081 FSTN, FW 1/4 010085 FSTN, FW 1/2 GR8 010089 FSTN, LW 1/4 010095 FSTN, LW 5/8 010098 FSTN, NUT HEX 1/4-20 010110 FSTN, NUT HEX 5/8-11 GR 8 011238...
- Page 120 22’ Gang Vibration Assembly - Illustration SECTION 4 PARTS 069265 Page 120 275 - 09/2018...
- Page 121 22’ Gang Vibration Assembly - Parts List SECTION 4 069265 PARTS ITEM PART NO. DESCRIPTION 067615 CENTER LH GANG LIFT ASSEM. 275 TRTP 067616 RH GANG LIFT ASSEMBLY 275 TRTP 067617 LH GANG LIFT ASSEMBLY 275 TRTP 067708 LH 5 BANK GANG RACK ASSEM. 275 TRTP 067717 PLATE, BACK FOR GANG RACK UPRIGHT MONTING 275 TRTP 068108...
- Page 122 28’ Gang Vibration Assembly - Illustration SECTION 4 069224 PARTS Page 122 275 - 09/2018...
- Page 123 28’ Gang Vibration Assembly - Parts List SECTION 4 069224 PARTS ITEM PART NO. DESCRIPTION 067616 RH GANG LIFT ASSEMBLY 275 TRTP 067617 LH GANG LIFT ASSEMBLY 275 TRTP 067717 PLATE, BACK FOR GANG RACK UPRIGHT MONTING 275 TRTP 068140 LH 6 BANK GANG RACK ASSEM.
- Page 124 RH Rack Assembly - Illustration SECTION 4 067706 PARTS Page 124 275 - 09/2018...
- Page 125 RH Rack Assembly - Parts List SECTION 4 067706 PARTS ITEM PART NO. DESCRIPTION 010002 FSTN, HHCS 1/4-20 X 3/4 010036 FSTN, HHCS 3/8-16 X 1 GR 8 010037 FSTN, HHCS 3/8-16 X 1-1/4 GR 5 010081 FSTN, FW 1/4 010089 FSTN, LW 1/4 010091...
- Page 126 RH Rack Assembly - Illustration (cont’d) SECTION 4 067706 PARTS Page 126 275 - 09/2018...
- Page 127 RH Rack Assembly - Parts List (cont’d) SECTION 4 067706 PARTS ITEM PART NO. DESCRIPTION 010002 FSTN, HHCS 1/4-20 X 3/4 010036 FSTN, HHCS 3/8-16 X 1 GR 8 010037 FSTN, HHCS 3/8-16 X 1-1/4 GR 5 010081 FSTN, FW 1/4 010089 FSTN, LW 1/4 010091...
- Page 128 LH Rack Assembly - Illustration SECTION 4 067707 PARTS Page 128 275 - 09/2018...
- Page 129 LH Rack Assembly - Parts List SECTION 4 067707 PARTS ITEM PART NO. DESCRIPTION 010002 FSTN, HHCS 1/4-20 X 3/4 010036 FSTN, HHCS 3/8-16 X 1 GR 8 010081 FSTN, FW 1/4 010089 FSTN, LW 1/4 010091 FSTN, LW 3/8 010098 FSTN, NUT HEX 1/4-20 010102...
- Page 130 LH Rack Assembly - Illustration (cont’d) SECTION 4 PARTS 067707 It is imperative during assembly that the rotation of the downward gearbox shaft be counter-clockwise to prevent the vibrator’s internal components from “unwinding” and coming apart causing vibrator failure. Page 130 275 - 09/2018...
- Page 131 LH Rack Assembly - Parts List (cont’d) SECTION 4 067707 PARTS ITEM PART NO. DESCRIPTION 010002 FSTN, HHCS 1/4-20 X 3/4 010036 FSTN, HHCS 3/8-16 X 1 GR 8 010081 FSTN, FW 1/4 010089 FSTN, LW 1/4 010091 FSTN, LW 3/8 010098 FSTN, NUT HEX 1/4-20 010102...
- Page 132 RH Rack 7-Bank Assembly - Illustration SECTION 4 PARTS 068773 Page 132 275 - 09/2018...
- Page 133 RH Rack 7-Bank Assembly - Parts List SECTION 4 068773 PARTS ITEM PART NO. DESCRIPTION 010002 FSTN, HHCS 1/4-20 X 3/4 010036 FSTN, HHCS 3/8-16 X 1 GR 8 010037 FSTN, HHCS 3/8-16 X 1-1/4 GR 5 010081 FSTN, FW 1/4 010089 FSTN, LW 1/4 010091...
- Page 134 LH Rack 6-Bank Assembly - Illustration SECTION 4 PARTS 068140 Page 134 275 - 09/2018...
- Page 135 LH Rack 6-Bank Assembly - Parts List SECTION 4 068140 PARTS ITEM PART NO. DESCRIPTION 012869 SCR, 1/4-20x3/8 BO SKT SET 015813 KEY, 3/16” SQ X 1” LG WITH RADI ENDS 020542 FSTN, NUT STOVER LOCK 1/4-20 033711 FSTN, HHCS 1/2-13 X 4 1/2” 044859 COUPLER, DRIVE SHAFT F/ VIB RACK 044860...
- Page 136 RH Rack 5-Bank Assembly - Illustration SECTION 4 068108 PARTS Page 136 275 - 09/2018...
- Page 137 RH Rack 5-Bank Assembly - Parts List SECTION 4 068108 PARTS ITEM PART NO. DESCRIPTION 012869 SCR, 1/4-20x3/8 BO SKT SET 015813 KEY, 3/16” SQ X 1” LG WITH RADI ENDS 044859 COUPLER, DRIVE SHAFT F/ VIB RACK 044860 SHAFT, 15 1/2” DRIVE 044889 ADAPTER BLOCK FOR GEARBOX 049327...
- Page 138 LH Rack 5-Bank Assembly - Illustration SECTION 4 PARTS 067708 Page 138 275 - 09/2018...
- Page 139 LH Rack 5-Bank Assembly - Parts List SECTION 4 067708 PARTS ITEM PART NO. DESCRIPTION 012869 SCR, 1/4-20x3/8 BO SKT SET 015813 KEY, 3/16” SQ X 1” LG WITH RADI ENDS 044859 COUPLER, DRIVE SHAFT F/ VIB RACK 044860 SHAFT, 15 1/2” DRIVE 044889 ADAPTER BLOCK FOR GEARBOX 049327...
-
Page 140: Rh End Vibrator Assembly
RH End Vibrator Assembly - Illustration SECTION 4 PARTS 067688 Page 140 275 - 09/2018... - Page 141 RH End Vibrator Assembly - Parts List SECTION 4 067688 PARTS ITEM PART NO. DESCRIPTION 010021 FSTN, HHCS 5/16-18 X 1-1/4 GR5 010066 FSTN, HHCS 1/2-13 X 3/4 GR 5 010091 FSTN, LW 3/8 010093 FSTN, LW 1/2 GR8 010098 FSTN, NUT HEX 1/4-20 010102 FSTN, NUT HEX 3/8-16...
-
Page 142: Lh End Vibrator Assembly
LH End Vibrator Assembly - Illustration SECTION 4 PARTS 067687 Page 142 275 - 09/2018... - Page 143 LH End Vibrator Assembly - Parts List SECTION 4 067687 PARTS ITEM PART NO. DESCRIPTION 010021 FSTN, HHCS 5/16-18 X 1-1/4 GR5 010066 FSTN, HHCS 1/2-13 X 3/4 GR 5 010091 FSTN, LW 3/8 010093 FSTN, LW 1/2 GR8 010098 FSTN, NUT HEX 1/4-20 010102 FSTN, NUT HEX 3/8-16...
-
Page 144: Center Vibrator Assembly
Center Vibrator Assembly - Illustration SECTION 4 PARTS 067689 Page 144 275 - 09/2018... - Page 145 Center Vibrator Assembly - Parts List SECTION 4 067689 PARTS ITEM PART NO. DESCRIPTION 010021 FSTN, HHCS 5/16-18 X 1-1/4 GR5 010066 FSTN, HHCS 1/2-13 X 3/4 GR 5 010091 FSTN, LW 3/8 010093 FSTN, LW 1/2 GR8 010098 FSTN, NUT HEX 1/4-20 010102 FSTN, NUT HEX 3/8-16 012612...
-
Page 146: Right Rack Lift Assembly
Right Rack Lift Assembly - Illustration SECTION 4 PARTS 067616 Page 146 275 - 09/2018... - Page 147 Right Rack Lift Assembly - Parts List SECTION 4 067616 PARTS ITEM PART NO. DESCRIPTION 010003 FSTN, HHCS 1/4-20 X 1 010081 FSTN, FW 1/4 010089 FSTN, LW 1/4 010464 FSTN, NUT NYLOK 3/8-16 GR 8 010632 FSTN, HHCS 5/8-11 X 2 GR 8 012982 FSTN, FW 5/8”...
-
Page 148: Left Rack Lift Assembly
Left Rack Lift Assembly - Illustration SECTION 4 PARTS 067617 Page 148 275 - 09/2018... - Page 149 Left Rack Lift Assembly - Parts List SECTION 4 067617 PARTS ITEM PART NO. DESCRIPTION 010003 FSTN, HHCS 1/4-20 X 1 010081 FSTN, FW 1/4 010089 FSTN, LW 1/4 010464 FSTN, NUT NYLOK 3/8-16 GR 8 010632 FSTN, HHCS 5/8-11 X 2 GR 8 012982 FSTN, FW 5/8”...
-
Page 150: Center Rack Lift Assembly
Center Rack Lift Assembly - Illustration SECTION 4 PARTS 067615 Page 150 275 - 09/2018... - Page 151 Center Rack Lift Assembly - Parts List SECTION 4 067615 PARTS ITEM PART NO. DESCRIPTION 010003 FSTN, HHCS 1/4-20 X 1 010081 FSTN, FW 1/4 010089 FSTN, LW 1/4 010464 FSTN, NUT NYLOK 3/8-16 GR 8 010632 FSTN, HHCS 5/8-11 X 2 GR 8 012982 FSTN, FW 5/8”...
- Page 152 6’ Center Section - Illustration SECTION 4 PARTS 068103 Page 152 275 - 09/2018...
- Page 153 6’ Center Section - Parts List SECTION 4 068103 PARTS ITEM PART NO. DESCRIPTION 010002 FSTN, HHCS 1/4-20 X 3/4 010036 FSTN, HHCS 3/8-16 X 1 GR 8 010042 FSTN, HHCS 3/8-16 X 2-1/2 GR 8 010046 FSTN, HHCS 3/8-16 X 3-1/2 010081 FSTN, FW 1/4 010098...
-
Page 154: Mirror Assembly
Mirror Assembly SECTION 4 PARTS Illustration and Parts List ITEM PART NO. DESCRIPTION 010090 FSTN, LW 5/16 010100 FSTN, NUT HEX 5/16-18 GR8 068051 12” DOME MIRROR FOR 275 TRTP 068052 BRACKET, MIRROR MOUNT FOR 275 TRTP Page 154 275 - 09/2018... - Page 155 SECTION 4 PARTS 09/2018 - 275 Page 155...
-
Page 156: Electrical Schematics
Electrical Schematics SECTION 4 Plug 20-18 & 14S-6 PARTS Page 156 275 - 09/2018... - Page 157 Electrical Schematics (Cont’d) SECTION 4 Plug 28-12 (Part 1) PARTS 09/2018 - 275 Page 157...
- Page 158 Electrical Schematics (Cont’d) SECTION 4 Plug 28-12 (Part 2) PARTS Page 158 275 - 09/2018...
- Page 159 Electrical Schematics (Cont’d) SECTION 4 PARTS Page 159 09/2018 - 275...
- Page 160 Electrical Schematics (Cont’d) SECTION 4 PARTS Page 160 275 - 09/2018...
-
Page 161: Hydraulic Schematics
Hydraulic Schematics SECTION 4 PARTS 30-34’ UNITS 09/2018 - 275 Page 161... - Page 162 Hydraulic Schematics (Cont’d) SECTION 4 PARTS 30-34’ UNITS Page 162 275 - 09/2018...
- Page 163 Hydraulic Schematics (Cont’) SECTION 4 PARTS 14-28’ UNITS 09/2018 - 275 Page 163...
- Page 164 Hydraulic Schematics (Cont’d) SECTION 4 PARTS 14-28’ Bill of Material ITEM PART # DESCRIPTION 057661 TMF-50-5 SUCTION STRAINER (3X2) 049357 TMF-25-5 SUCTION STRAINER (2x1.25) 067774 TANDEM PUMP 068167 PRESSURE GAUGE 043472 GAUGE SNUBBER 032960 WELD RING 068048 PRESSURIZED AIR/FILLER BREATHER CAP 068168 TEMPERATURE/LEVEL GAUGE ASSY.
- Page 165 Hydraulic Schematics (Cont’) SECTION 4 30-34’ Bill of Material PARTS ITEM PART # DESCRIPTION 057661 TMF-50-5 SUCTION STRAINER (3X2) 049357 TMF-25-5 SUCTION STRAINER (2x1.25) 067774 TANDEM PUMP 068167 PRESSURE GAUGE 043472 GAUGE SNUBBER 032960 WELD RING 068048 PRESSURIZED AIR/FILLER BREATHER CAP 068168 TEMPERATURE/LEVEL GAUGE ASSY.
- Page 166 Hydraulic Schematics (Cont’d) SECTION 4 PARTS Block and Hose Diagram Page 166 275 - 09/2018...
- Page 167 Hydraulic Schematics (Cont’) SECTION 4 Block and Hose Diagram PARTS Page 167 09/2018 - 275...
- Page 168 Hydraulic Schematics (Cont’d) SECTION 4 PARTS 18’ Hose List MODEL 275 GANG VIBRATION 18 FOOT MACHINE HOSE LIST 5.23.18 ITEM # AEC PART # ROUTING 068693 HS-275GV-1 Case drain on front pump to tank 068694 HS-275GV-2 Case drain on rear pump to tank 068695 HS-275GV-3 A Port on Transport Valve to VA Port on Block...
-
Page 169: Spray System Schematic
Spray System Schematic SECTION 4 PARTS 09/2018 - 275 Page 169... - Page 170 AEC FACTORY & HEADQUARTERS 8 1 9 S . 5 T H S T R E E T P A R A G O U L D , A R K A N S A S 7 2 4 5 0 8 7 0 .
Need help?
Do you have a question about the TRTP275 and is the answer not in the manual?
Questions and answers