Table of Contents
Advertisement
Quick Links
Advertisement
Table of Contents

Subscribe to Our Youtube Channel
Related Manuals for Ayre QX-5

Summary of Contents for Ayre QX-5
- Page 1 Ayre QX-5 Owner’s Manual Tw e n t y Tw e n t y Tw enty A y r e Digital Hub...
-
Page 2: Table Of Contents
Table of Contents Ayre ....... . . 2 Welcome to Installation . -
Page 3: Ayre
Quick Start The information required The Ayre QX-5 Twenty is a digital hub, a device to get started is contained which allows you to integrate all of your digital in the following three sources into one point of control. - Page 4 Out of the box, all inputs of the QX-5 Twenty will be active, but both the Ethernet and USB inputs will require some configuration. Please see the section of the manual called Ethernet Input and USB Input, respectively (pg. 17). For all other inputs, simply sending them a signal from your other devices will commence playback.
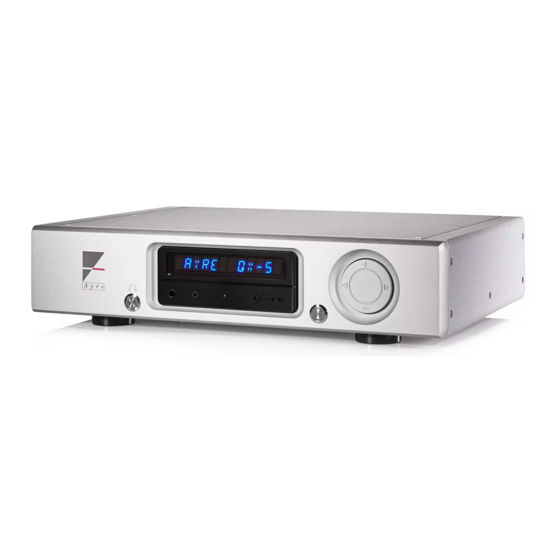
- Page 5 Tw e n t y Tw enty A y r e A y r e 1) Left-hand button • Headphone functionality • Menu navigation 2) Right-hand button • Mute • System-sleep mode • Menu navigation 3) Control Ring • Input selection ( •...
-
Page 6: Installation
Connection and Installation The Ayre QX-5 Twenty is easy to set up and use. The following guidelines will ensure that the installation goes smoothly. A good location for the QX-5 Twenty is in an open-backed cabinet or on a shelf. In order not to... - Page 7 Analog Audio Outputs Right Left Left QX-5 Digital Hu b USB Host USB Host Ethernet Input Volts 50/60 Hertz Right S.N. Boulder, Colorado USA 60 W Ma x AES/EBU Inputs Firmware Word Clock Optical Inputs Update AyreLink AyreLink USB Audio Input...
- Page 8 Headphone Outputs Headphones can be connected easily to the front PHONES OUT of the QX-5 Twenty. Directly below the display you’ll find four connectors; two for single- ended headphones and two for a set of balanced headphones. The two connectors on the left (one in ¼ inch diameter and the other in a 3.5 mm diameter) will...
- Page 9 The display will temporarily show PHONES OUT after pressing the button. While the headphone outputs are active, the main XLR and RCA outputs on the QX-5 Twenty will be muted. To re-activate the main outputs, press the left- hand button again.
- Page 10 There are two AyreLink ports on the rear panel line cords using modular of the QX-5 Twenty. Each port has four contacts (RJ-11) connectors. (These and contains both an input and an output. are the cords that connect...
-
Page 11: Configuration
Setup Menu In order to change settings or customize your While navigating the use of the QX-5 Twenty, you’ll need to access the Setup Menu, the buttons Setup Menu. immediately to the left and right of the display... - Page 12 Setup Menu Structure Below are diagrams of the QX-5 Twenty's menu structure. These can be used as a reference as to how the menu works and where each section is located within the larger structure.
- Page 14 QX-5 Twenty. These updates may provide new features and/or improve the use and reliability of your unit. There are two types of firmware updates that are available for the QX-5 Twenty. Do not turn off the QX-5 Twenty while updates are in progress.
- Page 15 General updates affect the firmware for the unit’s operating system, display, digital filters, etc. The general firmware of the QX-5 Twenty may be updated for ease of use and reliability. The unit’s firmware version can be found by accessing the Setup Menu, see (pg.
- Page 16 (e.g., in a preamplifier). DAC and Preamplifier Mode DAC mode bypasses the digital volume control of the QX-5 Twenty and sends a full-level signal to your preamplifier or integrated amplifier. Now your preamplifier or integrated amplifier controls the volume of the system.
- Page 17 5) Once the mode you wish to engage appears on the display, press the left-hand button twice to exit the menu. Digital Inputs The Ayre QX-5 Twenty provides virtually every type of digital input available.
- Page 18 BNC type connector or adapter. Maximum performance will be attained when using cables with 75 ohm BNC terminations and 75 ohm cabling. Ayre includes BNC-to-RCA adapters for convenience, but the typical impedance of an RCA connector is roughly 30 ohms and will degrade the performance slightly by creating reflections which can increase the jitter.
- Page 19 OFF in the setup QX-5 Twenty. For proper configuration of the menu, the network module USB input on the QX-5 Twenty, please see our will be disabled and powered computer audio setup page www.ayre.com/usb. off, potentially improving htm.
- Page 20 AP mode, please ensure you’ve downloaded the mconnect control app, see Apps (pg. 31). 1) Turn the QX-5 Twenty off via the rocker switch on the rear panel. USB Host 2) Insert the included Wi-Fi antenna into one of...
- Page 21 Ensure NO Ethernet cable is connected. 3) Turn the QX-5 Twenty on via the rocker switch on the rear panel. The unit will now enter System Sleep Mode. 4) Enter the Setup Menu by holding down the left-hand button until MAIN INPUT is displayed.
- Page 22 WPS mode, please easily connect your QX-5 Twenty to your home check your router’s manual for network, without the use of an Ethernet cable. this feature. 1) Turn the QX-5 Twenty off via the rocker switch on the rear panel.
- Page 23 2) Insert the included Wi-Fi antenna into one of the USB Host connector. Ensure NO Ethernet cable is connected. 3) Turn on the QX-5 Twenty via the rocker switch on the rear panel. 4) Enter the Setup Menu by holding down the left-hand button until MAIN INPUT is displayed.
- Page 24 Before beginning, please download the mconnect control app, see Apps (pg. 31). 1) Turn off the QX-5 Twenty via the rocker switch on the rear panel. 2) Make sure the Ethernet cable for your network is connected to the port in the back of the unit.
- Page 25 7) In the mconnect app, go to its Settings Menu symbol in the left-hand corner) select “Device Setup”. 8) Select “Ayre QX-5” from the device list. 9) Select “Wi-Fi network selection.” 10) Find your home network on the list and select 11) Type in your home network password.
- Page 26 7) Select which IP address you’d like to see displayed and press the right-hand button once. 8) The display will now show the IP address of the QX-5 Twenty. Make a note of it and exit the sub- menu by pressing the left-hand button.
-
Page 27: Operation
(e.g., the AyreLink system communication and Ethernet input) are operable. Once the QX-5 Twenty is turned “on”, it may take 30 minutes to fully warm up and sound its best. A System-sleep option is available, this allows... - Page 28 Control Ring The control ring on the right-hand side of the faceplate has two functions during normal operation. The arrow symbols scroll between inputs with the left- and right-hand arrows, and change volume level with the +/– buttons at the ring’s top and bottom.
- Page 29 A long press of the “1/0” remote button will place all AyreLinked components into low-power consumption or standby mode. A short press of the button will put the QX-5 Twenty into sleep mode and not affect any other components.
- Page 30 Front-panel Display The display of the QX-5 Twenty has the ability to display extra information about some of your recordings. Display Brightness The brightness of the front-panel display may be controlled via the remote control. There are three brightness levels and a “display off ” setting. Each press of the remote control button scrolls through the available brightness settings.
- Page 31 HDCD Indicators There are different types of HDCD recordings. Below are the different indicators which may be displayed during playback. 1) Green LED in the right side of the display window. This will mean that a Pacific Microsonics analog- to-digital converter was used in the making of the recording.
- Page 32 Remote Handset Top half of the remote The provided remote control handset will operate operates the QX-5 Twenty. both the Ayre QX-5 Twenty as well as an Ayre preamplifier or integrated amplifier. digital Battery The remote handset uses one CR2032 coin cell. It is accessed by pulling the plastic tab and opening the cover on the back/bottom of the remote.
- Page 33 UPnP control apps will also work. Searching for: “UPnP control apps” in your app store will provide you with a list of many. The QX-5 Twenty is designed to the UPnP standard and the majority of UPnP apps should operate it. If you have a problem with a specific app, please contact the specific publisher of the app in question.
- Page 34 QX-5 Twenty. If you are already using Roon or are interested in using it, please go to Roonlabs.com for instructions on doing so. Online Streaming Services It’s important to note that if you want to make...
-
Page 35: Customization
Please select the mode that best suits your system and needs. Digital Preamplifier The QX-5 Twenty will come from the factory with this setting as its default output mode. You may immediately begin using the + and – buttons (top and bottom) on the control ring to the right- hand side of the faceplate. - Page 36 Analog Audio Output connectors directly to an amplifier of your choosing. Digital-to-Analog Converter (DAC) In order to use the QX-5 Twenty as a digital source component without volume control, enter the Setup Menu, see (pg.10) and select (by scrolling once to the right) OUTPUT from the Main Menu.
- Page 37 Analog Audio Outputs on the rear panel will resume. Disabling Inputs Use of the QX-5 Twenty may be streamlined if all unused inputs are disabled in the Setup Menu. 1) Once in the Setup Menu, the first choice available will read MAIN INPUT.
- Page 38 5) Scroll left or right by pressing the right and left arrow buttons on the control ring until the display shows the word OFF. 6) You may press the left-hand button once to scroll through more inputs you may want to disable, or exit the Setup Menu by pressing the left-hand button on the left-hand side of the display four times.
- Page 39 2) Scroll to the desired input by pressing the right and left arrow buttons on the control ring. Once the desired input is shown on the display (INPUT XXX 0), press the right-hand button on the right-hand side of the display. 3) The input name and number for the input (NAME XXX 0) will be displayed to the right- hand side of the display.
- Page 40 Preset Names 1) Enter the Setup Menu, see (pg. 10). SPDIF3 SPDIF4 2) The display will show MAIN INPUT. Press SPDIF5 the right-hand button. OPTIC6 OPTIC7 3) The left-hand side of the display will read OPTIC8 INPUT. The right-hand side of the display will show the inputs you may select for re-naming.
- Page 41 Mode options are not universal, each input is set individually. Music Mode The QX-5 Twenty will ship from the factory with “Music Mode” as its default setting. The Music Mode uses a large buffer for the digital audio data, completely eliminating jitter even for inputs where the data flow is controlled by the source.
- Page 42 Measure Mode This digital filter uses an algorithm which produces greater accuracy in the frequency domain. Some listeners may prefer the additional high-frequency energy provided by this mode, but most will derive a greater sense of musical enjoyment from “Music Mode.” Changing Audio Modes 1) Enter the Setup Menu, see (pg.
-
Page 43: Specifications
Numbers and Specifications Audio Inputs USB: 44.1, 48, 88.2, 96, 176.4, 192, 352.8, 384 kHz PCM 16, 20, 24 bits DSD64 and DSD128 (as DoP) Optical/SPDIF/AESEBU: 44.1, 48, 88.2, 96, 176.4, 192 kHz PCM 16, 20, 24 bits DSD64 (as DoP) Network: 44.1, 48, 88.2, 96, 176.4, 192 kHz PCM 16, 20, 24 bits DSD64 (as DoP) -
Page 44: Trouble
Display Faults If any of these fault persists, The Ayre QX-5 Twenty will display faults when contact the Ayre dealer for a problem occurs. The following faults are listed, service. - Page 45 Contact the Ayre dealer for service. Network If the QX-5 Twenty cannot be seen as a device on your home network follow this proceedure. If you’re using an Ethernet cable, turn the unit off.
- Page 46 (current revision number will be available at www.ayre.com/qx5_support.htm). If it is not up to date, turn the QX-5 off, then bring the unit out of system sleep mode and wait for the NET UPDATE? prompt to appear.
- Page 47 USB Connection If the QX-5 Twenty appears as “Unknown USB device” when connected to a computer. Check that your drivers are installed correctly, and up-to- date. Instructions for this can be found at www. ayre.com/usb.htm. Other Connected Products The Ayre QX-5 Twenty will display error...
- Page 48 QX-5 Twenty so that the source of the error is known. To restore the unit to its normal operating mode, simply press the right-hand front-panel button. Rail Fuses Internal power supply fuses protect both the loudspeakers from excessive current and the amplifier from short-circuits.
- Page 49 AC power switch to loudspeaker. “Off ” immediately. Please return the unit to your The QX-5 Twenty display will change to read authorized dealer or service AMP DC OFFST when excessive DC offset is center. present.
-
Page 50: Warranty
Statement of Warranty North American Warranty The Ayre QX-5 Twenty digital hub is warranted against defects in materials and workmanship for a period of ninety days from the date of original purchase. This ninety-day coverage is automatic upon acceptance of delivery and no registration is required. - Page 51 Ayre will not be responsible for any shipping damage and strongly recommends the purchase of shipping insurance. 3. Ayre reserves the right to inspect any product that is the subject of any warranty claim prior to repairing or replacing it. Final determination of warranty coverage lies solely with Ayre.
- Page 52 5. The above warranty is the sole warranty given by Ayre, and is in lieu of all other warranties. All implied warranties, including warranties of merchantability or fitness for any particular purpose shall be strictly limited to the duration of the above warranty.
- Page 53 International Warranty Warranty terms outside of North America may vary. Please contact the authorized Ayre distributor in your country of purchase for the terms of warranty and also the service itself.
-
Page 54: Notes
A Place for Notes Serial Number: Purchase Date: Dealer: Salesperson:... - Page 55 Rev. 1.0...
- Page 56 Ayre Acoustics, Inc. 2300-B Central Ave. Boulder, Colorado 80301 www.ayre.com +1-303-442-7300...
Need help?
Do you have a question about the QX-5 and is the answer not in the manual?
Questions and answers