Table of Contents
Advertisement
Advertisement
Table of Contents
Troubleshooting

Subscribe to Our Youtube Channel
Related Manuals for Mindray VS9


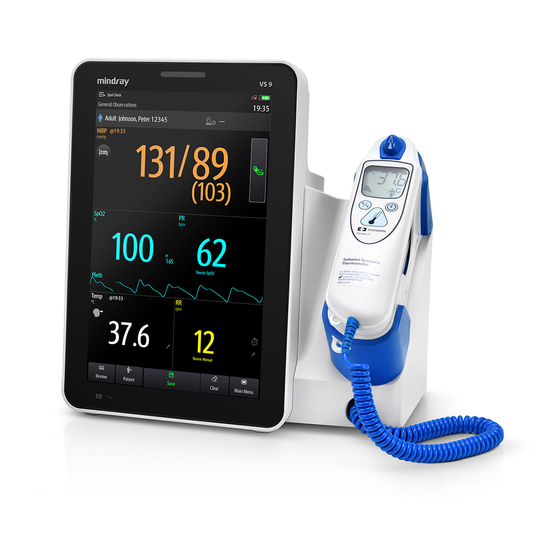
Summary of Contents for Mindray VS9
- Page 1 VS9/VS8 Vital Signs Monitor Service Manual...
- Page 3 Copyright 2021 Shenzhen Mindray Bio-Medical Electronics Co., Ltd. All rights reserved. Release time: November 2021 Revision VS 9/VS 8 Vital Signs Monitor Service Manual...
- Page 4 Mindray, nor the rights of others. Mindray does not assume any liability arising out of any infringements of patents or other rights of third parties.
- Page 5 This product is operated under strict observance of the operator’s manual. Return Policy In the event that it becomes necessary to return a unit to Mindray, follow the instructions below. Obtain a return authorization. Contact the Mindray Service Department and obtain a Mindray Customer Service Authorization Number.
- Page 6 Mindray maintains a network of service representatives and factory-trained distributors. Prior to requesting service, perform a complete operational check of the instrument to verify proper control settings. If operational problems continue to exist, contact Mindray service. In North America contact the Service Department at (800) 288-2121, ext: 8116 for Technical Support or (201) 995-8000 for assistance in determining the nearest field service location.
- Page 7 This manual is for biomedical engineers, authorized technicians or service representatives responsible for troubleshooting, repairing and maintaining the patient monitors. Contact your local Mindray Service Organization for information on product courses which address service and support for this product. Passwords A password may be required to access different modes within the monitor.
- Page 8 FOR YOUR NOTES VS 9/VS 8 Vital Signs Monitor Service Manual...
-
Page 9: Table Of Contents
2 Theory of Operation ....................2-1 2.1 Overview ............................2-1 2.2 Connectors for Peripheral Devices ..................2-2 2.2.1 Connectors for VS9 Peripheral Devices ............... 2-2 2.2.2 Connectors for VS8 Peripheral Devices ............... 2-3 2.3 Block Diagram of Hardware System................... 2-3 2.3.1 Multi-parameter Module (or Main Board) ............ - Page 10 4.1.1 Test Device ........................4-1 4.1.2 Test Report ........................4-1 4.1.3 Preventative Maintenance ..................4-1 4.1.4 Maintenance Period ....................4-2 4.1.5 Maintenance Package ....................4-2 4.2 Maintenance Preparations ....................4-3 4.3 Visual Inspection ........................4-3 Test Preparations ........................4-3 Procedure ..........................4-3 4.4 Power-on test ..........................
- Page 11 6.2 Whole Unit Disassembly Flowchart ................... 6-2 6.2.1 VS9 Disassembly Flowchart ..................6-2 6.2.2 VS8 Disassembly Flowchart ..................6-3 6.3 (A) Disassembly of VS9 Main Unit ..................6-4 6.3.1 (A-1) Body Temperature Module ................6-4 6.3.2 (A-2) Recorder Assembly/Door ................6-6 6.3.3 (B) Removing Rear Cover ..................
- Page 12 7.2 VS9 Parts ............................7-1 7.2.1 Main Unit ........................7-1 7.2.2 Front Cover Assembly ....................7-2 7.2.3 Rear Cover Assembly ....................7-3 7.2.4 Main frame assembly ....................7-4 7.2.5 Fully-configured Trolley Assembly ................ 7-5 7.2.6 Standard Trolley Assembly ..................7-6 7.3 VS8 Parts ............................
-
Page 13: Overview
Overview 1.1 About the Manual Please refer to the table below for the revision history of the monitor service manual. Version Revision History Newly created 1.2 Safety Information DANGER Indicates an imminent hazard that, if not avoided, will result in death or ... -
Page 14: Warning
1.2.2 WARNING WARNING Only personnel authorized by Mindray can disassemble the monitor. To avoid electric shock, disconnect the AC power supply and remove the battery before disassembling the monitor. Perform the patient leakage current test on a reassembled parameter ... -
Page 15: Equipment Symbols
1.3 Equipment Symbols NOTE The equipment you purchase may not have all the following symbols. Caution Serial number Standby Date of manufacture Direct current Alternating current Battery indicator Input/output USB connector Equipotentiality DEFIBRILLATION-PROOF DEFIBRILLATION-PROOF TYPE BF APPLIED PART TYPE CF APPLIED PART Gas inlet Gas outlet Graphical record... - Page 16 Authorized CE marking representative of the European Community TrueBP is Mindray's new non-invasive blood pressure measurement algorithm using linear inflation technology, which can measure the blood pressure quickly and comfortably during cuff inflation. VS 9/VS 8 Vital Signs Monitor Service Manual...
-
Page 17: Theory Of Operation
Theory of Operation 2.1 Overview The monitor: Measures and displays the physiological parameters of the patient, and supports the review, storage and printing of the measured data. Provides audible and visual alarm indications in case of patient or equipment ... -
Page 18: Connectors For Peripheral Devices
2.2 Connectors for Peripheral Devices 2.2.1 Connectors for VS9 Peripheral Devices Equipotential ground end: When other devices are used together with this monitor, use a wire to connect the equipotential ground end of this monitor to equipotential ground ends of other devices to eliminate the earth potential difference between them to guarantee safety. -
Page 19: Connectors For Vs8 Peripheral Devices
The USB connector and the network connector are on one side of the monitor. 2.3 Block Diagram of Hardware System The VS series vital sign monitors have a main unit. The differences between VS9 and VS8 are shown as follows: Screen ... - Page 20 The figure below shows the hardware architecture of VS9: (10.1-inch, Capacitor 1280x800) touch screen Alarm lamp Power-on/off board button board AC-DC Module Mindray SpO On the mu lti- UART Panel parameter module DCDC, power managemen t Parameter UART Main unit...
-
Page 21: Multi-Parameter Module (Or Main Board)
(watchdog, power circuit, and RTC). The parameter module comprises the Mindray SpO and NIBP circuit. The connector module of VS9 only comprises the internal connectors, which are used to connect the recorder component, CO module, touch screen/screen, speaker, power/button board, alarm lamp board, and connector board. - Page 22 The alarm lamp is a three-color LED that can turn on in red, yellow and cyan. Power-on/off Button Board: For VS9, it is necessary to develop a power-on/off button board, which is mainly a switch and a working indicator. Touchscreen and Touchscreen Control Board The touchscreen control panel can exchange data with the upper computer to realize the drive function of the touch screen.
-
Page 23: Power Architecture Diagram
USB connector, recorder, LCD display) Figure 3 Power Architecture Diagram Main unit battery: VS9 adopts the smart battery, while VS8 adopts the ordinary battery with the output voltage of 9.6 V-12.3 V. Backup battery: smart battery. AC-DC output is 15 V, therefore, the power supply with 40W output power and 15V output voltage is adopted. -
Page 24: Data And Information Flow Diagram
2.5 Data and Information Flow Diagram Display Parameter module (CO Data/status Data/status Temp) information/ information/ analysis results analysis results Data/status information/ Parameters analysis Patient resul ts Recorder (SpO , NIBP)/ Weight Analysis results main board scale User input Data/status Data/status information/ information/ parameters... -
Page 25: Equipment Installation
Equipment Installation 3.1 Installation Preparations 3.1.1 Environmental Requirements The operating environment of the monitor must meet the environmental requirements in the operator’s manual. The environment where the monitor is used should be reasonably free from noises, vibration, dust, corrosive, flammable and explosive substances. If the monitor is to be installed in a chassis, make sure there is enough space at the front and rear of the chassis to facilitate operation and service. -
Page 26: Network Requirements
WARNING If you have any doubt about the integrity of the external protective conductor installation or wiring, use a battery to power the monitor. Otherwise, the patient and the operator may be injured by electric shock. 3.1.3 Network Requirements If the monitor is connected to a wired or wireless network, the specifications and performance of the network must meet the requirements in the operator’s manual to prevent delay or loss of data transmission. -
Page 27: Installation Of Accessories
3.3 Installation of Accessories 3.3.1 Installation of Battery 3.3.1.1 Installation of VS9's Battery Pull the silicone handle on the battery door at the bottom of the monitor by hand to open the battery door to install the battery; VS 9/VS 8 Vital Signs Monitor Service Manual... - Page 28 Battery door 3.3.1.2 Installation of VS8's Battery Rotate the metal ring on the battery door at the bottom of the monitor by hand. After the ring is unscrewed, the battery door can be opened to install the battery. Note: If a small-capacity battery is installed, a small-capacity battery bracket needs to be used.
-
Page 29: Installation Of Parameter Accessories
Socket A Socket B 3.3.2 Installation of Parameter Accessories Refer to the operator’s manual. 3.3.3 Installation of Plug-in Modules (if any) None. 3.3.4 Installation of Peripherals (if any) Peripherals Refer to USB\Bluetooth\network Connected Printers, Scanners, Body Temperature Modules, Etc. Refer to the online practices. The quick body temperature and infrared body temperature modules are installed and shipped together with the monitor. - Page 30 Body temperature socket cover Align the sheet metal of the Welch Allyn or Braun body temperature bracket with the mounting hole of the rear cover, and fix the module with two screws. Insert the sheet metal support into the hole on the Fasten it with 2 tapping screws...
-
Page 31: Installation Of The Monitor
3.4 Installation of the Monitor After the accessories are installed, connect the monitor to the AC power and press the power switch to turn on the monitor. The monitor provides a setup wizard. When the monitor is turned on for the first time, follow the wizard to complete the setup of the monitor. - Page 32 If this is your first monitor, tap Create New Configuration. If a configuration file is available, you can choose Import Configuration. Then, tap Next. Set the date, time, time zone and date format. VS 9/VS 8 Vital Signs Monitor Service Manual...
- Page 33 Set the units of measurement. Select the department using the monitor. The selection of the department will affect the default workflow settings. You can modify the workflow after completing the setup wizard. VS 9/VS 8 Vital Signs Monitor Service Manual...
-
Page 34: Installation Of Assemblies And Trolley
After completing the setup wizard, you can restart the monitor. You can tap Advanced Settings to set the network and workflow. You can insert an USB flash drive into the monitor and tap Export Configuration to save the current power-on setup wizard. 3.4.1 Installation of Assemblies and Trolley Optional assemblies and trolley are available for the monitor. -
Page 35: Power-On Self-Test
Check whether any external cables and accessories are damaged, such as broken skin. Check whether all the signs and labels on the monitor and accessories are clear. If your monitor is installed on a trolley or a bracket, make sure that the connection between the monitor and the trolley or bracket is secure. - Page 36 FOR YOUR NOTES 3-12 VS 9/VS 8 Vital Signs Monitor Service Manual...
-
Page 37: Maintenance And Test
If the monitor or a module fails to perform as specified in any test, repairs or replacement must be done to correct the problem. If there is any problem, contact Mindray Customer Service Department. CAUTION All tests must be performed only by qualified professional maintenance ... -
Page 38: Maintenance Period
2. Following any repair or replacement of the NIBP Test Leakage test relevant module. Module calibration 3. For SpO , NIBP and Mindray quick body Temp test temperature module, at least once every two Leakage test years; for CO module, at least once a year. -
Page 39: Maintenance Preparations
4.2 Maintenance Preparations Before maintenance, make sure that the monitor is in the idle state and is not connected to the patient in any way. Clean and disinfect the monitor properly before maintenance to avoid contamination of the maintenance room. 4.3 Visual Inspection Inspect the equipment for obvious signs of damage. -
Page 40: Module Performance Tests
4.5 Module Performance Tests 4.5.1 SpO test Test the status of the SpO function. Test Method 1 Tool required: None. Test procedure Connect the SpO sensor for adult to the SpO connector on the monitor. Set Patient Category Adult PR Source on the monitor. -
Page 41: Nibp Test
Manufacturer Pulse Rate Nellcor 96% ± 2% (Adult, 80 ± 3 bpm pediatric) 96% ± 3% (Neonate) Masimo 96% ± 2% (Adult, 80 ± 3 bpm pediatric) 96% ± 3% (Neonate) 4.5.2 NIBP Test 4.5.2.1 NIBP Leakage Test Test the NIBP module and accessories for leaks. Test Preparations Test tools: NIBP cuff for adult patient... - Page 42 connections for leakages. If you ensure that the tubing and connections are all correct, perform a leakage test again. If fault prompt still appears, contact us for maintenance. 4.5.2.2 NIBP Accuracy Test Test whether the pressure measurement of the NIBP module is accurate. Test Preparations Test tools: T-shape connector...
- Page 43 Raise the pressure in the rigid vessel to 50 mmHg using the balloon pump. Then wait for 10 seconds so that the measured values become stable. Check that the difference between the reading of the manometer and that of the monitor is less than or equal to 3 mmHg.
-
Page 44: Temperature Test
button on the right side of the menu to start the test. When the test succeeds, the NIBP menu will display the message of Test Successful . If the pressure exceeds 160-165 mmHg, the message Test Failed will be displayed. 4.5.3 Temperature Test 4.5.3.4 SmarTemp Module Test... - Page 45 Test Procedure: Turn on the verifier device, using either a 9-volt battery or the power supply. Make sure the red LED is illuminated. Allow device ~5 minutes for warm-up and stabilization time. Allow certified master or the two reference thermometers and the instrument to be tested to acclimate in the same ambient temperature for at least 10 minutes.
-
Page 46: Co Test
4.5.4 CO Test 4.5.4.1 Leakage Test It tests whether the CO module leaks. Test Preparations None. Procedure Follow this procedure to perform the test: Start up the monitor. After the CO is warmed up, completely block the gas inlet of the module or watertrap (you may use a pneumatic plug or your finger to manually occlude the port). - Page 47 Relief valve Tubing Monitor T-shape connector Gas cylinder Open the valve to start flowing CO and make sure that there is sufficient flow to vent to atmosphere. Check that the real-time CO value is within±0.3% in the menu. Calibrate 4.5.4.3 Module Calibration Calibrate the CO module if you find it is inaccurate.
-
Page 48: Nurse Call Relay Performance Test
Relief valve Tubing Monitor T-shape connector Cylinder Open the valve to start flowing CO and make sure that there is sufficient flow to vent to atmosphere. In the text box on the upper right corner of the menu, enter the vented Calibrate concentration. -
Page 49: Barcode Scanner Test
In the Nurse Call menu, select all options of Alarm Priority Alarm Type , set Contact Type Normally Open and set Signal Type Continuous to save the setting and exit the menu. Enter the demo mode. Cause the monitor to generate an alarm and verify the output is continuous high level when there is an alarm. -
Page 50: Ground Resistance Test
Perform electrical safety tests in accordance with local regulations if any. All devices driven by AC power and connected to medical instruments in patient zones must comply with the IEC 60601-1 standard. And electrical safety tests on these devices must be implemented in accordance with the test interval of the monitor. - Page 51 Figure 6 Ground Resistance Test Procedure Procedure of the ground resistance test: Connect the device to be test and the analyzer according to the connection diagram. Press Ω on the panel. Connect one end of the test lead to the jack and the other end of the test lead to the (zero) jack.
-
Page 52: Equipment Leakage Current (Nc) Test
4.6.2 Equipment Leakage Current (NC) Test Test Preparations This manual conducts electrical safety tests in accordance with the IEC62353 (equivalent to YY/T0841) standard. Test equipment: Fluke ESA612 or ESA615 or equivalent equipment Connection Diagram Connect to protective ground terminal or any exposed conductive surface on the chassis. -
Page 53: Equipment Leakage Current (Single Fault) Test
Figure 8 Equipment Leakage Current Test Procedure Equipment leakage current test procedure: Connect the device to be test and the analyzer according to the connection diagram. Connect the accessory to the metal shell part of the device or the metal foil on the surface of the device's enclosure. - Page 54 Connection Diagram Connect to protective ground terminal or any exposed conductive surface on the chassis. Connect ESA612 to the ground power socket. Connect the AC power cable of the device to be tested to the equipment output of the analyzer. Figure 9 Connection Diagram Insert the power plug of the analyzer into the socket and turn on the power button to enter the startup screen.
-
Page 55: Application Part Leakage Current Test
Connect the device to be test and the analyzer according to the connection diagram. Connect the accessory to the metal shell part of the device or the metal foil on the surface of the device's enclosure. Press Direct device test is the default test which should already be selected. Press to apply the voltage and read the leakage current displayed on the screen. -
Page 56: Recorder Check
Connect the parameter accessory of the device (for example SpO ) to the application part connector of the electrical safety analyzer. If it is an ECG accessory, insert the banana jack to ECG adapter into the analyzer's application part jack, and connect the ECG lead to the banana jack to the ECG adapter. -
Page 57: Battery Check
4.8 Battery Check This test mainly tests the battery status. 4.8.1 Test Preparations None. 4.8.2 Procedure 4.8.2.1 Functionality test Remove any battery installed in the monitor. Verify that the monitor works properly when running on AC power. Install the battery according to the procedures described in the Operator's Manual. Remove the AC power cord and verify that the monitor still works properly. -
Page 58: Factory Maintenance
4.9 Factory Maintenance 4.9.1 Accessing Factory Maintenance Menu Select the Main Menu quick key -> System column -> Maintenance -> enter the factory maintenance password -> select -> select Factory Maintenance 4-22 VS 9/VS 8 Vital Signs Monitor Service Manual... -
Page 59: Monitor Information (Log Export)
4.9.2 Monitor Information (Log Export) Make sure the file format of the USB drive is FAT32. Then insert the USB drive into the USB port on the main unit of the monitor. Access the Monitor Information menu. Then you can view the information about the monitor’s main unit, such as CPU temperature, Wi-Fi signal strength, and hard disk capacity. -
Page 60: Software Version
4.9.9 Software Version Select Main Menu quick key →from the System column select Version to show software version information. Maintenance Test Report (See the above sections for detailed test procedures and contents.) Customer name Customer address Servicing person Servicing company Equipment under test (EUT) Model of EUT... - Page 61 The difference is within ±3 mm when 0, 50 and 200 mmHg is set for NIBP accuracy test. There is no leakage with NIBP, or the manual leakage test result does not exceed 6 mmHg/min. Temp test The temperature value displayed by the monitor is within 37±0.1°C.
- Page 62 FOR YOUR NOTES 4-26 VS 9/VS 8 Vital Signs Monitor Service Manual...
-
Page 63: Troubleshooting
Troubleshooting 5.1 Overview In this chapter, monitor problems are listed along with possible causes and recommended corrective actions. Refer to the tables to check the monitor and identify and eliminate these problems. The recommended solutions given in this chapter address most of the equipment problems you encounter, but do not include any problems that may arise. -
Page 64: Technical Alarm Check
Select Main Menu -> System -> Maintenance -> enter the factory maintenance password -> Version . In the displayed menu, you can check the version information of the system software. Select Main Menu -> System -> Maintenance -> enter the user maintenance password ->... -
Page 65: Alarm Lamp Failures
1. Verify the signal cable and backlight Cable failure cable connecting the display to the main board are correctly connected. Check if there is a symbol shown above the key on the main menu. If Touchscreen disabled yes, press Main Menu for more than 3s to enable the touchscreen. -
Page 66: Sound Failure
5.6.5 Sound Failure Fault Symptom Possible Cause Troubleshooting Verify the cable between the speaker and the No sound or Cable failure connector board is properly connected. abnormal sound while The speaker is Replace the speaker the button or faulty rotary encoder The main board is Replace the main board is normal... -
Page 67: Recorder Failures
5.6.7 Recorder Failures Fault Symptom Possible Cause Troubleshooting 1. Verify whether the recorder status LED is lit. Recorder module 2. If yes, enable the module in the Factory disabled menu. If it is not lit, check for other Maintenance possible causes. Paper is installed No printout Remove and reinstall the paper roll properly. -
Page 68: Wi-Fi Failures
Fault Symptom Possible Cause Troubleshooting The IP address is Check whether an IP address conflict exists in incorrect. the network. If yes, reset the IP address. Connector board Replace the connector board damaged The main board is Replace the main board faulty The network The network cable... -
Page 69: Module Failure
5.6.12 Module Failure Fault Symptom Possible Cause Troubleshooting It cannot be loaded. 1. Verify the connection between the No beep sound is external adapter board inside the module made. The Module Failure and the adapter board. information column 2. The adapter board is damaged. Replace does not display the the adapter board. -
Page 70: Technical Alarm Messages
The battery display is abnormal after the No power-off after Upgrade the power management power power board software software again, and then power off the management upgrade entire system before restart. program is upgraded 5.6.14 Technical Alarm Messages Refer to the operator’s manual. VS 9/VS 8 Vital Signs Monitor Service Manual... -
Page 71: Disassembly And Maintenance
Disassembly and Maintenance 6.1 Disassembly Preparations Tooling: Screwdriver Preparations: Make sure that the monitor is turned off and the AC power is disconnected. Make sure that the desk is clean and tidy, and the touchscreen is not damaged ... -
Page 72: Whole Unit Disassembly Flowchart
6.2.1 VS9 Disassembly Flowchart Refer to the following flowchart to repair and disassemble the corresponding FRU unit of the VS9 series products. You can search for the red number to quickly find the disassembly procedure of the corresponding unit. 4. VS9 enclosure mainten an ce package 5. -
Page 73: Vs8 Disassembly Flowchart
4. VS8 enclosure maintenance package (including Start 1. Body temperature module speaker) 5. Battery door maintenance package 6. VS8 and VS9 Wi-Fi module material package 2. Recorder material package/ 7. Wi-Fi antenna recorder door Detaching recorder 3. Cable connecting the recorder and the main board 8. -
Page 74: A) Disassembly Of Vs9 Main Unit
6.3 (A) Disassembly of VS9 Main Unit NOTE Make sure that the AC power is disconnected and the monitor is off. Before disassembly, make sure that the point for placement is smooth and free of unrelated things; otherwise, the screen or the knob may be scratched or damaged. - Page 75 Open the battery door. Remove the body temperature cable from the socket as shown in the figure, and remove the cable from the rear cover buckle. Remove the body temperature module from the rear cover and replace the body temperature module or the cable separately. VS 9/VS 8 Vital Signs Monitor Service Manual...
-
Page 76: A-2) Recorder Assembly/Door
6.3.2 (A-2) Recorder Assembly/Door 6.3.2.1 When No Recorder is Used Insert a flat-bladed screwdriver or tweezers (or other similar small tools) into the removal hole on the recorder door as shown in the figure to remove the recorder door. 6.3.2.2 When Recorder is Used. -
Page 77: B) Removing Rear Cover
Unplug the recorder cable to replace the recorder module or recorder cable separately. 6.3.3 (B) Removing Rear Cover Disassembling the assembly into rear cover assembly + main bracket & front cover assembly Open the battery door. Pull the battery buckle in the direction shown in the figure, and remove the battery. - Page 78 Remove the body temperature cable from the socket as shown in the figure (perform this step if the monitor is equipped with a quick body temperature module or infrared body temperature module. Otherwise, skip this step). Remove the AC socket anti-falling hook. VS 9/VS 8 Vital Signs Monitor Service Manual...
- Page 79 Unscrew the 5 M3*6 pan head screws with washers at the position shown in the figure on the rear cover. Unscrew the 1 M3*6 pan head screw at the position shown in the figure in the recorder compartment. Use a screwdriver to tilt the red circle in the figure, and remove the latch of the connector panel.
- Page 80 Unplug the power cable and speaker cable in the recorder compartment from the socket. Press the connector panel with your hand to make it completely sink into the rear cover, lift the rear cover to the top, and remove the rear cover. 6-10 VS 9/VS 8 Vital Signs Monitor Service Manual...
-
Page 81: B-1) Rear Cover Assembly
The assembly is disassembled into the rear cover assembly + main bracket & front cover assembly. 6.3.4 (B-1) Rear Cover Assembly VS9 enclosure maintenance package: The rear cover assembly can be replaced as a whole. 6-11 VS 9/VS 8 Vital Signs Monitor Service Manual... - Page 82 Pull the connection belt of the battery door at the position shown in the figure on the rear cover to replace the battery door. Uncover the tape that fixes the connection cable at the position shown in the figure on the rear cover to replace the connection cable (6012) (power button connection cable) between the main board and the alarm lamp board.
-
Page 83: C) Removing Components On The Main Support And Front Cover Assembly
6.3.5 (C) Removing Components on the Main Support and Front Cover Assembly 6.3.5.1 (C-1) Removing the Wi-Fi Module Pinch the fixing spring at the red circle as shown in the figure, and press it hard. The Wi-Fi module will automatically pop up; the Wi-Fi module or Wi-Fi antenna can be replaced separately. - Page 84 6.3.5.3 3) Removing the Battery Connector Board Unscrew the 2 ST3.3X8 tapping screws shown by the upper arrow, and remove the sockets shown by the two arrows on the lower right to replace the 5600mAh battery adapter board. 6-14 VS 9/VS 8 Vital Signs Monitor Service Manual...
- Page 85 SpO cable and CO cable on the main board; (subject to the actual configuration of the monitor). Replace the VS9 panel assembly or SpO cable separately; Rotate the SpO cable clockwise to remove it.
- Page 86 6.3.5.5 (C-5) Removing the Connection Cable of the Power Management Board Unplug the socket and buckle shown by the arrow to replace the power management board and the power board connection cable; 6.3.5.6 (C-6) Removing the Connection Cable Between the Connector Board and Main Board Unplug the socket and buckle shown by the arrow in the figure to replace the connector board connection cable (standard/full configuration).
-
Page 87: D) Disassembling The Assembly Into The Main Frame Assembly And Front Cover Assembly
6.3.6 (D) Disassembling the Assembly into the Main Frame Assembly and Front Cover Assembly Detach the connector on the main board. Unplug the Wi-Fi antenna, Bluetooth antenna, Bluetooth connection cable, battery connector board connection cable, SpO cable, CO cable, power connection cable, connector board connection cable and the socket connecting to the main board at one end and other devices at the other end. -
Page 88: Removing The Main Support Assembly D
6.3.7 Removing the Main Support Assembly D 6.3.7.1 (D-1) Removing the NIBP Valve Open the buckle shown by the arrow by hand and remove the two valves for replacement; 6.3.7.2 (D-2) Removing the NIBP Pump Cut the cable tie shown by the arrow to replace the inflation pump. 6-18 VS 9/VS 8 Vital Signs Monitor Service Manual... -
Page 89: G) Removing The Sheet Metal Main Support And Plastic Main Support Assemblies
6.3.7.3 (D-3) Removing the NIBP Pipeline Disconnect the three air pipes of the pump and valve shown by the arrows by hand to replace the NIBP airway. 6.3.8 (G) Removing the Sheet Metal Main Support and Plastic Main Support Assemblies Unscrew the 10 ST3.3X8 pan head screws as shown in the figure to disassemble the assembly into the plastic main support assembly (F) and sheet metal main support assembly (G). - Page 90 (G-2) Removing the AC Socket Remove the black socket silicone washer as shown in the figure. Unscrew the 2 M3*6 countersunk head screws, and finally unscrew the 1 M4*8 combination screw to replace the VS9 AC socket cable. 6.3.8.3 (G-3) Removing the Connector Board Unscrew the 2 M3*6 pan head screws with washers at the position shown in the figure to replace the VS9 connector board.
-
Page 91: F) Plastic Main Support Assembly
6.3.9 (F) Plastic Main Support Assembly 6.3.9.1 (F-1) Removing the CO Module Unscrew the 4 ST3.3X8 tapping screws at the position shown in the figure to replace the module assembly. 6.3.10 (E) Front Cover Assembly 6.3.10.1 (E-1) Removing the SpO Board Unscrew the screws corresponding on the small SpO board as shown in figure on the... - Page 92 6.3.10.2 (E-2) Removing the Alarm Lamp Board Unscrew the 2 ST3.3X8 tapping screws as shown in the figure and remove the cable socket to replace the alarm lamp board. 6.3.10.3 (E-3) Removing the Main Board Unscrew the 6 M3*6 pan head screws with washers as shown in the figure and remove the board.
- Page 93 6.3.10.4 (E-3-1) Removing the Display Cable Remove the corresponding socket and back tape of the display cable indicated by the arrow, and remove the tape fixing the touchscreen FPC to replace the display cable. 6.3.10.5 (E-3-2) Removing the Display Assembly Unscrew the 10 M3*6 pan head screws with washers as shown in the figure, and remove the touchscreen FPC fixing tape and adhesive to remove the display assembly.
-
Page 94: A) Disassembling The Vs8 Main Unit
6.3.10.6 (E-3-3) Removing the Touchscreen After the display assembly is removed, the remaining part is the touchscreen assembly on the front cover, which can be replaced as a whole. 6.4 (A) Disassembling the VS8 Main Unit NOTE Make sure that the AC power is disconnected and the monitor is off. ... -
Page 95: A-1) Body Temperature Module
6.4.1 (A-1) Body Temperature Module NOTE Different body temperature modules can be removed in the same way. The quick body temperature module is used as an example here. Use a Phillips screwdriver to unscrew the 2 ST3.3*8 tapping screws at the position shown in the figure on the rear cover. - Page 96 If a battery is loaded, unplug the battery socket and take out the battery (only one socket 1 for the small-capacity battery and two socket 1 and 2 for large-capacity batteries). Skip this step if no battery is loaded. Remove the tape in the battery compartment. Remove the body temperature cable from the socket as shown in the figure, and then the cable from the rear cover buckle.
-
Page 97: A-2) Recorder Assembly/Door
Remove the body temperature module from the rear cover and replace the body temperature module or the cable separately. 6.4.2 (A-2) Recorder Assembly/Door 6.4.2.1 When No Recorder is Used Recorder door: Insert a flat-bladed screwdriver or tweezers (or other similar small tools) into the removal hole on the recorder door as shown in the figure to remove the recorder door. - Page 98 6.4.2.2 When Recorder is Used. Use a Phillips screwdriver to unscrew the 2 M3*6 pan head screws with washers at the position shown in the figure on the rear cover. Pinch the two lugs on the inside of the recorder as shown in the figure and press in the direction of the arrow to remove the recorder.
-
Page 99: B) Removing Rear Cover
6.4.3 (B) Removing Rear Cover Disassembling the assembly into rear cover assembly + main bracket & front cover assembly (C) Rotate the metal ring on the battery door counterclockwise, unscrew it completely, and open the battery door. If a battery is loaded, unplug the battery socket and take out the battery (only one socket 1 for the small-capacity battery and two socket 1 and 2 for large-capacity batteries). - Page 100 Remove the fiber tape 1 that secures the cable, remove the body temperature cable from the socket 2 as shown in the figure, and then pull it out from the position 3 under the battery compartment. (Perform this step if the monitor is equipped with a quick body temperature module or infrared body temperature module.
- Page 101 Unplug the speaker cable in the recorder compartment from the socket and slot. Unscrew the 6 M3*6 pan head screws with washers at the position shown in the figure on the rear cover. 6-31 VS 9/VS 8 Vital Signs Monitor Service Manual...
- Page 102 Lift and remove the rear cover. The assembly is disassembled into the rear cover assembly (B) and the main frame & front cover assembly. 6.4.3.1 (B-1) Removing the Rear Cover VS8 enclosure maintenance package: The rear cover assembly can be replaced as a whole. If the monitor is equipped with a multi-function connector, you need to use a blade or other suitable tools to cut off the stamp hole structure indicated by the arrow on the rear cover.
- Page 103 Pull the connection belt of the battery door at the position shown in the figure on the rear cover to replace the battery door. Main Frame & Front Cover Assembly (C) 6.4.3.2 (C-1) Removing the Wi-Fi Module Pinch the fixing spring at the red circle 1 as shown in the figure, and press it firmly. The Wi-Fi module will automatically pop up;...
- Page 104 6.4.3.3 (C-2) Removing the Bluetooth Module Unplug the socket 1 to replace the Bluetooth module or the Bluetooth antenna/cable separately. Paste the Bluetooth antenna and route the cable at position 2 shown in the figure. 6.4.3.4 (C-3) Removing the Connection Cable of the Power Management Board Remove the connection cable of the power management board directly.
- Page 105 6.4.3.5 (C-4) Removing the AC-DC Power Board Unplug the power management board cable socket 2 (you may replace the cable only), unplug the AC cable socket 1 shown in the figure, and unscrew the two M3*6 pan head screws 3 to replace the power module. 6.4.3.6 (C-5) Removing the Panel and SpO Signal Cable...
-
Page 106: D) Detaching The Main Frame And Front Cover Assembly
6.4.4 (D) Detaching the Main Frame and Front Cover Assembly Unplug the sockets connecting the Wi-Fi antenna, Bluetooth antenna, Bluetooth connection cable, SpO cable, CO cable, and power connection cable to the main board. If the monitor is equipped with a multi-function connector, remove the connector board connection cable socket indicated by the arrow on the main board. -
Page 107: F) Detaching The Plastic Support
Unscrew the 5 M3*6 pan head screws with washers as shown in the circle in the figure to disassemble the assembly into the main frame assembly (D) and front cover assembly (E). The main support assembly (D) is disassembled into the plastic main support assembly (F) and sheet metal main support assembly (G). - Page 108 6.4.5.1 (F-1) Removing the NIBP Valve Unplug the six-way air tube 1 from the valve assembly, and take the valve out of the buckle structure 2 to remove the valve assembly (note the installation position of the fast and slow valve during installation). 6.4.5.2 (F-2) Removing the NIBP Pump Cut off the two cable ties that fix the pump at position 1 and unplug the air tube 2 to...
-
Page 109: G) Sheet Metal Main Support Assembly
6.4.5.3 (F-3) Removing the NIBP Air Tube Same as F-2 Removing the NIBP Pump 6.4.6 (G) Sheet Metal Main Support Assembly Unplug the AC cable socket 1, and remove the sheet metal from bottom to top to disassemble the assembly into the plastic main support assembly and the sheet metal main support assembly. - Page 110 6.4.6.1 (G-1) Removing the Connector Board Cable Unplug the connector board cable socket shown in the figure (press the metal lock on the side of the socket) to replace the connector board cable. 6.4.6.2 (G-2) Removing the AC Socket Unscrew the M4*8 combination screw 1 and unscrew the two M3*6 pan head screws 2 with washers to replace the VS8 AC socket cable.
-
Page 111: E) Front Cover Assembly
6.4.7 (E) Front Cover Assembly 6.4.7.1 (E-1) Removing the SpO Board Unscrew the screws corresponding on the small SpO board as shown in figure on the main board to replace the corresponding SpO board. mall SpO board on Nellcor (1 M2X4 stainless steel pan head screw) A: S 6-41 VS 9/VS 8 Vital Signs Monitor Service Manual... - Page 112 B: Small SpO board on Masimo (2 M3X6 pan head screws with washers) 6.4.7.2 (E-2) Removing the Alarm Lamp Board Unscrew the 2 ST3.3X8 tapping screws as shown in the figure and remove the cable socket to replace the alarm lamp board or alarm lamp board cable. 6.4.7.3 (E-3) Removing the Encoder Cable Unscrew the 6 M3*6 pan head screws with washers as shown in the figure and remove...
- Page 113 6.4.7.4 (E-4) Removing the Main Board Unscrew the 7 M3*6 pan head screws with washers marked by the red circle in the figure. 6-43 VS 9/VS 8 Vital Signs Monitor Service Manual...
- Page 114 Flip up the black snap on the head of the display socket marked by 1 in the figure and remove the display FPC cable; if a touchscreen is used, unplug the touchscreen cable socket 2 to remove the main board. 6.4.7.5 (E-4-1) Removing the Encoder Unscrew the 2 ST3.3*8 tapping screws 1, and slowly lift the board in the area with no...
- Page 115 6.4.7.6 (E-4-2) Removing the Touchscreen Cable Unplug the touchscreen cable socket to replace the cable. 6.4.7.7 (E-4-3) Removing the Display Assembly If the monitor is equipped with a touchscreen, remove the display FPC fixing tape and remove the back parameter insulating sheet shown in the figure. Unscrew the 11 ST3.3*8 tapping screws shown in the figure.
- Page 116 6.4.7.8 (E-4-4) Removing the Touchscreen Assembly Same as E-4-3 6-46 VS 9/VS 8 Vital Signs Monitor Service Manual...
-
Page 117: Parts
The Part Numbers listed in the "Part Number" columns of all parts lists are used only to assist the maintenance personnel in searching for the corresponding FRU part numbers. Please provide the FRU parts numbers if you want to purchase the spare parts. 7.2 VS9 Parts 7.2.1 Main Unit 7.2.1.1 Exploded View... -
Page 118: Front Cover Assembly
7.2.1.2 Parts Details Material Description FRU Part Number Remarks VS9 front cover and touchscreen assembly 115-073821-00 Main frame assembly VS9 rear cover assembly 115-073899-00 7.2.2 Front Cover Assembly 7.2.2.1 Exploded View VS 9/VS 8 Vital Signs Monitor Service Manual... -
Page 119: Rear Cover Assembly
7.2.2.2 Parts Details Material Description FRU Part Number Remarks VS9 front cover and touchscreen assembly 115-073821-00 VS8 VS9 alarm lamp board PCBA 115-073776-00 maintenance package VS9 BOE display assembly maintenance 115-073833-00 package VS9 fully-configured main board (Masimo or Nellcor SpO2) maintenance package (with... -
Page 120: Main Frame Assembly
Material Description FRU Part Number Remarks VS8 VS9 quick temperature module 115-073875-00 material package (without probe) VS8 VS9 IR body temperature Dock 115-073876-00 (Exergen) material package VS8 VS9 Exergen IR body temperature 115-073881-00 upgrade material package VS8 VS9 WelchAllyn body temperature... -
Page 121: Fully-Configured Trolley Assembly
FRU Part Material Description Remarks Number VS9 NIBP tube maintenance package 115-073883-00 Dual air valves 6VDC 300 mmHg 125 mm 082-002237-00 line length (custom) Maintenance package for 5600mAh 115-059753-00 battery transition board VS9 CO2 module upgrade material 115-073896-00 package POWER SUPPLY BOARD 15V 40W... -
Page 122: Standard Trolley Assembly
7.2.5.2 Parts Details Material Description FRU Part Number Remarks Writing panel assembly maintenance package 045-004447-00 Assembly maintenance package for basket 045-004448-00 without handle 3" threaded connection casters with brake 034-000728-00 7.2.6 Standard Trolley Assembly 7.2.6.1 Exploded View 7.2.6.2 Parts Details Material Description FRU Part Number Remarks... -
Page 123: Vs8 Parts
7.3 VS8 Parts 7.3.1 Main Unit 7.3.1.1 Exploded View 7.3.1.2 Parts Details Material Description FRU Part Number Remarks VS8 front cover assembly 115-073736-00 Touchscreen assembly Main frame assembly VS8 rear cover assembly VS 9/VS 8 Vital Signs Monitor Service Manual... -
Page 124: Front Cover Assembly
Parts Details Material Description FRU Part Number Remarks Knob (white) 043-003372-01 VS8 front cover touchscreen assembly 115-073736-00 VS8 VS9 alarm lamp board PCBA 115-073776-00 maintenance package VS8 display assembly maintenance 115-073745-00 package (Tianma) VS8 fully-configured main board (Masimo or Nellcor SpO... -
Page 125: Rear Cover Assembly
Parts Details Material Description FRU Part Number Remarks VS8 VS9 quick temperature module 115-073875-00 material package (without probe) VS8 VS9 IR body temperature Dock 115-073876-00 (Exergen) material package VS8 VS9 WelchAllyn body temperature 115-073878-00 DOCK material package VS8 enclosure maintenance package... -
Page 126: Main Frame Assembly
7.3.4.2 Parts Details Material Description FRU Part Number Remarks VS8 NIBP tube maintenance package 115-073884-00 VS8 VS9 NIBP air pump maintenance package 115-073871-00 POWER SUPPLY BOARD 15V 40W 022-000125-00 VS8 VS9 Bluetooth module upgrade material 115-073873-00 package VS8 fully-configured connector board... -
Page 127: Fully-Configured Trolley Assembly
7.3.5 Fully-configured Trolley Assembly 7.3.5.1 Exploded View 7.3.5.2 Parts Details Material Description FRU Part Number Remarks Writing panel assembly maintenance package 045-004447-00 Assembly maintenance package for basket 045-004448-00 without handle 3" threaded connection casters with brake 034-000728-00 7-11 VS 9/VS 8 Vital Signs Monitor Service Manual... -
Page 128: Standard Trolley Assembly
7.3.6 Standard Trolley Assembly 7.3.6.1 Exploded View 7.3.6.2 Parts Details Material Description FRU Part Number Remarks Assembly maintenance package for 045-004291-00 basket with handle 3" threaded connection casters with 034-000728-00 brake 7-12 VS 9/VS 8 Vital Signs Monitor Service Manual... -
Page 129: Hardware And Software Upgrade
For upgrading the VS9 package nonstandard machine only. 115-073872-00 For upgrading the VS8 Wi-Fi module upgrade nonstandard machine only; and package there is no limitation for VS9. 115-073875-00 Quick temperature upgrade package 115-073878-00 WelchAllyn bracket upgrade package NOTE The packages available to you vary with the configuration of the monitor ... -
Page 130: Software Upgrade
This tool can directly run on a PC. We recommend you to connect a PC to the monitor through a switch or router for network upgrade. If the monitor is connected to the Mindray central monitoring system (CMS), the network upgrade can be completed on the CMS. - Page 131 Enter the SN, and click to enter program installation location screen. Select the corresponding folder for installation, and click instructed to complete the installation. Appendix: Reference Table of Multiple Languages: Language ENGLISH SIM.CHINESE FRENCH GERMAN ITALIAN POLISH SPANISH PORTUGUESE RUSSIAN CZECH TURKISH HUNGARIAN...
-
Page 132: Upgrade Through Cms
NOTE To ensure correct upgrade, set the IP address of the PC to 77.77.1.xx before running the upgrade program. There are no special requirements for the IP addresses of the gateway and DNS. For example, the IP address is 77.77.1.13, and the subnet mask is 255.255.255.0. - Page 133 8.2.2.1 Connecting Monitor and CMS NOTE Before allocating configuration for the monitor, exporting logs or upgrading software through the CMS, build a connection between the monitor and CMS. Method 1: Choose Main Menu -> Maintenance -> Network Setup , select Transfer ...
- Page 134 In the screen that pops up, click Synchronize To Device screen pops up. Check the monitor to be upgraded, and click Select Device In this case, the monitor status will not change and keeps in original working status. If you want to power off the monitor, the monitor screen will display the information similar to the following to ask you whether to update the version.
-
Page 135: Upgrade Through Usb Drive
Click OK. The CMS station starts to transmit the version file to the monitor. After the file is transmitted, the monitor starts to upgrade software. The information similar to the following will pop up on the monitor screen during upgrade. 8.2.2.3 Confirming Upgrade Result After the upgrade is successful, the result of success is displayed in the device list screen. - Page 136 8.2.3.2 Entering the Upgrade Mode Method 1: Power off the monitor, and connect the monitor to a USB keyboard. Press the power key to power on the monitor. During the power-on, keep pressing F4+F5 at the same time or press * to enter the upgrade mode to perform upgrade.
- Page 137 on the touchscreen or press the arrow key on the keyboard to switch the upgrade program upward. on the touchscreen or press the arrow key on the keyboard to switch the upgrade program leftward. on the touchscreen or press the arrow key on the ...
-
Page 138: Software Function Upgrade
-> System -> License 8.3.3 Software Function Upgrade After receiving a license from Mindray, import this license file into the monitor to complete upgrade. To import the license file, do as follows: Unzip the file to obtain the folder. PMLS.ZIP... -
Page 139: Test After Upgrade
Select Main Menu -> System -> License -> External . Then click Import to complete installation. 8.3.4 Test after Upgrade After software function upgrade is complete, perform test according to the following steps: Select Main Menu -> System -> License -> Local, and check whether the software functions upgraded are in the Installed status. - Page 140 FOR YOUR NOTES 8-12 VS 9/VS 8 Vital Signs Monitor Service Manual...
-
Page 141: A Wireless Network Installation And Requirements
Wireless Network Installation and Requirements A.1 Introduction This chapter describes how to install the Mindray monitor that uses the wireless local area network (WLAN). CAUTION Using 5GHz frequency band is recommended whenever possible. There are more interference sources in 2.4GHz frequency band. - Page 142 Template Wireless network Determine the wireless network Wireless network requirements of deployment requirements of requirement table the Mindray the Mindray monitor. monitor Network Check if the customer's network Wireless network acceptance report meets the requirements of the acceptance table Mindray monitor through questionnaire survey and measurement.
- Page 143 If the hospital plans to establish a new WLAN for the Mindray monitor, make sure that at least one Wi-Fi channel is idle. Otherwise, after the new WLAN is established, it cannot meet the requirements of the Mindray monitor in terms of co-channel interference. The figure below shows the network deployment process.
-
Page 144: Network Requirements
Network design documents and materials list Installation Confirm the actual operation of Monitor confirmation the Mindray monitor after installation report installation. confirmation table NOTE Network design and deployment are complex and can be completed only with help of professional IT engineers. This document does not contain this content. -
Page 145: Network Acceptance
Beacon and DTIM AP DTIM = 1, Beacon = 100 milliseconds Service port Refer to the white paper of the Mindray monitor network. The monitor requests network devices to open some TCP/UDP ports. A.4 Network Acceptance A.4.1 Tools and Resources... - Page 146 A.4.2 Wi-Fi Signal Calibration Before using the wireless network survey tool (running on a laptop) to test the network coverage, use the monitor to calibrate the RSSI of the tool as follows: Keep the monitor close to the tool. The distance between the monitor and the tool is not greater than 30 cm.
- Page 147 802.11 The WLAN cannot use the Check if this protocol protocols not supported requirement is satisfied by the Mindray monitor, together with the IT e.g., 802.11ac. department of the hospital. Security The WLAN cannot use Check if this...
-
Page 148: Using The Monitor To Evaluate Network Coverage
IT department of the hospital. Service port Refer to the white paper Check if this of the Mindray monitor requirement is satisfied network. The monitor together with the IT requests opening some department of the TCP/UDP ports. -
Page 149: Recommended Network Devices
whether the coverage meets the requirements. When necessary, adjust the AP location or add APs to ensure the coverage effect. Do as follows: Set the monitor to access the CMS. Run the in the CLI window of the CMS to ping the ping –t –l 32 –w 1500 IP address monitor continuously (The packet consists of 32 bytes, and the reply timeout duration is 1500 milliseconds). -
Page 150: Setting Wireless Parameters Of Monitor
Device Model 2500 wireless controller AIR-CT2504-x-K9 2600 wireless access point AIR-CAP2602I-x-K9 A.7 Setting Wireless Parameters of Monitor Configure the WLAN parameters of the monitor according to the table below: Parameter Recommended Description Setting ]→[ ]→[ ]→[ ]→[ Main Menu Maintenance User Maintenance Network Setup WLAN... - Page 151 Parameter Recommended Description Setting must match the WLAN AP channel setting. ]→[ ]→[ ]→[ ]→[ ]→ Main Menu Maintenance User Maintenance Network Setup WLAN Certificate Management Local Display the existing EAP certificate in the monitor. USB drive Display the existing EAP certificate in the USB drive.
-
Page 152: Troubleshooting
Certificat Certifica Certif Passwor icate PEAP-MSCHAPV2 PEAP-GTC PEAP-TLS TTLS FAST LEAP Note: Y means "Yes", N means "No," and "O" means "Optional". The configuration items are described as follows: Phase2 Auth: When PEAP is selected in the EAP method, users can configure the ... - Page 153 If yes, restart this monitor and ensure that the two monitors have the same configuration. If this monitor still cannot be connected online, return it to Mindray for repair. The monitor can The monitor has not Allow the monitor to access the central...
- Page 154 Symptom Possible Cause Recommended Measures restarted, return this monitor to Mindray for repair. Static IP addresses Check if the monitor displays a message conflict. about an IP address conflict. Check whether the same IP address is assigned to multiple sets of equipment.
- Page 156 PN: 046-020105-00(2.0)
Need help?
Do you have a question about the VS9 and is the answer not in the manual?
Questions and answers