Table of Contents
Advertisement
Advertisement
Table of Contents
Troubleshooting

Related Manuals for Mindray VS-900


Summary of Contents for Mindray VS-900
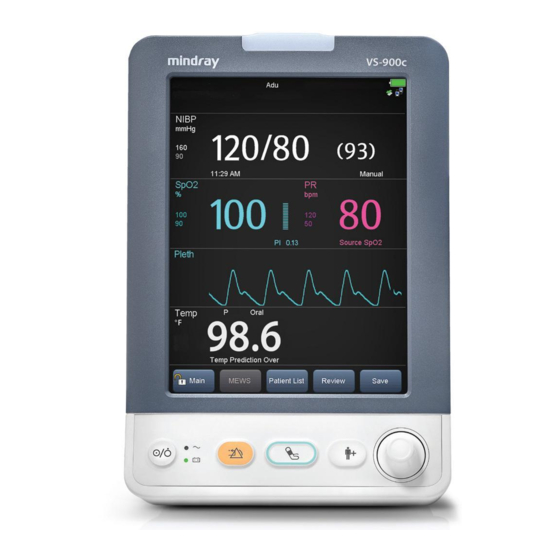
- Page 1 VS-900 Vital Signs Monitor Service Manual...
- Page 3 This manual may refer to information protected by copyrights or patents and does not convey any license under the patent rights of Mindray, nor the rights of others. Mindray does not assume any liability arising out of any infringements of patents or other rights of third parties.
- Page 4 Preface Manual Purpose This manual provides detailed information about the assembling, dissembling, testing and troubleshooting of the equipment to support effective troubleshooting and repair. It is not intended to be a comprehensive, in-depth explanation of the product architecture or technical implementation. This manual is based on the maximum configuration and therefore some contents may not apply to your product.
-
Page 5: Table Of Contents
Contents 1 Introduction ........................1-1 1.1 Information of This Manual ........................1-1 1.2 Safety Information ............................1-1 1.2.1 Dangers .............................. 1-2 1.2.2 Warnings ............................1-2 1.2.3 Cautions ............................. 1-2 1.2.4 Notes ..............................1-2 1.3 Equipment Symbols ........................... 1-3 2 Theory of Operation ......................2-1 2.1 Overview ................................. - Page 6 4.4.6 Nurse Call Reply Performance Test ..................4-10 4.4.7 Bar Code Scanner Test ........................ 4-10 4.5 Electric Safety Tests ........................... 4-11 4.6 Touchscreen Calibration ......................... 4-11 4.7 Recorder check ............................4-11 4.8 Battery Check .............................. 4-11 4.9 Factory Maintenance ..........................4-12 4.9.1 Accessing Factory Maintenance Menu ................
- Page 7 6.3.2 Disassembling the Infrared Ear Thermometer Module (Optional) ......6-2 6.3.3 Removing the Recorder ....................... 6-3 6.3.4 Separating the Front and Rear Half of the Monitor ............6-3 6.3.5 Removing the Parameter Connector Panel Assembly ............. 6-5 6.3.6 Disassembling the Main Bracket Assembly ................6-6 6.3.7 Removing the Parameter Board (SpO Optional) and Power Management Board6-8 6.3.8 Removing the Parameter Connector Panel Assembly (With CO...
- Page 8 8.1.8 Upgrading Recorder Function ....................8-4 8.1.9 Upgrading Nurse Call Function and DIAP Protocol Port ..........8-5 8.2 Software Upgrade ............................8-5 8.2.1 Installing Mindray Patient Monitor Software Upgrade Tool .......... 8-6 8.2.2 Software Upgrade Procedure ....................8-8 8.2.3 Upgrading the Scoring ......................... 8-9...
- Page 9 A Electrical Safety Inspection ....................A-1 A.1 Power Cord Plug ............................A-1 A.2 Device Enclosure and Accessories .......................A-1 A.3 Device Labeling ............................A-2 A.4 Protective Earth Resistance ........................A-2 A.5 Earth Leakage Test .............................A-3 A.6 Patient Leakage Current ..........................A-5 A.7 Mains on Applied Part Leakage ......................A-6...
- Page 10 FOR YOUR NOTES...
-
Page 11: Introduction
Introduction 1.1 Information of This Manual Version Revision History Change parts list according to new BOM 1. Add the related description of infrared ear thermometer module. 2. Add the description of MEWS software upgrade. Add the description of CO and Covidien thermometer. 1. -
Page 12: Dangers
WARNING All installation operations, expansions, changes, modifications and repairs of this product are conducted by Mindray authorized personnel. There is high voltage inside the equipment. Never disassemble the equipment before it is disconnected from the AC power source or the battery. -
Page 13: Equipment Symbols
1.3 Equipment Symbols NOTE Not all the symbols listed below are applied to your equipment. General warning sign Power ON/OFF Alternating current (AC) Battery indicator AUDIO PAUSED NIBP Start/Stop key Alarm Paused Record Admit a new patient Insertion Direction DEFIBRILLATION –PROOF Input/Output TYPE CF APPLIED PART... - Page 14 The following definition of the WEEE label applies to EU member states only. This symbol indicates that this product should not be treated as household waste. By ensuring that this product is disposed of correctly, you will help prevent bringing potential negative consequences to the environment and human health.
-
Page 15: Theory Of Operation
Theory of Operation 2.1 Overview The Monitor is intended for monitoring physiologic parameters, including SpO , PR, NIBP and TEMP, on adult, pediatric, and neonatal patients in healthcare facilities by clinical physicians or appropriate medical staff under the direction of physicians. The equipment also: ... -
Page 16: Connectors For Peripheral Devices
Rear housing assembly: power module (AC/DC), power management and interface board (including SpO isolation power), recorder, speaker, battery, NIBP module, and board (including three types of configuration, i.e. Mindray, Masimo, and Nellcor). External module: SmarTemp module or Infrared Ear Thermometer module. The two... - Page 17 Backlight (Indicator) Rear Housing Assembly Pump NIBP socket Speaker NIBP module Power management and interface board board (Standard Recorder socket Mindray, OEM optional) 2600mAh battery External Module Predictive Temp Temp probe module AC-DC power module AC-IN External interface RJ45/USB/Multifunctional (nurse call, extended ports)
-
Page 18: Front Housing Assembly
2.4 Front Housing Assembly Alarm lamp Wi-Fi antenna Touchsc reen control Main Wi-Fi module Keypa Screws securing the front and rear 2.5 Main Board The main board is the control center of the equipment. It provides communication, display, and data storage functions, including: ... -
Page 19: Rear Housing Assembly
Recorder AC/DC power module board Rear housing assembly consists of power module (AC/DC), power management and interface board (including SpO isolation power), recorder, speaker, battery, NIBP module, and SpO board (including three types of configuration, i.e. Mindray, Masimo, and Nellcor). - Page 20 Control over power on/off key and AC, BAT indicator; Communication transmission among parameter modules; Providing isolation power for Mindray/OEM SpO module; and, Providing external connectors, and also filter and protection for these connectors. Recorder The recorder receives data from the main board and sends them to the thermal printhead for printing.
-
Page 21: External Module
2.7 External Module An external SmarTemp module or Infrared Ear Thermometer module can be extended on the monitor. The two modules are mutually exclusive. The SmarTemp module consists of an isolation power board, Temp measurement board, and probes. The Temp measurement board collects Temp signals, processes algorithm and sends measurement results to the main board. - Page 22 FOR YOUR NOTES...
-
Page 23: Equipment Installation
Equipment Installation 3.1 Unpacking the Equipment Open the package and take out the packing list. Check that all the articles included in the packing list are available and the quantity and specification are correct. Make sure that: All the optional parts purchased by the customer shall also be checked. ... -
Page 24: Electrical Requirements
NOTE The environmental specifications of unspecified parameters are the same as those of the main unit. 3.2.3 Electrical Requirements Check cables and power cords. Make sure that: Check that the system cables, power cords, and power plugs are not damaged, and that the pins are not loose. -
Page 25: Preparation For Power On
CAUTION Use mounting brackets we supply or approve. If other compatible mounting bracket is used, be sure it can be safely used on the vital signs monitor. The mounting bracket should be installed by our qualified service personnel, or engineers who have adequate knowledge on it. - Page 26 FOR YOUR NOTES...
-
Page 27: Testing And Maintenance
Testing and Maintenance 4.1 Introduction To ensure the equipment always functions normally, qualified service personnel should perform regular inspection, maintenance and test. This chapter provides a checklist of the testing procedures for the equipment with recommended test equipment and frequency. The service personnel should perform the testing and maintenance procedures as required and use appropriate test equipment. -
Page 28: Recommended Frequency
4.1.4 Recommended Frequency Check/Maintenance Item Frequency Visual inspection 1. When first installed or reinstalled. 1. When first installed or reinstalled. Power-on test 2. Following any repairs or replacement of any main unit parts. test Pressure check NIBP test Leakage test 1. -
Page 29: Power-On Test
Inspect all external connections for loose connectors, bent pins or frayed cables. Inspect all connectors on the equipment for loose connectors or bent pins. Make sure that safety labels and data plates on the equipment are clearly legible. 4.3 Power-on Test This test is to verify that the equipment can power up correctly. - Page 30 Set the patient type to [Adu], [Ped], and [Neo] respectively. Observe the monitor and make sure the displayed SpO and PR value fall in the following range. Manufacturer 96% ± 2% (Adult, pediatric) Mindray 80 ± 3 bpm 96% ± 3% (Neonate) 96% ± 2% (Adult, pediatric) Nellcor 80 ±...
-
Page 31: Nibp Test
4.4.2 NIBP Test Leakage Test NOTE Perform NIBP leakage test before any other NIBP concerned test and calibration. Tools required: NIBP cuff for adult patient Air tubing Cylinder Follow this procedure to perform the leakage test: In the [Patient Demographics] menu, set [Patient Cat.] to [Adu]. - Page 32 NIBP Accuracy Test Tool required: T-shape connector Appropriate tubing Balloon pump Rigid Vessel with volume 500 ± 25 ml Reference manometer (calibrated with accuracy equal to or better than 0.75 mmHg) Follow this procedure to perform the accuracy test: Connect the equipments as shown below.
-
Page 33: Co Test
4.4.3 CO Test Accuracy test Tool required: A steel gas cylinder with 5±0.03% CO and balance gas N (P/N 0075-00-0033-01) T-shape connector Tubing 1. Select Main]→ [Maintenance >>]→[User Maintenance>>]→enter the required password→ [Module Maintenance>>]→[Calibrate CO2>>] 2. Connect the test system as follows: Flowmeter Relief value Sampling line... -
Page 34: Infrared Ear Thermometer/Exergen Temporalscanner Thermometer Test
Flowmeter Relief value Sampling line T-shape connector Monitor Cylinder Open the valve to flow CO and make sure that there is flow sufficient to vent to atmosphere. In the [Calibrate CO2] menu, enter the CO concentration in the [CO2] field. In the [Calibrate CO2], the measured CO concentration is displayed. -
Page 35: Smartemp Tm Module Test
Verify accuracy of temperature on monitor(subtract temperature value on four-channel thermometer from temperature value on monitor) is within ±0.2 for THP79JU Infrared ear thermometer or ±0.1 for Convidien Genius 2 Tethered Tympanic Thermometer or ±0.1℃ for Exergen TemporalScanner Thermometer. Repeat sections 1 to 4. For water bath set to 42.0 . Verify accuracy of temperature on monitor is within ±0.2 for both types of infrared ear thermometer. -
Page 36: Nurse Call Reply Performance Test
Wait till the Temp value displayed on the monitor stabilizes. Verify that the displayed value is 37±0.1℃. Please contact our service personnel if the Temp test fails. 4.4.6 Nurse Call Reply Performance Test Tool required: Oscilloscope Connect the nurse call cable to the Multifunctional Connector of the equipment. Select [Main →... -
Page 37: Electric Safety Tests
4.5 Electric Safety Tests See Appendix A Electrical Safety Inspection for electrical safety tests. 4.6 Touchscreen Calibration Tool required: None Select [Main → ] [Maintenance >> → ] [Touchscreen Calibration]. symbol will appear at different positions of the screen. Select, in turn, the central point of the symbol. -
Page 38: Factory Maintenance
Performance Test Perform the test by referring to the Battery chapter in the Operator's Manual (P/N: H-046-004882-00) and verify the operating time of the battery meets the product specification. 4.9 Factory Maintenance 4.9.1 Accessing Factory Maintenance Menu Select [Main → ] [Maintenance >>... -
Page 39: Software Version
4.9.3 Software Version Selecting the [Software Version >>] will show software version information, as shown below: System software version Power software version Module software version 4-13... -
Page 40: Monitor Information
4.9.4 Monitor Information Selecting [Monitor Information >>] will show the status of the monitor as shown below: NOTE If the main board is replaced, you need to check the label on the main unit and reconfigure the serial number of the monitor. If you need the calibration methods of Covidien Genius infrared ear module and Exergen TemporalScanner Thermometer module, please contact the manufacturer factory. - Page 41 Maintenance and Test Report (See the above sections for detailed test procedures and contents) Customer name Customer address Servicing person Servicing company Equipment under test (EUT) Model of EUT SN of EUT Hardware version Software Version Test equipment Model/No. Effective date of calibration Test Result Test Contents Test Record...
- Page 42 The difference is within ±3 mm when 0, 50 or 200 mmHg is set for NIBP accuracy test. There is no leakage with NIBP, or the manual leakage test result does not exceed 6 mmHg/min. test The difference is within ±0.3% when gas level 5% is set for CO2 accuracy test.
- Page 43 The monitor can operates correctly from battery power when an AC power failure accidentally occurs. The monitor can operate independently on a single battery. Test conclusion Tested by: Test date: 4-17...
- Page 44 FOR YOUR NOTES 4-18...
-
Page 45: Troubleshooting
Troubleshooting 5.1 Overview In this chapter, equipment problems are listed along with possible causes and recommended corrective actions. Refer to the tables to check the monitor, identify and eliminate the troubles. The troubles we list here are frequently arisen difficulties and the actions we recommend can correct most problems, but not all of them. -
Page 46: Checking Technical Alarms
5.5 Checking Technical Alarms Before troubleshooting the monitor, check for technical alarm messages. If an alarm message is presented, eliminate the technical alarm first. For detailed information on technical alarm message, possible cause and corrective action, refer to the monitor’s Operation Manual. 5.6 Troubleshooting Guide 5.6.1 Power On/Off Failure Symptoms... -
Page 47: Alarm Lamp Failures
Symptoms Possible Cause Troubleshooting Check if there is a symbol displayed above the [Main] quickkey. If yes, press and hold the [Main Touchscreen disabled Menu] quickkey for more than 3 seconds to enable the touchscreen. 1. Check that the cable between the touchscreen and Touchscreen touchscreen control board is correctly connected. -
Page 48: Sound Failures
5.6.5 Sound Failures Symptoms Possible Cause Troubleshooting Select [Main → The key volume is set ] [General Setup >>] to adjust the key to 0. volume. No hardkey Check that the cable between the speaker and Cable defective or knob interface board is properly connected. -
Page 49: Recorder Failures
5.6.7 Recorder Failures Symptoms Possible Cause Troubleshooting 1. Check if the recorder status indicator lights. 2. If yes, select [Main → ] [Maintenance >> → ] [Factory Recorder module Maintenance >> → ] enter the required disabled password [Ok → →... -
Page 50: Data Storage Failure
5.6.9 Data Storage Failure Symptoms Possible Cause Troubleshooting Abnormal patient admitting Admit the patient properly. Fails to review SD card full; unavailable for Delete garbage patient data, remove the archived patient more patient data related alarm, and readmit the patient. data The main board failed. -
Page 51: Wi-Fi Related Problems
Symptoms Possible Cause Troubleshooting Incorrect IP address Check for IP address conflict. If yes, reconfigure configuration the IP address. 5.6.11 Wi-Fi Related Problems Symptoms Possible Cause Troubleshooting The Wi-Fi signal is unstable in the Check the signal quality of the operating area. -
Page 52: Thj79Ju Infrared Ear Thermometer Module Problems
or some parameters Converter board cannot be used defective inside the Replace corresponding converter board. module "XX" indicates the configured modules, such as NIBP, SpO and Temp. 5.6.13 THJ79JU Infrared Ear Thermometer Module Problems Symptoms Possible Cause Troubleshooting Error 5~9, the system Unload the battery, wait for 1 minute and is not functioning repower it. -
Page 53: Exergen Temporalscanner Thermometer Module Problems
If system error “12”, power off the Site mode corruption thermometer. Enter Biotech mode to reset the error displayed. site mode. Save the Biotech settings and let the thermometer power off. For all other Site mode corruption system errors, reset the thermometer by installing a probe cover. -
Page 54: Module Problems
5.6.16 CO Module Problems Symptoms Possible Cause Troubleshooting Ambient temperature is Lower the operating temperature. If the Sensor High Temp too high or there is a alarm persists, the CO module may fail. module failure. Change the CO module. Wait for next successful zeroing, or Zero Failed The zeroing failed. -
Page 55: Technical Alarm Messages
5.6.18 Technical Alarm Messages Please refer to the Operator's Manual. 5-11... - Page 56 FOR YOUR NOTES 5-12...
-
Page 57: Disassembly And Repair
Disassembly and Repair 6.1 Tools Required To disassemble and replace the parts and components, the following tools may be required: Philips screwdrivers Tweezers Sharp nose pliers Clamp Slot-type screwdriver 6.2 Preparations for Disassembly Before disassembling the equipment, finish the following preparations: ... -
Page 58: Disassembling The Main Unit
6.3 Disassembling the Main Unit NOTE The recorder can be disassembled separately. To disassemble the equipment, place the equipment on a work surface free from foreign material, avoiding damaging the antiglare screen, touchscreen and the knob. Be careful not to break the two cotters on the front ends of rear housing. ... -
Page 59: Removing The Recorder
6.3.3 Removing the Recorder Unscrew the two M3×6 screws and pull the clamps as indicated to take out the recorder. Then disconnect the cable. Clamps NOTE The recorder can be disassembled separately. 6.3.4 Separating the Front and Rear Half of the Monitor Lay the monitor on a table as shown below. - Page 60 Remove the recorder or recorder cover, and pull the rear housing out as indicated below to separate the fastener that are fixing the front and rear housing. Stand the monitor and separate the front housing assembly and rear housing assembly with caution.
-
Page 61: Removing The Parameter Connector Panel Assembly
6.3.5 Removing the Parameter Connector Panel Assembly Lay the rear housing assembly of the equipment on a table. Pull out the cable for AC receptacle and SpO cable, and then the silicon tube. Cable for AC input receptacle signal cable Parameter connector panel assembly Silicone tube... -
Page 62: Disassembling The Main Bracket Assembly
6.3.6 Disassembling the Main Bracket Assembly For monitors without multi-function connector, you need to prize the cover from the inside of the monitor with a slot-type screwdriver, and then take out the cover. Cover... - Page 63 Disconnect the speaker cable, recorder cable, power cable, battery interface board cable, and NIBP cable. Unscrew the five PT3×8 screws and a M4 screw. Then take out the main bracket assembly. Speaker cable Recorder cable Battery interface board cable Power cord NIBP cable 1 grounding screw...
-
Page 64: Removing The Parameter Board (Spo Optional) And Power Management Board6-8
6.3.7 Removing the Parameter Board (SpO Optional) and Power Management Board Unscrew the three M3×6 screws and take the power management board assembly out from the main bracket assembly. 3 M3 screws Unscrew the two M3×4 screws and take the parameter board out from the power management board assembly. -
Page 65: Removing The Parameter Connector Panel Assembly
Unscrew the two M3×6 screws and take out the power management board assembly. 2 M3 screws Power management board 6.3.8 Removing the Parameter Connector Panel Assembly (With CO Lay the rear housing assembly of the equipment on a table. Pull out the AC receptacle, SpO cable, and then the silicon tube, gas inlet tube, gas outlet tube and CO connection cable. -
Page 66: Disassembling The Co Module Assembly
6.3.9 Disassembling the CO Module Assembly Pull out the AC receptacle, NIBP connection cable, CO2 connection cable. Unscrew two M3X6 screws. Remove the CO module. NIBP connection cable AC receptacle Screw connection cable Screw 6.3.10 Disassembling Pumps and Valves (NIBP optional) Cut the two cable ties and take out the gas pump. -
Page 67: Disassembling Co2 Main Module
Unscrew the three M3×6 screws as indicated and take out the valve. 3XM3 screws 6.3.11 Disassembling CO2 main Module 3XM2.5 screws 6-11... -
Page 68: Disassembling The Main Bracket Assembly(With Co
) 6.3.12 Disassembling the Main Bracket Assembly(With CO Disconnect the speaker cable, recorder cable, power cable, battery interface board cable. Unscrew the five PT3×8 screws and a M4 screw. Take out the main bracket assembly. Speaker cable Recorder cable Battery interface board cable Power cord grounding... -
Page 69: Disassembling Pumps And Valves (Nibp Optional)
6.3.13 Disassembling Pumps and Valves (NIBP optional) Cut the two cable ties and take out the gas pump. Cable tie Unscrew the three M3×6 screws as indicated and take out the valve. 3 M3 screws 6.3.14 Disassembling AC/DC Power Board and Battery Converter Board Unscrew the four M3×6 screws as indicated and take out the AC/DC power board. -
Page 70: Disassembling The Front Housing Assembly
Unscrew the two M3 nuts to take out the battery interface board. 2 M3 screws 6.4 Disassembling the Front Housing Assembly NOTE To disassemble the equipment, place the equipment on a work surface free from foreign material, avoiding damaging the antiglare screen, touchscreen and the knob. -
Page 71: Removing The Wi-Fi Module (Optional)
6.4.2 Removing the Wi-Fi Module (Optional) 1. Remove the antennas on the front panel from the slots as shown below: Antenna Remove the antennas from the Wi-Fi module PCBA. Antenna 6-15... - Page 72 Remove the antennas from antenna sleeve. Antenna Antenna sleeve Push the clamps aside to remove the Wi-Fi module. Clamps 6-16...
-
Page 73: Removing The Main Control Board
Remove the Wi-Fi module. Wi-Fi module 6.4.3 Removing the Main Control Board Disconnect the alarm lamp cable, cable for display backlight, display cable, and the cable between the main board and keypad board respectively. Unscrew the four M3×8 screws and take out the main board, as shown below: 4 screws Cable... -
Page 74: Removing Sd Card (Optional)
6.4.4 Removing SD Card (Optional) Take out the main board for VS-900, and push the SD card as indicated below to take out the SD card. SD card 6.4.5 Removing the Touchscreen (Optional) Unscrew the seven PT3×8 screws as indicated below. Take out the touchscreen assembly and then the touchscreen. -
Page 75: Disassembling The Display
6.4.6 Disassembling the Display Unscrew the four M3×6 screws indicated below to remove the screen. 6.4.7 Removing the Keypad Unplug the encoder cable and unscrew the three PT3×8 screws indicated below. Take out the keypad. 6.4.8 Removing the Encoder Poke the encoder knob out from the slot and loose the nut with a sharp nose plier. Take out the encoder. -
Page 76: Removing The Alarm Lamp
6.4.9 Removing the Alarm Lamp Unscrew the four PT2×6 screws indicated below and take out the alarm lamp board and alarm lamp. 6.5 Disassembling the SmarTemp Module (Optional) 6.5.1 Removing the SmarTemp Module PCBA and SmarTemp Module Power Board PCBA Unscrew the two M3×6 screws and the two M3 screws. -
Page 77: Disassembling The Temp On-Position Detection Board Pcba
6.5.2 Disassembling the Temp On-Position Detection Board PCBA Unscrew the four M3×6 screws as indicated and take out the SmarTemp module housing. 4 screws Unscrew the four M2 screws as indicated below and take out the Temp on-position detection board PCBA. 4 screws Temp on-position detection board PCBA NOTE... -
Page 78: Disassembling The Infrared Ear Thermometer Module (Optional)
6.6 Disassembling the Infrared Ear Thermometer Module (Optional) 6.6.1 Disassembling the Pop-up Unit Press the release button, and pull the pop-up unit out of the infrared ear thermometer module. Pop-up unit Release button Remove the two springs under the pop-up unit. Springs 6-22... -
Page 79: Disassembling The Separator Plate Pcba
6.6.2 Disassembling the Separator Plate PCBA As indicated in the figure below, pull both sides of the pop-up unit open, and take out the stop cover. Stop cover Unscrew the two PT2.5×6 screws to take out the separator plate. Separator plate PT2.5×6 screws 6-23... -
Page 80: Disassembling The Convidien Infrared Ear Thermometer Module Or Exergen Temporalscanner Themometer Module (Optional)
Unscrew the two M3×6 screws to take out the separator plate PCBA. M3×6 screws Separator plate PCBA 6.6.3 Disassembling the Convidien Infrared Ear Thermometer Module or Exergen TemporalScanner Themometer Module (Optional) Unscrew three M3×6 screws, and then remove the panel. M3×6 screws 6-24... - Page 81 Pull out the thermometer cable, unscrew two M3X6 screws, and then take out the bottom panel. M3×6 screws Connection cable Unscrew four M3X6 screws, and then take out the metal bracket. M3×6 screws 6-25...
- Page 82 Unscrew three M3X6 screws, and then take out the power isolation board. 6-26...
-
Page 83: Parts
Parts 7.1 Introduction This section contains the exploded views and parts lists of the main unit. It helps the engineer to identify the parts during disassembling the monitor and replacing the parts. This manual is based on the maximum configuration. Your equipment may not have same parts and the quantity of the screws or stacking sleeves etc. -
Page 84: Parts List
Non-touch 115-059387-00 screen 115-046892-00 115-046892-00 TR6F recorder(Datascope) Rear Housing Assembly for Cover 115-048904-00 VS-900 assembly Screw, Pan head with washer, Phillips M3×8 Screw, pan head Phillips, M3×10 115-048910-00 115-048910-00 VS-900 Temp module 7.3 Front Housing Subassembly (Touchscreen) 7.3.1 Exploded View... -
Page 85: Parts List
Silicon water-proof strip 115-059373-00 Alarm lamp for VS-900 Silicon water-proof strip Touchscreen position pad (8") 115-048914-00 0012-00-1730-01 Antenna cable Alarm lamp pad for VS-900 051-001362-00 Alarm Lamp Board 051-001362-00 Cross recessed pan head self-tapping screw PT2X6 Touch-panel, resitive-type, 021-000271-00 021-000271-00 8.4"... -
Page 86: Front Housing Subassembly (Non-Touchscreen)
Font housing for VS-900 Alarm lamp for VS-900 VS-900 front Water-proof strip, 115-059387-00 housing 144.2X1.5mm poron service kit Water-proof strip, 173.2X1.5mm poron 0012-00-1730-01 Antenna cable 0012-00-1730-01 Alarm lamp pad for VS-900 Cross recessed pan head self-tapping screw PT2X6 051-001362-00 Alarm Lamp Board 051-001362-00... - Page 87 (VS-900, touchscreen) Touchscreen control board 051-000881-00 051-000881-00 PCBA-6301 Screw, Pan head with washer, M3×6 Main board PCBA (6301) 115-018264-00 Naked screen water-proof plate for VS-900 Self-tapping screw Keypad board adjusting 043-003153-00 sleeve Keypad board cushion 047-010363-00 051-001359-00 VS-900 keypad PCBA 051-001359-00...
-
Page 88: Rear Housing Assembly
Subassembly for VS-900 Battery door assembly for 043-008878-00 VS-900 AC socket assembly for 115-017699-00 115-017699-00 VS-900 Mindray SpO 115-059370-00 Parameter connector with no NIBP 115-017705-00 panel assembly for VS-900 115-048908-00 With no SpO Parameter connector 043-003168-00 043-003168-00 board support for VS-900... - Page 89 Remarks 115-018262-00 With multi-IO Power management Without board for VS-900 115-018263-00 multi-IO Screw, Pan head w/washer, Phillips M3X6 115-017679-00 Valve assembly for VS-900 115-017679-00 Pump Shock absorption cushion NIBP pump 801-9261-00040-00 for pump service kit Fixing strip M02D CO module...
-
Page 90: Main Bracket Assembly
7.6 Main Bracket Assembly 7.6.1 Exploded View 7.6.2 Parts List Description FRU part number Remarks Screw, Pan head w/washer 047-010575-00 Power board insulator 047-010575-00 022-000125-00 Power board 022-000125-00 0380-00-0593 Knob, Battery latch 0380-00-0593 Nut with washer Battery spring 115-018254-00 6301 battery interface PCBA... -
Page 91: Power Management Board Assembly
Remarks with 115-018262-00 multifunctional Power management connector board service kit for without VS-900 115-018263-00 multifunctional connector Interface board support for VS-900 M90-000156--- Plastic hexagon nut M90-000156--- 047-010576-00 shield 047-010576-00 099-000129-00 Plastic hexagon bolt 099-000129-00 Screw, pan head Mindray SpO board... -
Page 92: Parameter Connector Panel Assembly
Screw, Pan head w/washer 7.8 Parameter Connector Panel Assembly 7.8.1 Exploded View 7.8.2 Parts List Description FRU part number Remarks Parameter panel for 043-008871-00 VS-900 Hand feel spring 042-013555-00 NIBP fitting 115-010541-00 Mindray SpO 009-003242-00 module Masimo SpO signal cable... -
Page 93: Predictive Temp Assembly
Description FRU part number Remarks Receptacle with no panel NIBP air cock 115-046902-00 043-008498-00 Decorative IBP socket 7.9 Predictive Temp Assembly 7.9.1 Exploded View 7.9.2 Parts List Description FRU part number Remarks Screw, Pan head w/washer Predictive Temp module power M09A-30-62080 801-6006-00043-00 board PCBA... - Page 94 Screw, Flat Head Phillips, M3X8 Screw, pan head cross recessed M3X6 Silicone tube VS-900 predictive Temp board 009-003368-00 009-003368-00 cable VS-900 Cable between the Temp 009-003239-00 module and power management 009-003239-00 board VS-900 Cable between the 009-003240-00 isolation power board and Temp...
-
Page 95: Thj79Ju Infrared Ear Thermometer Assembly
7.10 THJ79JU Infrared Ear Thermometer Assembly 7.10.1 Exploded View 7.10.2 Parts List FRU part Description Remarks number Cover, infrared ear 043-004299-00 thermometer(VS) 115-030318-00 009-004499-00 Infrared ear temperature cable 0348-00-0223 Foot, "ENDEAVOUR" 051-001957-00 VS temp Interface Board PCBA 051-001957-00 Separator PCB plate of ear temp Stop cover, infrared ear 043-004300-00 043-004300-00... - Page 96 FRU part Description Remarks number Sleeve label, infrared ear 047-012162-00 047-012162-00 thermometer VS Ejector pad, infrared ear 043-004303-00 043-004303-00 thermometer(VS) Button, infrared ear 043-004302-00 043-004302-00 thermometer(VS) 0601-20-78919 Spring 0601-20-7891 049-000783-00 Silicone cover of earphone 049-000783-00 Lower cover, infrared ear 043-004301-00 043-004301-00 thermometer(VS) M3X8 combined screw...
- Page 97 7.11 Genius 2 Tympanic Thermometer or Exergen TemporalScanner Thermometer Assembly 7.11.1 Exploded View 7.11.2 Parts List Description FRU part number Remarks Temp connection cable, Genius 009-006361-00 043-008823-00 Lower cover, Genius Fixed screw, Genius 041-023435-00 Spacer gasket 047-016529-00 7 X 12 Base, Genius 047-010577-00 Pin buckle, Genius 041-022395-00...
-
Page 98: Genius Tm
Description FRU part number Remarks Temp holder, Genius 042-016758-00 Screw, flat head Philips M3 X 6 M04-005005--- Stop cover, Genius 043-006888-00 Insulated sheet 047-017159-00 Insulated sheet connection cable, 009-006362-00 Genius Screw, pan head W/Washer Philips M04-004012--- M3 X 6 7.12 Exergen frame Assembly 7.12.1 Exploded View 7-16... -
Page 99: Parts List
7.12.2 Parts List Description FRU part number Remarks Exergen frame cover Lower cover, Genius spring holder 045-003420-00 Exergen frame base 7 X 12 Base, Genius tail bed antiskid pad 7-17... - Page 100 FOR YOUR NOTES 7-18...
-
Page 101: Hardware And Software Upgrade
VS-900 Mindray SpO upgrade 115-059650-00 VS-900 Masimo SpO upgrade 115-059651-00 115-050362-00 VS-900 Nellcor SpO upgrade kit NIBP VS-900 NIBP module upgrade kit 115-018382-00 Temp 115-048910-00 VS-900 SmarTemp module (SmarTemp module) Temp (Infrared Ear Infrared ear thermometer Thermometer 115-023226-00... -
Page 102: Upgrading Parameter Modules
Nellcor SpO board; An SpO insulator; A connector panel assembly for Mindray SpO board or Nellcor SpO board; and, Two M3×6 screws Remove the power management board and connector panel assembly as described in 6.3 Disassembling the Main Unit. -
Page 103: Upgrading Nibp
8.1.3 Upgrading NIBP List of upgrade package: An NIBP valve; A pump; Two cable ties; A cable between NIBP module and power management board; A parameter connector panel assembly; and, Two M3×6 screws Disassemble the main bracket assembly and parameter connector panel assembly as described in 6.3 Disassembling the Main Unit , assemble the NIBP valve and pump onto the main bracket assembly, and then assemble the new connector panel assembly, cables, and tubes together into the main unit. -
Page 104: Upgrading Touchscreen
List of upgrade package: A front housing assembly service kit for VS-900 (Touchscreen, without main board) Disassemble the main board and cables from the front housing, and install them to the front housing with touchscreen as described in 6.4 Disassembling the Front Housing Assembly. -
Page 105: Upgrading Nurse Call Function And Diap Protocol Port
You can upgrade system software and module software by installing and running the Mindray Patient Monitor Software Upgrade Tool on a PC with Windows operating system. Connect the monitor to be upgraded and a PC running the upgrade tool to the same network, or directly connect the monitor and the PC via a crossover network cable. -
Page 106: Installing Mindray Patient Monitor Software Upgrade Tool
8.2.1 Installing Mindray Patient Monitor Software Upgrade Tool Find the installation program and double click it to start installation. Select language. Click [Ok] and the following screen is displayed. Click [Next] to go to the next step. Enter User Name, Company name, and Serial Number "26582640". Then click [Next]. - Page 107 Specify the destination folder for installing this program. Then select [Next]. Select Program Folder. Then select [Next]. 7. Click [Finish] to complete installation.
-
Page 108: Software Upgrade Procedure
PC. When software upgrade is finished, restart the monitor and check if the software is correctly upgrade. For details of software upgrade, please refer to help and instructions for use of Mindray Patient Monitor Software Upgrade Tool. CAUTION ... -
Page 109: Upgrading The Scoring
8.2.3 Upgrading the Scoring Upgrading the Scoring Software Refer to 8.2.2 Software Upgrade Procedure for more information. Importing a Scoring Refer to H-046-007126-00 Mindray Clinical Scoring Config Tool Instructions for Use and H-046-004883-00 VS-900 Vital Signs Monitor Operator's Manual for more information. - Page 110 FOR YOUR NOTES 8-10...
-
Page 111: A Electrical Safety Inspection
Electrical Safety Inspection The following electrical safety tests are recommended as part of a comprehensive preventive maintenance program. They are a proven means of detecting abnormalities that, if undetected, could prove dangerous to either the patient or the operator. Additional tests may be required according to local regulations. -
Page 112: Device Labeling
A.2.2 Contextual Inspection Test Item Acceptance Criteria No unusual noises (e.g., a rattle inside the case). No unusual smells (e.g., burning or smoky smells, The enclosure and accessories particularly from ventilation holes). No taped notes that may suggest device deficiencies or operator concerns. -
Page 113: Earth Leakage Test
defective. To Perform the Test From the MAIN MENU, or with the outlet unpowered, plug the DUT into the 601PRO front panel outlet. Attach the 601PRO RED input lead to the device’s Protective Earth terminal or an exposed metal area. Press shortcut key 3. - Page 114 device internally. To Perform the Test From the MAIN MENU, or with the outlet unpowered, plug the DUT into the 601PRO front panel outlet, and turn on the device. Attach the device's applied parts to the 601PRO applied part terminals if applicable. Press shortcut key 4.The Earth Leakage test appears on the display, and the test begins immediately: ...
-
Page 115: Patient Leakage Current
A.6 Patient Leakage Current Patient leakage currents are measured between a selected applied part and mains earth. All measurements have a true RMS only response. Preparation Perform a calibration from the Mains on Applied Part menu. The following outlet conditions apply when performing this test: ... -
Page 116: Mains On Applied Part Leakage
Test the wall outlet; verify it is grounded and is free of other wiring abnormalities. Notify the user or owner to correct any deviations. As a work around, check the other outlets to see if they could be used instead. ... - Page 117 When the calibration is finished, the Mains on Applied Part test will reappear. WARNING A 2-beep-per-second signal indicates high voltage present at the applied part terminals while a calibration is being performed. High voltage is present at applied part terminals while measurements are being taken.
- Page 118 LIMITS For CF applied parts: 50 μA For BF applied parts: 5000 μA...
- Page 119 ELECTRICAL SAFETY INSPECTION FORM Overall assessment Scheduled inspection Test item: 1, 2, 3, 4, 5, 6, 7 Unopened repair type Test item: 1, 2, 3 Opened repair type, not replace the power part including Test item: 1, 2, 3, 4 transformer or patient circuit board Opened repair type, replace the power part including transformer Test item: 1, 2, 3, 4, 5...
- Page 122 PN: 046-004903-00 (6.0)
Need help?
Do you have a question about the VS-900 and is the answer not in the manual?
Questions and answers