Table of Contents
Advertisement
Quick Links
Advertisement
Table of Contents

Subscribe to Our Youtube Channel
Related Manuals for Makita PT001GZ


Summary of Contents for Makita PT001GZ
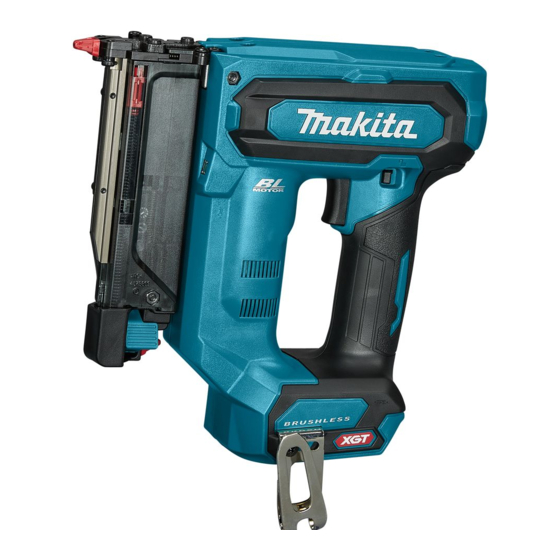
- Page 1 INSTRUCTION MANUAL Cordless Pin Nailer PT001G Read before use.
-
Page 2: Specifications
SPECIFICATIONS Model: PT001G Pin nail size ø0.6 mm x 15, 18, 25, 30, 35 mm Pin nail magazine capacity 100 pcs. Dimensions with BL4025, without hook (L x W x H) 265 mm x 86 mm x 226 mm Rated voltage D.C. -
Page 3: Ec Declaration Of Conformity
Electrical safety Vibration Power tool plugs must match the outlet. Never modify the plug in any way. Do not use any The vibration total value determined according to adapter plugs with earthed (grounded) power EN60745-2-16: tools. Unmodified plugs and matching outlets will Vibration emission (a ) : 2.5 m/s or less reduce risk of electric shock. - Page 4 Do not let familiarity gained from frequent use Keep handles and grasping surfaces dry, of tools allow you to become complacent and clean and free from oil and grease. Slippery ignore tool safety principles. A careless action can handles and grasping surfaces do not allow for cause severe injury within a fraction of a second.
- Page 5 Disconnect the tool from the power source 21. Always remove fasteners from the tool when when the fastener jams in the tool. While not in use. removing a jammed fastener, the nailer may be SAVE THESE INSTRUCTIONS. accidentally activated if it is plugged in. Use caution while removing a jammed fas- WARNING: DO NOT let comfort or familiarity tener.
-
Page 6: Functional Description
Only use genuine Makita batteries. Use of non-genuine Makita batteries, or batteries that have been altered, may result in the battery bursting causing fires, personal injury and damage. It will also void the Makita warranty for the Makita tool and charger. Tips for maintaining maximum battery life Charge the battery cartridge before completely discharged. -
Page 7: Overload Protection
OFF position. Let the tool and battery(ies) cool down. If no improvement can be found by restoring protection system, then contact your local Makita Service Center. Indicating the remaining battery capacity Press the check button on the battery cartridge to indi- cate the remaining battery capacity. - Page 8 Lighting up the lamp CAUTION: Do not look in the light or see the source of light directly. Pull the switch trigger or actuate the contact element to light up the lamp. The lamp remains lit for up to 60 seconds while pulling the switch trigger or actuating the contact element.
- Page 9 ASSEMBLY CAUTION: Always make sure that your fingers are not placed on the switch trigger or the contact element and the battery cartridge is removed before carrying out any work on the pin nailer. Loading and unloading pin nails CAUTION: Always make sure that your fin- gers are not placed on the trigger and the battery Fig.10...
- Page 10 Place the optional nose adapter over the contact top Nose adapter of the driver guide so the guide projections inside the nose adapter well fit into the guide notches in the driver CAUTION: Always make sure that your guide. fingers are not placed on the switch trigger or the contact element and the battery cartridge is removed before installing the nose adapter. When firing pin nails on the material with easily-marred surfaces, use the nose adapter.
-
Page 11: Operation
The hook is convenient for temporarily hanging the tool. OPERATION This can be installed on either side of the tool. To install the hook, insert it into a groove in the tool housing on either side and then secure it with a screw. Testing the safety system To remove, loosen the screw and then take it out. - Page 12 Release the trigger lock. Anti dry fire mechanism Place flat the contact element on the material. Pull the switch trigger fully to drive a pin nail. WARNING: Always make sure that your To drive the next nail, release your finger from the fingers are not placed on the switch trigger or switch trigger once, and then repeat the step 2 and 3 the contact element and the battery cartridge is above.
-
Page 13: Optional Accessories
CAUTION: These accessories or attachments ► 1 . Hex bolt 2. Driver guide cover 3. Contact top are recommended for use with your Makita tool cover 4. Driver guide specified in this manual. The use of any other accessories or attachments might present a risk of NOTE: If you find difficult to remove the jammed injury to persons. Only use accessory or attachment... - Page 16 Makita Europe N.V. Jan-Baptist Vinkstraat 2, 3070 Kortenberg, Belgium Makita Corporation 3-11-8, Sumiyoshi-cho, Anjo, Aichi 446-8502 Japan 885942-223 www.makita.com 20211026...
Need help?
Do you have a question about the PT001GZ and is the answer not in the manual?
Questions and answers