Advertisement
Quick Links
INSTALLATION INSTRUCTIONS
GUIDE D'INSTALLATION
GUÍA DE INSTALACIÓN
Did you know you can buy MAAX replacement parts online for your product? Visit parts.maax.com for more information.
Saviez-vous que vous pouvez acheter en ligne des pièces de rechange MAAX pour votre produit? Visitez le parts.maax.com pour plus d'information.
¿Sabía que puede comprar en línea piezas de repuesto MAAX para su producto? Visite parts.maax.com para obtener más información.
Read all instructions carefully before proceeding.
Lire attentivement toutes les instructions avant de commencer l'installation.
Leer detenidamente todas las instrucciones antes de comenzar la instalación.
IMPORTANT
• Record the serial number
IMPORTANT
• Noter le numéro de série
IMPORTANTE
• Registre el número de serie
MODEL • MODÈLE • MODELO
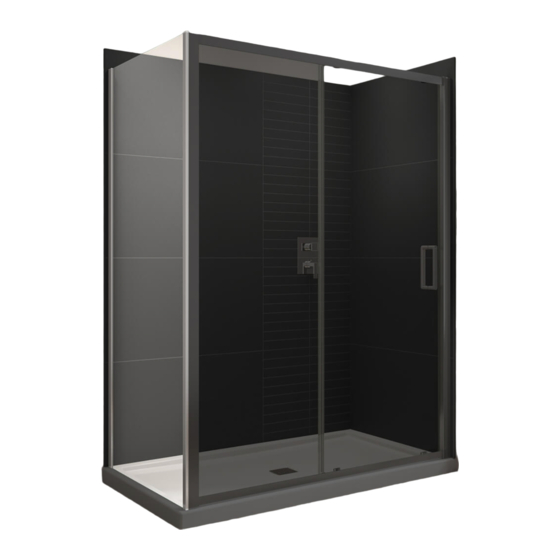
Sliding shower door
Porte de douche coulissante
Puerta corrediza de ducha
135239 • 135240
SAVE THIS GUIDE FOR FUTURE REFERENCE.
CONSERVER POUR UN USAGE ULTÉRIEUR.
CONSERVE ESTE MANUAL COMO REFERENCIA.
Serial number • Numéro de série • Número de Serie
Advertisement

Subscribe to Our Youtube Channel
Related Manuals for MAAX 135239


Summary of Contents for MAAX 135239
- Page 1 Did you know you can buy MAAX replacement parts online for your product? Visit parts.maax.com for more information. Saviez-vous que vous pouvez acheter en ligne des pièces de rechange MAAX pour votre produit? Visitez le parts.maax.com pour plus d’information. ¿Sabía que puede comprar en línea piezas de repuesto MAAX para su producto? Visite parts.maax.com para obtener más información.
- Page 2 PARTS PIÈCES PIEZAS AND COMPONENTS ET COMPOSANTES Y COMPONENTES * According to selected model. | * Selon le modèle selectionné | * Según el modelo seleccionado...
- Page 3 PARTS PIÈCES PIEZAS AND COMPONENTS ET COMPOSANTES Y COMPONENTES 1 2A 2.5mm * According to selected model. | * Selon le modèle selectionné | * Según el modelo seleccionado...
- Page 4 PARTS PIÈCES PIEZAS AND COMPONENTS ET COMPOSANTES Y COMPONENTES DOOR | PORTE | PUERTA Part Nom de la pièce Pieza Cant. Door panel Panneau de porte Panel de puerta Fixed panel Panneau fixe Panel fijo Wall jamb Montant mural Jamba mural Header - Door panel R Rail - Panneau de porte D Riel - Panel de puerta D...
-
Page 5: Tools Outils
TOOLS OUTILS HERRAMIENTAS REQUIRED REQUIS NECESARIAS Electric drill Level Pencil Perceuse électrique Niveau Crayon Taladro eléctrico Nivel Lápiz ¼'' ceramic drill bit ⅛ " drill bit Mèche à céramique ⅛ Clear silicone sealant Mèche de ¼ po. ⅛ Broca de "... - Page 6 76" 74 3/8" 57" - 58 1/2" 24 5/8" - 25 7/16" 34 1/8" Connect Pro 76" x 57" - 58 1/2" 135239 76" 30 1/8" - 30 7/8" Connect Pro Return panel 32" 135240 Connect Pro Return panel 36"...
- Page 7 BEFORE AVANT ANTES YOU BEGIN DE COMMENCER DE COMENZAR Double the studs (2x4) where the wall jambs will be installed. Doubler les montants de bois (2x4) là où les montants muraux seront installés. Duplique los montantes (2x4) en los lugares en los que se instalarán las jambas murales. Doubled stud Montant double Montante doble...
- Page 8 Parts required: Pieces requis: Partes requeridas: RETURN PANEL WALL JAMB INSTALLATION INSTALLATION DU MONTANT MURAL DU PANNEAU DE RETOUR INSTALACIÓN DEL MONTANTE MURAL DEL PANEL DE RETORNO A. Place the wall jamb (#19) on the middle of the threshold and against the shower wall (return panel side) and verify that is leveled.
- Page 9 Parts required: Pieces requises: Partes requeridas: RETURN PANEL INSTALLATION INSTALLATION DU PANNEAU DE RETOUR INSTALACIÓN DEL PANEL DE RETORNO B. Insert the j-shape gasket (#20) on the edge of the return panel (#19). Insert glass and j-shape gasket inside wall jamb. Cut gasket excess if needed.
- Page 10 Parts required: Pieces requises: Partes requeridas: CONFIGURATION SELECTION SELECTION DE LA CONFIGURATION SELECCIÓN DE LA CONFIGURACIÓN A. Place the header and threshold (#4 - #5) in front of the shower alcove. Choose door side configuration by placing the sides with the slot on opposite side to where the door will be installed (slots to the left equals door to the right and vice-versa).
- Page 11 Parts required: Pieces requises: Partes requeridas: FRAME ASSEMBLY ASSEMBLAGE DU CADRE ENSAMBLE DEL MARCO A. Assemble the wall jambs (#3) first to the threshold (#4) and then to the header (#5) inserting them as shown. A. Assembler les montants muraux (#3) d'abord au seuil (#4) puis au rail (# 5) en les insérant comme illustré. A.
- Page 12 FRAME INSTALLATION INSTALLATION DU CADRE INSTALACIÓN DEL MARCO A. Lift the frame (A1). Align the keyholes with the shoulder bushings (A2). Insert the bushings thru the lower perforation of the keyholes (A3) then lower until frame is in full contact with the shower base threshold (A4). A.
- Page 13 FRAME INSTALLATION INSTALLATION DU CADRE INSTALACIÓN DEL MARCO B. Expand the frame until wall jamb on the opposite side of the return panel is in contact with the shower wall. B. Extensionner le cadre jusqu'à ce que le montant mural du côté oppo- sé...
- Page 14 Parts required: Pieces requises: Partes requeridas: FRAME INSTALLATION INSTALLATION DU CADRE INSTALACIÓN DEL MARCO D. Align the frame with the end of the base radius and level and square. Mark the position of the fastening holes on the shower wall (the holes highlighted by arrows ONLY).
- Page 15 Parts required: Pieces requises: Partes requeridas: FRAME INSTALLATION INSTALLATION DU CADRE INSTALACIÓN DEL MARCO E. Drill the holes with a 1/8 drill bit. [For ceramics and wall anchors always use a ceramics 1/4" drill bit]. Apply silicone inside the holes. *Insert the wall anchors (#14) if there is no stud behind the wall jamb.
- Page 16 Parts required: Pieces requises: Partes requeridas: FRAME INSTALLATION INSTALLATION DU CADRE INSTALACIÓN DEL MARCO G. From within the shower, Install the I-shape gasket (#21) between the glass and the wall jamb. G. À l'intérieur de la douche, installer le joint d'étanchéité en I (#21) entre le verre et le montant mural. G.
- Page 17 Parts required: 2.5mm Pieces requises: Partes requeridas: ROLLERS AND HANDLES INSTALLATION INSTALLATION DES ROULETTES ET POIGNÉES INSTALACIÓN DE LOS RODAMIENTOS Y MANIJAS A. Install the top rollers (#12) on the brackets on top of the door glass panel. Turn the anti-jump on the top rollers so they do not interfere while the rollers are being engaged to CLICK! the track on step 5.
- Page 18 FIXED PANEL INSTALLATION INSTALLATION DU PANNEAU FIXE INSTALACIÓN DEL PANEL FIJO A. Slide the glass clips to the opposite side of where the fixed panel will be installed so it will not interfere when inserting the glass. A. Faites glisser les dispositifs de retenue sur le côté opposé...
- Page 19 Parts required: Pieces requises: Partes requeridas: FIXED PANEL INSTALLATION INSTALLATION DU PANNEAU FIXE INSTALACIÓN DEL PANEL FIJO C. From within the shower, Install the I-shape gasket (#8) between the glass and the wall jamb. C. À l'intérieur de la douche, installer le joint d'étanchéité en I (#8) entre le verre et le montant mural. C.
- Page 20 DOORS INSTALLATION INSTALLATION DES PORTES INSTALACIÓN DE LAS PUERTAS A. Push bumpers against the wall jambs, to avoid interference while installing the door on the frame. A. Pousser les pare-chocs contre les montants muraux, pour éviter les interférences lors de l'installation de la porte sur le cadre.
- Page 21 Parts required: 2.5mm Pieces requises: Partes requeridas: DOORS INSTALLATION INSTALLATION DES PORTES INSTALACIÓN DE LAS PUERTAS C. Turn the anti-jump on the top rollers. Open and close the door to find bumpers optimal position. Fasten bumpers with the included 2.5mm Allen key. C.
- Page 22 Parts required: Pieces requises: Partes requeridas: GASKETS INSTALLATION INSTALLATION DES JOINTS D'ÉTANCHÉITÉ INSTALACIÓN DE LAS JUNTAS DE ESTANQUEIDAD 1 2A A. Insert door gaskets (#6) on the both edges of the door. Insert fixed panel gasket (#7) on the edge of the fixed panel. A.
- Page 23 Parts required: Pieces requises: Partes requeridas: GASKETS INSTALLATION INSTALLATION DES JOINTS D'ÉTANCHÉITÉ INSTALACIÓN DE LAS JUNTAS DE ESTANQUEIDAD B. Insert the decorative PVC seal (#9) on wall jamb. B. Insérer le joint PVC décoratif (#9) dans le montant mural. B. Insertar la junta de PVC decorativa (#9) en la jamba mural. INSIDE INTÉRIEUR INTERIOR...
- Page 24 Parts required: Pieces requises: Partes requeridas: CAPS INSTALLATION INSTALLATION DES CAPUCHONS INSTALACIÓN DE LAS TAPAS A. Install a wall jamb cap (#16) on the top of each wall jamb. Install a cap (#22) on top of the return panel wall jamb. Install a cap (#23) on top of the return panel extrusion.
- Page 25 Parts required: Pieces requises: Partes requeridas: APPLICATION OF THE SILICONE APPLICATION DU SILICONE APLICACIÓN DE LA SILICONA A. On the outside of the shower apply a bead of silicone as shown. A. À l'extérieur de la douche, appliquer du silicone tel qu'illustré. A.
- Page 26 REPAIR STEP | ÉTAPE DE RÉPARATION | PASO DE REPARACIÓN Parts required: Pieces requises: Partes requeridas: FRAME DISASSEMBLY (TO BE DONE IN CASE OF WRONG FRAME ASSEMBLY ON PAGE 9 ONLY!) DÉMONTAGE DU CADRE (A FAIRE UNIQUEMENT EN CAS DE MAUVAIS MONTAGE DU CADRE À LA PAGE 9!) DESMONTAJE DEL MARCO (¡SOLO PARA HACER EN CASO DE MONTAJE INCORRECTO DEL MARCO EN LA PAGINA 9!) A.
-
Page 28: Maintenance | Entretien | Mantenimiento
MAINTENANCE | ENTRETIEN | MANTENIMIENTO Right after installation Check me! Juste après l'installation Cochez-moi! Justo después de la instalación Marcarme! 1. Open the door and verify it closes seamlessly. Also verify that the gap when opened on bottom and top is equal. If not adjust the screws under the top rollers to lift of lower the door. - Page 29 MAINTENANCE | ENTRETIEN | MANTENIMIENTO Every 6 months Check me! Chaque 6 mois Cochez-moi! Cada 6 meses Marcarme! 1. Open the door and verify it closes seamlessly. Also verify that the gap when opened on bottom and top is equal. If not adjust the screws under the top rollers to lift of lower the door.
-
Page 31: Limited Warranty - United States
LIMITED WARRANTY — UNITED STATES MAAX Bath Inc. offers express limited warranty on each of its products. This warranty extends only to the original owner/end-user for personal household use. For commercial uses, additional limitations apply. For accessing product Limited warranty please visit: www.maax.com/us-warranty... - Page 32 Technical Services / Service technique / Servicio técnico T. 1 877 GET-MAAX (1 877 438-6229) F. 1 888 361-2045 www.maax.com 10042724 © 2021 MAAX Bath Inc. PRINTED IN CANADA / IMPRIMÉ AU CANADA / IMPRESO EN CANADA 2021-11-05...
Need help?
Do you have a question about the 135239 and is the answer not in the manual?
Questions and answers