
Subscribe to Our Youtube Channel
Related Manuals for SCHUNK TANDEM KSH3 IM 100


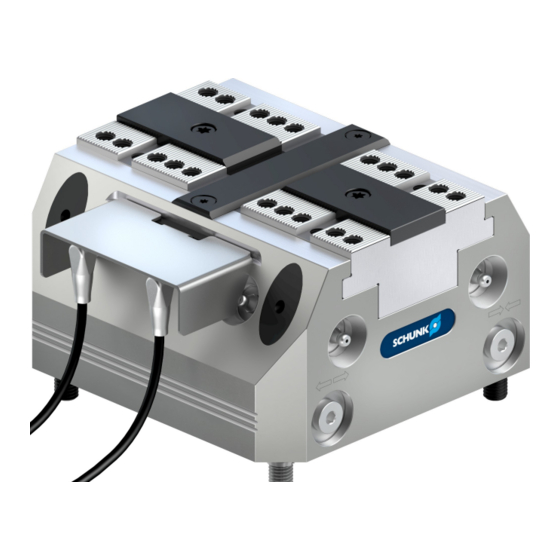
Summary of Contents for SCHUNK TANDEM KSH3 IM 100
- Page 1 Translation of Original Operating Manual TANDEM Clamping Force Block KSH3 IM Assembly and Operating Manual...
- Page 2 Imprint Imprint Copyright: This manual is protected by copyright. The author is SCHUNK GmbH & Co. KG. All rights reserved. Technical changes: We reserve the right to make alterations for the purpose of technical improvement. Document number: 1477686 Version: 02.00 | 04/01/2022 | en...
-
Page 3: Table Of Contents
Table of Contents Table of Contents General ........................5 About this manual ....................5 1.1.1 Presentation of Warning Labels ..............5 1.1.2 Applicable documents ................5 1.1.3 Sizes ......................6 Warranty ......................... 6 Scope of delivery ..................... 6 Accessories ......................6 Basic safety notes .................... - Page 4 Table of Contents Troubleshooting ..................... 31 Maintenance and care .................... 33 Notes ........................33 Maintenance and lubrication intervals ..............33 Greasing areas/lubricants ..................33 Maintenance work ....................34 7.4.1 Lubrication ....................34 7.4.2 Basic cleaning .................... 35 7.4.3 Testing the leakage and tightness of the hydraulic system...... 38 7.4.4 Assembly devices piston seals ..............
-
Page 5: General
• General terms of business * • Catalog data sheet of the purchased product * The documents marked with an asterisk (*) can be downloaded on our homepage schunk.com 02.00 | KSH3 IM | Assembly and Operating Manual | en | 1477686... -
Page 6: Sizes
General 1.1.3 Sizes This operating manual applies to the following sizes: • KSH3 IM 100, 140, 160 • KSH3-LH IM 100, 140, 160, 250 1.2 Warranty The warranty period is 24 months after delivery date from factory or 500 000 cycles*, if it is used as intended, under the following conditions: •... -
Page 7: Basic Safety Notes
Use of unauthorized spare parts Using unauthorized spare parts can endanger personnel and damage the product or cause it to malfunction. • Use only original spare parts or spares authorized by SCHUNK. 2.5 Use of special chuck jaws Requirements of the chuck jaws... -
Page 8: Environmental And Operating Conditions
Basic safety notes When using special chuck jaws, please observe the following rules: • The chuck jaws should be designed to be as low as possible.The clamping point must be as close as possible to the housing. (clamping points at a greater distance cause higher surface pressures in the jaw guidance and can significantly reduce the clamping force.) •... -
Page 9: Personal Protective Equipment
Basic safety notes Qualified personnel Due to its technical training, knowledge and experience, qualified personnel is able to perform the delegated tasks, recognize and avoid possible dangers and knows the relevant standards and regulations. Instructed person Instructed persons were instructed by the operator about the delegated tasks and possible dangers due to improperbehaviour. -
Page 10: Transport
Basic safety notes IMPORTANT! Following a longer shutdown period (more than approx. 6 hours), always re-tension the clamping device in order to compensate for the setting properties of the clamping situation or possible pressure losses and the resulting loss of clamping force. 2.10 Transport Handling during transport Incorrect handling during transport may impair the product's... -
Page 11: Protection During Handling And Assembly
Basic safety notes • Disconnect power sources before installation, modification, maintenance, or calibration. Ensure that no residual energy remains in the system. • Do not reach into the open mechanism or movement area of the product during operation. 2.13.1 Protection during handling and assembly Incorrect handling and assembly Incorrect handling and assembly may impair the product's safety and cause serious injuries and considerable material damage. -
Page 12: Notes On Particular Risks
Basic safety notes • To avoid accidents and/or material damage, human access to the movement range of the machine must be restricted. Limit/ prevent accidental access for people in this area due through technical safety measures. The protective cover and protective fence must be rigid enough to withstand the maximum possible movement energy. - Page 13 Basic safety notes WARNING Risk of injury due to accidental actuation when working on the product Disconnect the power supply when working on the product • CAUTION Ergonomic risk to the musculoskeletal system when lifting and transporting the product using manual force. Use load handling equipment for lifting and transporting •...
-
Page 14: Technical Data
Technical data 3 Technical data Installation position Operating temperature +5 °C to +60 °C Noise emission [dB(A)] ≤ 70 Pressure medium Hydraulic oil Requirement for the pressure filtered (10 μm), viscosity 46 mm/s at 40 °C in line medium with ISO VG Volumetric flow max. - Page 15 Technical data KSH3 IM / KSH3-LH IM KSH3-LH IM Dimension 34.5 51.8 59.7 74.2 77.7 87.2 103.2 13.5 45 (off-center) 15.5 Ø Q 10f7 10f7 12f7 14f7 Ø R 18.7 58.5 65.8 81.8 81.8 134.8 82.1 99.5 124.5 68.5 92.2 14...20 18.5...26.5 18.5...26.5...
- Page 16 Technical data Optional Z variant ±0.01 mm to clamping center Clamping sleeve ±0.04 mm to clamping center Clamping sleeve fitting screw ±0.02 mm to clamping center 02.00 | KSH3 IM | Assembly and Operating Manual | en | 1477686...
-
Page 17: Tightening Torques For Screws
Tightening torques for screws 4 Tightening torques for screws Tightening torques for mounting the clamping system on the machine table (screw quality 10.9) Screw size M4 M5 M6 M8 M10 M12 M14 M16 M18 M20 M22 M24 Admissible torque 120 160 200 290 400 500 (Nm) Tightening torques for mounting top jaws on the TANDEM clamping force block (screw quality 12.9) -
Page 18: Assembly And Connection
Assembly and connection 5 Assembly and connection The numbers shown for individual components refer to the illustrationsforassemblyorconnectionsoftheclampingforce block and to the "Drawings" chapter. } 9 [/ 44] WARNING Danger of crushing due to the product approaching the machine table during assembly. Do not reach between the product and machine table during •... - Page 19 Assembly and connection NOTE • For vertical installation, the openings of the coolant drain (V) must always face downwards • Surface >>X<< is parallel to the guideway of the base jaws (item 2) in order to be able to align the clamping force block on the machine table or check the positioning.
-
Page 20: Connecting The Clamping Block
Assembly and connection 5.2 Connecting the clamping block Hose-free direct connection Clamping system Adapter O-ring OPEN (front) CLOSED (front) OPEN (bottom) CLOSED (bottom) Coolant drainage/connection for air purge (front) No use No use No use No use Bottom connection for coolant drain or use for air purge Bottom connection for lubrication (one-sided supply, left) Bottom connection for lubrication (one-sided supply, right) No use... -
Page 21: Supply Lines
Assembly and connection 5.2.1 Supply lines The clamping force block has four hydraulic connections: I, II, III, Two connections for OPEN (I and III) and two connections for CLOSE (II and IV). Which of the two hydraulic connections has to be opened for actuation depends on the specific application: •... -
Page 22: Hydraulic Circuit Diagram
The monitoring result is: The clamping force block is open or closed (for I.D. or O.D. clamping depending on the application). • Information on handling sensors is available at schunk.com or from SCHUNK contact persons. • Technical data for the sensors can be found in the data sheets (included in the scope of delivery or at schunk.com). -
Page 23: Basic Construction And Dimensions Of The Inductive Proximity Switches With Scew-Fastened Connection Cable
Assembly and connection For the proper use of the proximity switches, observe the following: • Do not pull forcefully on the sensor cable. • Do not subject the sensor cable to tensile strain. • Install the sensor connection cable straight and do not twist it. •... -
Page 24: Dimensions And Switching Function Of The In S-M8-1
Assembly and connection 5.3.2 Dimensions and switching function of the IN S-M8-1 Dimensions and switching function of the IN S-M8-1 Connection colors Pin 1: Brown Pin 3: Blue Pin 4: Black Technical data: Size: M8 x 1 x 40 mm Switching function: Closer Switching distance:... -
Page 25: Assembly And Adjustment Of The Proximity Switches
Assembly and connection Switching distance: 1.5 mm Voltage: 10 – 30 V DC Ripple: ≤ 10% Max. current on contact: 100 mA, short-circuit-proof Switching hysteresis: ≤ 15% of the nominal switching distance Temperature range: –25°C to +70°C Switching frequency approx.: 5000 Hz Voltage drop (max. -
Page 26: Circuit And Functional Diagram For External Workpiececlamping
Assembly and connection that the signal LED on the sensor is easily visible. Then fasten the proximity switch to the retaining plate (item 12) using the counter nut. Test the function by clamping and opening the clamping system. If necessary, adjust the switching position. Then link the plug connection between the proximity switch and connection cable. - Page 27 Assembly and connection Circuit diagram and monitoring/control functions for external workpiece clamping Circuit diagram proximity switch proximity switch Signal output Jaw end position open Clamping position Jaw end position closed Jaw end positionon clamping force block open Clamping position Jaw end position closed clamping force block closed Fig.°5 Circuit diagram for external workpiece clamping 02.00 | KSH3 IM | Assembly and Operating Manual | en | 1477686...
-
Page 28: Circuit And Functional Diagram For Internal Workpiece Clamping
Assembly and connection Functional diagram for O.D clamping »S2« Monitoring of the clamping »S1« Monitoring the jaw stroke end position position for O.D. and I.D. clamping Stroke end position open Edges in front and behind depression serve asposition transducers Raised intermediate rail as position transducer »S2«... - Page 29 Assembly and connection The circuit diagram and the functional diagram show the recommended settings of the proximity switches for monitoring "End position closed" and "Clamping position reached." The circuit diagram can also be adjusted for monitoring "Stroke end position open" and "Missed clamping position." The proximity switches can also be individually adjusted on the retaining plate.
- Page 30 Assembly and connection Functional diagram for I.D clamping Stroke end position closed Jaw end position »Open« S1 and S2 adjusted just in front of the signal output »S1« assigned »S1« assigned signal o « LED lit utput »1« LED lit signal output »1 Clamping position Clamping position S2 adjusted just...
-
Page 31: Troubleshooting
Troubleshooting 6 Troubleshooting Clamping force block chuck jaws will not move Possible cause Solution(s) Oil supply interrupted Check the hydraulic supply System pressure too low Increase system pressure according to clamping system technical specifications Check connections and functions and connect Connections mixed up properly Hydraulic connections that are in use... - Page 32 Troubleshooting Possible cause Solution(s) Inadequate lubrication Lubricate the lubrication nipples with LINO MAX } 7 [/ 33] Clamping force block movement jerky Possible cause Solution(s) Steel guide rollers on sliding surfaces See chapter "Maintenance and Care" } 7 [/ 33] not greased 02.00 | KSH3 IM | Assembly and Operating Manual | en | 1477686...
-
Page 33: Maintenance And Care
Replacement of the housing and base jaws The base jaws and the guides in the housing are matched to each other. To replace these parts, send the entire product to SCHUNK with a repair order. 7.2 Maintenance and lubrication intervals... -
Page 34: Maintenance Work
Maintenance and care 7.4 Maintenance work 7.4.1 Lubrication CAUTION Allergic reactions or irritation due to skin or eye contact with lubricants on the product. Wear protective equipment (protective gloves, protective • goggles) in case of foreseeable contact with lubricants on the product (e.g. -
Page 35: Basic Cleaning
Maintenance and care • To use central lubrication, the set-screwsof the factory sealed connections (6, 7) must be removed. • For proper lubrication, both supplylines must be connected. • The central lubrication system must be suitable for greases of NLGI 2 classification. •... - Page 36 Maintenance and care • Pull out the plug (item 81) • Unscrew the screws (item 84) and the fitting screws (item 82) and disassemble the clamping system from the machine table • If using clamping sleeves (item 85), remove them from the housing •...
- Page 37 Maintenance and care • Unscrew the screw (item 69) by holding it against the cylinder piston (item 4) • Pull the chuck piston (item 3) out of the housing via its extraction thread • Push the cylinder piston together with the quad ring (item 40) out of the housing.
-
Page 38: Testing The Leakage And Tightness Of The Hydraulic System
To assemble the seal (item 40), a multi-part assembly tool is required. If no assembly tool is available, repair work on the TANDEM clamping force block should be carried out by SCHUNK. 1. Assembly • Disassemble the two-part seal (item 40) and grease with Renolit HLT 2 or an equivalent grease. - Page 39 Maintenance and care 2. Calibration After sliding it over, the Turcon-ring snaps into the groove. However, assembly is still not complete. The stretched ring needs to be returned to its original shape with a calibration sleeve. Piston Assembly tools for the piston seal Cone sleeve Expansion sleeve Calibration sl...
- Page 40 Maintenance and care C calibration Material: steel sleeve +0,1 ±1 KSH3 Piston Ø 29.05 21.05 43.05 35.05 58.05 50.05 66.05 58.05 128.05 120.05 02.00 | KSH3 IM | Assembly and Operating Manual | en | 1477686...
-
Page 41: Sealing Kits, Accessory Packs And Parts Lists
Sealing kits, accessory packs and parts lists 8 Sealing kits, accessory packs and parts lists When ordering spare parts, the type , size and, if possible, the serial number of the clamping block must always be stated to avoid delivery mistakes. Seals, sealing elements, screw connections, springs, bearings, screws, wiper bars and parts that come into contact with the workpiece are not covered by the warranty. - Page 42 Sealing kits, accessory packs and parts lists Item Designation Quantity a Cover ● Cupped-type lubrication nipples ● Conical lubrication nipple ● ● ● Sound absorber ● Locking screw ● Cylindrical pin ● Angular plug ● Proximity switch ● Supply cable ●...
-
Page 43: Proximity Switches And Supply Cables For Single Or Replacement Orders
Sealing kits, accessory packs and parts lists Parts list key a = for all sizes y = included in the sealing kit b = for size 100 z = included in accessory kit c = for size 140 d = for size 160 e = for size 250 * Individual components are specially tuned to one another and cannot be replaced by the customer. -
Page 44: Assembly Drawing
Assembly drawing 9 Assembly drawing Centering with fitting screw Centering with clamping sleeves Centering with cylindrical pins (Z variant) 02.00 | KSH3 IM | Assembly and Operating Manual | en | 1477686... -
Page 45: Translation Of The Original Declaration Of Incorporation
Directive 2006/42/EG, Annex II, Part 1.B of the European Parliament and of the Council on machinery. Manufacturer/ H.-D. SCHUNK GmbH & Co. Spanntechnik KG Distributor Lothringer Str. 23 D-88512 Mengen We hereby declare that on the date of the declaration the following partly completed machine complied with all basic safety and health regulations found in the directive 2006/42/EC of the European Parliament and of the Council on machinery. -
Page 46: Appendix On Declaration Of Incorporation, As Per 2006/42/Ec, Annex Ii, No. 1 B
Appendix on Declaration of Incorporation, as per 2006/42/EC, annex II, No. 1 B 11 Appendix on Declaration of Incorporation, as per 2006/42/EC, annex II, No. 1 B 1. Description of the basic safety and health protection requirements, as per 2006/42/EC, annex I, that apply to and are fulfilled for the scope of the incomplete machine: Product designation TANDEM clamping force block, pneumatic (with inductive proximity switches) - Page 47 Appendix on Declaration of Incorporation, as per 2006/42/EC, annex II, No. 1 B Protection against mechanical hazards 1.3.6 Risks related to variations in operating conditions 1.3.7 Risks related to moving parts 1.3.8 Choice of protection against risks arising from moving parts 1.3.8.1 Moving transmission parts 1.3.8.2 Moving parts involved in the process 1.3.9...
- Page 48 Appendix on Declaration of Incorporation, as per 2006/42/EC, annex II, No. 1 B Information 1.7.1 Information and warnings on the machinery 1.7.1.1 Information and information devices 1.7.1.2 Warning devices 1.7.2 Warning of residual risks 1.7.3 Marking of machinery 1.7.4 Instructions 1.7.4.1 General principles for the drafting of instructions 1.7.4.2 Contents of the instructions 1.7.4.3 Sales literature...
- Page 49 SCHUNK.
- Page 50 SCHUNK.
- Page 51 SCHUNK.
- Page 52 Translation of Original Operating Manual H.-D. SCHUNK GmbH & Co. Spanntechnik KG Lothringer Str. 23 D-88512 Mengen Tel. +49–7572-7614-0 Fax +49-7572-7614-1099 info@de.schunk.com schunk.com Folgen Sie uns I Follow us...
Need help?
Do you have a question about the TANDEM KSH3 IM 100 and is the answer not in the manual?
Questions and answers