
Subscribe to Our Youtube Channel
Related Manuals for SHOWTEC QubiQ F1500


Summary of Contents for SHOWTEC QubiQ F1500
- Page 1 USER MANUAL ENGLISH QubiQ F1500 Product code: 61080 Highlite International B.V. – Vestastraat 2 – 6468 EX – Kerkrade – the Netherlands...
- Page 2 QubiQ F1500 Preface Thank you for purchasing this Showtec product. The purpose of this user manual is to provide instructions for the correct and safe use of this product. Keep the user manual for future reference as it is an integral part of the product. The user manual shall be stored at an easily accessible location.
-
Page 3: Table Of Contents
QubiQ F1500 Table of contents Introduction ................................4 Before Using the Product ..........................4 Intended Use ............................... 4 Product Lifespan ..............................4 Text Conventions ..............................4 Symbols and Signal Words ..........................5 Symbols on the Information Label ........................5 Safety ..................................6 Warnings and Safety Instructions ........................ - Page 4 QubiQ F1500 Remote Control ............................36 Start up (Remote Control) ........................36 Main Menu (Remote Control) ......................37 Menu Overview (Remote Control) .....................37 Setup ..............................38 Output Volume ...........................39 Fan Speed ............................39 Duration..............................39 Interval ..............................39 Save ..............................39 Continuous Output ..........................40 Timer / Interval ............................40 Version ..............................40...
-
Page 5: Introduction
The manufacturer will not accept liability for any resulting damages caused by the non-observance of this manual. After unpacking, check the contents of the box. If any parts are missing or damaged, contact your Highlite International dealer. Your shipment includes: ● Showtec QubiQ F1500 ● Remote control ● 2 x safety eye ●... -
Page 6: Symbols And Signal Words
QubiQ F1500 Symbols and Signal Words Safety notes and warnings are indicated throughout the user manual by safety signs. Always follow the instructions provided in this user manual. Indicates an imminently hazardous situation which, if not avoided, will result in DANGER death or serious injury. -
Page 7: Safety
QubiQ F1500 Safety Important Read and follow the instructions in this user manual before installing, operating or servicing this product. The manufacturer will not accept liability for any resulting damages caused by the non-observance of this manual. Warnings and Safety Instructions... - Page 8 QubiQ F1500 WARNING Risk of explosion caused by incorrect handling ● Do not add flammable liquids such as perfume and alcohol to the fog fluid. ● Operate the device only with the fluids recommended in this user manual. CAUTION Risk of health problems ●...
- Page 9 QubiQ F1500 ● If the device is dropped or struck, disconnect the device from the electrical power supply immediately. ● If the device is exposed to extreme temperature variations (e.g. after transportation), do not switch it on immediately. Let the device reach room temperature before switching it on, otherwise it may be damaged by the formed condensation.
-
Page 10: Requirements For The User
QubiQ F1500 Attention Do not expose the device to conditions that exceed the rated IP class conditions. This device is IP20 rated. IP (Ingress Protection) 20 class provides protection against solid objects greater than 12 mm, such as fingers, and no protection against harmful ingress of water. -
Page 11: Description Of The Device
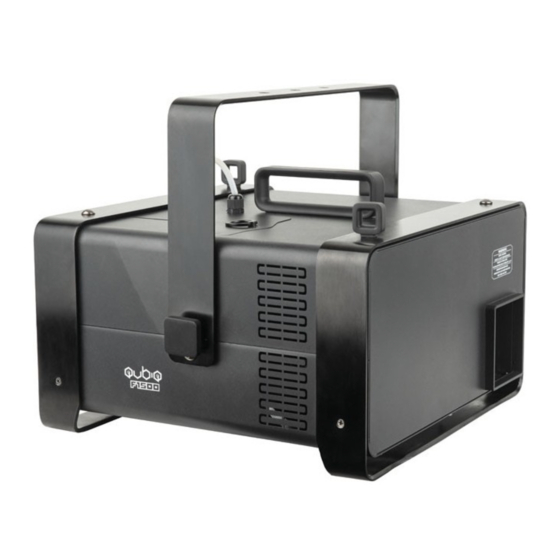
Description of the Device The Showtec QubiQ F1500 is a professional 1500 W fazer with a high airflow radial fan. This fazer is reliable, safe and feature-rich. In addition, it has a practical and nice looking design. It will be your best smoking friend at small to large venues. -
Page 12: Back View
QubiQ F1500 Back View Fig. 03 07) LED display with Menu buttons 08) ON / OFF 09) Ground/earth connection 10) Pro power connector (Gray) OUT 11) Pro power connector (Blue) IN 12) Fuse F8AL /250 V 13) 3-pin DMX signal connector OUT... -
Page 13: Remote Control
QubiQ F1500 Remote Control Fig. 04 16) Special 5-pin connector with 3,5 m cable 17) Control Wheel 18) Blue SETUP Button 19) Red PLUS / CONTI 20) Yellow MINUS / TIMER Button 21) Green ENTER / MANUAL Button Product code: 61080... -
Page 14: Product Specifications
QubiQ F1500 Product Specifications Model: QubiQ F1500 Electrical: Input voltage: 240 V AC, 50/60 Hz Power consumption: 1500 W Fuse: F8AL /250 V Physical: Dimensions: 385 x 412 x 335 mm (LxWxH) Weight: 15,1 kg Fogger capacity: Heater: 1500 W... -
Page 15: Dimensions
QubiQ F1500 Dimensions Fig. 05 Product code: 61080... -
Page 16: Installation
QubiQ F1500 Installation Safety Instructions for Installation WARNING Incorrect installation can cause serious injuries and damage of property. If trussing systems are used, installation must be carried out only by instructed or skilled persons. Follow all applicable European, national and local safety regulations concerning rigging and trussing. - Page 17 QubiQ F1500 To mount the device, follow the steps below: Use a clamp to attach the device to the supporting structure, as shown in Fig. 06. Make sure that the device cannot move freely. 02) Secure the device with a secondary suspension, for example a safety cable. Make sure that the secondary suspension can hold 10 times the weight of the device.
-
Page 18: Connecting To Power Supply
QubiQ F1500 Connecting to Power Supply DANGER Electric shock caused by short-circuit The device accepts AC mains power at 240 V and 50/60 Hz. Do not supply power at any other voltage or frequency to the device. This device falls under IEC protection class I. Make sure that the device is always electrically connected to the ground (earth). -
Page 19: Setup
Disconnect power supply before connecting or disconnecting data cables. Stand-alone Setup When the QubiQ F1500 is not connected to a controller or to other devices, it functions as a stand-alone device. It can be operated manually. For more information about the control mode, refer to 6.7.4.1. DMX Address on page 32. -
Page 20: Dmx Cables
QubiQ F1500 DMX Cables Shielded twisted-pair cables with 3-pin XLR connectors must be used for reliable DMX connection. You can purchase DMX cables directly from your Highlite International dealer or make your own cables. If you use 3-pin XLR audio cables for DMX data transmission, this may lead to signal degradation and unreliable operation of the DMX network. -
Page 21: Dmx Addressing
04) Continue assigning the starting addresses of the remaining devices by adding each time 2 to the previous number. Make sure that you do not have any overlapping channels in order to control each QubiQ F1500 correctly. If two or more devices are addressed similarly, they will work similarly. -
Page 22: Operation
QubiQ F1500 Operation Safety Instructions for Operation Attention This device must be used only for the purposes it is designed for. This device is designed to be used as a professional fog effect. Any incorrect use may lead to hazardous situations and result in injuries and material damage. -
Page 23: Filling The Tank
QubiQ F1500 Filling the Tank WARNING Risk of explosion caused by incorrect handling ● Do not add flammable liquids such as perfume and alcohol to the fog fluid. ● Operate the device only with the fluids recommended in this user manual. - Page 24 QubiQ F1500 Do not disconnect the safety cable. Unscrew the lid on the fluid tank, as shown in Fig. 13. Take out the fluid tank, as shown in Fig. 14. Fig. 13 Fig. 14 Place the fluid tank on a flat service near the device, as shown in Fig. 15.
- Page 25 QubiQ F1500 Put the fluid tank back in the device, as shown in Fig. 17. Screw the lid back on the fluid tank, as shown in Fig. 18. Fig. 17 Fig. 18 Put the lid back on the device, as shown in Fig. 19.
-
Page 26: Emptying The Tank After Operation
QubiQ F1500 Emptying the Tank after Operation To empty the tank, follow the steps below: Lift the small ring on top of the device to open the service lid, as shown in Fig. 21. Open the service lid, as shown in Fig. 22. - Page 27 QubiQ F1500 Do not disconnect the safety cable. Unscrew the lid on the fluid tank, as shown in Fig. 25. Take out the fluid tank, as shown in Fig. 26. Fig. 25 Fig. 26 Place the fluid tank on a flat service near the device, as shown in Fig. 27.
- Page 28 QubiQ F1500 Put the fluid tank back in the device, as shown in Fig. 29. Screw the lid back on the fluid tank, as shown in Fig. 30. Fig. 29 Fig. 30 Put the lid back on the device, as shown in Fig. 31.
-
Page 29: Restarting The Device After Running The Tank Empty
Make sure you fill the entire tank, let the device reheat and then manually start fogging. This will take a few seconds until the completely emptied lines are filled with fog fluid. Control Modes The QubiQ F1500 supports the following control modes: ● Manual (fog intensity, duration, timer) ●... -
Page 30: Manual Operation
QubiQ F1500 Manual Operation To set up the device, follow the steps below: Fill the tank (Fluid Tank Capacity 2,3 L). See 6.3. Filling the Tank on page 22 for more information. Connect the power cable before supplying power to the device. See 4.5. Connecting to Power Supply on page 17 for more information. -
Page 31: Start-Up
QubiQ F1500 Start-up Upon start-up, the display will show the current software version and the temperature. Before you are able to see the main menu or change settings, you have to wait until the device is fully heated. The display will show:... -
Page 32: Menu Overview (Device)
QubiQ F1500 Menu Overview (Device) Notes: ● The remote control always has priority over manual operation with the control panel on the device. You are not able to use the buttons on the device, when the remote is plugged in. -
Page 33: Main Menu Options (Device)
QubiQ F1500 Main Menu Options (Device) The main menu has the following options: Press the SETUP button to navigate through the main menu. DMX Address In this menu you can set the DMX address. Press the UP/DOWN buttons to set the desired DMX address. The adjustment range is 001–512. -
Page 34: Interval
QubiQ F1500 Interval In this menu you can set the fog interval. Press the UP/DOWN buttons to set the desired interval time. The adjustment range is 30–999 sec. Duration In this menu you can set the duration of the fog output. -
Page 35: Restore Default
QubiQ F1500 Restore Default In this menu you can restore the default factory settings. Press the UP/DOWN buttons to restore the default factory settings. About In this menu you can view the device’s model, the current software version and the software date. -
Page 36: Manual Operation With Remote Control
QubiQ F1500 Manual Operation with Remote Control To set up the device, follow the steps below: Fill the tank (Fluid Tank Capacity 2,3 L). See 6.3. Filling the Tank on page 22 for more information. Connect the remote control cable to the device. -
Page 37: Remote Control
QubiQ F1500 Remote Control The device can be controlled with a remote control. Fig. 34 Button Function Description Increase/Decrease Scroll through the Menu / Press control wheel to Save Setup Scroll through the Menu Plus / Conti Increase value / Continuous output... -
Page 38: Main Menu (Remote Control)
QubiQ F1500 Main Menu (Remote Control) Notes: ● The remote control always has priority over manual operation with the control panel on the device. You are not able to use the buttons on the device, when the remote is plugged in. -
Page 39: Setup
QubiQ F1500 Setup In this menu you can set the output volume, duration and interval for the fog output. Press the colored buttons, the UP/DOWN buttons or turn the CONTROL WHEEL to select the parameter. Press the green ENTER / MANUAL button to confirm the selection and open the submenu. -
Page 40: Output Volume
QubiQ F1500 Output Volume In this menu you can continuously fog. Press the UP/DOWN buttons or turn the CONTROL WHEEL to increase / decrease the output volume. The adjustment range is 1–100 %. Fan Speed In this menu you can set the fan speed. -
Page 41: Continuous Output
QubiQ F1500 Continuous Output In this menu you continuously keep fogging until the tank is empty. Press the red PLUS / CONTI button or press the CONTROL WHEEL to immediately start fogging at the preset volume. To change the volume, see 6.8.4.2. Output Vol on page 39 for more information. -
Page 42: Dmx Operation
QubiQ F1500 DMX Operation To setup up the device, follow the steps below: Fill the tank (Fluid Tank Capacity 2,3 L). See 6.3. Filling the Tank on page 22 for more information. Connect the DMX cables before supplying power to the device. See 5.3. DMX Connection on page 18 for more information Connect the power cable before supplying power to the device. -
Page 43: Troubleshooting
QubiQ F1500 Troubleshooting This troubleshooting guide contains solutions to problems which can be carried out by an ordinary person. The device does not contain user-serviceable parts. Unauthorized modifications to the device will render the warranty void. Such modifications may result in injuries and material damage. -
Page 44: Maintenance
QubiQ F1500 Maintenance Safety Instructions for Maintenance DANGER Electric shock caused by dangerous voltage inside Disconnect power supply before servicing or cleaning. WARNING Risk of burns due to hot surface Allow the device to cool down for at least 15 minutes before servicing or cleaning. -
Page 45: Basic Cleaning Instructions
QubiQ F1500 Basic Cleaning Instructions The device must be cleaned periodically from the built-up dust and fog fluid residues. To clean the device, follow the steps below: Disconnect the device from the electrical power supply. Allow the device to cool down for at least 1 hour. -
Page 46: Corrective Maintenance
QubiQ F1500 Corrective Maintenance The device does not contain user-serviceable parts. Do not open the device and do not modify the device. Refer repairs and servicing to instructed or skilled persons. Contact your Highlite International dealer for more information. Replacing the Fuse... -
Page 47: Deinstallation, Transportation And Storage
QubiQ F1500 Deinstallation, Transportation and Storage Instructions for Deinstallation WARNING Incorrect deinstallation can cause serious injuries and damage of property. ● Let the device cool down before dismounting. ● Disconnect power supply before deinstallation. ● Always observe the national and site-specific regulations during deinstallation and derigging of the device. - Page 48 ©2022 Showtec...
Need help?
Do you have a question about the QubiQ F1500 and is the answer not in the manual?
Questions and answers