Table of Contents
Advertisement
Quick Links
Advertisement
Table of Contents

Related Manuals for Austroflamm Sina


Summary of Contents for Austroflamm Sina
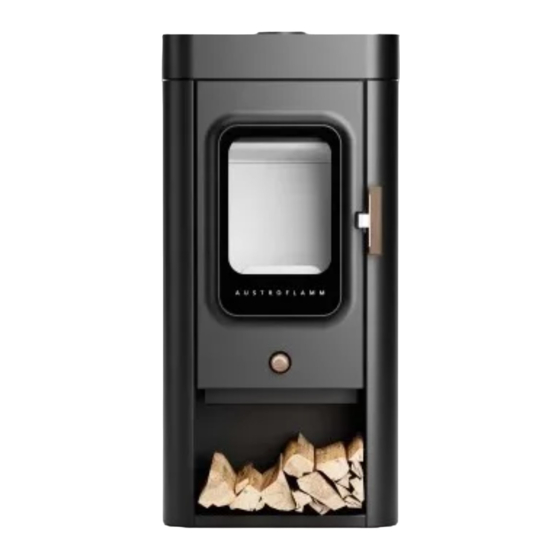
- Page 1 Operating manual Sina / Sina Xtra www.austroflamm.com...
- Page 2 Tel: +43 (0) 7249 / 46 443 www.austroflamm.com info@austroflamm.com Edited by: Olivera Stojanovic Illustrations: Konstruktion Text: Technical department (Austroflamm) Copyright All Rights reserved. The contents of these instructions may be reproduced or distributed only with the consent of the publisher! Printing, spelling and typographical errors reserved.
-
Page 3: Table Of Contents
Operating manual Sina / Sina Xtra Contents Contents General information ............................Copyright.............................. Purpose of the manual ............................Storing the manual ..........................Structure of the manual........................Representations used.......................... Version control............................. Abbreviations ............................Safety ..................................Importance of the safety instructions ....................Warning of sources of danger ...................... - Page 4 Contents Operating manual Sina / Sina Xtra 9.2.3 Rearranging the flue pipe connection ....................23 9.2.4 Installing external air connection at the rear..................25 9.2.5 Installing AIR+ controls (optional) ..................... 28 9.2.6 Installing HMS (optional)........................31 9.2.7 Installing Xtra (optional)........................33 9.2.8...
-
Page 5: General Information
Operating manual Sina / Sina Xtra 1 | General information General information You have decided in favor of an Austroflamm stove. Congratulations on your decision and thank you for your trust. Correct operation and care are essential for trouble-free operation and long service life. -
Page 6: Purpose Of The Manual
2 | Purpose of the manual Operating manual Sina / Sina Xtra Purpose of the manual This manual is a component part of the stove and is intended to contribute to the stove being safely in- stalled and maintained. Please read this manual before using the stove for the first time. -
Page 7: Abbreviations
Operating manual Sina / Sina Xtra 2 | Purpose of the manual Abbreviations Abbreviation Meaning Heat Memory System Stoves... -
Page 8: Safety
3 | Safety Operating manual Sina / Sina Xtra Safety In this manual we give you numerous safety instructions for the safe operation of your stove. These in- structions are characterized differently as follows, depending on their importance: Importance of the safety instructions NOTICE Particular behaviour and/or activities that are required for safe working. -
Page 9: Special Types Of Danger And Personal Protective Equipment
Operating manual Sina / Sina Xtra 3 | Safety • Please note that the surfaces of this stove heat up considerably during operation. We recommend that you use the protective glove supplied to operate your stove. • Please alert children to these dangers, and keep them away from the stove when it is operating. -
Page 10: Product Overview
Operating manual Sina / Sina Xtra Product overview Intended use The Austroflamm stove described in this manual is manufactured and tested with a type A1 self-closing and locking door under EN test EN 13240. NOTICE Operation is only permissible with closed/bolted door. -
Page 11: Energy Label
Operating manual Sina / Sina Xtra 4 | Product overview 1786 1258 1245 1135 2:25 Primär-/Sekundärluftregler Primary/secondary air control Regolatore aria primario/secondario Manette de régulation de l´air primaire/secondaire Fig. 2: Dimensions inc. Xtra (optional) Energy label Fig. 3: Energy label... -
Page 12: Positioning Of The Nameplates
4 | Product overview Operating manual Sina / Sina Xtra Positioning of the nameplates Here we show where you can find the nameplate. You can find a copy of the nameplate of your stove on the back of this manual. -
Page 13: Technical Data
Operating manual Sina / Sina Xtra 5 | Technical data Technical data As a type 1 stove, a connection to a chimney already occupied with other solid-fuel stoves and ovens is possible provided that the chimney rating under DIN 4705 – part 3, does not contravene this. - Page 14 5 | Technical data Operating manual Sina / Sina Xtra Bituminous coal Brown coal briquettes Peat briquettes Briquettes made of a mix- ture of fossil fuels Other fossil fuels Briquettes made of a mix- ture of biomass and fossil fuels...
-
Page 15: General Specifications
Operating manual Sina / Sina Xtra 5 | Technical data Specification in mg/m³ for heated filter method (in compliance with Annexe III, number 4, letter a, section i, point 1) or g/kg for measurement in dilution tunnel (in compliance with Annexe III, number 4, letter a, section i, point 2 and 3.) -
Page 16: Transport, Handling And Storage
6 | Transport, handling and storage Operating manual Sina / Sina Xtra Transport, handling and storage Transportation Immediately checked the goods delivered for complete- ness and damage in transit. Before installing the stove, check that all movable parts are working. Any defects before the installation of the stove must be reported. -
Page 17: Requirements At The Installation Location
When connecting the flue pipes to the chimney, national and/or local safety regulations must be com- plied with. Your Austroflamm stove is fitted at the factory with a flue pipe outlet at the top (diameter 130 mm). The connection can, as described in these instructions, be rearranged to the bottom. When connecting with other pipe diameters the approval of your responsible chimney sweep is required. -
Page 18: Fuel Material/-Quantity
8 | Fuel material/-quantity Operating manual Sina / Sina Xtra Fuel material/-quantity Fuel Wood Many of our native types of wood can, after being appropriately dried, be burnt CO2-neutral in heat- producing appliances. Wood stands out because it grows again, can be sustainably harvested, re- quires little or no extra external energy to be invested in the fuel, and has a short journey from the pro- ducer to the consumer, which provides an optimal climate balance. - Page 19 Operating manual Sina / Sina Xtra 8 | Fuel material/-quantity Please observe at all times the maximum specified amount to be laid, even when putting on more wood! Otherwise your fire will not provide the desired efficiency - but above all considerable damage may be caused to your appliance, to gaskets and material and to the flue gas duct.
-
Page 20: Fuel Quantity
Maximum amount of fuel to be deposited: 1.8 kg wood or 1.5 kg briquettes. NOTICE Overheating Too great a quantity of fuel can lead to overheating and damage to your Austroflamm stove. NOTICE To avoid damage you must NEVER operate your Stove a greater quantity of fuel than that specified in... -
Page 21: Installation
Operating manual Sina / Sina Xtra 9 | Installation Installation Installation must only be carried out by an authorized specialist company. Before installing the stove, check that all movable parts are working. Any defects must be reported be- fore the installation. -
Page 22: Mounting The Side Cladding
9 | Installation Operating manual Sina / Sina Xtra 2) Loosen the two locking screws (M5/TX 25) of the side cladding, top left and right. Fig. 8: Loosening l+r screws 3) Loosen the two locking screws (M5/TX25) of the side cladding, right and left inside bottom. -
Page 23: Rearranging The Flue Pipe Connection
Operating manual Sina / Sina Xtra 9 | Installation 2) Fix side cladding to the mounting at the top with two M5/ TX25 screws (M5/TX25). Fig. 11: Fixing side cladding to mounting 3) Fix steel side cladding below from inside with two screws (M5/TX25). - Page 24 9 | Installation Operating manual Sina / Sina Xtra 2) Loosen the four screws (M5/TX25) of the rear panel and remove the rear panel. 3) Using a saw, remove the perforated cut-outs in the rear panel and heat shield. Fig. 14: Removing the rear panel 4) Remove the cover incl.
-
Page 25: Installing External Air Connection At The Rear
Operating manual Sina / Sina Xtra 9 | Installation Fig. 17: Cover and bracket replaced 7) Remount side cladding and rear panel and attach cover. Fig. 18: Mounting side cladding, rear panel and cover 9.2.4 Installing external air connection at the rear 1) If necessary the cover must first be detached and the side cladding removed. - Page 26 9 | Installation Operating manual Sina / Sina Xtra 2) Open door. 3) Loosen the screw joint (M5/TX25) of the rear cover and remove cover to the rear. Fig. 19: removing rear cover 4) Loosen the four screws (M5/TX25) of the rear panel and remove the rear panel.
- Page 27 Operating manual Sina / Sina Xtra 9 | Installation 7) Remove supply air flange. Fig. 22: Removing the supply air flange at the bottom 8) Change supply air flange and cover. Fig. 23: Changing the supply air flange and cover 9) Mount the supply air flange in place of the cover and vice-versa.
-
Page 28: Installing Air+ Controls (Optional)
9.2.5 Installing AIR+ controls (optional) ü Not all the parts included in the scope of delivery of the AIR+ controls are required on your Austroflamm stove. To install the AIR+ control, please proceed as follows: 1) Open door. 2) Loosen the two nuts (M5/SW8) from inside and pull out rotary controller inc. - Page 29 Operating manual Sina / Sina Xtra 9 | Installation 5) In place of the cover plate a sensor tube with the fire- box temperature sensor can now be inserted and fixed with the two screws (M5/TX25). Fig. 27: Firebox temperature sensor Fig. 28: Attaching the firebox temperature...
- Page 30 9 | Installation Operating manual Sina / Sina Xtra 8) Make sure that all the components are correctly con- nected. 9) Plug the mains cable plug into the electrical point. Test the air control system and set the minimum and maximum motor position - calibration process.
-
Page 31: Installing Hms (Optional)
Operating manual Sina / Sina Xtra 9 | Installation 9.2.6 Installing HMS (optional) To avoid cuts and injuries, when installing the bricks, wear safety gloves. Safety gloves 1) If necessary the cover must first be detached and the side cladding removed. Proceed as described in the section Removing the side cladding [}on page 21]. - Page 32 9 | Installation Operating manual Sina / Sina Xtra 6) Repeat the steps on the right side and install the bricks from bottom to top. ð Note that the third brick from bottom is narrower than the remaining bricks. Fig. 34: Bricks installed on the right 7) Remount the side cladding and fasten all screws.
-
Page 33: Installing Xtra (Optional)
Operating manual Sina / Sina Xtra 9 | Installation 9.2.7 Installing Xtra (optional) It is absolutely vital to start with the left-hand side. Other- wise the stove may tip over! Install the XTRA bricks, always starting on the left side from bottom to top. -
Page 34: Installing Base Door (Optional)
9 | Installation Operating manual Sina / Sina Xtra 9.2.8 Installing base door (optional) 1) Open door. Fig. 37: Open door. 2) Loosely screw in the four screws. 3) Insert grub screws below the screws into the holes provided and align door. -
Page 35: Installing Keramott
Operating manual Sina / Sina Xtra 9 | Installation 3) From inside install the mountings for the raceway panel (left and right) as shown. Fig. 40: Installing the raceway panel mount- 4) Now mount the raceway panel on to the mounting from the front. -
Page 36: Settings
10 | Settings Operating manual Sina / Sina Xtra Settings 10.1 Aligning the stove 1) First the cover and the side cladding must be de- tached. ð Proceed as described in the section Removing the side cladding. 2) There are two screw on the back of the stove. These can be used to align the stove. -
Page 37: Adjusting The Door Lock
Operating manual Sina / Sina Xtra 10 | Settings 10.3 Adjusting the door lock 1) Open door. Fig. 45: Open door. 2) Using the marked screws the door lock can be adjus- ted upwards, downwards, forwards and backwards. Fig. 46: Adjusting the door lock... -
Page 38: Commissioning
11 | Commissioning Operating manual Sina / Sina Xtra Commissioning 11.1 Initial Commissioning NOTICE During the initial commissioning and in the following 2-3 combustion cycles, only approx. 2/3 of the maximum fuel quantity is to be used. NOTICE To avoid damage you must NEVER operate your Stove a greater quantity of fuel than that specified in this manual! During the first 3-4 combustion cycles at nominal heat output, odors may develop. -
Page 39: Operation
Operating manual Sina / Sina Xtra 12 | Operation Operation 12.1 Before heating up The stove can only function properly if there is sufficient combustion air coming to the room of installa- tion (the appliance), specially if several firing installations are being operated at the same time. Ensure sufficient air supply before heating up. -
Page 40: Heating In The Transition Period
12 | Operation Operating manual Sina / Sina Xtra 7) Close the door. ð It is best to allow the first layer of wood to combust without altering the air damper setting. ð If only the bed of embers is left (no more flames), you can place another layer of log. -
Page 41: Maintenance
Operating manual Sina / Sina Xtra 13 | Maintenance Maintenance 13.1 Changing the seal on the door 1) Remove old seal from the door. 2) Glue in new seal with a suitable adhesive (e.g. silicon B310). Fig. 50: Changing the seal... -
Page 42: Cleaning
14 | Cleaning Operating manual Sina / Sina Xtra Cleaning 14.1 Cleaning the stove, flue gas ducts and flue pipe The stove, the flue gas ducts and flues should be annually - possible even more often, e.g. • after the chimney has been cleaned •... -
Page 43: Cleaning The Door Window
14.3 Cleaning the door window Spray window with glass cleaner and leave it for a moment to take effect. • We recommend cleaning the glass with our Austroflamm glass cleaner or a commercially available window cleaner. • Prevent door- or window seals from coming into contact with water or cleaner, since these will oth- erwise harden and in doing so lose their function. -
Page 44: Help
15 | Help Operating manual Sina / Sina Xtra Help Problem Cause Solution The glass window is sooty Insufficient draft from time to time (depending on use) the window must be cleaned with glass cleaner Clarification with chimney sweeper (poss extend chimney/measure... -
Page 45: Firebox Lining
Operating manual Sina / Sina Xtra 15 | Help Problem Cause Solution Operating temperature not reached Bring stove to the operating temper- ature Sooting up of the window after 8- 10 hours of fires is normal Chimney draft too low Contact chimney sweep 15.1 Firebox lining... -
Page 46: Accessories
16 | Accessories Operating manual Sina / Sina Xtra Accessories Have defective parts (accessories, spare parts) replaced by your specialist stove dealer. This guaran- tees that stove is and remains safe and functional. Fig. 55: Accessories Item no. Quantity Item Item no. -
Page 47: Spare Parts
Operating manual Sina / Sina Xtra 17 | Spare parts Spare parts Here you can find an overview of the most important spare parts. Keramott Fig. 56: Keramott: Numbering = installation sequence Item no. Quantity Item Item no. Keramott floor front... - Page 48 17 | Spare parts Operating manual Sina / Sina Xtra AIR+ Fig. 57: AIR+ Item no. Quantity Item Article no. Cheesehead bolt with socket head (very low head) M4x10 Ring magnet DM19.1/9.5 H 6.4mm 724701 Actuator 7 24719 Airmaster Mainboard 724720...
- Page 49 Operating manual Sina / Sina Xtra 17 | Spare parts Item no. Quantity Item Article no. Taptite SKS M5x8 DIN7500D 718539-92 Taptite hex. LKS M5X8 DIN7500C 718567-92 Fillister head screw (is not required) Driving plate 724689-92 Controller drive shaft 2 (is not required)
- Page 50 17 | Spare parts Operating manual Sina / Sina Xtra Cover panel Fig. 59: Cover panel Item no. Quantity Item Item no. Cheesehead bolt with hex M5x10 718587-92 Cover panel 729977-29 Cover panel mountings Fig. 60: Mounting for cover panel Item no.
- Page 51 Operating manual Sina / Sina Xtra 17 | Spare parts Heat Memory System (HMS) Fig. 61: HMS Item no. Quantity Item Item no. Hexagon nut with flange, M6 718740-92 HMS assembly bracket 729944-29 729963 HMS short 732056...
- Page 52 17 | Spare parts Operating manual Sina / Sina Xtra Steel side cladding Fig. 62: Steel side cladding incl. cover Item no. Quantity Item Item no. Grub screw with hex and eyebolts M5x6 718032-92 Large diameter washer for M5 718214-92 Fillister-head screw with hex M5x10...
- Page 53 Operating manual Sina / Sina Xtra 17 | Spare parts Xtra 3:25 2:25 7:25 Fig. 63: Xtra Item no. Quantity Item Item no. Grub screw with hex and eyebolts M5x6 718032-92 Large diameter washer for M5 718214-92 Lamella slider 20x20 718375...
- Page 54 17 | Spare parts Operating manual Sina / Sina Xtra Door, complete Fig. 64: Door, complete Item no. Quantity Item Item no. Gasket 8x2x L[mm] = 1352 710096 Gasket 8x2x L[mm] = 15 710096 Gasket 8x2x L[mm] = 95 710096 Cheesehead bolts with ISK.e.n.K M5x16 BN1206...
-
Page 55: Dismantling
Operating manual Sina / Sina Xtra 18 | Dismantling Dismantling For correct uninstallation and dismantling of the stove, contact your Austroflamm specialist dealer. 18.1 Removing the door 1) Open door. Fig. 65: Open door. 2) Loosen the pressure spring screws (top and bottom). -
Page 56: Disposal
NOTICE For correct uninstallation and dismantling of the stove, contact your Austroflamm specialist dealer. Electric and electronic components Remove the electric and electronic components from the appliance by dismounting them. These com- ponents must not be disposed of via non-recyclable waste. - Page 57 Operating manual Sina / Sina Xtra 19 | Disposal Handles and decorative elements made of metal If present, disassemble or remove handles and decorative elements made of metal and dispose of as metal scrap. Local disposal options must be observed.
-
Page 58: Guarantee / Warranty
For the replaceability of the warranty case the start-up log must be received by Austroflamm within one month at the latest of the initial commissioning. In or- der to make a claim on the warranty, repairs to your stove must only be carried out by a service en- gineer authorized by Austroflamm. -
Page 59: Data Processing
If you consent to the appropriate handling of your personal data for the following purposes, please tick this box. o I hereby agree that Austroflamm GmbH and AUSTROFLAMM Service GmbH & Co KG may send me service reminders and offers on other products from Austroflamm GmbH for the purposes of advert- ising via E-Mail/ SMS/ telephone. -
Page 60: Start Up Log
22 | Start up log Operating manual Sina / Sina Xtra Start up log Operator / Customer Dealer / Engineer Name Company Street Street Town and postal code Town and postal code Telephone Telephone Email Email Stove Working Comments Model... -
Page 61: Service Report
Operating manual Sina / Sina Xtra 23 | Service Report Service Report Date Technicians Notes Work carried out, replacement parts installed... - Page 62 23 | Service Report Operating manual Sina / Sina Xtra Date Technicians Notes Work carried out, replacement parts installed...
- Page 63 Notizen / notes / appunti / remarques...
- Page 64 Vollständigkeit / completeness / completo / complet Geprüft von / checked by / controlled da / contrôlé par ____________________________________________________ Datum / date / data / date ____________________________________________________ AUSTROFLAMM GMBH Austroflamm-Platz 1 A- 4631 Krenglbach Tel: +43 (0) 7249 / 46 443 www.austroflamm.com info@austroflamm.com...
Need help?
Do you have a question about the Sina and is the answer not in the manual?
Questions and answers