
Related Manuals for Austroflamm 80x64S


Summary of Contents for Austroflamm 80x64S
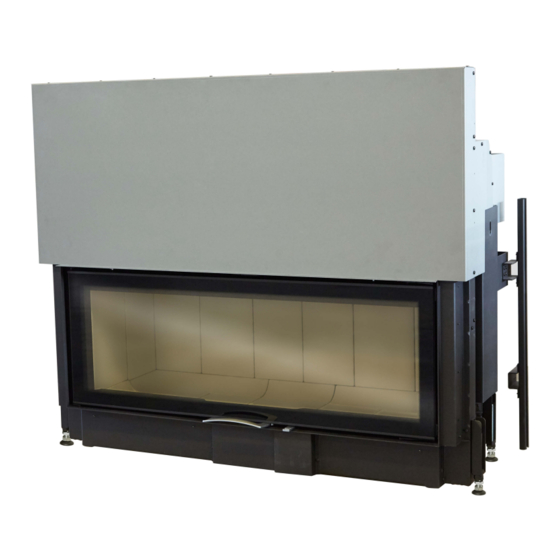
- Page 1 Fireplace inserts 120x45 S Assembly Manual 120x45S Fireplace Inserts / Sliding door www.austroflamm.com...
-
Page 3: Table Of Contents
Ventilation requirements ........................ 18 Triple Skin flue sheild........................19 Information on Maintenance / Repair ............... 20 Removing the door on appliances with a flat sliding door 2.0 ............20 Placement of the type plates ......................21 Firebox lining ..........................21 www.austroflamm.com english... -
Page 4: Aussie Warnings
CAUTION: THIS APPLIANCE SHOULD NOT BE OPERATED WITH A CRACKED GLASS. CAUTION: THIS APPLIANCE SHOULD BE MAINTAINED AND OPERATED AT ALL TIMES IN ACCORDANCE WITH THESE INSTRUCTIONS. CAUTION: THE USE OF SOME TYPES OF PRESERVATIVE-TREATED WOOD AS A FUEL CAN BE HAZARDOUS. www.austroflamm.com english... -
Page 5: General Information
Check that all moving parts function properly before installing the devices. In principle, all defects must be reported before the appliance is assembled and encased. • Remove the enclosed document "Operating Instructions" and hand it over personally to the owner of the fireplace heater with a briefing on how the appliance works (heating operation). www.austroflamm.com english... -
Page 6: Carrying Aid
1.4 Carrying aid for Transit, The Austroflamm fireplace inserts (with the exception of 71x51/57 S3, 69x49x57 and 89x49x57) are equipped with a carrying aid, intended to make it easier for you to transport the fireplace insert to the installation site. Remove once in Situ. -
Page 7: Setting Up The Fireplace Insert
In this case, the combustion air nozzle can be fitted either on the left or right side of the appliance before installation. The combustion air nozzle and the gasket are each fixed with three screws. For appliances with a sliding door, conversion to auto closing is carried out as follows: 9 pieces. www.austroflamm.com english... -
Page 8: Positioning The Appliance
Flat and corner fireplace inserts The sliding door counterweight is secured with a screw on each side of the appliance. CAUTION: These transport safety screws must be removed before installing the appliance! www.austroflamm.com english... -
Page 9: Fitting The Deflector Plates
If the appliance has to be transported further, it is essential to refit the transport safety screws so that the weight is securely anchored. 80x64S/SII 97x45 / 97x74S / 120x45S Fitting the deflector plates The Keramott elements of the fireplace are pre-assembled. Only the Keramott deflectors still have to be fitted:... -
Page 10: Demands On The Installation Space
Combustion air supply from the room The Austroflamm fireplace insert obtains its combustion air exclusively via a combustion air nozzle. For models 80x64S, 97x45/74S and 120x45S the combustion air nozzle is mounted on the left or right side of the appliance. All other models described in this document have the combustion air nozzle on the base of the appliance. -
Page 11: Combustion Air Supply Via A Direct Duct
(see state building regulations). Demands on the chimney Before setting up or installing the Austroflamm fireplace insert, the size and quality of the chimney must be checked according to the applicable local regulations (respective state building regulations, combustion regulations and DIN 18160, part 1). -
Page 12: Technical Data
(e.g. rear ventilation). • When installing a closed system using Austroflamm fireplace inserts with a sliding door, the temperature resistance of the rope guide roller is a maximum of 250 °C. Attention must be paid to this maximum permissible ambient tem- perature! If the Central heating ducts and the Cavity ventilation is constructed according specifications, this material temperature should never be reached. -
Page 13: Data For Designing The Chimney / Fireplace
- The free air passage at the air grid must not fall below the actual cross section of the recommended outdoor air duct. - Negative pressure (suction) must not occur at the air duct inlet even in unfavourable wind conditions. 5. Flue Exit Terminal requirements for AS2918:2018 www.austroflamm.com english... -
Page 14: Installation Instructions
The installation needs to be full Masonry and meet the local install requirements for solid fuel. Electrical wiring There must be no electrical wiring in walls and ceilings in the area where the open fireplace is installed. www.austroflamm.com english... -
Page 15: Masonry Installation
5mm thick plate steel, or minimum 12mm thick heat resistant material. The flue must be ventilated double casing (triple skin) starting from the firebox/ convection cladding. (Note flue spigot I.D. is 170mm). Over crimped 7" crimp to fit. www.austroflamm.com english... -
Page 16: Protecting The Installation Floor
Floor Protector - beneath the heater If the heater is raised 450mm or more off the combustible floor, then the hearth • requirement can be used from the Skamol installation, that is 2085 x 775 x 6mm cement sheet below the heater. And minimum 1490 wide x 390mm deep x 6mm thick in front of the heater, the 1490mm width placed centrally in front of the heater. -
Page 17: Convection Air Vents
, the ceiling must be protected if: - it consists of combustible materials; - it serves as a load-bearing element; • the thermal insulation layer has to be installed according to national installation standards . Vent below the cavity cap to be 2940cm2. • www.austroflamm.com english... -
Page 18: Skamol Enclosure Install
Skamol Enclosure Board Installation Skamol Installation - Chimney build out To install into Skamol enclosure board, the heater must be on a stand no less than 450mm tall. Use the optional accessory kit AUA120-45Base available from your supplier. At this minimum height the hearth requirement is 2085 x 775 x 6mm cement sheet below the heater. -
Page 19: Triple Skin Flue Sheild
The cavity must be ventilated to reduce heat build up inside the cavity. A minimum of 4 vents must be installed, with 2 level with the underside of the cavity cap with total 60,000mm2, to reduce heat build up at the top of the cavity, and 2 at 60mm from the bottom of the enclosure at 60,000mm2, to draw air in below the heater. -
Page 20: Information On Maintenance / Repair
Removing the door on appliances with a flat sliding door 2.0 ( 120 x 45) Disable the door lift mechanism Open the door. (1, 2). Unlock the door (3). Do not apply any weight to the door! Remove the door from its hinges. www.austroflamm.com english... -
Page 21: Placement Of The Type Plates
3. Do not apply any weight to the door! 4. Lift the door and swing it out of the bottom hinge pin. (To install the door, follow the steps in reverse order.) (To install the door, follow the steps in reverse order.) english www.austroflamm.com english... - Page 22 NOTES: www.austroflamm.com...
- Page 23 NOTIZEN / NOTES: www.austroflamm.com...
- Page 24 NOTIZEN / NOTES: www.austroflamm.com...
- Page 25 AUSTROFLAMM GmbH Austroflamm-Platz 1 / A-4631 Krenglbach T: +43 7249 46443-0 info@austroflamm.com...
Need help?
Do you have a question about the 80x64S and is the answer not in the manual?
Questions and answers