HIKOKI C 10FCH2 Handling Instructions Manual
Hide thumbs
Also See for C 10FCH2:
- Handling instructions manual (120 pages) ,
- Handling instructions manual (64 pages)
Table of Contents
Advertisement
Available languages
Available languages
Quick Links
Advertisement
Table of Contents

Related Manuals for HIKOKI C 10FCH2


Summary of Contents for HIKOKI C 10FCH2
- Page 1 Compound Miter Saw Ingletadora C 10FCH2 ∙ C 10FCE2 Read through carefully and understand these instructions before use. Leer cuidadosamente y comprender estas instrucciones antes del uso. Handling instructions Instrucciones de manejo...
- Page 2 &...
- Page 4 ¢ £ ™ ¡ ∞ ¡ ¶ ¶ § ⁄ ¤ ‹ • › ª º º ⁄ ‡ fi fl...
- Page 5 ´ & ‚ ‚ Œ · ° · „ & ‰ ˇ...
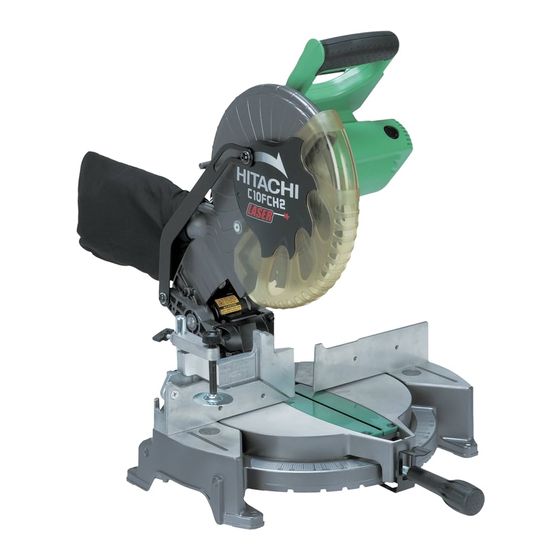
- Page 6 English Español Handle Empuñaradura Motor Head Cabezal del motor Gear Case Caja de engranajes Dust Bag Bolsa para el polvo Laser Marker (Only C10FCH2) Marcador láser (Sólo C10FCH2) Vise Assembly Conjunto del tornillo de carpintero Sub Fence (B) Tope-guía secundario (B) Fence (B) Protección (B) Turntable...
- Page 7 English Español Laser line Línea de láser Groove Ranura 4 mm Hex. Bar Wrench Llave de barra hexagonal de 4 mm Marking (pre-marked) Marcaje (pre-marcado) Miter Scale Escala de ingletes Holder (Optional accessory) Soporte (Accessorio opcionales) Steel Square Escuadra de acero Tuerca de aletas de 6 mm 6 mm Wing Nut (Optional accessory) (Accesorio opcional)
-
Page 8: General Operational Precautions
14. Maintain tools with care. Keep cutting tools sharp 9. Use only original HiKOKI replacement parts. and clean for better and safer performance. Follow 10. This tool should only be disassembled for replacement instructions for lubrication and changing accessories. -
Page 9: Specifications
37. Shut off power and wait for saw blade to stop before 23. Use only saw blades recommended by HiKOKI. servicing or adjusting tool. Use of saw blade comply with EN847-1. 38. During a miter or bevel cut the blade should not be lifted 24. - Page 10 English CAUTION STANDARD ACCESSORIES Empty the dust bag frequently to prevent the duct and the safety cover from becoming clogged. (1) 255 mm TCT Saw blade (mounted on tool) ....1 Sawdust will accumulate more quickly than normal (2) Dust bag ..............1 during bevel cutting.
-
Page 11: Position Adjustment Of Laser Line
English CAUTION WARNING (Fig. 13 and Fig. 14) Always confi rm that the motor head does not contact ○ Make sure before plugging the power plug into the the vise assembly when it is lowered for cutting. If there receptacle that the main body and the laser marker are is any danger that it may do so, loosen the 6 mm wing turned off... - Page 12 English CAUTION CAUTION ○ For maximum dimensions for cutting, refer to Always secure the workpiece with the right hand side “SPECIFICATIONS” table. for compound cutting. Never rotate the table to the ○ Increased pressure on the handle will not increase the right for compound cutting, because the saw blade cutting speed.
-
Page 13: Maintenance And Inspection
ONLY be performed by a HiKOKI 1. Mounting the saw blade (Fig. 23, Fig. 24, Fig. 25 Authorized Service Center. and Fig. 26) 4. - Page 14 C : No. Used D : Remarks CAUTION Repair, modifi cation and inspection of HiKOKI Power Tools must be carried out by a HiKOKI Authorized Service Center. Especially laser device should be maintained by the authorized agent by laser manufacturer.
- Page 15 Español 14. Mantener cuidadosamente las herramientas. Tener PRECAUCIONES GENERALES PARA las siempre limpias y afi ladas para obtener un mejor OPERACIÓN rendimiento y un funcionamiento más seguro. Seguir siempre las instrucciones para la lubricación y el ¡ADVERTENCIA! Cuando utilice herramientas eléctricas, cambio de accesorios.
- Page 16 22. No utilice cuchillas de sierra hechas de acero de corte rápido. 23. Utilice solamente cuchillas de sierra recomendadas por HiKOKI. Utilice una hoja de sierra que cumpla con EN847-1. 24. El diámetro exterior de las cuchillas de sierra debe...
-
Page 17: Especificaciones
Español ESPECIFICACIONES 59 mm × 144 mm 0° 89 mm × 101 mm Capacidad máx. de corte Angular 45° 59 mm × 102 mm Altura × Anchura Bisel Izquierdo 45° 41 mm × 144 mm Compuesto (Bisel Izq. 45°, Angular 45°) 41 mm ×... -
Page 18: Instalación
Español (2) Durante el corte en bisel y compuesto, fi je la bolsa para (2) El portatornillo puede elevarse o bajarse de acuerdo el polvo en ángulo recto con relación a la superfi cie de con la altura de la pieza de trabajo afl ojando el perno la base como se muestra en la Fig. - Page 19 Español (2) A continuación introduzca una llave de barra hexagonal ○ No tire con fuerza del cordón provisto detrás del de 4 mm en el orifi cio de 12 pulgadas de diámetro cabezal del motor ni enganche su dedo, madera, o situado sobre el lado de la caja de engranajes, y gire el algún objeto alrededor del mismo;...
-
Page 20: Montaje Y Desmontaje De La Hoja De Sierra
Español NOTA 14. Retén para precisión de corte (El retén y el soporte ○ Se proveen paradas positivas a la derecha y la son accesorios opcionales) izquierda del ajuste central de 0˚, en los ajustes de 15°, Los retenes facilitan un continuo corte de precisión en 22,5°, 31,6°... -
Page 21: Mantenimiento E Inspección
El husillo de la cuchilla de sierra se bloquea cuando dañado, envíe la herramienta al Centro de Servicio se presiona hacia adentro el bloqueo del husillo. Autorizado de HiKOKI para que le cambien el cable de (4) Quite el perno y la arandela (D). alimentación. - Page 22 PRECAUCIÓN La reparación, modifi cación e inspección de las herramientas eléctricas HiKOKI deben ser realizadas por un Centro de Servicio Autorizado de HiKOKI. Especialmente el dispositivo láser debería ser revisado por el agente autorizado por el fabricante del dispositivo láser.
- Page 24 C10FCH2 (1/2) 626 627...
- Page 25 C10FCH2 (1/2) 326748 "2" 322902 ——— 326694 "62" 307956 M6×10 322957 "602-608" 323208 M6×20 998836 M6×11 322935 ——— 326706 306985 318934 964851 322889 304043 M4×10 322965 318967 322890 321551 M10×54 302518 "12" 322713 "610-613" 984528 301806 M6×15 322933 ——— 322934 321390 322888 316030...
- Page 26 C10FCH2 (2/2)
- Page 27 C10FCH2 (2/2) 998335 M7×17.5 322915 308789 953121 D5×50 255MM-D15.88 HOLE- 176-1 340686C 120V "177" 102-1 318963 NT24 176-2 340687E 220V-230V "177" 255MM-D25.4 HOLE- 176-3 340686B 127V "177" 102-2 319106 NT24 937623 976819 D25.4 HOLE 322123 M5×40 323133 "105-109" 322914 "180, 181" 990430 M4×10 938477...
- Page 28 C10FCE2 (1/2) 626 627...
- Page 29 C10FCE2 (1/2) 307956 M6×10 322957 "602-608" 323208 M6×20 998836 M6×11 322935 ——— 326706 306985 318934 964851 322889 304043 M4×10 322965 318967 322890 321551 M10×54 302518 "12" 322713 "610-613" 984528 301806 M6×15 322933 ——— 322934 321390 322888 316030 M6×52 322932 322714 "615-618"...
- Page 30 C10FCE2 (2/2)
- Page 31 C10FCE2 (2/2) 998335 M7×17.5 938477 M5×8 308789 938241 255MM-D25.4 HOLE- 182-1 999038 110V-120V 102-1 319106 NT24 182-2 999065 220V-240V 255MM-D15.88 HOLE- 945161 102-2 318963 NT24 322949 976819 D25.4 HOLE 940543 10MM 323133 "105-109" 949695 M10×35 990430 M4×10 322955 322919 6003VV 322918 322917 982027...
- Page 32 Issued by Shinagawa Intercity Tower A, 15-1, Konan 2-chome, Minato-ku, Tokyo 108-6020, Japan Distribuido por Calle Isaac Newton No.286, 2do Piso, Col. Polanco V Sección, Del. Miguel Hidalgo, C. P. 11560 Ciudad de México, México. Code No. C99235541 F Printed in China...
Need help?
Do you have a question about the C 10FCH2 and is the answer not in the manual?
Questions and answers