Table of Contents
Advertisement
Quick Links
Advertisement
Table of Contents

Subscribe to Our Youtube Channel
Related Manuals for Atag CM4585M


Summary of Contents for Atag CM4585M
- Page 1 INSTRUCTIONS FOR USE CM4574M Coffee machine CM4585M...
-
Page 2: Table Of Contents
Contents Pictograms used ........Clean all components of the milk Safety ............container ............Your coffee machine ........Clean the appliance’s internal circuit ..Dear customer! ..........Clean the coffee grounds container .... Description of the appliance ......Clean the drip tray ........Touch keys and symbols ...... -
Page 3: Pictograms Used
Pictograms used The following symbols are used throughout the manual, and they have the following meanings: INFORMATION! Information, advice, tip, or recommendation WARNING! Warning general danger ELECTRIC SHOCK! Warning danger of electric shock HOT SURFACE! Warning danger of hot surface DANGER OF FIRE! Warning danger of fire... -
Page 4: Safety
Safety WARNING! READ CAREFULLY AND KEEP IT FOR FUTURE REFERENCE! What you should pay attention to WARNING! The appliance and its accessible parts become hot during use. Care should be taken to avoid touching heating elements. • This appliance can be used by children aged from 8 years and above and persons with reduced physical, sensory or mental capabilities or lack of experience and knowledge if they have been given supervision or instruction concerning use of the... - Page 5 Safety • WARNING! Avoid spillage on the connector. • WARNING! There is a possibility of injury when there is a misuse of the appliance. • Heating element surfaces are subjected to residual heat after use. • WARNING! Do not use the appliance if the glass surface is cracked. •...
- Page 6 Safety • Do not put objects containing liquids, inflammable or corrosive materials on the machine. • Use the accessories holder to contain coffee accessories (for example coffee beans). • Never touch the appliance with damp hands. • Unplug directly from the plug only. •...
-
Page 7: Your Coffee Machine
Your coffee machine Dear customer! Please read the operating instructions before use. They include general tips, information about the settings and adjustments you can make, and the best way to take care of your appliance. TIP! You can find the most recent version of the instructions for use on our website. Enjoy your cooking! -
Page 8: Description Of The Appliance
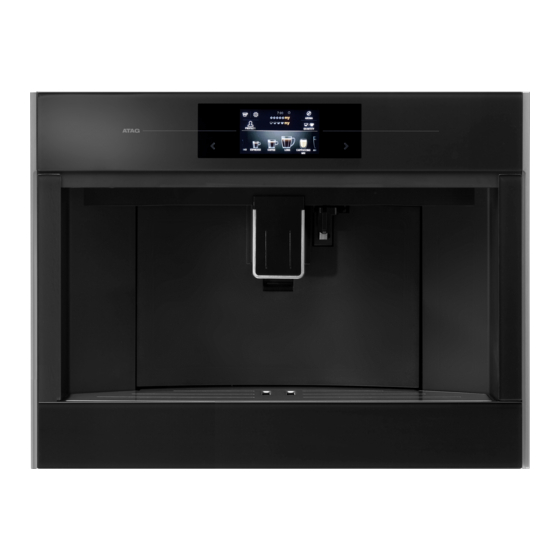
Your coffee machine Description of the appliance A. My profile B. Settings C. User profile D. Selected aroma E. Time F. Selected size G. Aroma H. Size I. Scroll left/right J. Beverages available to select When this primary screen is shown, the appliance is ready to use. - Page 9 Your coffee machine...
- Page 10 Your coffee machine 1. Lid bean container 2. Bean container 3. Ground coffee funnel (with lid) 4. Knob to adjust the grind level 5. Power cord 6. IEC connector 7. Area for the measuring spoon 8. Cup warming area 9. Service door 10.
-
Page 11: Touch Keys And Symbols
Your coffee machine Touch keys and symbols Touch keys My profile Customise several beverage settings for the user profile that is shown on the primary screen. • See chapter Customise beverages’. • You cannot use this touch key when the guest profile is shown on the display. - Page 12 Your coffee machine Table continued from last page Table continued from last page Touch keys Next Minus (-) / Plus (+) • Adapt the aroma when you customise a beverage. Start Enter • Enter a menu. Double espresso • This touch key is shown on the display for a few seconds at the start of preparing one espresso.
- Page 13 Your coffee machine Symbols My aroma (if programmed) / Standard • Pre-ground • Extra light • Light • Medium • Strong • Extra strong My quantity (if programmed) / Standard • Small • Medium • Large • Extra large Settings saved Default value Auto-start function enabled Energy-saving enabled...
-
Page 14: Operation
Operation Before first use Remove the packaging. Make sure the product is complete and undamaged. Check if all accessories are present. Do not use the appliance if it is visibly damaged. Contact the service department if there are any problems. NOTE! •... -
Page 15: Set Your Appliance To On
Operation The appliance goes to standby automatically. It is now ready for normal use. WARNING! Danger! Risk of burns. During rinsing, a little hot water flows out of the coffee spouts. Avoid contact with splashes of water. Do not let the appliance stay unattended while hot water is being supplied. Set your appliance to On’... -
Page 16: Set Your Appliance To Standby' And Off
Operation Set your appliance to Standby’ and Off’ NOTE! Each time the appliance is set to Standby’ after being used to make coffee, it performs an automatic rinse cycle. TIP! • If you do not use the appliance for a long period, set the appliance to Off’. •... -
Page 17: Make Coffee Using Pre-Ground Coffee
Operation Make coffee using pre-ground coffee NOTE! • Only add pre-ground coffee when the appliance is set to On’. Otherwise, the coffee could spread through the inside of the appliance and damage it. • Only make one cup of coffee at a time. Do not use more than 1 measuring spoon. •... -
Page 18: Make Milk-Based Hot Drinks
Operation • if the coffee is supplied too slowly or not at all. Turn the knob one click clockwise in the direction of 7. • for a stronger, creamier coffee. Turn the knob one click anti-clockwise in the direction of 1. NOTE! •... -
Page 19: Make Two Cups Of Coffee
Operation NOTE! After the supply of a milk-based hot drink, the display shows a CLEAN message (see chapter Maintenance’). Make two cups of coffee With this appliance, you can make a perfect espresso or coffee. To guarantee the quality of each cup, we have chosen not to offer the option of two cups of coffee at the same time. -
Page 20: Customise A User Profile
Operation Customise a user profile Supply hot water or steam HOT SURFACE! Danger! Risk of burns. • Do not let the appliance stay unattended while hot water or steam is being supplied. • Avoid burns from splashes. Always stop the hot water or steam supply before removing the cup containing the liquid. -
Page 21: Settings
Settings Settings menu Rinsing Clean and heat the appliance’s internal circuit. Supply hot water from the coffee spouts and hot water spout (if inserted). • Put a container with a minimum capacity of 100 ml under the coffee and hot water spouts. - Page 22 Settings Table continued from last page Coffee temperature Adjust the temperature of the water that is used to make coffee. Water hardness See chapter Maintenance’. Set language Adjust the language shown on the display. Beep Set the beep on or off. •...
-
Page 23: Maintenance
Maintenance Clean your appliance WARNING! Read and obey the instructions shown on the display. The display shows information and touch keys to use. Important information is accompanied by an audio signal. NOTE! • Do not use solvents, abrasive detergents, alcohol or chemical products to clean the appliance! •... -
Page 24: Clean The Internal Tubes Of The Milk Container And The Nozzle
Maintenance HOT SURFACE! Wait a few minutes for the hot water spout to cool down. NOTE! Wash all parts of the spout thoroughly with a sponge and warm water. Clean the internal tubes of the milk container and the nozzle Each time a milk-based hot drink is supplied, the display shows a CLEAN message. -
Page 25: Clean All Components Of The Milk Container
Maintenance NOTE! • To prepare a number of cappuccinos and milk-based coffees, only confirm the CLEAN message after you have prepared the last beverage. To proceed with making the next beverages, touch the escape key. • If you touch the escape key, a symbol is shown on the display to remind you that the internal tubes of the milk container need cleaning. -
Page 26: Clean The Coffee Grounds Container
Maintenance Clean the coffee grounds container NOTE! • A message to empty the grounds container is displayed 72 hours after the first coffee has been prepared. Do not set the appliance to Off’ with the main switch. If you do so, the 72 hours cannot be calculated correctly. -
Page 27: Clean The Inside Of The Coffee Machine
Maintenance Clean the inside of the coffee machine WARNING! Before cleaning internal parts, set the appliance to Standby’. Do not immerse the coffee machine in water. Clean the water tank NOTE! Clean the water tank with a damp cloth and a little mild washing-up liquid. Rinse thoroughly before filling the tank and putting it back in the appliance. -
Page 28: Descale The Appliance
Maintenance Descale the appliance Descale the appliance when the related message is shown on the display. • To descale immediately, read and obey the instructions shown on the display. • To descale the appliance later, touch the escape key. A symbol is shown on the display to remind you that the appliance needs descaling. WARNING! Before use, read the instructions and the labelling on the descaler pack. -
Page 29: Set The Water Hardness
Maintenance Set the water hardness NOTE! The appliance is set by default for a hardness level of 4. The appliance can also be programmed according to the hardness of the mains water in the various regions. The appliance needs to be descaled less often if this hardness level is lower. Immerse the total hardness test’... -
Page 30: Install A Water Softener Filter
Maintenance Level 1: soft water Level 2: moderately hard water Level 3: hard water Level 4: very hard water The appliance is now programmed with the new water hardness setting. Install a water softener filter NOTE! Certain models are fitted with a water softener filter. If this is not the case with your model, you are recommended to purchase one from the service department. -
Page 31: Replace A Water Softener Filter
Maintenance The water filter symbol is shown on the display adjacent to the time. This indicates that the filter has been enabled. Replace a water softener filter Replace the filter when the related message is shown on the display. • To replace the filter immediately, read and obey the instructions shown on the display. - Page 32 Maintenance...
-
Page 33: Clean The Brewing Unit/Infuser Twice A Year
Maintenance Clean the brewing unit/infuser twice a year WARNING! • Do not remove the brewing unit when the appliance is set to On’. Set the appliance to Standby’. Do not use force to remove the brewing unit. • Do not use washing-up liquid to clean the brewing unit. It would remove the lubricant applied to the inside of the piston. - Page 34 Maintenance...
-
Page 35: Use The Milk Cleaner
Maintenance Use the milk cleaner... - Page 36 Maintenance...
-
Page 37: Troubleshooting
Troubleshooting WARNING! Read and obey the instructions shown on the display. The display shows information and touch keys to use. Important information is accompanied by an audio signal. If the given instruction shown on the display or the given remedy in the table below is not the solution to a problem, contact Customer Services. - Page 38 Troubleshooting Table continued from last page Problem Possible cause Solution Coffee does not come out of one The coffee spouts are blocked. Clean the coffee spouts. or both of the spouts. The appliance does not make The appliance has detected Wait for the appliance to be coffee.
-
Page 39: Environmental Aspects
Environmental aspects Disposal of the appliance and packaging Sustainable materials have been used during the manufacture of this appliance. This appliance must be disposed of responsibly at the end of its service life. Ask your local authorities for more information about how to do this. -
Page 40: Installation
Installation Safety WARNING! If the safety instructions and warnings are not followed, the manufacturer cannot be held responsible for any resulting damage. • After removing the packaging, make sure the product is complete and undamaged. If in doubt, do not use the appliance and contact a qualified professional. -
Page 41: Dimensions
Installation • If a stationary appliance is not fitted with a supply cord and a plug, or with other means for disconnection from the supply mains having a contact separation in all poles that provide full disconnection under overvoltage category III conditions, the means for disconnection must be incorporated in the fixed wiring in accordance with the wiring rules. -
Page 42: Built-In
Installation Built-in... - Page 43 Installation...
-
Page 44: Your Notes
569953 We reserve the right to make changes.
Need help?
Do you have a question about the CM4585M and is the answer not in the manual?
Questions and answers