
Related Manuals for Wirepath Surveillance WPS-750-BUL-AH-GR


Summary of Contents for Wirepath Surveillance WPS-750-BUL-AH-GR
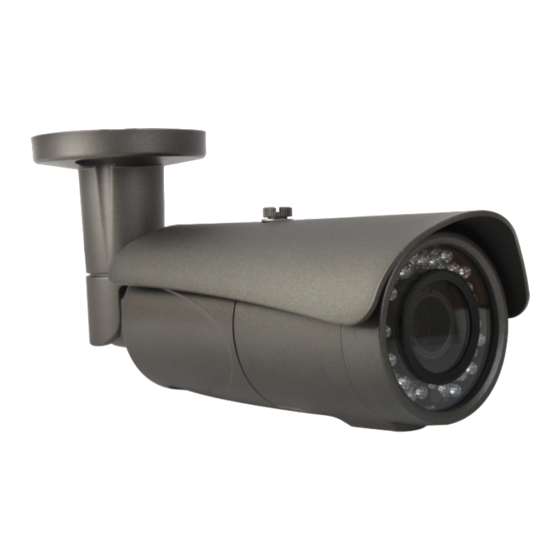
- Page 1 WPS-750-BUL-AH-GR WPS-750-BUL-AH-WH BULLET CAMERA INSTALLATION MANUAL Review manual thoroughly before installation. Retain for future reference.
-
Page 2: Table Of Contents
WPS-750-BUL-AH Installation Manual CONTENTS Safety Instructions................3 Features....................4 Package Contents................5 Installation Instructions............... 7 Set-Up....................10 1. Operating The OSD Menu............. 10 2. OSD Menu Structure............... 10 3. OSD Menu Settings..............14 3.1 Camera Name Setting..........14 3.2 Lens................. 14 3.3 Exposure................. -
Page 3: Safety Instructions
5. Do not install camera in environments with extreme humidity. Installing camera in environments with extreme humidity may cause moisture to condense on the surface of the lens or dome cover, which can affect picture quality. © 2013 Wirepath Surveillance... -
Page 4: Features
WPS-750-BUL-AH Installation Manual FEATURES • 1/3” Sony Super-HAD II CCD The Sony Super HAD II CCD is ideal for low lux illumination, resulting in a clear and crisp image. • Varifocal Auto-Iris Lens This camera features a varifocal lens with a focal length of 3.7-12 mm. The auto-iris function intuitively manages the amount of light passing through the lens for consistent image brightness. -
Page 5: Package Contents
The PS-12DC-1A or WPS-PS multiple output power supplies are recommended. OPTIONAL ACCESSORIES Wirepath Surveillance offers a wide range of accessories that provide power to the cameras, allow for various mounting options, and make connection to the head end quick and easy. - Page 6 WPS-750-BUL-AH Installation Manual WIRING ACCESSORIES In addition to mounts and power supplies, Wirepath offers a full line of accessories to easily send power, audio, and video over 2 conductors of Cat5 wiring back to the head end. Visit www.snapav.com for a complete listing of accessories. • WPS-BAL-V-PIGTAIL • WPS-BAL-VPD Mini Passive Video Balun with Pigtail...
-
Page 7: Installation Instructions
Too small a power supply or wire will cause too much voltage drop, which will cause the camera to operate incorrectly or not power up at all. © 2013 Wirepath Surveillance... - Page 8 WPS-750-BUL-AH Installation Manual 3. Mount the Camera A. Mounting directly to a wall or eve: A.1 - Use the Camera base as a template to mark the screw locations. A.2 - Predrill holes in the marked locations. A.3 - Connect the wires from the wall to the Cameras Pigtail and insert them into wall.
- Page 9 3mm Allen key. F. Adjust the Cameras Zoom (furthest to the lens) using the supplied 3mm Allen key. G. Adjust the Cameras Focus (closest from the lens) using the supplied 3mm Allen key. © 2013 Wirepath Surveillance...
-
Page 10: Set-Up
WPS-750-BUL-AH Installation Manual SET-UP Operating the OSD Menu • To view the OSD, the OSD Joystick / BNC Test Adapter must be connected to a display monitor or WPS-CCTV-TESTER (not included). • The button found on the pigtail provides five separate actions: UP, DOWN, EXIT, ENTER and MENU. • Press the button to enter into the OSD MENU page. • Press UP, DOWN, EXIT (Left) or ENTER (Right) to select items on the menu and begin configuration. OSD Menu Structure Settings have been preconfigured for optimal performance in most applications. If adjusting the settings produces a poor picture, factory reset the camera to restore the original settings (see p.21) Bold indicates factory preset CAM NAME... - Page 11 ECLPS LEVEL ON, OFF GAIN CONTROL PREVIOUS PREVIOUS BLC LEVEL HIGH, MIDDLE, LOW PREVIOUS ECLPS AREA SETTING ALL AREA SET ON, OFF MASK COLOR GRAY, BLACK, D. GRAY ECLPS LEVEL 1~5 (1) GAIN CONTROL ON, OFF PREVIOUS © 2013 Wirepath Surveillance...
- Page 12 WPS-750-BUL-AH Installation Manual OSD Menu Structure cont. (bold indicates factory preset) WHITE BAL COL-ROLL PUSH MANUAL INDOOR, OUTDOOR COLOR TEMP -100~100 (0) BLUE -100~100 (0) INITIAL SET PREVIOUS 3D-DNR ON, OFF DNR LEVEL 1~100 (24) DESTINATION 0-63 (47) GLOBAL ON, OFF MOVEMENT PREVIOUS EFFECTS DZOOM ON, OFF...
- Page 13 L/L SYNC MONITOR TYPE CRT, LCR FACTORY RESET COMM SET PROTOCOL PELCO-D CAMERA ID 0~255 DISPLAY ID ID POSITION PREVIOUS BAUD RATE 4800 / 9600 / 19200 / 38400 / 57600 SAVE / REBOOT PREVIOUS PREVIOUS EXIT © 2013 Wirepath Surveillance...
-
Page 14: Osd Menu Settings
WPS-750-BUL-AH Installation Manual OSD MENU SETTINGS The camera menu allows for <MAIN MENU> the adjustment of settings to 1. CAM NAME obtain optimal image clarity 2. LENS DC IRIS and color realism. 3. EXPOSURE 4. DAY/NIGHT 5. WDR/BLC/ECLPS Note : If there is a “ ”... -
Page 15: Exposure
• AUTO: Activates the SENSE-UP function. Select the SENSE-UP level from X2 to X512. Note : The SENSE-UP function is only available when SHUTTER is set to AUTO. INITIAL SET Returns the exposure settings to factory default. © 2013 Wirepath Surveillance... -
Page 16: Day/Night
WPS-750-BUL-AH Installation Manual <MAIN MENU> DAY/NIGHT 1. CAM NAME 2. LENS DC IRIS 3. EXPOSURE • Set the DAY/NIGHT value to AUTO, 4. DAY/NIGHT 5. WDR/BLC/ECLPS DAY, NIGHT, or EXT based on the 6. WHITE BAL 7. 3D-DNR installation application. 8. EFFECTS 9.SPECIAL 0. EXIT • DAY: The camera remains in color mode all of the time. -
Page 17: Wdr/Blc/Eclps
This function corrects the exposure of subjects in front of a bright light source. <BLC MENU> • BLC LEVEL: Set the BLC LEVEL by BLC LEVEL HIGH PREVIOUS selecting LOW, MIDDLE, or HIGH. • PREVIOUS: Return to previous page. © 2013 Wirepath Surveillance... -
Page 18: White Balance
WPS-750-BUL-AH Installation Manual ECLIPSE Setting The ECLIPSE function is used to cut off exceptionally bright light, such as headlights < ECLIPSE MENU> of a vehicle. Zones and sensitivity can be AREA SETTING adjusted based on the scene. ALL AREA SET MASK COLOR GRAY •... -
Page 19: 3D-Dnr
7. 3D-DNR 8. EFFECTS Note: The 3D-DNR function is only available 9.SPECIAL 0. EXIT when Auto Gain Control (AGC) is enabled in the EXPOSURE sub menu. • Set the 3D-DNR to ON to activate the DNR function. When 3D-DNR is ON, enter into the subdirectory to adjust: © 2013 Wirepath Surveillance... -
Page 20: Effects
WPS-750-BUL-AH Installation Manual <3D-DNR MENU> DNR LEVEL 24 -----|----------- • DNR LEVEL: User-selectable from 1 to 100. DESTINATION 47 -----------|----- GLOBAL MOVEMENT The higher the value, the more obvious PREVIOUS DNR performance. • DESTINATION: User-selectable from 0 to 63. The higher the value, the brighter the image. •... -
Page 21: Special
• MOVE X: Determines the coordinate of the vertical axis for selected zone. • MOVE Y: Determines the coordinate of the horizontal axis for selected zone. • SENSITIVITY: Increase motion detection sensitivity by increasing this setting. • PREVIOUS: Return to previous page. © 2013 Wirepath Surveillance... - Page 22 WPS-750-BUL-AH Installation Manual PRIVACY MASK Setting <PRIVACY MASK MENU> Privacy Mask configuration allows for masking MASK NUMBER MASK 1 MASK STATE of up to 8 “surveillance-free” zones in the picture. MASK COLOR WIDTH 20 ---|---------- For example, this may be used for a camera HEIGHT 30 ------|------- MOVE X 15 ---|----------...
- Page 23 ID POSITION and devices are being used in PREVIOUS the surveillance system, confirm that no other device is using the same ID. If two or more devices share the same ID number, the PTZ controller or DVR will not be able to control or configure any of the devices. © 2013 Wirepath Surveillance...
-
Page 24: Exit
WPS-750-BUL-AH Installation Manual - DISPLAY ID: Set DISPLAY ID to ON to display the CAMERA ID on the screen. This feature is useful when needing to know the ID of a camera simply by viewing a picture. - ID POSITION: Select the position for the CAMERA ID on the display screen by using the left and right arrows “”, “”... -
Page 25: Rs485 System Diagram
WPS-750-BUL-AH Installation Manual SYSTEM DIAGRAM RS485 Cable ID 1 ID 2 ID 3 ID 4 ID 255 Controller ID 0 © 2013 Wirepath Surveillance... -
Page 26: Troubleshooting
WPS-750-BUL-AH Installation Manual TROUBLESHOOTING If you have trouble operating the camera, first refer to the following guidelines. If the problem persists, contact Technical Support at 866.838.5052. Nothing appears on the display • Check if the power for camera and monitor is ON. • Check if the VIDEO cable is connected to the camera BNC video output jack. • Check if the VIDEO cable is connected to the monitor VIDEO input jack. Image appears dim on the display • Check the monitor contrast setting. • Check the monitor and camera brightness setting. • Check the camera exposure and shutter settings. • Check the lens. If necessary, clean with a soft, clean cloth. • Check if the camera is facing towards a bright light. If so, change the camera position. - Page 27 • Check the color of the beads in the Silica pack under the lens cover. • I f the blue crystals have turned pink indicating that the pack has absorbed moisture, replace the pack with the spare provided with the camera. Camera Power Cycles Intermittently • Check voltage at camera for proper voltage level. • C onnect camera locally with a different power supply to test. © 2013 Wirepath Surveillance...
-
Page 28: Specifications
WPS-750-BUL-AH Installation Manual SPECIFICATIONS Image Sensor 1/3" Color Sony Super HAD II Lens 3.7 - 12mm Estimated Horizontal Viewing Angle 78.1° (3.7mm) ~ 28.1° (12mm) Resolution (TVLs) Effective Pixels NTSC: 768(H) x 494(V) Gamma 0.45 Imaging S/N Ratio 52dB (AGC Off, Weight On) Sync Mode Internal Scanning System 2:1 Interlace... -
Page 29: Dimensions
WPS-750-BUL-AH Installation Manual DIMENSIONS 3.24in. 11.62in. 3.00in. 9.96in. 4.72in. 0.6in. Ø 3in. © 2013 Wirepath Surveillance... -
Page 30: Warranty
WPS-750-BUL-AH Installation Manual WARRANTY 5-Year Limited Warranty This camera has a 5-Year Limited Warranty. The warranty includes parts and labor repairs on all components found to be defective in material or workmanship under normal conditions of use. This warranty shall not apply to products which have been abused, modified, disassembled or improperly installed. Products to be repaired under this warranty must be returned to Wirepath™... - Page 32 130424-1605 © 2012 Wirepath Surveillance...
Need help?
Do you have a question about the WPS-750-BUL-AH-GR and is the answer not in the manual?
Questions and answers