Table of Contents
Advertisement
Quick Links
Advertisement
Table of Contents

Related Manuals for Cooper Security Scantronic i-on160EXEUR


Summary of Contents for Cooper Security Scantronic i-on160EXEUR
- Page 1 i-on160EX Security System Administrator’s and User Guide...
- Page 2 © Cooper Security Ltd. 2011 IN NO EVENT WILL COOPER BE LIABLE FOR ANY SPECIAL, CONSEQUENTIAL , OR INDIRECT LOSS OR DAMAGE, INCIDENTAL DAMAGES, STATUTORY DAMAGES, EXEMPLARY DAMAGES, LOSS OF PROFITS, LOSS OF REVENUE, LOSS OF ANTICIPATED SAVINGS, LOSS OF BUSINESS OR OPPORTUNTIY, LOSS OF GOODWILL OR INJURY TO REPUTATION, LIQUIDATED DAMAGES OR LOSS OF USE, EVEN IF INFORMED OF THE POSSIBILITY OF SUCH DAMAGES.
-
Page 3: Table Of Contents
Contents 1. Introduction ............. 1 Setting and Unsetting ..........3 Alarms and Reset ............... 3 Security Levels ..............3 Partitions ................3 24 Hour Alarms ..............4 Communications ............4 Security Grade ............4 ... - Page 4 Omitting Zones ............33 Users ............... 34 Editing Existing Users ............35 Adding Users ..............47 Deleting Users ..............50 Viewing the Log ............51 Testing the System ............ 52 Sirens & Sounders ............52 ...
- Page 5 i-on160 Compliance Statement The i-on160EX is suitable for use in systems designed to comply with PD6662:2004 at Grade 2, Grade 3 and environmental class The i-on160EX is suitable for use in systems designed to comply with the requirements of EN50131-3 at Grade 2, Grade3 and environmental class II.
- Page 6 i-on160 This page is intentionally blank. Page vi...
-
Page 7: Introduction
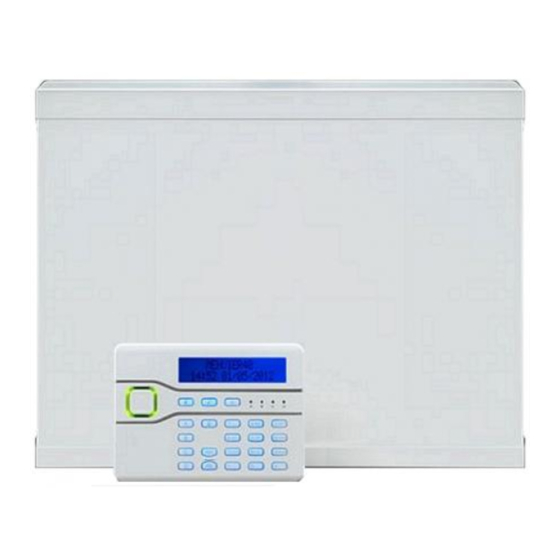
i-on160 1. Introduction The i-on160EX is an intruder alarm system intended mainly for use in commercial properties. The heart of the i-on160EX system is the control unit, its expanders and keypads. The control unit contains the main processing unit, the power supply and stand-by battery. - Page 8 1. Introduction i-on160 1. Two button panic alarm with tilt switch. 2. Two button panic alarm. 3. Four button remote control. 2 abc 3 def 2 abc 3 def 4 ghi 5 jkl 6 mno 4 ghi 5 jkl 6 mno 4.
-
Page 9: Setting And Unsetting
i-on160 1. Introduction Setting and Unsetting The majority of alarm systems are intended to detect the movements of people, and to notify others when people move into protected areas. Readying the system to start an alarm when someone moves into a protected area is called “setting” the system. -
Page 10: 24 Hour Alarms
1. Introduction i-on160 The i-on160EX can have up to 20 partitions. Users can set and unset each partition completely independently of all the others. Individual users can be given access to one or more partitions: if they have no access to a partition then they cannot set or unset that partition. -
Page 11: Controls And Displays
i-on160 1. Introduction Controls and Displays Figure 2 shows the controls and displays available on the keypad. 1. LCD display . 2. Programming keys. 3. Navigation key 4. Setting and unsetting keys. 2 abc 3 def 5. Panic Alarm (PA) keys. -
Page 12: Displays
1. Introduction i-on160 b) Press this key to abandon your decision when the display shows “Are you sure Y/N?” Press this key to gain access to the Menu. 1 to 0, Used to key in access codes. Can also be used to key in *, # text for names, and telephone numbers. -
Page 13: Users
i-on160 1. Introduction Note that the installer can disable these LEDs in order to hide the state of the system (to comply with EN50131). In addition, in a Security Grade 2 installation the installer may have programmed the LEDs to glow for 30s immediately after setting, and then to go out. -
Page 14: Identifying Users
1. Introduction i-on160 Normal User A normal user is assigned to one or more partitions. They cannot add or delete other users. A normal user can change their own access code, switch the Chime function on and off, and operate any outputs that the installer has made available. -
Page 15: Access To The System
User does not have any tag or other device registered to their account. Cooper Security Limited recommend that you change the default access code as soon as possible (see page 35). Codes 0000 (or 000000) to 9999 (or 999999) are available but Cooper Security Limited recommends that you avoid easily memorised codes such a 0000, 999999 or 654321. -
Page 16: Proximity Tags
1. Introduction i-on160 Proximity Tags A proximity tag is a small plastic token with a low powered radio transmitter inside. Each tag contains a unique identity code. (There are 4,294,967,296 (2 ) different tag identity codes.) Inside the keypad is a sensor. When you present the tag within about 10mm of the front of the keypad, the control unit senses the presence of the tag and reads its identity code. -
Page 17: Panic Alarms (Pa)
i-on160 1. Introduction 1. Full Set. 2. Part Set. 3. Not used. 4. Unset. 5. Transmit LED. Figure 3. Remote control Buttons. Each remote control has a unique electronic identity. When you assign a remote control to a user you teach the identity to the control unit. -
Page 18: Alarms
i-on160 2. Alarms The table below shows the different kinds of alarms possible. Type of Signal Started by: Alarm (see note) Intruder Loud warbling Normal alarm or entry route zone tone from activated when system is set. siren. 24 hour zone activated at any time. Fire Pulsing tone Fire zone activated at any time. - Page 19 i-on160 2. Alarms Make sure it is safe to enter the premises: Either key in your access Enter Access Code code OR present your proximity Press tick to reset tag. Burg Z040 Alarm The bottom line of the display shows the first zone to alarm. Press <...
-
Page 20: If You Cannot Reset The System
2 Alarms i-on160 Press < or > to see the name of Press tick to Reset the zone (if the installer has Hallway programmed one), for example: Press Y to restore the display to i-on160EX 12:20 02/11/2010 normal. If you wish to see any other zones that were triggered during the alarm, look in the log (see page 51). -
Page 21: Accidental Alarms
i-on160 2. Alarms When you talk to the alarm company, they will ask about the circumstances of the alarm, and also for the code you recorded from the display. If the alarm company decides that an engineer does not need to visit you, then they will give you another four digit code (the “anti-code”). -
Page 22: Alerts (Or Why Is It Beeping?)
2 Alarms i-on160 Function End this call (and let the control unit contact the ‘5’ other destinations for this alarm) Play ‘Home’ and ‘alarm’ message again ‘3’ Clear down (and do not call any of the other ‘9’ destinations for this alarm). Note: When the called party answers a speech dialler call there is a six second delay before the control unit starts playing the home message. -
Page 23: Technical Alarms
i-on160 2. Alarms alerts the keypad will return to its’ standby screen and, after a few seconds, the rim of the navigation pad will glow green. In addition the keypad will stop beeping. OR: Press X. The rim of the navigation pad will stay red and the system will show the text of the alert the next time... - Page 24 2 Alarms i-on160 “RESET FAULTS”. You must make sure that the detector is not active before you can reset a technical alarm. Page 18...
-
Page 25: Setting And Unsetting
i-on160 3. Setting and Unsetting Setting the System Using a Keypad Do this: The display shows: Make sure the system is idle. i-on160EX Secure all the windows and 12:20 02/11/2009 doors. (The top line may show the installer’s name.) Either key in your access Enter Access Code code. -
Page 26: Quick Set
3. Setting and Unsetting i-on160 keypad sounds the exit tone (a continuous tone). The top line of the display shows the part of the system being set, the bottom line shows the remaining exit time (in seconds). Leave by the designated exit door. - Page 27 i-on160 3. Setting and Unsetting Do this: The display shows: Make sure the system is idle. i-on160EX 12:20 11/09/2010 Secure all windows and doors. (The top line may show the installer’s name instead of “i- on160EX”.) Press A, B, C or D. Setting: Part Set B 10 to set The keypad sounds the exit...
-
Page 28: Unsetting The System Using A Keypad
3. Setting and Unsetting i-on160 Unsetting the System Using a Keypad When unsetting the system do not stray from the entry route designated by the installer. If you do so then you will cause an alarm. Do this: The display shows: Enter by the designated entry i-on160EX 12:20... -
Page 29: Setting/Unsetting Partitions From A Keypad
i-on160 3. Setting and Unsetting being monitored. If there is any activity on any detector then the system will start an alarm. “Part Set” means that the system is monitoring some detectors but not others. The installer selects those detectors that should be monitored during a Part Set. “Partition”... - Page 30 3. Setting and Unsetting i-on160 access code or tag the system unsets that partition. ↕ Press u or n to show “Partitions”. Setting Options Partitions > “Partitions” is the second or third item down on the setting options menu. ↕ Press Partitions: Partition 1...
- Page 31 i-on160 3. Setting and Unsetting access. Partitions you have chosen to unset, unset immediately. Partitions you have chosen to set start their exit timer (or set immediately - see note.). Note: If a partition is programmed to set instantly make sure you are outside the protected area before pressing...
-
Page 32: If The System Will Not Set
3. Setting and Unsetting i-on160 If the System Will Not Set Normally, the system will set only when all the detectors are “quiet”, that is: not reporting any activity. If you have the final exit door open, or if you trigger one of the detectors on your exit route, then the keypad and internal sounder will give an interrupted setting tone (this is normal). -
Page 33: Using A Radio Keypad
i-on160 3. Setting and Unsetting The table below shows the keypad message for each fault, what the message means, and who can override the fault in either a Security Grade 2 or Grade 3 system. Override by: Message Meaning Grade 2 Grade 3 A PA device is still active Installer Installer Panic A part of the system has... -
Page 34: Unsetting
3. Setting and Unsetting i-on160 (If you wish to stop setting while the exit tone sounds, then press The left hand LED glows to show that the keypad is transmitting. Leave by the exit door and make sure that it is closed properly. -
Page 35: Using A Remote Control
i-on160 3. Setting and Unsetting Note: The radio keypad does not show the status of the alarm system at all. The left hand “Transmit” LED glows only to show that the keypad is sending a command to the control unit. Using a Remote Control Setting Note: You must ask your Administrator to provide a suitably... -
Page 36: Unsetting
3. Setting and Unsetting i-on160 Unsetting Enter by the designated entry door. Press on your remote control. The system unsets. At this point the system displays the standby screen. If The System Will Not Set by Remote Control If one of the detectors is still active when you try to set the system then you will not hear the exit warning tone. -
Page 37: Administration
i-on160 4. Administration To make changes to the way your system works you must enter the Menu. Your degree of access to the Menu depends on what type of user you are: Master User, Admin User or Normal User. A Master User has access to all the options of the Menu. A Master User can add, change, or remove users in any partition, and has full access to the system options menu. -
Page 38: Editing Text
4. Administration i-on160 (If you do not press any keys on the keypad for 60 seconds then the display returns to the standby screen.) The rest of this chapter describes each of the main options in the Menu. Editing Text For many of the items that you can program, the control unit lets you assign a 12 character name. -
Page 39: Omitting Zones
i-on160 4. Administration Omitting Zones You may wish to prevent a zone causing an alarm. For example, if your garage door is protected by a detector, but you wish to leave it unlocked for the delivery of a parcel, you may wish to omit that detector when you set the rest of the alarm system. -
Page 40: Users
4. Administration i-on160 Repeat steps 5 and 6 for any other zone you wish to omit (or include). Press Y to store the changes MENU Omit Zones > you have made. Press X to leave the Menu. i-on160EX 12:20 02/11/2010 The control unit allows you to omit a zone for one setting/unsetting cycle. -
Page 41: Editing Existing Users
i-on160 4. Administration A Normal or Partition User can: Edit their own user code, and delete or add their own proximity tag, remote or PA. Guards and Set Only users have no access to the Menu. Editing Existing Users This menu lets you change the details for an existing user. Name Use this option to give the user a 12 character name. - Page 42 4. Administration i-on160 Press Y . USER 003 Name > The bottom line shows: 10. Press Y. EDIT USER NAME User 003 The display shows the current name given to the user, and places a cursor at the beginning of the name. 11.
- Page 43 i-on160 4. Administration programmed into the control unit. In the example shown the name is “User 001”. Press u or n to display the EDIT USER User 003 > user you wish to edit. (Alternatively, if you already know their user number, you can key that in and the display will show that user immediately.)
- Page 44 4. Administration i-on160 Key in your access code (or MENU Omit Zones > present a tag). Press n . MENU Users > Press Y. USERS Add User > Press n . USERS Edit User > Press Y . EDIT USER User 001 >...
- Page 45 i-on160 4. Administration 13. Press > to change a “Yes” to a USER 003 Partition 3 “No” or back again. See page 3 for a description of partitions. See Note below for a quick way of assigning users to partitions. 14.
- Page 46 4. Administration i-on160 If you are a Master or Admin User: Press Y. USERS Add User > Press n. USERS Edit User > Press Y. EDIT USER User 001 > Press u or n. until the EDIT USER bottom line of the display User 003 >...
- Page 47 i-on160 4. Administration If a user forgets their code then a Master or Admin user must delete that user from the system (see page 50), and recreate a new user with a new code (see page 47). Proximity Tags No user can change or delete any other user’s proximity tag. (A Master User or Admin User can register a proximity tag for a new user when they first add the user to the system, see page 47.) Any user except a Guard or Set Only user can register a tag for...
- Page 48 4. Administration i-on160 Code Press n until the display USER 002 Prox Tag > shows: Press Y. Present Prox Tag to add to panel Note: If you already have a prox tag allocated to you then the screen will display “Delete Prox Tag?”.
- Page 49 i-on160 4. Administration If you are a Master or Admin User: Press Y. USERS Add User > Press n. USERS Edit User > Press Y. EDIT USER User 001 > Press u or n. until the EDIT USER bottom line of the display User0 03 >...
- Page 50 4. Administration i-on160 The control unit learns the identity of the Remote and links it with your access code. If the control unit has already learned that remote control then you will hear a low tone and the display tells you that the remote control is already in use.
- Page 51 i-on160 4. Administration Press u or n. until the EDIT USER User 003 > bottom line of the display shows your own user name. Press Y. USER 003 Name > Press u or n. until the USER 003 Panic Alarm >...
- Page 52 4. Administration i-on160 and links it with your access code. You cannot register more than one PA per user. If the control unit has already learned that PA then you will hear a low tone and the display remains unchanged, asking you to press the buttons on the PA.
-
Page 53: Adding Users
i-on160 4. Administration Go on to step 8. If you are a Normal User: Press Y. USER 002 Code Press n until the display USER 002 Panic Alarm > shows the device you wish to delete, for example: Press Y. USER 002 Delete Panic Alarm? The bottom line of the display... - Page 54 4. Administration i-on160 Key in your Master User or MENU Omit Zones > Admin access code (or present a suitable tag). Press n . MENU Users > Press Y. USERS Add User > Press Y. Name : User 004 The display shows a default user name, for example: “User 004”.
- Page 55 i-on160 4. Administration user is not assigned to the partition. Press > to change the “Yes” to a USER 004 Partition 3 “No” or back again. See page 3 for a description of partitions. Press Y when you have finished assigning the user to their partitions.
-
Page 56: Deleting Users
4. Administration i-on160 The display finally asks you to press both buttons on any PA that you want to assign to the new user. 13. Press both buttons on a PA that you wish to assign to the user. If you do not have one New User Added for the user press Y. -
Page 57: Viewing The Log
i-on160 4. Administration Press Y. DELETE User 003 Are you sure? The bottom line of the displays asks you to confirm that you wish to delete the selected user. (If you change your mind at this point press X.) 10. Press Y to confirm that you DELETE USER User 001 >... -
Page 58: Testing The System
4. Administration i-on160 The display will show, for example, the name you keyed in for a user. Press u or n to scroll through U001 Delete U003 15:12 24/03/2010 the log. n shows earlier events, u shows more recent events. Press X to finish viewing the MENU View Log... - Page 59 i-on160 4. Administration Press Enter Access Code Key in your access code (or MENU Omit Zones > present a tag). Press n until you see:. MENU Test > Press Y. TEST Sirens & Sounders > The display shows: Press Y . SIRENS &...
- Page 60 4. Administration i-on160 10. Press Y. WIRED SIRENS All Sirens Press >. WIRED SIRENS All Sirens The control unit turns on the wired sirens. Check that you can hear them. Press > again to turn the WIRED SIRENS All Sirens sirens off.
-
Page 61: Keypad
i-on160 4. Administration Check that you can hear them. Press > again to turn the WIRED KEYPADS All Sounders keypad sounders off. 17. Press Y when you have SIRENS & SOUNDERS Wired Keypads > finished this test. 18. Press X to leave the siren test TEST menu. -
Page 62: Walk Test
4. Administration i-on160 shows the key you pressed. Press both PA keys together to test. Tick Key As you press the function keys on the keypad the display shows their name, for example: Press X to end the test. TEST Wired Keypad >... - Page 63 i-on160 4. Administration Press Y. TEST Sirens & Sounders > The bottom line of the display shows: Press n until you see: TEST Walk Test > Press Y. WALK TEST Chime The bottom line of the display shows: Press < or > to turn a chime tone on or off.
-
Page 64: Outputs
4. Administration i-on160 the bottom line to mark the zone as one you want to test. Press Y when you have finished making your selection. Once you have selected the Walk Test option you want to use: 10 Zone(s) to test: The display shows a list of all Zone 001 the detectors ready for testing. - Page 65 i-on160 4. Administration Key in your access code (or MENU Omit Zones > present a tag). Press n until you see:. MENU Test > Press Y. TEST Sirens & Sounders > The display shows: Press n until you see: TEST Outputs >...
-
Page 66: Remotes
4. Administration i-on160 Remotes Make sure the display shows i-on160EX 12:20 02/11/2010 the standby screen. Press Enter Access Code Key in your access code (or MENU present a tag). Omit Zones > Press n until you see:. MENU Test > Press Y. -
Page 67: Panic Alarms
i-on160 4. Administration by the system from the remote. If the signal strength is less than 2 you should contact your installer. a). Press all the other buttons on the remote. For each button you press you RM01,B2:User01 Prt Set All SS:9 will see a similar message, for example:... -
Page 68: Proximity Tags
4. Administration i-on160 No PAs If there are no PAs available Learnt the display briefly shows: Press and hold down both buttons on the panic alarm you wish to test (you should hold the buttons down until the transmit LED on the PA flashes). - Page 69 i-on160 4. Administration Press Y. TEST Sirens & Sounders > The display shows: Press n until you see: TEST Prox Tags > Press Y. TESTING PROX TAGS Present Tag to panel The display asks you to present the prox tag you wish to test to the keypad.
-
Page 70: System Configuration
4. Administration i-on160 System Configuration The System Configuration option allows you to change some parts of the system to suit your particular needs. If you need more extensive changes to the operation of the system then you must contact your installer. Switching the Chime On/Off The installer may have set up your alarm system to give a chime tone whenever something triggers one or more detectors while... -
Page 71: Setting The Date And Time
i-on160 4. Administration Press Y when you have SYSTEM CONFIG Facilities On/Off > finished making changes. Setting the Date and Time You will need to re-program the date and time if the control unit loses power for an extended time, and the battery is exhausted. Make sure the display shows i-on160EX 12:20... -
Page 72: Calendar Set
4. Administration i-on160 shows “Set the Time” and the bottom line of the display shows the current system time. The minutes are highlighted. 10. Key in the correct time. Use SET THE TIME the 24-hour clock in the format 13:49 hh/mm. - Page 73 i-on160 4. Administration A 12 character name as a reminder of the purpose of the event. An exception (see below). Each exception marks a time period when certain events do not apply. An exception has a start time and date, an end time and date, and a name.
- Page 74 4. Administration i-on160 In a partitioned system the keypad display shows a list of partitions. Press u or n to scroll through each partition. Press < or > to select one of the actions: Full Set, Part Set or Unset. Alternatively, select “No” if you do not want the partition involved in the event.
- Page 75 i-on160 4. Administration Calendar Sets in Action To describe what happens when the control unit reaches the time specified in an event, it is simpler to treat events as if they either set or unset the system. In reality, an event can do both things at the same time to different partitions.
- Page 76 4. Administration i-on160 Unsetting Events. When the control unit reaches the time programmed for an unsetting event the control unit unsets all partitions programmed to unset. There are no specific warning indications for partitions unset by a calendar event. Manual Setting/Unsetting and Calendar Sets. If a user sets a partition that is due to be set by a Calendar event, then the partition remains set when the calendar event time is past.
- Page 77 i-on160 4. Administration Press Y. EXCEPTION NAME Exception 01 The display shows: 10. Key in a name to remind you EXCEPTION NAME Bank Hol May of the exception, for example: 11. Press Y. EXCEPTION START TIME 00 : 00 The display shows: 12.
- Page 78 4. Administration i-on160 lasts for one day, so the start date and end date are the same. 19. Press Y. CALENDAR SET Add Exception > The display shows: Next, you would program two events: event one sets the system in the evening on Monday to Friday, and event two unsets the system in the morning on Monday to Friday.
- Page 79 i-on160 4. Administration 29. Repeat steps 27 and 28 for all EVENT DAYS Friday the days you want the event to occur on. In the example this is Monday through to Friday 30. Press Y. EVENT ACTIONS Partition 1 The display shows: 31.
- Page 80 4. Administration i-on160 The display shows: 36. Press Y. EVENT NAME Event 02 The display shows: 37. Repeat steps 22 to 35, but this time program the setting time. For the example: The setting time has the name “Evening Set”, takes place at 18:15, applies on each of the five working days, Monday to Friday, and sets partition 2 to...
-
Page 81: Programming Outputs
i-on160 Programming Outputs During programming the installer may allocate some outputs so that they can be reprogrammed by an Administrator. This section describes how the Administrator can use those outputs. For each output you can, if you wish, set and “on” time and an “off”... - Page 82 4. Administration i-on160 Press u or n to display the EDIT O/P R1>03>03 O/P R1>03>03 > output you wish to edit. Press Y. EDIT O/P R1>03>03 Name > The bottom line of the display shows the first option that you can edit for the output: “Name”.
- Page 83 i-on160 4. Administration a user turns it on, but then goes off again after a set time. You can program the time it remains on. 15. Press u or n to select the EDIT O/P R1>03>03 option you wish to use. For example: 16.
- Page 84 4. Administration i-on160 18. Press Y. O/P R1>03>03 ON TIME 00:00 The display shows the time when the output will turn on. 19. Key in the time when you want O/P R1>03>03 ON TIME the output to come on. Use the 06:50 24-hour clock in the format hh/mm.
-
Page 85: Programming Remote Controls For Users
i-on160 4. Administration Note: You can switch the output on and off from the Menu by selecting Outputs On/Off (see page 90). If you want to program a remote control to control the output, see page 79. Programming Remote Controls for Users The System Config - Remotes option allows you to re-program buttons on an i-fb01 remote control. - Page 86 4. Administration i-on160 Note: If your system is a part setting system (there are no partitions) then you cannot reprogram the unset key on a remote control. OR (if you do not have the remote in your possession) a) Press Y. The display presents a list of the registered remote EDIT REMOTE...
- Page 87 i-on160 4. Administration In the example on the right, the button is currently programmed to unset. b) Press n to change the RM001,B2:User 001 bottom line between Set, Unset, Output or No Action: c) Press Y . RM001,B2:User 001 *Part Set All The bottom line of the display now shows the first item in a list of setting or...
- Page 88 4. Administration i-on160 If you selected “Partitions” in step SET PARTITION Partition 1 10c) the display shows: c) Press > to select between SET PARTITION Partition 1 Full “No”, “Full” or “Part”. “No” = No effect. “Full” = Full Set “Part”...
- Page 89 i-on160 4. Administration transmit LED flash. The display shows the identity and owner of the remote control, and the button you pressed. Go on to step 10. Note: If your system is a part setting system (there are no partitions) then you cannot reprogram the unset key on a remote control.
- Page 90 4. Administration i-on160 setting system (there are no partitions) then you cannot reprogram the unset key on a remote control. 10. Press n until the display RM01,B2:User 01 shows: Output 11. Press Y . O/P W1>01>02 FOUNTAIN The display shows the first in a list of outputs that are available for allocating to a remote button.
-
Page 91: Deleting Remote Controls
i-on160 4. Administration for example: 15. Press Y . RM001: User 01 Button 2 16. Press X repeatedly to leave the menu. Deleting Remote Controls If a user has lost a remote control you should delete it from the system to make sure that no unauthorised person can use it to gain access. - Page 92 4. Administration i-on160 OR (if you do not have the remote to hand.) a) Press Y. DELETE REMOTE RM01:User 01 The bottom line of the display shows the first in a list of the known devices. b) Press n until the bottom DELETE REMOTE line of the display shows the RM02:User 02...
-
Page 93: Starting A Call To Downloader
i-on160 4. Administration Press Y. REMOTE Edit > Press n until the display REMOTE Delete All > shows: Press Y. DEL ALL REMOTES Are you sure? The display shows: (Press X if you decide you do NOT want to delete all remotes.) 10. - Page 94 4. Administration i-on160 Make sure the display shows i-on160 12:20 02/11/2010 the standby screen. Press Enter Access Code Key in your access code (or MENU Omit Zones > present a tag). Press n until you see:. MENU System Config > Press Y.
-
Page 95: Redirecting Speech Messages
i-on160 4. Administration Redirecting Speech Messages Note: This option is available only if you have the a speech dialler module fitted inside the control unit and it has been programmed by the installer. You can use the About menu to check if you have a communication module fitted, see page 91. -
Page 96: Turning Outputs On/Off
4. Administration i-on160 of the cursor. 11. Press Y to store the changes TELEPHONE NAME 2 Tel No 02 you have made. The display now shows the current name of the telephone number. 12. If necessary, key in a new TELEPHONE NAME 2 name for the telephone Office_... -
Page 97: What System Have I Got
i-on160 4. Administration example “PORCH LIGHT”. Press n until the display RADIO OUTPUT 2 PORCH LIGHT shows the output you wish to operate: Press > to change the state of RADIO OUTPUT 2 the output. PORCH LIGHT Note: Outputs connected to radio output modules may take several seconds to change state. - Page 98 4. Administration i-on160 Press Y . ABOUT PANEL I-ON160 V1.00 The bottom line of the display shows your control unit type and its software revision. Press X repeatedly to leave the i-on160EX 12:20 02/11/2010 menu. Seeing Which Communications Module Is Currently Installed: Make sure the system is idle.
-
Page 99: List Of Menu Options
i-on160 List of Menu Options Item Page Omit Zones Users Add User Edit User (for each user:) Name Type (not U01) Partitions (not in part setting system) Code Prox Tag Remote Panic Alarm Delete User View Log Test Siren & Sounders Wired Keypad Walk test Outputs... - Page 100 i-on160 NOTES: Page 94...
- Page 101 i-on160 NOTES: Page 95...
- Page 102 i-on160 NOTES: Page 96...
-
Page 103: Alarm Functions At A Glance
i-on160 Alarm Functions At a Glance Display shows: Time and date when system off (unset). First zone to alarm after alarm Read log here. Glowing = On (set) Flashing = Part Set Off = Off (unset) 2 abc 3 def Key in access code 4 ghi 5 jkl... -
Page 104: After An Alarm
i-on160 After an Alarm N ORDER TO O THIS HE SYSTEM WILL Switch off siren: EITHER: Stop the siren. The Key in ACCESS keypad display CODE shows the first zone OR present tag. to alarm. Reset the system: Press Y. Keypad display shows time and date.
Need help?
Do you have a question about the Scantronic i-on160EXEUR and is the answer not in the manual?
Questions and answers