Table of Contents
Advertisement
Quick Links
1.1 Product Description ............................................................................................................................. 7
1.2 Product Features .................................................................................................................................. 8
1.3 Product Specifications ...................................................................................................................... 10
2.1 Hardware Description ........................................................................................................................ 14
2.1.1 Front LED ..................................................................................................................................................... 16
2.1.2 LED Indications ............................................................................................................................................ 16
2.1.3 Rear Panel .................................................................................................................................................... 18
2.1.4 Bottom panel ................................................................................................................................................ 20
2.1.5 Side Panel ..................................................................................................................................................... 21
3.1 System Requirements ........................................................................................................................ 23
3.2 Installing the Router ........................................................................................................................... 23
4.1 Manual Network Setup - TCP/IP Configuration ................................................................................ 26
4.1.1 Obtaining an IP Address Automatically .................................................................................................... 26
4.1.2 Configuring the IP Address Manually ........................................................................................................ 31
4.2 Starting Setup in the Web UI ............................................................................................................. 37
5.1 Home ................................................................................................................................................... 43
5.1.1 Internet .......................................................................................................................................................... 43
5.1.2 DWR-M960 .................................................................................................................................................... 44
5.1.3 Connected Clients ....................................................................................................................................... 44
5.2 Settings ............................................................................................................................................... 45
5.2.1 WAN .............................................................................................................................................................. 45
5.2.1.1. IPv4 .................................................................................................................................................. 45
5.2.1.2. IPv6 .................................................................................................................................................. 49
5.2.1.3. Status ............................................................................................................................................... 51
5.2.2 Mobile network ............................................................................................................................................. 52
5.2.2.1. Basic Settings ................................................................................................................................... 52
5.2.2.2. PIN Manage ..................................................................................................................................... 53
5.2.2.3. SMS .................................................................................................................................................. 53
◆ Inbox ...................................................................................................................................................... 53
DWR-M960 user manual
IV
Advertisement
Table of Contents

Related Manuals for D-Link DWR-M960


Summary of Contents for D-Link DWR-M960
-
Page 1: Table Of Contents
4.1.2 Configuring the IP Address Manually ......................31 4.2 Starting Setup in the Web UI ......................37 5.1 Home ..............................43 5.1.1 Internet ................................43 5.1.2 DWR-M960 ..............................44 5.1.3 Connected Clients ............................44 5.2 Settings ............................... 45 5.2.1 WAN ................................45 5.2.1.1. - Page 2 ◆ OutBox ..............................54 ◆ SMS Settings ............................54 ◆ Send SMS .............................. 54 5.2.2.4. USSD ............................... 55 5.2.3 Operation Mode ............................55 5.2.4 Wi-Fi ................................55 5.2.4.1. Wi-Fi ..............................55 5.2.4.2. Security ............................58 5.2.4.3. ACL ..............................58 5.2.4.4. Site Survey ............................59 5.2.4.5.
- Page 3 5.3.4 URL Filter ..............................77 5.3.5 Route ................................78 5.3.5.1. Default Route ........................... 78 5.3.5.2. Static Route ............................79 5.3.6 Dynamic DNS ............................... 80 5.4 Management ............................81 5.4.1 Time................................81 5.4.1.1. NTP Server ............................81 5.4.1.2. Auto Reboot ............................. 81 5.4.2 System Log ..............................
-
Page 4: Product Description
Chapter 1. Introduction 1.1 Product Description DWR-M960 Wireless Broadband Router supports IEEE 802.11b/g/n/ac standard, dual band, and Gigabit LAN and WAN, thus providing the wireless speed of 867Mbps in the 5GHz frequency band and 300Mbps in the 2.4GHz frequency band at the same time, which is 16 times faster than that of the traditional 11g access point. -
Page 5: Product Features
User Manual of DWR-M960 1.2 Product Features ➢ IEEE Compliant Wireless LAN and Wired LAN ◼ Compliant with IEEE 802.11a/b/g/n/ac dual band [2.4G (300Mbps) and 5G (867Mbps)] wireless ◼ Equipped with 4x 10/100/1000Mbps Fast Ethernet ports and 1x 10/100/1000Mbps WAN ethernet port which supports auto MDI/MDI-X ➢... - Page 6 User Manual of DWR-M960 ◼ System status monitoring includes DHCP Client List and System Log...
-
Page 7: Product Specifications
User Manual of DWR-M960 1.3 Product Specifications DWR-M960 Product 1200Mbps 802.11ac Dual Band Wireless Gigabit Router Hardware Specifications WAN Port: 1 x 10/100/1000 Mbps auto MDI/MDI-X RJ45 port Interface LAN Port: 4 x 10/100/1000 Mbps auto MDI/MDI-X RJ45 port (LAN1~4) USB Port: 1 x USB 2.0, Type A, 5V 500mA... - Page 8 User Manual of DWR-M960 2.4GHz up to 300Mbps Data Rates 5GHz up to 867Mbps 2.4GHz Channel FCC (America): 2.412~2.462GHz (11 Channels) ETSI (Europe): 2.412~2.472GHz (13 Channels) 5GHz 5.180-5.240GHz, 5.745-5.825GHz (up to 9 channels) *The actual channels in application will vary depending on the regulation in different regions and countries.
- Page 9 User Manual of DWR-M960 Max. Supported Clients 5GHz wireless: 32 Wireless Extender Supports repeater Router Features Shares data and Internet access for users, supporting the following Internet accesses: ◼ 3G/LTE Mobile network ◼ ETH Router mode ->DHCP Internet Connection Type ->Static IP...
- Page 10 User Manual of DWR-M960 Other Protocols and Standards TCP/IP, DHCP, ICMP, NAT, PPPoE, SNTP Regulatory CE, RoHS, WEEE Environment Operating: 0 ~ 40 degrees C Temperature Storage: -40 ~ 70 degrees C Operating: 10 ~ 90% (non-condensing) Humidity Storage: 5 ~ 95% (non-condensing)
-
Page 11: Hardware Description
User Manual of DWR-M960 Chapter 2. Hardware Installation DWR-M960 Please follow the instructions below to connect the to the existing network devices and your computers. 2.1 Hardware Description Dimensions: 200 x 128 x 33 mm (W x D x H) - Page 12 User Manual of DWR-M960 Figure 2-2 -15-...
-
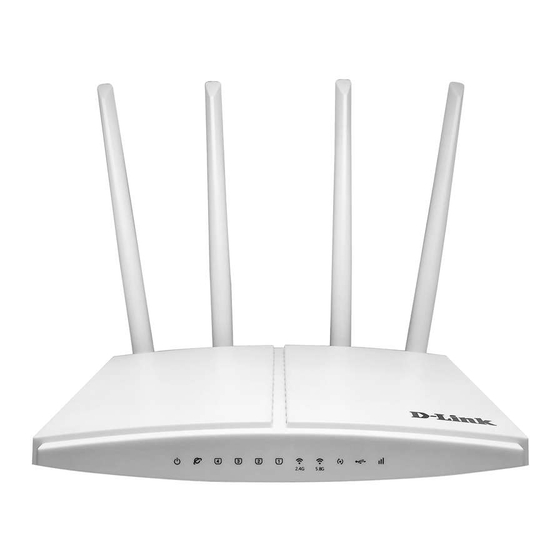
Page 13: Front Led
User Manual of DWR-M960 2.1.1 Front LED The front LED provides a simple interface monitoring the router. Figure 2-1-1 shows the front LED of the DWR- M960. Front LED Figure 2-1-1 DWR-M960 Top View 2.1.2 LED Indications -16-... - Page 14 User Manual of DWR-M960 The LEDs on the front panel indicate instant status of port links, wireless data activity, system power, LTE, USB and WPS, and help monitor and troubleshoot when needed. Figure 2-3 Table 2-1 show the LED indications of the Wireless Router.
-
Page 15: Rear Panel
LTE or 3G is not connected Table 2-1 LED Indications 2.1.3 Rear Panel The rear panel provides the physical connectors connected to the power adapter and any other network device. Figure 2-4 shows the rear panel of the DWR-M960. -18-... - Page 16 User Manual of DWR-M960 Rear Panel Figure 2-1-3 Rear Panel of the DWR-M960 Interface Description Press it will enable WPS functiont Press the Reset button gently for 3 seconds and then release it. The system Reset restores to the factory default settings...
-
Page 17: Bottom Panel
Connect to the power adapter provided in the package Table 2-2 Interface Indications 2.1.4 Bottom panel The SIM Card slot of the DWR-M960 at the bottom shows the user how to install the LTE sim card. Figure 2-1- shows the sim card slot of the DWR-M960. -
Page 18: Side Panel
User Manual of DWR-M960 Figure 2-1-4-2 Wall hanging hole of the DWR-M960 2.1.5 Side Panel The side panel provides the physical connectors connected to the USB device and provides the RESET and WPS button. Figure 2-1-5 shows the side panel of the DWR-M960. - Page 19 User Manual of DWR-M960 Figure 2-1-5 side panel of the DWR-M960 -22-...
-
Page 20: System Requirements
TCP/IP protocols ◼ The above PC is installed with a Web browser 1. The Router in the following instructions means DWR-M960. 2. It is recommended to use Internet Explorer 7.0 or above to access the Router. 3.2 Installing the Router Before installing the Router, make sure your PC is connected to the Internet through the broadband service successfully at this moment. - Page 21 User Manual of DWR-M960 Step 2. Locate an optimum location for the Router. The best place is usually at the center of your wireless network. Step 3. Connect the PC or Switch/Hub in your LAN to the LAN Ports of the Router with Ethernet cable, shown Figure 3-1.
- Page 22 User Manual of DWR-M960 Figure 3-1 Hardware Installation of the DWR-M960 Wireless Router Step 4. Connect the power adapter to the power socket on the Router, and the other end into an electrical outlet. Then power on the Router. Step 5. Power on your PC and Cable/xDSL Modem.
-
Page 23: Manual Network Setup - Tcp/Ip Configuration
User Manual of DWR-M960 Chapter 4. Quick Installation Guide This chapter will show you how to configure the basic functions of your Wireless Router using Quick Setup within minutes. A computer with wired Ethernet connection to the Wireless Router is required for the first- time configuration. - Page 24 User Manual of DWR-M960 Then the Wireless Router built-in DHCP server will assign IP address to the PC automatically. If you are sure the DHCP server of Wireless Router is enabled, you can set up the TCP/IP Protocol in "Obtain an IP address automatically"...
- Page 25 User Manual of DWR-M960 2) Under the Network and Internet icon, click on t he View network status and tasks. And then click Change adapter settings. Figure 4-1 Change Adapter Settings 3) Right-click on the Wireless Network Connection, and select Properties in the appearing window.
- Page 26 User Manual of DWR-M960 Figure 4-2 Network Connection Properties -29-...
- Page 27 User Manual of DWR-M960 4) In the prompt window shown below, double-click on the Internet Protocol Version 4 (TCP/IPv4). Figure 4-3 TCP/IP Setting 5) Choose Obtain an IP address automatically, and Obtain DNS server address automatically as shown in the figure below. Then click OK to save your settings.
-
Page 28: Configuring The Ip Address Manually
User Manual of DWR-M960 Figure 4-4 Obtain an IP Address Automatically 4.1.2 Configuring the IP Address Manually Summary: ◼ Set up the TCP/IP Protocol for your PC. ◼ Configure the network parameters. The IP address is 192.168.0.xxx ("xxx" is any number from 2 to 254), Subnet Mask is 255.255.255.0, and Gateway is 192.168.0.1(The Router's default IP address) - Page 29 User Manual of DWR-M960 If the LAN IP address of the Wireless Router is 192.168.0.1, enter IP address 192.168.0.x (x is from 2 to 254), and Subnet mask 255.255.255.0 Enter the LAN IP address of the Wireless Router (the default IP is 192.168.0.1) into the default gateway field.
- Page 30 User Manual of DWR-M960 Figure 4-5 IP and DNS Server Addresses Now, you can run the Ping command in the command prompt to verify the network connection between your PC and the Router. The following example is in Windows 7 OS. Please follow the steps below: Click on Start Type “cmd”...
- Page 31 User Manual of DWR-M960 Figure 4-6 -34-...
- Page 32 User Manual of DWR-M960 Open a command prompt, and type ping 192.168.0.1, and then press Enter. ◼ If the result displayed is similar to Figure 4-7, it means the connection between your PC and t he Router has been established well.
- Page 33 User Manual of DWR-M960 If the Router's IP address is 192.168.0.1, your PC's IP address must be within the range of 192.168.0.2 ~ 192.168.0.254. -36-...
-
Page 34: Starting Setup In The Web Ui
User Manual of DWR-M960 4.2 Starting Setup in the Web UI It is easy to configure and manage the DWR-M960 with the web browser. Step 1. To access the configuration utility, open a web-browser and enter the default IP address http://192.168.0.1in the web address field of the browser. - Page 35 After entering the user name and password, click the red “X”, the Wizard Setup page screen appears as Figure 4-11. Figure 4-11 DWR-M960 Web UI Screenshot Choose “Next” and you can configure the router Operation Mode by yourself. Step 2.
- Page 36 User Manual of DWR-M960 Figure 4-13 Configure the Time Zone Setting. Choose “Next” and you can configure the LAN Interface Setup. Step 4. Figure 4-14 Configure LAN Interface Setup. Choose “Next” and you can configure the WAN Interface Setup. Step 5.
- Page 37 User Manual of DWR-M960 Figure 4-16 Configure Wi-Fi Interface setup. Step 7. Please enter the Wi-Fi Settings. Then click Next button for Wi-Fi security setup and finished. Figure 4-17 Wi-Fi Settings Figure 4-18 Wi-Fi Security Settings -40-...
- Page 38 User Manual of DWR-M960 -41-...
- Page 39 User Manual of DWR-M960 Chapter 5. Configuring the Router This chapter delivers a detailed presentation of router’s functions and features under 4 main menus shown below, allowing you to manage the router with ease. Figure 5-1 Router’s Functions -42-...
-
Page 40: Home
User Manual of DWR-M960 5.1 Home 5.1.1 Internet Figure 5-1-1 Router IPv4 Status Figure 5-1-2 Router IPv6 Status -43-... -
Page 41: Dwr-M960
User Manual of DWR-M960 Figure 5-1-3 Router Mobile network Status 5.1.2 DWR-M960 On this page, you can view information about the current LAN and Wi-Fi status of the DWR-M960. Figure 5-1-3 DWR-M960 Info 5.1.3 Connected Clients This page shows the IP addresses and host names of all the PCs in your network... -
Page 42: Settings
User Manual of DWR-M960 5.2 Settings 5.2.1 WAN On this page, you can configure the parameters of the WAN interface. Figure 5-2-1 WAN 5.2.1.1. IPv4 There are four wan connection can be use, each wan connection can be configured as difference mode, such as DHCP router mode, PPPoE router mode, Static router mode, and each wan connection can be configured to have VLAN tag, this will more helpful for user to meet different environment usage. - Page 43 User Manual of DWR-M960 Figure 5-2-2 DHCP Object Description You can keep the maximum transmission unit (MTU) as default. VLAN ID Enter the VLAN ID value provided by your ISP. WAN Type From this feature, user can distinguish different services.
- Page 44 User Manual of DWR-M960 Figure 5-2-3 Static IP -47-...
- Page 45 User Manual of DWR-M960 Object Description Enter the WAN IP address provided by your ISP. Inquire your ISP if IP Address you are not clear. Enter WAN Subnet Mask provided by your ISP. Subnet Mask Enter the WAN Gateway address provided by your ISP.
-
Page 46: Ipv6
User Manual of DWR-M960 Object Description Username Enter the User Name provided by your ISP. Password Enter the password provided by your ISP. VLAN ID Enter the VLAN ID value provided by your ISP. WAN Type From this feature, user can distinguish different services. - Page 47 User Manual of DWR-M960 Figure 5-2-6 IPv6 auto Object Description Origin Type Current origin type AUTO. Address Mode WAN IPv6 address mode, including stateless and stateful address mode. PD Enable WAN IPv6 prefix delegation. Rapid-commit Enable Rapid commit switch. WAN IPv6 DNS.
-
Page 48: Status
User Manual of DWR-M960 Figure 5-2-7 IPv6 6RD Object Description Origin Type Current origin type 6RD. 6RD IPv6 Prefix WAN IPv6 prefix delegation WAN IPv4 Address WAN IPv4 address. 6RD Border Relay IPv4 Border Relay IPv4 Address. Address WAN IPv6 DNS. -
Page 49: Mobile Network
User Manual of DWR-M960 This page will show all the status of the wan connections. Figure 5-2-8 Status 5.2.2 Mobile network 5.2.2.1. Basic Settings This page is used to configure the parameters for Internet network which 3G or LTE. Figure 5-2-9 Mobile network... -
Page 50: Pin Manage
User Manual of DWR-M960 Enter the APN from ISP. If the SIM card has set PIN, please enter the PIN here. Enter the Dial number from ISP. Dial Number Net Select Select Auto/2G/3G/4G. Auth Method Auth mode settings, include auto, pap and chap. -
Page 51: Outbox
User Manual of DWR-M960 Figure 5-2-11 Inbox ◆ OutBox This page lists all the SMS messages that in your outbox, and you can delete them Figure 5-2-12 Outbox ◆ SMS Settings SMS Settings page, you can set the SMS stored in the SIM card or module. -
Page 52: Ussd
User Manual of DWR-M960 5.2.2.4. USSD You can send a command to the network (have predefined numbers or symbols), the network will be based on the instruction for you to provide the corresponding services. Figure 5-2-15 USSD 5.2.3 Operation Mode You can setup different modes to LAN and WLAN interface for NAT and bridging function. - Page 53 802.11b/g/n”. It is strongly recommended that you set the Band to Band “802.11b/g/n”, and al l of 802.11b, 802.11g, and 802.11n wireless stations can connect to the DWR-M960 WLAN working mode, such AP, client, WDS and AP+WDS. Mode You can set guest SSID from this button.
- Page 54 User Manual of DWR-M960 Set a name (SSID) for your wireless network. The ID of the wireless network. User can access the wireless network through it only. However, if you switch to Client Mode, this field becomes SSID the SSID of the AP you want to connect with.
-
Page 55: Security
User Manual of DWR-M960 5.2.4.2. Security Figure 5-2-18 Wi-Fi security Object Description Set a name (SSID) for your wireless network. User can access the wireless network through the ID only. However, if you switch Select SSID to client mode, this field becomes the SSID of the AP you want to connect with. -
Page 56: Site Survey
User Manual of DWR-M960 Figure 5-2-19 Wi-Fi security Object Description If you choose 'Allowed Listed', only those clients whose wireless MAC addresses are in the access control list will be able to Wireless ACL Mode connect to your Access Point. When 'Deny Listed' is selected, these wireless clients on the list will not be able to connect the Access Point. - Page 57 User Manual of DWR-M960 Figure 5-2-21 WPS Object Description This page allows you to change the setting for WPS (Wi-Fi Protected Setup). Using this feature could let your wireless client automatically synchronize its setting and connect to the Access Point in a minute without any hassle.
-
Page 58: Lan
User Manual of DWR-M960 5.2.5 LAN 5.2.5.1. IPv4 This page is used to configure the parameters for local area network which connects to the LAN port of your Access Point. Here you may change the setting for IP address, subnet, DHCP, etc. -
Page 59: Static Dhcp
User Manual of DWR-M960 This page allows you reserve IP addresses, and assign the same IP address to the network device with the specified MAC address any time it requests an IP address. This is almost the same as when a device has a static IP address except that the device must still request an IP address from the DHCP server. -
Page 60: Radvd
User Manual of DWR-M960 Object Description Router’s LAN IPv6 address. IP Address Router’s LAN DNS server. DNS Addr If it is selected, the router serves as the DHCP server and Interface Name automatically assigns IPv6 addresses to all computers in the LAN. - Page 61 User Manual of DWR-M960 Figure 5-2-25 RADVD Object Description Enter the interface name. radvdinterfacename Enter the max retry advertisement interval. MaxRtrAdvInterval Enter the min retry advertisement interval. MinRtrAdvInterval Enter the min delay between router advertisement. MinDelayBetweenRAs Enable or disable the advertisement managed flag.
-
Page 62: Tunnel 6 Over 4
User Manual of DWR-M960 Enter the advertisement retrains timer. AdvRetransTimer Enter the advertisement current hop limit AdvCurHopLimit Enter the advertisement default life time. AdvDefaultLifetime Select from “high”, “medium” or “low” for the advertisement AdvDefaultPreference default preference. Enable or disable advertisement source link local address. -
Page 63: L2Tpv2
User Manual of DWR-M960 Figure 5-2-27 PPTP Object Description Type the name of PPTP Server. Server Enter the user name provided by your ISP. Username Enter the password provided by your ISP. Password You can keep the maximum transmission unit (MTU) as default. -
Page 64: L2Tpv3
User Manual of DWR-M960 L2TPv3 5.2.6.3. This page is used to configure the parameters for Internet network which connects to peer by L2TPv3. Figure 5-2-29 L2TPv3 Object Description The address of the LAN side device of local , eg:192.168.0.2 Local Host Address... -
Page 65: Status
This page shows the status information for PPTP , L2TPv2 and L2TPv3 Figure 5-2-30VPN status 5.2.7 USB The DWR-M960 has a built-in USB port which can be connected to an external USB storage device for file sharing. Disk information 5.2.7.1. -
Page 66: Share Folder
User Manual of DWR-M960 Figure 5-2-32 Account Management Share Folder 5.2.7.3. This page used for add/delete share folder. Figure 5-2-33 Account Management Enabled this function and connect a USB device to the USB port of the router. Click Run or Search Windows enter the user name and in the Start Menu of your PC and input the address of the router 192.168.0.1, after... -
Page 67: Features
User Manual of DWR-M960 5.3 Features 5.3.1 QoS -70-... - Page 68 User Manual of DWR-M960 Figure 5-3-1 QoS Object Description Automatic Uplink Speed Automatic uplink speed. Manual Uplink Speed Set the download speed of your Internet access (Kbps) Automatic Downlink Automatic downlink speed. Speed Manual Downlink Speed Set the upload speed of your Internet access...
-
Page 69: Firewall
User Manual of DWR-M960 Name QoS rule name. 5.3.2 Firewall 5.3.2.1. Advanced Figure 5-3-2 Advanced Object Description Enable DMZ Enable or disable DMZ function Enable UPnP Enable or disable UPnP function Enable IGMP Proxy Enable or disable IGMP Proxy function... -
Page 70: Dos
User Manual of DWR-M960 Enable PPTP pass through Enable or disable PPTP to pass through PPTP communication on VPN connection data. Enable L2TP pass through Enable or disable L2TP to pass through L2TP communication on VPN connection data. 5.3.2.2. Dos A denial-of-service (DoS) attack is characterized by an explicit attempt by hackers to prevent legitimate users of a service from using that service. -
Page 71: Port Filtering
User Manual of DWR-M960 Figure 5-3-4 IP Filtering Object Description Enable IP Filtering Enable or disable IP Filtering function. Enable IPv4 Enable or disable IPv4 Filtering feature. Enable IPv6 Enable or disable IPv6 Filtering feature. Local IPv4 Address Set LAN side source IPv4 address... - Page 72 User Manual of DWR-M960 Figure 5-3-5 Port Filtering Object Description Enable Port Filtering Enable or disable IP Filtering function. Enable IPv4 Enable or disable IPv4 Port Filtering feature. Enable IPv6 Enable or disable IPv6 Port Filtering feature. Port Range Set the port range for port filtering Select “TCP”, “UDP”...
-
Page 73: Mac Filtering
User Manual of DWR-M960 5.3.2.5. MAC Filtering Figure 5-3-6 MAC Filtering Object Description Model You can set working model here, Black and White. MAC Address Enter a MAC address Comment Comment info. 5.3.3 Port Forwarding -76-... -
Page 74: Url Filter
User Manual of DWR-M960 Figure 5-3-7 Port Forwarding Object Description Enable Port Forwarding Enable or disable Port Forwarding function. Local IP Address Enter a LAN IP address Local Port Start Enter LAN side start port. Local Port End Enter LAN side end port. -
Page 75: Route
User Manual of DWR-M960 URL filter is used to deny LAN users from accessing the internet. Block those URLs which contain keywords listed below. Please note: URL Filter can not filter the HTTPS encrypted domain name. Figure 5-3-8 URL Filter... -
Page 76: Static Route
User Manual of DWR-M960 5.3.5.2. Static Route Figure 5-3-10 Static Route Object Description Enable Static Route Enable or disable Static route. IP Address Enter the destination network Subnet Mask Enter the network mask Gateway Enter the network gateway Metric Enter the routing metric... -
Page 77: Dynamic Dns
User Manual of DWR-M960 5.3.6 Dynamic DNS The Wireless Router supports Dynamic Domain Name Service (DDNS). The dynamic DNS service allows a dynamic public IP address to be associated with a static host name in any of the many domains, and allows access to a specified host from various locations on the Internet. -
Page 78: Management
User Manual of DWR-M960 5.4 Management 5.4.1 Time 5.4.1.1. NTP Server Object Description Current Time Select the time zone in your area Copy LAN time Copy time from computer. Time Zone Select Select time zone from the drop box. Enable NTP client update Enable or disable NTP client update. -
Page 79: System Log
User Manual of DWR-M960 5.4.2 System Log Figure 5-4-4 System Log Object Description Enable or disable Log function. Enable Log Print all log information. System All Print wireless log information. Wireless Print DoS log information. Enable or disable “Logging to Syslog Server”... -
Page 80: System Settings
User Manual of DWR-M960 Enter the Syslog server IP address Log Server IP Address 5.4.3 System Settings 5.4.3.1. Administrator Figure 5-4-5 Administrator Object Description Connect name Modify admin or user account. Username Enter the new username. Password Enter the new password. - Page 81 User Manual of DWR-M960 Figure 5-4-6 System Object Description Save settings to file Save the setting to local PC Load settings from File Load the settings from local PC Reset Settings to Default Restore the device to factory default Reboot the device Press the button to reboot the device When you load new configuration, the original configuration will be lost.
-
Page 82: Statistics
User Manual of DWR-M960 5.4.4 Statistics 5.4.4.1. User Statistics This page shows each user's total traffic statistics and LTE traffic statistics. Figure 5-4-7 User Statistics 5.4.4.2. Interface Statistics This page shows the packet counters for transmission and reception regarding to wireless and Ethernet networks. - Page 83 User Manual of DWR-M960 Figure 5-4-9 TR069 Object Description TR069 Enable or disable TR069. ACS server domain or IP Address. User Name User name for connection to ACS. Password Password for connection to ACS. Enable or disable periodic inform. Periodic Inform Enable Periodic inform interval.
-
Page 84: Upgrade
5.4.6 Upgrade 5.4.6.1. Firmware Upgrade You install new version of the router’s software using this page. From time to time, we may release new versions of the Router's firmware. Firmware updates contain improvements and fixes the current problems. On this page, you can check the firmware version and upgrade firmware. Figure 5-4-10 Upgrade DO NOT turns off the power or press the Reset button when updating the firmware.
Need help?
Do you have a question about the DWR-M960 and is the answer not in the manual?
Questions and answers